BeeAInspector 
Blog 2: Nest building
Hi all, welcome to our second blog for the Save the Bees Challenge.
Today we will describe how to build the wild bee research nests that we will be using for the challenge. For this bee nest design we want to acknowledge everyone at the project NutriB2, Macrobees and collaborators who designed and tested these nests in the past. The materials we use are:
- Drainage PVC Tubes (300 mm diameter): We use these tubes as a container.
- Bamboo reeds: We get long bamboo reeds with a variety of diameters. The ones we get in Germany are from the following brand: https://www.naturschutzcenter.de/schilf. Sometimes also in construction supermarkets one can get panels of bamboo reeds attached to each other. If the diameter is not too small, those will also work.
- Oscillator cutting machine: After trying with many machines, this is the one that we preferred, as it leaves the least sprints and broken pieces of bamboo. On the downside, you need to cut one by one the reeds with this device.
- Cable binder
- Optional: a metal mesh
Procedure:
- Cut the PVC tubes in trapezoids with about 30 cm length on the top and 20 cm length at the bottom. The longer area will act as a roof preventing water from coming in and soaking the reeds.
- At the bottom make cuts perpendicular to the entry point, one on each side, so that any stagnated water will flow out after the rain and the reeds will dry easier.
- Cut the bamboo reeds in pieces of 18 cm length with the oscillation machine. Try to avoid using the ones with diameters too big (more than 10 mm) or too small (less than 2 mm). When cutting the reeds, try to do so in a way that one side is closed by the natural segment of the bamboo reed. This will prevent that bees can begin a nest from both sides. Be aware of splinters and try to smooth the borders with sandpaper when possible.
- Put the tube upside down and fill it with reeds until they are very tight that none of them can be moved easy. Optional: use a string around the reeds as you place them, to help keep them in place. Stay clear from superglue or other adhesives that could contain toxic materials.
- Look for a nice spot for your nest. It should be relatively high (ideally 1 to 3 m from the ground), to help avoid ants infestations. It should be sunny but not directly in the sun specially in very hot and dry weathers. It should not be too much exposed to the wind, if possible to be avoided, to ease the flight of the bees. There should be plenty of flowers and water in the surroundings, to ensure they don’t need to go too far for food and drink. The nest doesn’t need to be completely dry all the time, but protection from direct rain is beneficial and good air circulation, to avoid excess humidity and fungi/moss proliferation.
- Hang your nests using cable binder or any other tool you can think of. Some people use nails, although be aware that this may break the reeds inside and make it more difficult to exchange them if needed.
- Optional: Protect your nest from birds with a metal mesh, surrounding the nest and covering the exits, with holes big enough that a bee will pass without problem, but not the beak of a hungry bird looking for larvae.
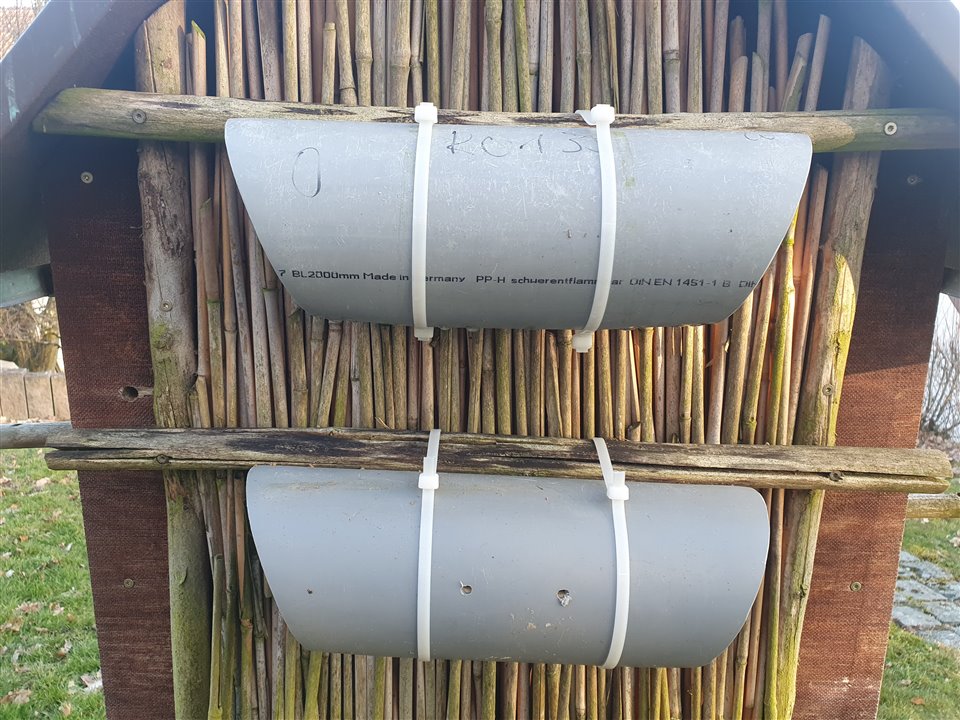
The final research nest looks like this:

Figure 1: Final nests hanging in their places.
We currently have 2 nests in our garden, with reeds that were occupied since last year around June, which means they are overwintering now and we can expect them to come out in end of March to May.
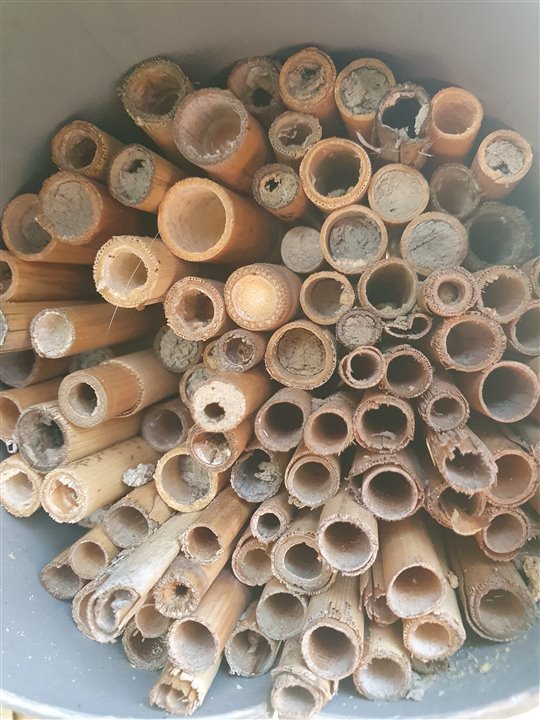
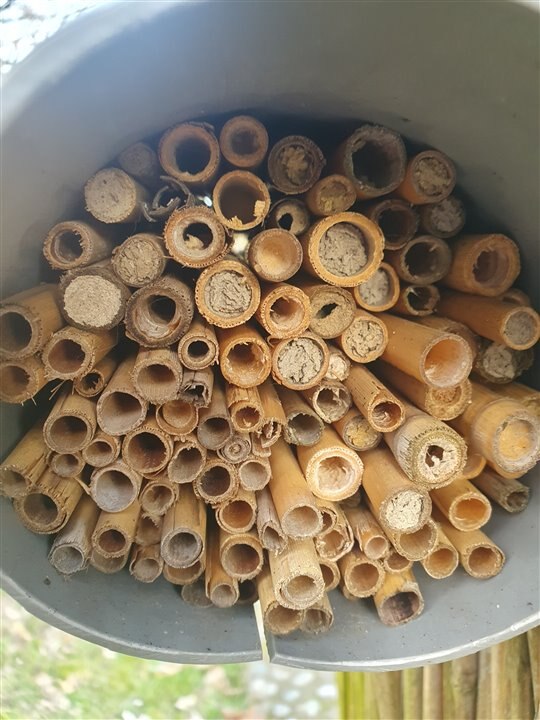
From the side you can distinguish the reeds that are filled from those that are not filled, by the soil closing. Most of them will be Osmia species which close the nests using that element.


Figure 2: Side from the nest, showing closed and open reeds.
One of our questions is whether we can train an algorithm to interpret the images taken with the provided camera-kit, to identify the proportion of reeds closed or open. Even if we would not be on time to test this with flying bees (given the time constraints of the challenge), we could use already available pictures of the nest to test our algorithm alone.
There will be at least two additional challenges with the camera:
- to mount it on the side of the nest: with sufficient time we would try a 3D printing solution to build up a mount.
- to adjust zoom to get an area of the nest side that is representative of the proportion of filled/empty reeds in the whole nest: for this we need the device and to test it at different zoom/distances from the nest. Only then we can tell if a few reeds can be representative of what is happening in the non-visible parts of the nest.
We still have not received the kit, so we are a bit worried about timing. We also have a big trip in March and won’t be able to assemble much during that time. Hopefully the deadline will be passed to April or even May, given the 2 month delay in the kit send-off.
We will start working soon on the algorithm and maybe have something to show on that in the next blog.
Cheers
Phil and Ale

-

beacon_dave
-
Cancel
-
Vote Up
0
Vote Down
-
-
Sign in to reply
-
More
-
Cancel
-

FollowTheWizard
in reply to beacon_dave
-
Cancel
-
Vote Up
0
Vote Down
-
-
Sign in to reply
-
More
-
Cancel
-

beacon_dave
in reply to FollowTheWizard
-
Cancel
-
Vote Up
0
Vote Down
-
-
Sign in to reply
-
More
-
Cancel
-

FollowTheWizard
in reply to beacon_dave
-
Cancel
-
Vote Up
0
Vote Down
-
-
Sign in to reply
-
More
-
Cancel
Comment-

FollowTheWizard
in reply to beacon_dave
-
Cancel
-
Vote Up
0
Vote Down
-
-
Sign in to reply
-
More
-
Cancel
Children