Intro
This episode chronicles getting the Lora & Husky show live-connecting with the Crystal display.
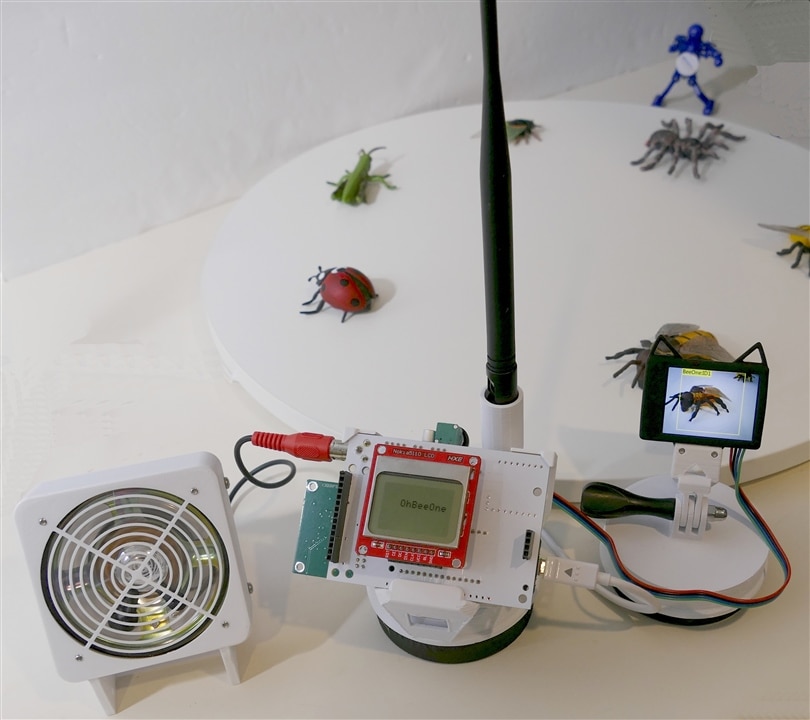
The Lora and husky hardware and software are fully functional, including a 3D printed chassis. This node views the scene with the Husky camera and display, recognizing bugs with a Kendryte ML processor, passing the info to the Arduino MKR and its display, which then announces what is happening and transmits the findings via its LoRa radio.
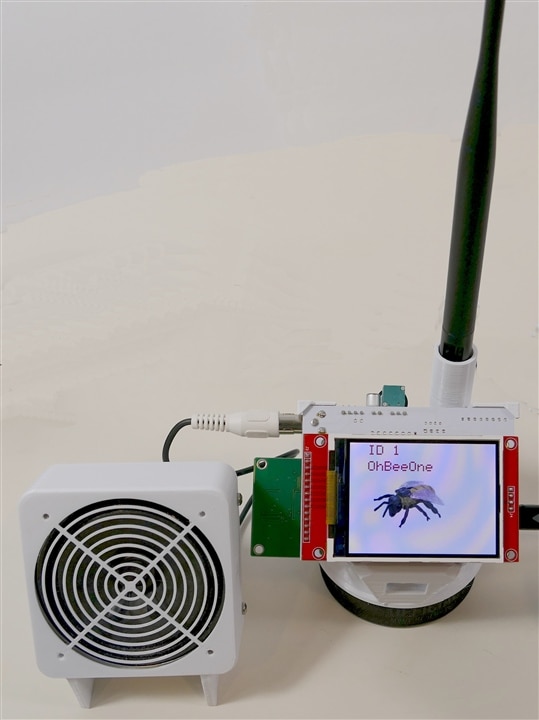
The Crystal Base hardware and software are also fully functional, including a 3D printed chassis. This node receives info via LoRa radio and displays an image of what was recognized as well as announcing it.
The Build For This Episode:
The builds for this episode include
- design and printing of two chassis' that stabilize the circuit boards and antennas
- assembly of 2 system PCBs and their peripherals
- coding of firmware for both nodes
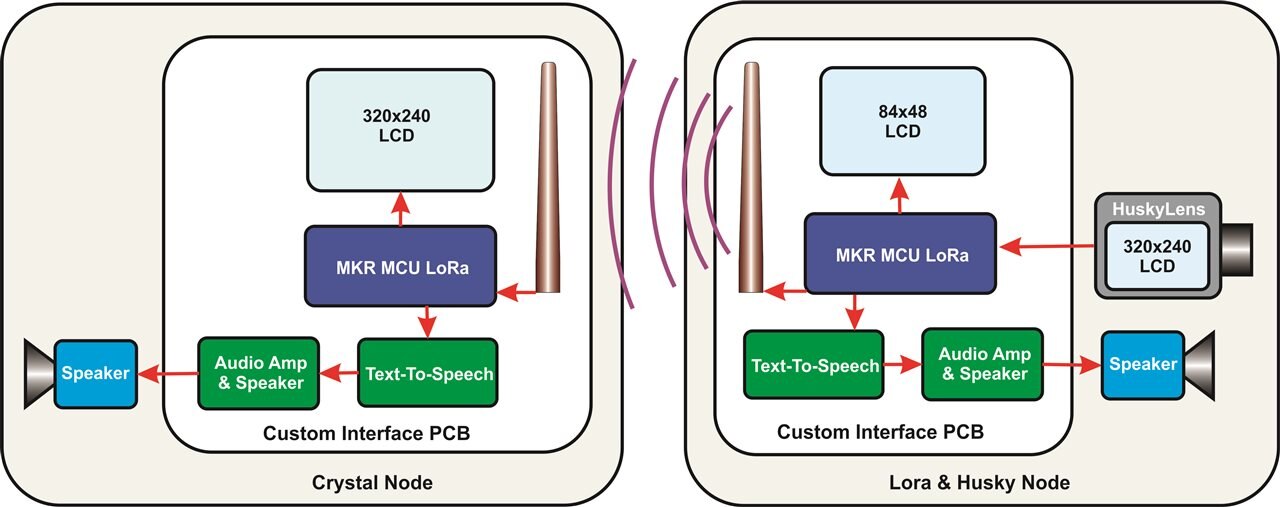
Here is a block diagram of the system as it stands now:

The Lora & Husky System
The Lora System now has an LCD, a speech synthesizer and the Huskylens connected via a custom system PCB and software to control all peripherals and the radio. The 3D printed chassis is essential to stabilize the antenna and prevent stress on the very thin antenna cable.

The Crystal Base Station
The Crystal Base Station includes an Arduino MKR WAN 1300, a 5 dB antenna, a color LCD, a speech synthesizer and a speaker. It also needs a 3D printed chassis to stabilize the antenna and its cable.

Lora & Husky Show
This video shows the system fully operating
- it displays the scene on an LCD
- it recognizes bees and other insects in the scene
- it announces them with (Husky) speech
- they introduce themselves with their own voice
- the MKR communicates with the Huskylens to find out what was seen and displays it on its own LCD
- The MKR sends the info to the Crystal Base Station via RoRa
- The Crystal Base Station displays the info along with an image of what was recognized and announces the event with its own speech synthesizer
The two systems are close to each other in this demo, but I have successfully tested these 5dB antennas with Arduino MKRWANs at ranges up to 3.5 km in an urban environment.
You can see in this video there are a lot of 3D printed parts in this project - the speaker enclosures, the Husky GoPro puck mount, and the chassis'/antenna holders.
The Build Process
The 2 PCBs were assembled and tested using test programs for each peripheral and subsystem. This was a lengthy process since I had not worked with the big LCD before. I switched the Huskylens to an I2C interface as designed into the PCB, although I programmed the names it recognizes using a UART on an UNO (because the PCB had not arrived). I also had to design a chassis to protect the circuits and antennas from handling.
Here is a brief video showing how it all fits together:
The firmware was pretty tricky especially the LoRa code. The system uses LoRa in a stand-alone peer-to-peer network. I didn't realize there was a separate configuration program that needed to be run on the MKR to allow it to operate stand-alone, so I spent quite a while spinning my wheels trying to figure out why even example code didn't work. The program is called "MKRWANFWUpdate_standalone" - found in the library examples, assuming you have installed the MAKWAN library.
Discussion
This is a major milestone in the project, with a complete system working - both hardware and firmware. I ran into snags with the LoRa firmware and had to stop testing so I could print some chassis' - because I was worried all the manual manipulation during troubleshooting would damage the system, especially the antenna cable. Once things started to work, it rapidly progressed to performing very well. The software is rudimentary - no robust error checking protocols or anything like that.
The hardware went together well, because I had spent more time planning it. I did run into a snag trying to get a PC to supply enough current through USB to run the Husky system. It seems that the Arduino does not negotiate enough current so I had to make a cheater connector that allows a separate 5V supply to run the system while still communicating with the PC.
I' m happy that I could get all the multimedia aspects of the system working as they are important in providing interesting things for readers to see and hear. As finicky as they were to get going, they also provided me extra ways to get feedback of what the system was doing, or not doing. When there is no output from a radio link, it is always tough to figure out which end of the link is the problem.
I will add the code to this post as soon as I go through it to see if there are enough comments.
So far the project is coming together nicely, not exactly as planned, but at least a complete system is now fully functional.
Links:
Save the Bees - Machine Learning
Image Conversion to Integer Array for LCD Display
Save The Bees Wrap Up - Blog 9
Save The Bees - Design Challenge
