element14 Community
element14 Community
    Register Log In
  • Site
  • Search
  • Log In Register
  • Community Hub
    Community Hub
    • What's New on element14
    • Feedback and Support
    • Benefits of Membership
    • Personal Blogs
    • Members Area
    • Achievement Levels
  • Learn
    Learn
    • Ask an Expert
    • eBooks
    • element14 presents
    • Learning Center
    • Tech Spotlight
    • STEM Academy
    • Webinars, Training and Events
    • Learning Groups
  • Technologies
    Technologies
    • 3D Printing
    • FPGA
    • Industrial Automation
    • Internet of Things
    • Power & Energy
    • Sensors
    • Technology Groups
  • Challenges & Projects
    Challenges & Projects
    • Design Challenges
    • element14 presents Projects
    • Project14
    • Arduino Projects
    • Raspberry Pi Projects
    • Project Groups
  • Products
    Products
    • Arduino
    • Avnet & Tria Boards Community
    • Dev Tools
    • Manufacturers
    • Multicomp Pro
    • Product Groups
    • Raspberry Pi
    • RoadTests & Reviews
  • About Us
  • Store
    Store
    • Visit Your Store
    • Choose another store...
      • Europe
      •  Austria (German)
      •  Belgium (Dutch, French)
      •  Bulgaria (Bulgarian)
      •  Czech Republic (Czech)
      •  Denmark (Danish)
      •  Estonia (Estonian)
      •  Finland (Finnish)
      •  France (French)
      •  Germany (German)
      •  Hungary (Hungarian)
      •  Ireland
      •  Israel
      •  Italy (Italian)
      •  Latvia (Latvian)
      •  
      •  Lithuania (Lithuanian)
      •  Netherlands (Dutch)
      •  Norway (Norwegian)
      •  Poland (Polish)
      •  Portugal (Portuguese)
      •  Romania (Romanian)
      •  Russia (Russian)
      •  Slovakia (Slovak)
      •  Slovenia (Slovenian)
      •  Spain (Spanish)
      •  Sweden (Swedish)
      •  Switzerland(German, French)
      •  Turkey (Turkish)
      •  United Kingdom
      • Asia Pacific
      •  Australia
      •  China
      •  Hong Kong
      •  India
      • Japan
      •  Korea (Korean)
      •  Malaysia
      •  New Zealand
      •  Philippines
      •  Singapore
      •  Taiwan
      •  Thailand (Thai)
      • Vietnam
      • Americas
      •  Brazil (Portuguese)
      •  Canada
      •  Mexico (Spanish)
      •  United States
      Can't find the country/region you're looking for? Visit our export site or find a local distributor.
  • Translate
  • Profile
  • Settings
Sci Fi Your Pi
  • Challenges & Projects
  • Design Challenges
  • Sci Fi Your Pi
  • More
  • Cancel
Sci Fi Your Pi
Blog Meditech: Python + PyGTK + Glade = UI Design
  • Blog
  • Forum
  • Documents
  • Files
  • Mentions
  • Sub-Groups
  • Tags
  • More
  • Cancel
  • New
  • Share
  • More
  • Cancel
Group Actions
  • Group RSS
  • More
  • Cancel
Engagement
  • Author Author: balearicdynamics
  • Date Created: 21 Aug 2015 11:40 PM Date Created
  • Views 3422 views
  • Likes 7 likes
  • Comments 24 comments
  • interface_design
  • meditech_project
  • python
  • user_interface
  • development_speedup
  • raspberry-pi
  • graphic_libraries
  • glade
  • pygtk
  • graphic_design
  • sci_fi_your_pi
Related
Recommended

Meditech: Python + PyGTK + Glade = UI Design

balearicdynamics
balearicdynamics
21 Aug 2015

Introduction

Definitely the Python language with some content improvements has been adopted to manage the UI, replacing the initial idea to use Qt for two reasons: development optimization and architecture simplification. Unfortunately as many times occur, making things simple it is not so simple.


Exploiting the features of the Linux graphic interface

Together with Python there is a very useful  library interfacing the language with the standard features natively available in the Raspbian desktop: PyGTKimage

This library lets create almost any graphical user interface with the Python language using  GTK+. This means that it is possible to create multiplatform visual applications based on the graphic features and performances of the Gnome Desktop.

The resulting program can work easily with good performances without further intermediate graphic components.

Another advantage is that the entire set of UI applications developed in PyGTK inherit the GTK  desktop theme adapting to any supported environment.


As occur with all the Python libraries the integration of PyGTK in the Python programs is almost simple:


#!/usr/bin/env python

import sys
try:
    import pygtk
    pygtk.require("2.0")
except:
    pass
try:
    import gtk
    import gtk.glade
except:
    print("GTK Not Availible")
    sys.exit(1)

class HellowWorldGTK:
    """This is an Hello World GTK application"""

    def __init__(self):

        #Set the Glade file
        self.gladefile = "HelloWin.glade"
        self.wTree = gtk.glade.XML(self.gladefile)


if __name__ == "__main__":
    hwg = HellowWorldGTK()
    gtk.main()


A simple GTK Window with Python

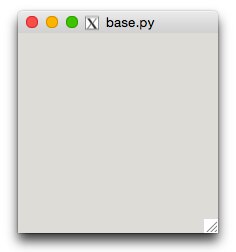
The following scriptlet  shows the creation of a simple windows using PyGTK

#!/usr/bin/env python

# example base.py

import pygtk
pygtk.require('2.0')
import gtk

class Base:
    def __init__(self):
        self.window = gtk.Window(gtk.WINDOW_TOPLEVEL)
        self.window.show()

    def main(self):
        gtk.main()

print __name__
if __name__ == "__main__":
    base = Base()
    base.main()


This source is very simple generating a small window on the screen as shown below:

image

Something more complex

Using the PyGTK API - we can try this more complex example

#!/usr/bin/env python

# example table.py

import pygtk
pygtk.require('2.0')
import gtk

class Table:
    # Our callback.
    # The data passed to this method is printed to stdout
    def callback(self, widget, data=None):
        print "Hello again - %s was pressed" % data

    # This callback quits the program
    def delete_event(self, widget, event, data=None):
        gtk.main_quit()
        return False

    def __init__(self):
        # Create a new window
        self.window = gtk.Window(gtk.WINDOW_TOPLEVEL)

        # Set the window title
        self.window.set_title("Table")

        # Set a handler for delete_event that immediately
        # exits GTK.
        self.window.connect("delete_event", self.delete_event)

        # Sets the border width of the window.
        self.window.set_border_width(20)

        # Create a 2x2 table
        table = gtk.Table(2, 2, True)

        # Put the table in the main window
        self.window.add(table)

        # Create first button
        button = gtk.Button("button 1")

        # When the button is clicked, we call the "callback" method
        # with a pointer to "button 1" as its argument
        button.connect("clicked", self.callback, "button 1")


        # Insert button 1 into the upper left quadrant of the table
        table.attach(button, 0, 1, 0, 1)

        button.show()

        # Create second button

        button = gtk.Button("button 2")

        # When the button is clicked, we call the "callback" method
        # with a pointer to "button 2" as its argument
        button.connect("clicked", self.callback, "button 2")
        # Insert button 2 into the upper right quadrant of the table
        table.attach(button, 1, 2, 0, 1)

        button.show()

        # Create "Quit" button
        button = gtk.Button("Quit")

        # When the button is clicked, we call the main_quit function
        # and the program exits
        button.connect("clicked", lambda w: gtk.main_quit())

        # Insert the quit button into the both lower quadrants of the table
        table.attach(button, 0, 2, 1, 2)

        button.show()

        table.show()
        self.window.show()

def main():
    gtk.main()
    return 0      

if __name__ == "__main__":
    Table()
    main()

This code will generate the window shown in the image below

image

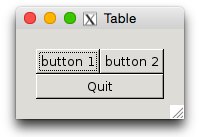
Until we press the buttons 1 and 2 we  see on the terminal the button message then pressing the  OK button the program ends.

Hello again - button 1 was pressed
Hello again - button 2 was pressed


The PyGTK library includes also the API to set callback functios, associate methods to the buttons and so on. A complete manager of the visual interaction. Unfortunately also for a  simple application (three buttons with their callback  inside a standard window) we should write a lot of code. As a matter of fact every graphic option, button, icon and  detail should be written in Python calling the proper PyGTK API.


Separating the design from the code

The solution to make the things easier is to operate a separation between the User Interface design and the code. To reach this goal we should adopt a technique very similar to the Android applications, keeping apart the  objects design in XML format  from the PyGTK Python code.

The Meditech Python controller when start shows the main Meditech logo on the screen while managing the inter-process communication. To reach this result  the background image has been created:

image

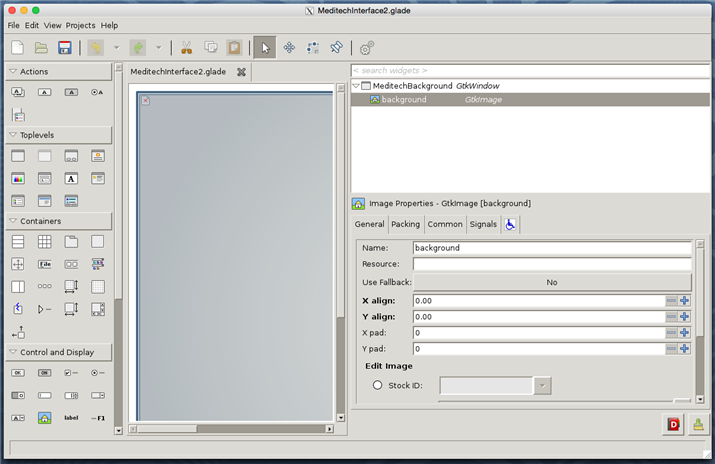
Then a special window has been defined in a separate XML file: the MeditechInterface2.glade as shown below

<?xml version="1.0" encoding="UTF-8"?>
<interface>
  <!-- interface-requires gtk+ 3.0 -->
  <object class="GtkWindow" id="MeditechBackground">
    <property name="visible">True</property>
    <property name="sensitive">False</property>
    <property name="can_focus">False</property>
    <property name="halign">center</property>
    <property name="valign">center</property>
    <property name="title" translatable="yes">Meditech 1.0Beta</property>
    <property name="resizable">False</property>
    <property name="modal">True</property>
    <property name="window_position">center-on-parent</property>
    <property name="default_width">1024</property>
    <property name="default_height">1080</property>
    <property name="hide_titlebar_when_maximized">True</property>
    <property name="type_hint">desktop</property>
    <property name="skip_taskbar_hint">True</property>
    <property name="skip_pager_hint">True</property>
    <property name="accept_focus">False</property>
    <property name="focus_on_map">False</property>
    <property name="decorated">False</property>
    <property name="deletable">False</property>
    <property name="gravity">center</property>
    <property name="has_resize_grip">False</property>
    <property name="mnemonics_visible">False</property>
    <property name="focus_visible">False</property>
    <child>
      <object class="GtkImage" id="background">
        <property name="width_request">1024</property>
        <property name="height_request">768</property>
        <property name="visible">True</property>
        <property name="sensitive">False</property>
        <property name="can_focus">False</property>
        <property name="xalign">0</property>
        <property name="yalign">0</property>
        <property name="pixbuf">images/Meditech-1024.jpg</property>
      </object>
    </child>
  </object>
</interface>

This is a window where many parameters are  different than the default: there are no decorations, the window is not resizable, the image is centered and both window and image are expanded over the entire screen and more. Designing the UI apart has created a dramatic simplification in the Python code, where the entire UI definition is reduced to a line of code as shown below.

import sys
try:
    import pygtk
    pygtk.require("2.0")
except:
    pass
try:
    import gtk
    import gtk.glade
except:
    print("GTK Not Availible")
    sys.exit(1)

class MeditechMain:

    wTree = None

    def __init__( self ):
        #  ============================ XML with the UI desgn definition
        builder = gtk.Builder()
        builder.add_from_file("MeditechInterface2.glade")
        # ============================
        builder.connect_signals(self)
        self.window = builder.get_object("MeditechBackground")
        self.window.fullscreen()
        self.window.maximize()
        self.window.set_keep_below(True)
        self.window.set_deletable(False)
        # self.window.show_all()

        # self.image = builder.get_object("Background")
        # self.image.show()

def main():
    gtk.main()

if __name__ == "__main__":
    mainClass = MeditechMain()
    main()


What makes the difference is the call add_from_file("MeditechInterface2.glade") incorporating the XML file. Obviously the PyGTK APIs remain available and can be used in the program to make changes and adaptions to the initial UI.


Making the design simple

It is almost intuitive that it is not simple to define the UI components in  XML. It is also obvious that this separation between design and code has also another great advantage: we can retouch and adjust some design issues without changing the code.

The reason that the UI design XML file has the glade extension derives from the name of the graphic IDE we are using, just to create the design. Again this strategy is a remembrance of the Android UI design.

image

The Glade IDE makes available all the GTK components to design the UI components seeing them as they appear at runtime; then generates the glade XML file when the design is saved to be used in the PyGTK Python application. Details on the installation and usage of the Glade IDE can be found at glade.gnome.org

  • Sign in to reply

Top Comments

  • fvan
    fvan over 10 years ago in reply to balearicdynamics +2
    That's indeed one of the big rewards of the challenge, winner or not, to be able to play, experiment and learn new things on your own and from others
  • balearicdynamics
    balearicdynamics over 10 years ago in reply to phoenixcomm +2
    Enjoy ! Enrico
  • fvan
    fvan over 10 years ago +1
    Impressive work, as usual
Parents
  • shabaz
    shabaz over 10 years ago

    Hi Enrico,


    This is great stuff! I've not had a chance to use glade yet, been meaning to for a couple of small projects, so this is very valuable information for when I get around to it,

    although I don't plan on using Python but an alternate language.

    • Cancel
    • Vote Up +1 Vote Down
    • Sign in to reply
    • More
    • Cancel
  • balearicdynamics
    balearicdynamics over 10 years ago in reply to shabaz

    Hi Shabaz,


    thank you. Remember to notice me when you plan to manage with Galde as there are a couple of tricks that made me crazy the first time, but the solution is almost stupid. The working version of Glade under raspian is Glade 3 that support some features that are not totally supported by the PyGTK that is supported by the raspian. So there are a couple of parameters that should be checked with attention when creating the glade file with the IDE (that is really good in my opinion).


    The second trick is more sneaky: the glade file generated by the Glade 3 is not a glade file of the same "flavour" than the kind of glade files accepted by the PyGTK by default and - the worst - as it is shown on all the examples I found. The solution is in a different way to open and load the glades files from Python. Anyway I have collected a considerable number of links and pages to explain this detail. Maybe the worth to plan a Tutorial on the use of the software available on raspian by default (or simply and easy to install) to get the better and faster results from the Raspberry PI ? What do you think ?


    Enrico

    • Cancel
    • Vote Up +1 Vote Down
    • Sign in to reply
    • More
    • Cancel
Comment
  • balearicdynamics
    balearicdynamics over 10 years ago in reply to shabaz

    Hi Shabaz,


    thank you. Remember to notice me when you plan to manage with Galde as there are a couple of tricks that made me crazy the first time, but the solution is almost stupid. The working version of Glade under raspian is Glade 3 that support some features that are not totally supported by the PyGTK that is supported by the raspian. So there are a couple of parameters that should be checked with attention when creating the glade file with the IDE (that is really good in my opinion).


    The second trick is more sneaky: the glade file generated by the Glade 3 is not a glade file of the same "flavour" than the kind of glade files accepted by the PyGTK by default and - the worst - as it is shown on all the examples I found. The solution is in a different way to open and load the glades files from Python. Anyway I have collected a considerable number of links and pages to explain this detail. Maybe the worth to plan a Tutorial on the use of the software available on raspian by default (or simply and easy to install) to get the better and faster results from the Raspberry PI ? What do you think ?


    Enrico

    • Cancel
    • Vote Up +1 Vote Down
    • Sign in to reply
    • More
    • Cancel
Children
  • shabaz
    shabaz over 10 years ago in reply to balearicdynamics

    Hi Enrico,


    This is interesting information. I think a tutorial as you say, would be useful.

    For example, do you advise running glade on a PC and then using the resultant output for the RPI? Or better to run it directly on the RPI?

    This kind of stuff will be useful to have documented, to make it easier for others.

    I'm not fan of Python, but I can see that nevertheless many people do use it, so the information will help them create better applications.

    • Cancel
    • Vote Up 0 Vote Down
    • Sign in to reply
    • More
    • Cancel
  • balearicdynamics
    balearicdynamics over 10 years ago in reply to shabaz

    Hi Shabaz,


    the reason that I have not yet documented this in a tutorial is that I have to close something before. But it is in my to-do list. The other reason is that I have not yet experimented all the possibilities to make the things as much simple and useful as possible. In theory, as far as what I know it is not a problem to develop the UI design on the PC then port the glade file on the destination platform. The only condition is that you have GTK installed on the development computer. PyGTK is not needed as Glade ignore everything else then GTK.

    I have not yet tested this because when I was setting the system there was a lot of issues, not sure what was the origin. Now that the things are clear the first thing I will do is install GTK on Mac and Glade, then try simply opening the first working parts and see what happens.


    Enrico.

    • Cancel
    • Vote Up +1 Vote Down
    • Sign in to reply
    • More
    • Cancel
element14 Community

element14 is the first online community specifically for engineers. Connect with your peers and get expert answers to your questions.

  • Members
  • Learn
  • Technologies
  • Challenges & Projects
  • Products
  • Store
  • About Us
  • Feedback & Support
  • FAQs
  • Terms of Use
  • Privacy Policy
  • Legal and Copyright Notices
  • Sitemap
  • Cookies

An Avnet Company © 2025 Premier Farnell Limited. All Rights Reserved.

Premier Farnell Ltd, registered in England and Wales (no 00876412), registered office: Farnell House, Forge Lane, Leeds LS12 2NE.

ICP 备案号 10220084.

Follow element14

  • X
  • Facebook
  • linkedin
  • YouTube