


Introduction
Before starting with the blog post, I need to say the project will change. I wanted to use the ADS1299 because it can sample up to 8 channels up to 16kSPS and with a resolution with 24bits. This ADC is really popular among the most used BCI on the market. Upon checking on Digikey, usually the waiting time to get it is 26 weeks which is way longer than this competition. In order to still compete, I will create a prototype of a prototype. So instead to design the PCB and create a new device from scratch, I will use commercially available boards that everybody can purchase for few euros and start doing experiments.
The advantages of this approach are:
- the project is going to be easier and faster since I will not need to finish the PCB and do all the process of contacting the manufacturer and print the PCB
- everybody can easily copy my design without buying anything too expensive or having hard skills
- this project will mean everybody can start doing their own BCI experiment with their board
The disadvantages are:
- I will not be able to sample data with an accuracy of 24bits (that will be determined by the board used and the integrated ADC)
- I will not develop my design for a neuroergonomic BCI (that will come later)
Start the connection
At home, I have a Huzzah32 feather board that I have never used (I got it from my university because I always wanted to try a board with WiFi and Bluetooth and finally I get to use it). I checked the specification of the board and I found out it does have WiFi but no Bluetooth. I wanted to use Bluetooth especially because WiFi requires too much set up like getting the IP address of the raspberry pi4 and the board. I will look for a board that does have Bluetooth online. Preferably, a board with an ADC with an higher bit resolution. The Huzza32 has an ADC with 12bits.
***CORRECTION***
The Huzzah32 feather board does have Bluetooth. ChatGPT lied to me. I trusted too much ChatGPT because I was having issues connecting with the board via Bluetooth. I will try again next week to connect via Bluetooth. If I am not able to fix it, this means I will stay with UDP. The goal of project is to create an easy device that requires the least amount possible of configuration. If something is complicated or requires external support, that is a reason to disregard for this project. Check my Post #6 for instructions on how to connect via Bluetooth and for the code.
********************************************
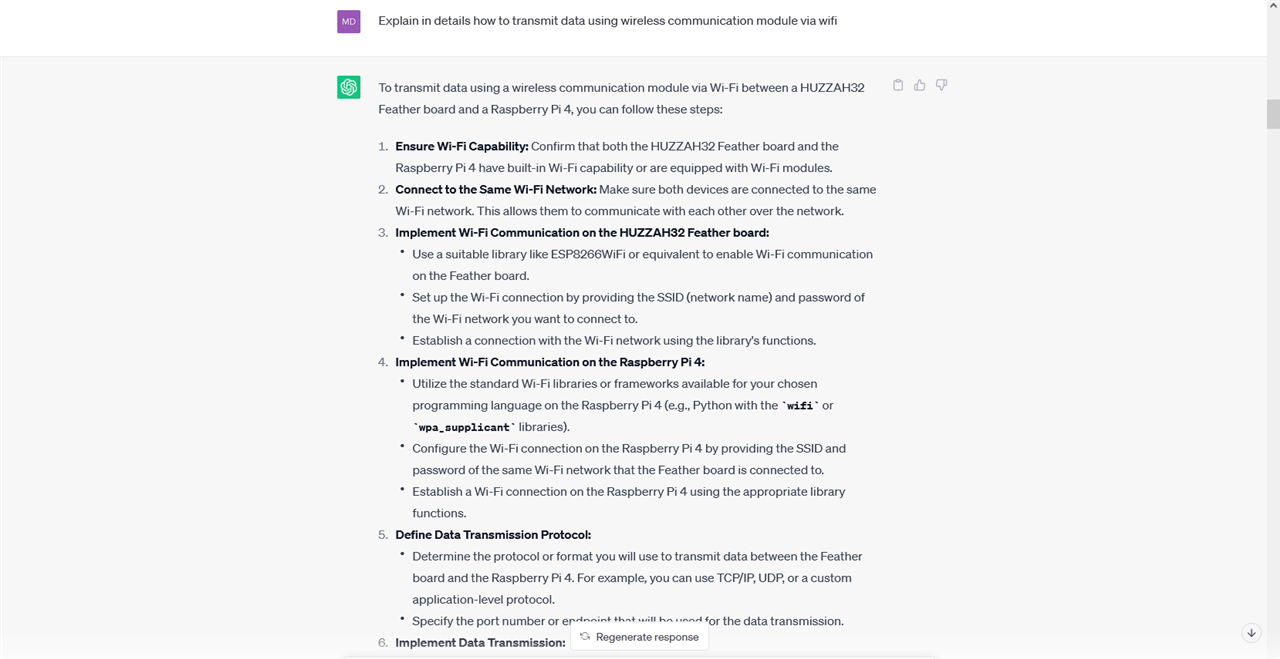
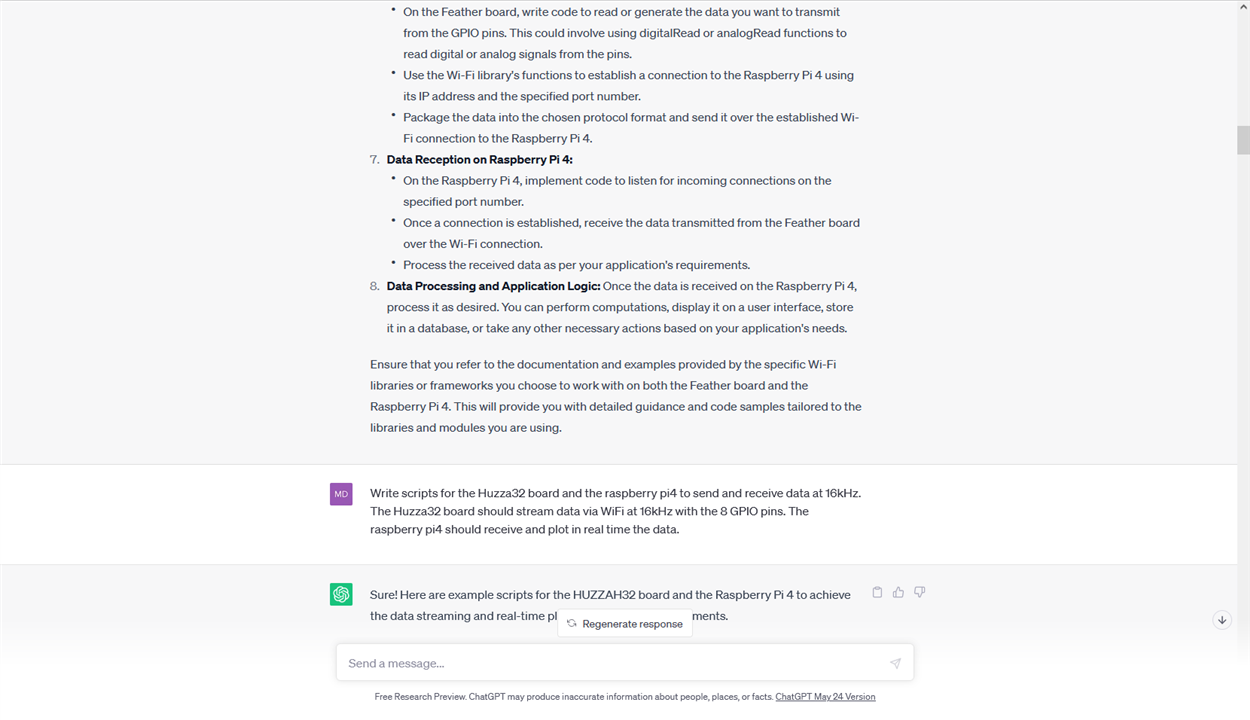
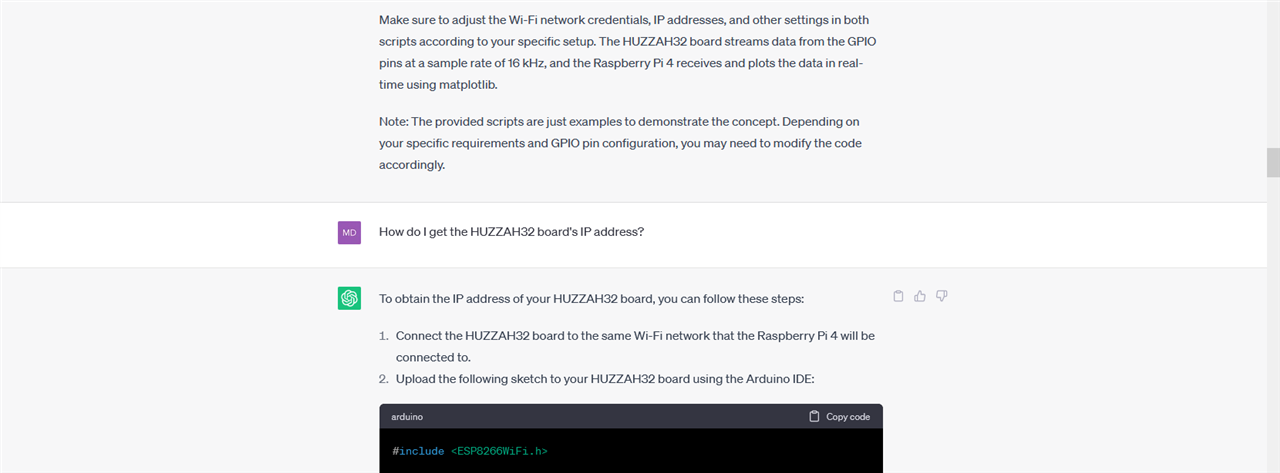
I have never worked with a board with WiFi or any IoT project. So, in order to get started, I asked ChatGPT the best way to connect the board with the raspberry pi. I attach below the conversation.
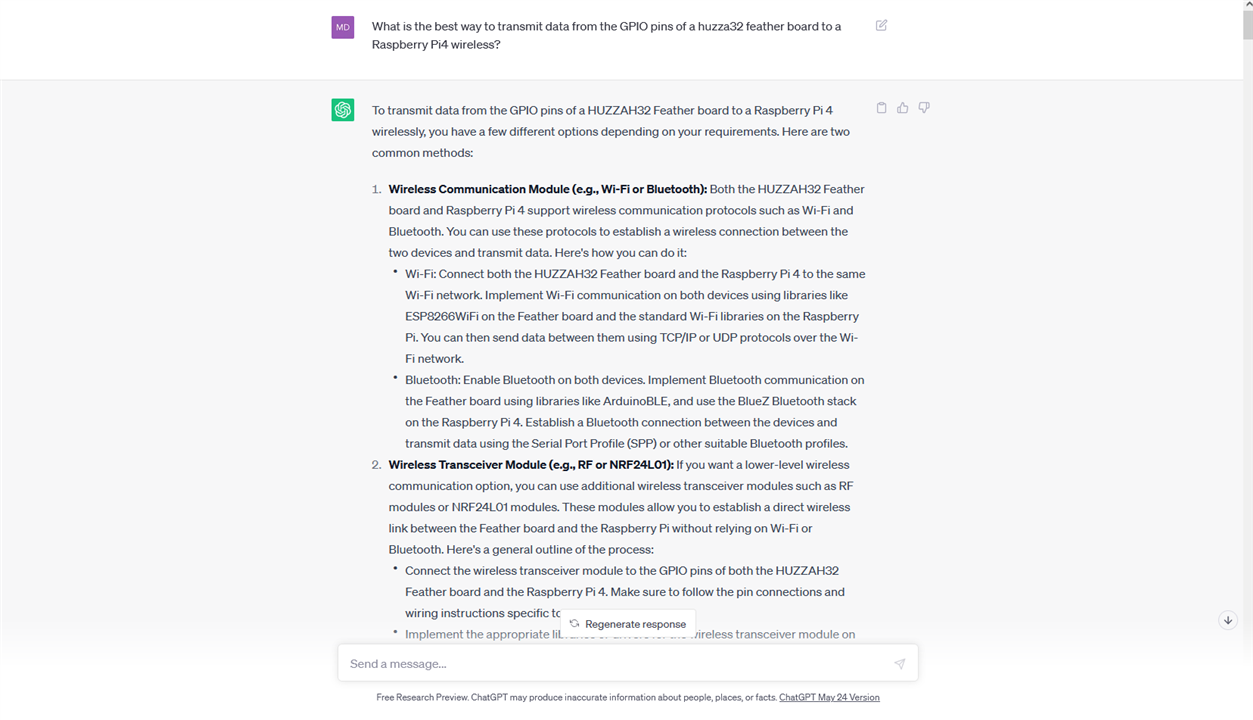
I will attach below the codes so I will not post the screenshots of the codes.
Here ChatGPT made an error since it used a library of another board to transmit via WiFi. So I was getting errors. Luckily, ChatGPT knew how to correct itself.
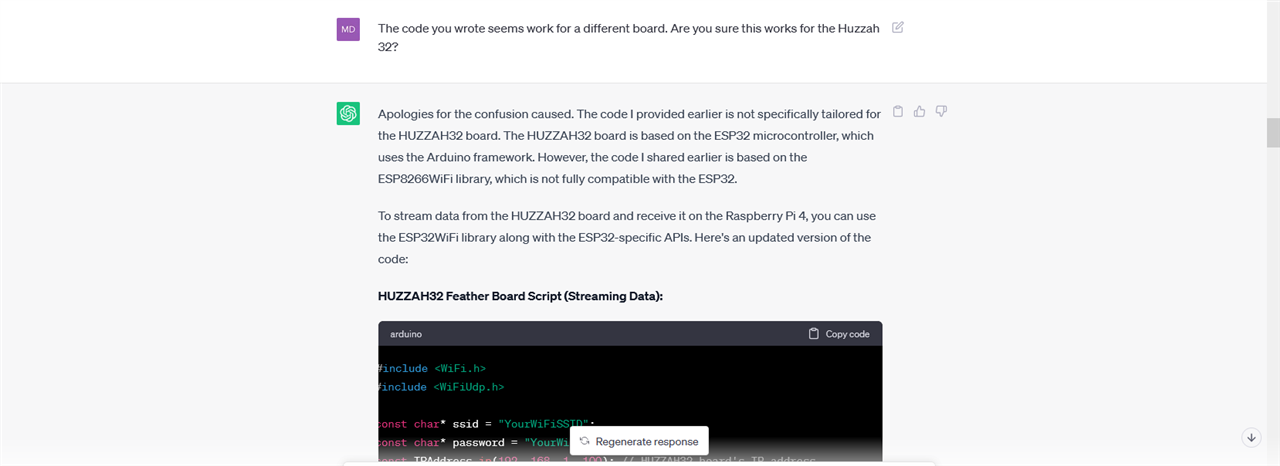
The codes that provided reported some bugs as well, so I just copied and pasted the errors to ChatGPT. It rewrote the scripts and this time without error. I am copying below the codes the codes that work. By the way, I have to say ChatGPT writes really nice documented code.
Arduino
#include <WiFi.h>
#include <WiFiUdp.h>

const char* ssid = "YourWiFiSSID";
const char* password = "YourWiFiPassword";
const unsigned int port = 12345; // Port number for data transmission
const unsigned int sampleRate = 16000; // Sample rate in Hz

const int gpioPins[] = {4, 5, 12, 13, 14, 15, 16, 17}; // GPIO pins to stream data from
const int numPins = sizeof(gpioPins) / sizeof(gpioPins[0]);

WiFiUDP udp;
unsigned long previousMicros = 0;
unsigned long intervalMicros = 1000000 / sampleRate;

void setup() {
  Serial.begin(115200);
  delay(1000);

  WiFi.begin(ssid, password);

  while (WiFi.status() != WL_CONNECTED) {
    delay(500);
    Serial.println("Connecting to WiFi...");
  }
  Serial.println("Connected to WiFi");

  udp.begin(port);

  pinMode(LED_BUILTIN, OUTPUT);
  digitalWrite(LED_BUILTIN, HIGH); // Turn on the built-in LED to indicate streaming
}

void loop() {
  unsigned long currentMicros = micros();

  if (currentMicros - previousMicros >= intervalMicros) {
    previousMicros = currentMicros;

    // Read data from GPIO pins
    uint16_t data[numPins];
    for (int i = 0; i < numPins; i++) {
      data[i] = analogRead(gpioPins[i]);
    }

    // Send data over WiFi
    udp.beginPacket(IPAddress(192, 168, 1, 200), port); // Raspberry Pi's IP address
    udp.write((uint8_t*)&data, sizeof(data));
    udp.endPacket();

    // Print data to Serial Monitor
    Serial.println("Data:");
    for (int i = 0; i < numPins; i++) {
      Serial.print("Pin ");
      Serial.print(gpioPins[i]);
      Serial.print(": ");
      Serial.println(data[i]);
    }

    digitalWrite(LED_BUILTIN, !digitalRead(LED_BUILTIN)); // Toggle built-in LED
  }
}
Raspberry Pi4
import socket
import numpy as np
import matplotlib.pyplot as plt

UDP_IP = "0.0.0.0"  # Bind to all available network interfaces
UDP_PORT = 12345    # Port number for data transmission

# Create a UDP socket
sock = socket.socket(socket.AF_INET, socket.SOCK_DGRAM)

# Bind the socket to the IP address and port
sock.bind((UDP_IP, UDP_PORT))

# Create empty data array for each pin
numPins = 8
data = [[] for _ in range(numPins)]

# Create plots for each pin
fig, axs = plt.subplots(numPins, sharex=True)

# Configure plot settings
plt.ion()
plt.show()

# Start receiving and plotting data
while True:
    # Receive data from the socket
    receivedData, addr = sock.recvfrom(2 * numPins)
    receivedData = np.frombuffer(receivedData, dtype=np.uint16)

    # Split the received data into separate pin values
    pinData = np.split(receivedData, numPins)

    # Append received data to corresponding lists
    for i in range(numPins):
        data[i].extend(pinData[i])

    # Plot the updated data
    for i in range(numPins):
        axs[i].clear()
        axs[i].plot(data[i])

    plt.draw()
    plt.pause(0.001)
This code for the Raspberry Pi4 wouldn't plot data in real time so I decided to ask ChatGPT to rewrite the code to plot data as it was receiving it. It did... but the raspberry pi4 wouldn't run it. There is just no error. It is just after I run the command on the terminal ("python UDP_live_stream.py") nothing comes up. I need to check if maybe it is too much for the raspberry pi4 to plot data at 16kHz. I tried changing the above code and removed the delay to see if it could plot data in real time but I was getting the same problem. So, I need to check if there are better ways to plot data in real time. I am attaching below the code for the data to be plotted in real time.
Raspberry Pi4
import socket
import numpy as np
import matplotlib.pyplot as plt
import matplotlib.animation as animation

UDP_IP = "0.0.0.0"  # Bind to all available network interfaces
UDP_PORT = 12345    # Port number for data transmission
SAMPLE_RATE = 16000  # Sample rate in Hz

# Create a UDP socket
sock = socket.socket(socket.AF_INET, socket.SOCK_DGRAM)

# Bind the socket to the IP address and port
sock.bind((UDP_IP, UDP_PORT))

# Create empty data array for each pin
numPins = 8
data = [[] for _ in range(numPins)]

# Create plots for each pin
fig, axs = plt.subplots(numPins, sharex=True)

# Configure plot settings
plt.ion()
line_objects = []
for i in range(numPins):
    line, = axs[i].plot([])
    line_objects.append(line)

# Function to update the plot with new data
def update_plot(frame):
    # Receive data from the socket
    received_data, _ = sock.recvfrom(2 * numPins)
    received_data = np.frombuffer(received_data, dtype=np.uint16)

    # Split the received data into separate pin values
    pin_data = np.split(received_data, numPins)

    # Append received data to corresponding lists
    for i in range(numPins):
        data[i].extend(pin_data[i])
        line_objects[i].set_data(np.arange(len(data[i])), data[i])

    return line_objects

# Create animation object
ani = animation.FuncAnimation(fig, update_plot, interval=int(1000/SAMPLE_RATE))

# Show the plot
plt.show()
Plotting Data
The Huzza32 board is transmitting data via UDP to the Raspberry Pi4. I set up that the Huzza32 is transmitting data from 8 GPIO pins. The only problem is transmitting only 0s. I didn't have anything to attach to the GPIO pins but usually even touching them would just trigger a new state. I will look into something to attach into the GPIO pins. Probably the problem is inside the code. I asked ChatGPT to rewrite the code and add at the bottom to print in the Serial Monitor the data as well. I could see the data was only 0s. I am attaching below a screenshot from the Raspberry Pi4 plotting data in real time.

Conclusion and next steps
My next tasks are to check why it is sending only 0s, how I can plot data in real time at 16kHz on the Rapsberry Pi4 and check online for a cheap board with Bluetooth and preferably an ADC with higher bit resolution. For my next blog, I will make some hydrogel and test it as a biosensor for the board. I have already set up the UV chamber and ordered two missing ingredients. I wanted to attache below a picture of the UV chamber and the chemicals for the hydrogel but the website wouldn't let me. I guess I have already attached too much. Oh well no spoilers wait until next week!
This week, I have learned a lot about transmitting data in real time from a microcontroller and rapsberry pi4. I already knew about TCP and UDP but this was my first time actually working with them. I have enjoyed learning something practical instead of theory. And I finally used the Huzza32 feather board! In a different conversation with ChatGPT, it explained to me what MQTT is and how it is more reliable to UDP. I didn't used MQTT this time because I needed to install libraries on the Raspberry Pi4 and I want the connection with the board to the Raspberry Pi4 the easiest as possible since everybody should use PiBCI in the easiest way possible.
Top Comments