Hardware Setup & First Code Upload
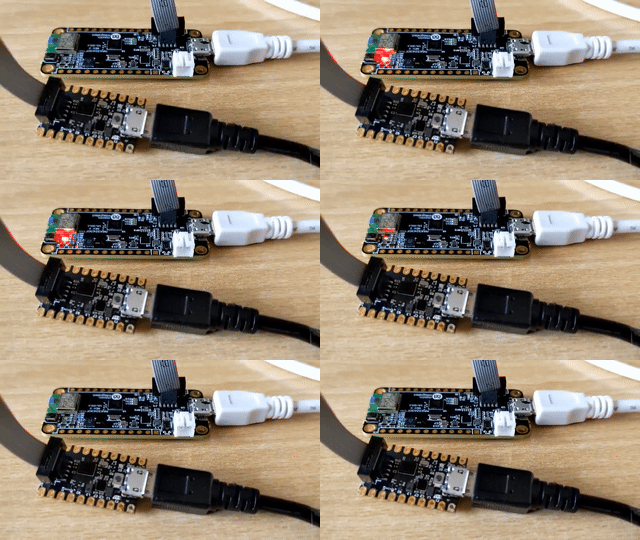
Connecting the Boards

To begin the setup:
- The MAX32625PICO is connected to the Analog Devices MAX32630FTHR using the provided socket-to-socket connector cable
- Both boards are then connected to the computer using USB cables (included in the kit)
This setup allows the PICO board to act as a programmer for the main board.
 ️ Development Environment Setup
Setting up the software environment can be a bit confusing, as most available tutorials are quite old. So here is a simple and working method.
Step 1: Install VS Code
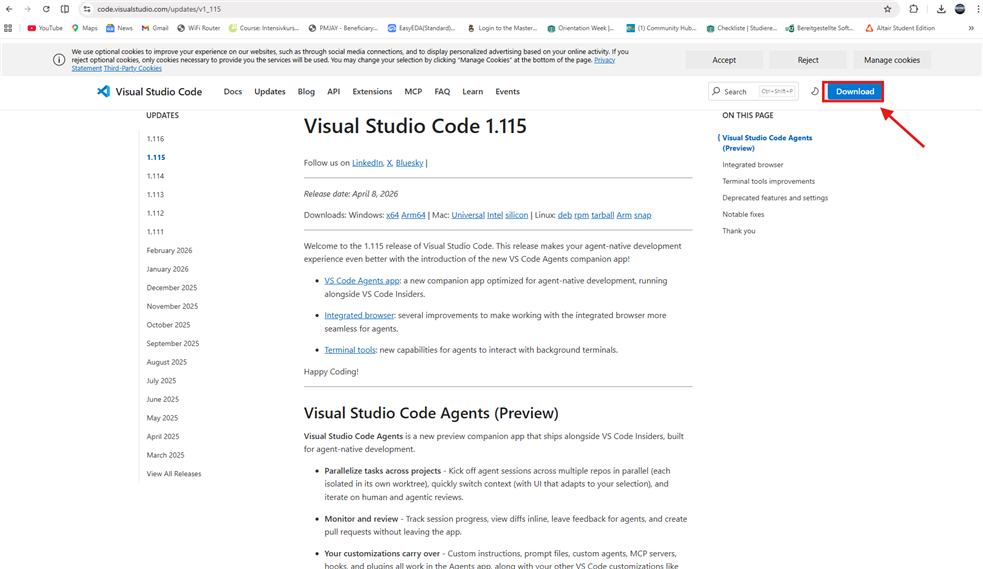
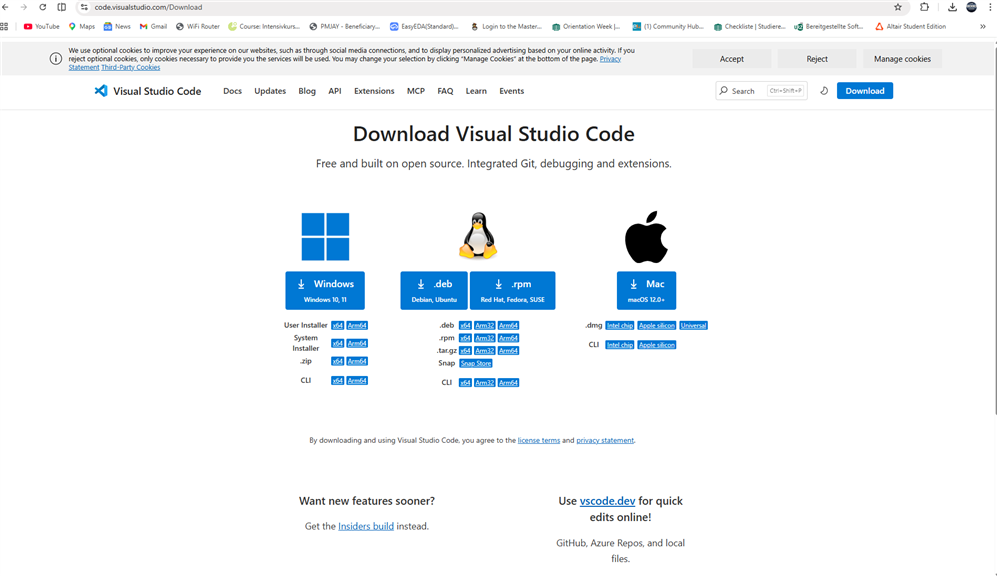
- Install Visual Studio Code (if not already installed). Link : https://code.visualstudio.com/Download
Step 2: Install PlatformIO
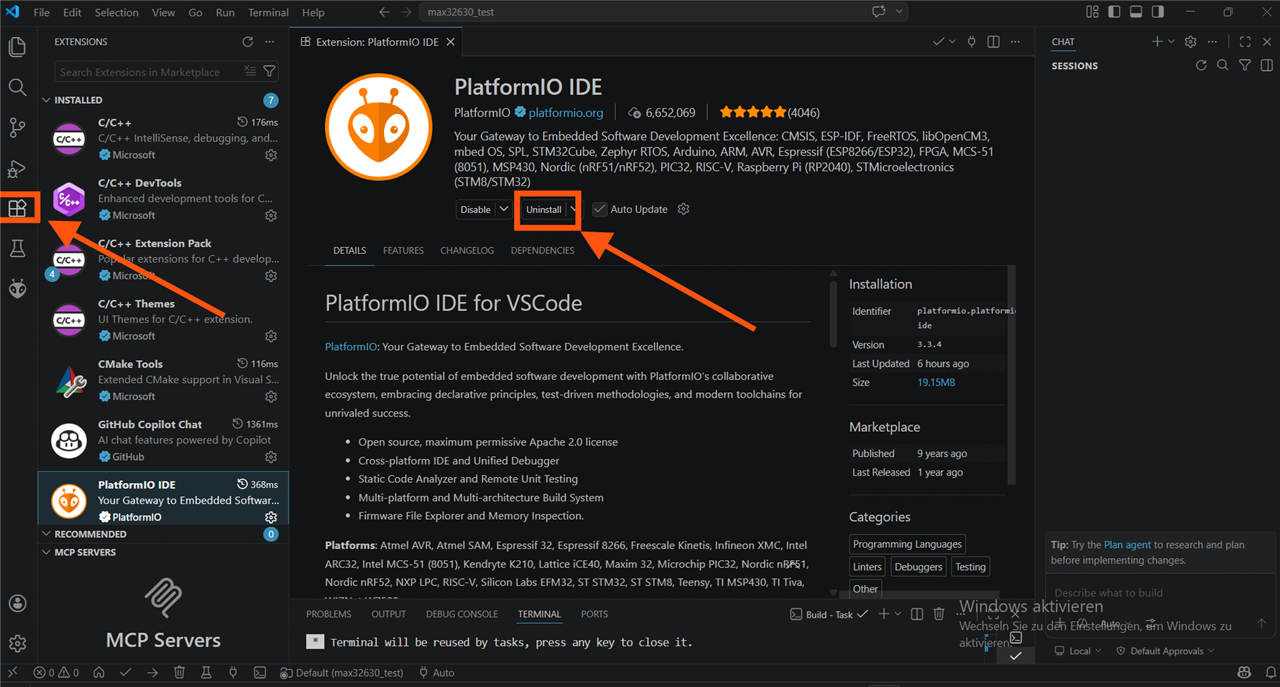
- Go to Extensions in VS Code
- Search for PlatformIO IDE
- Install it
What is PlatformIO?
PlatformIO is an extension that makes it easy to develop, build, and upload code to embedded boards. It manages libraries, toolchains, and programming automatically.
You can see that I have already installed it.
 ️ After installation, restart VS Code.
Step 3: Create New Project
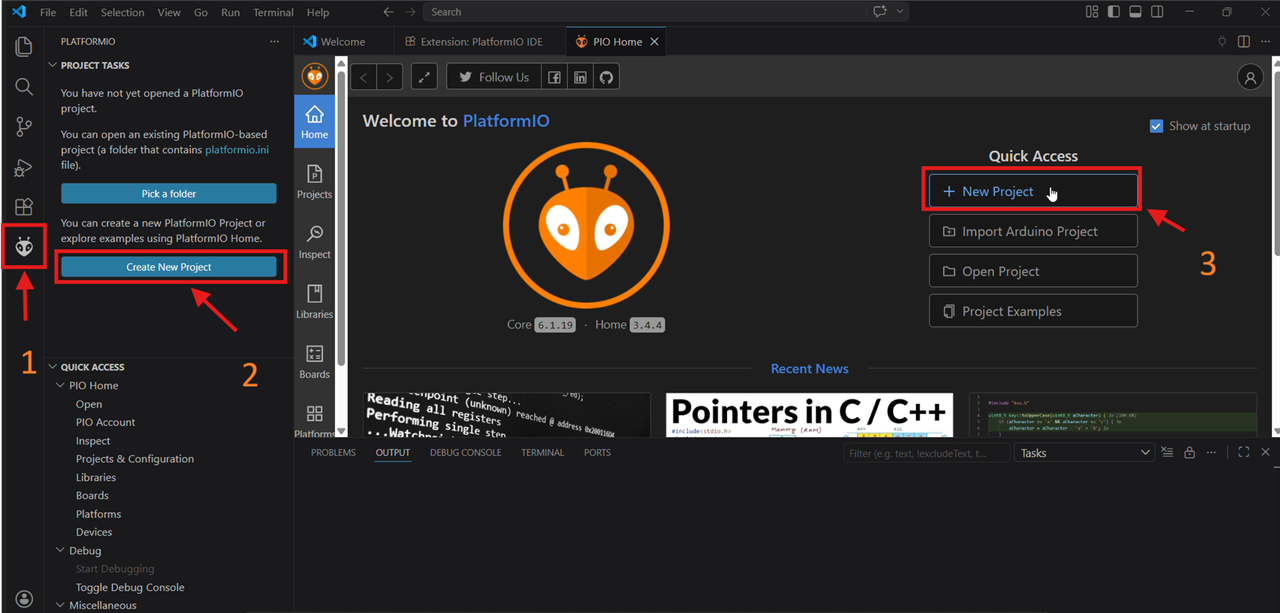
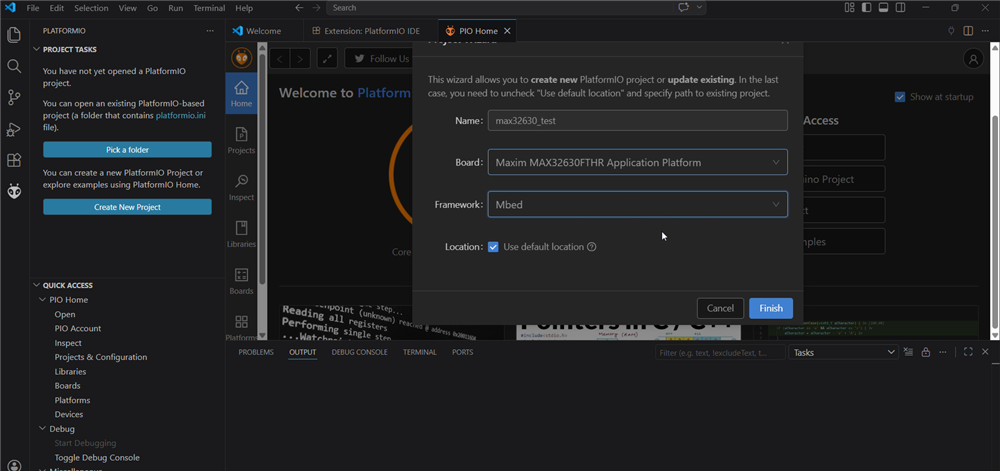
- Click on the alien icon
 (PlatformIO) on the left
 - Click New Project
Fill details:
- Project Name:
max32630_test - Board: Maxim MAX32630FTHR Application Platform
- Framework: Mbed
Click Finish and wait for setup.
Step 4: Create Main Code File
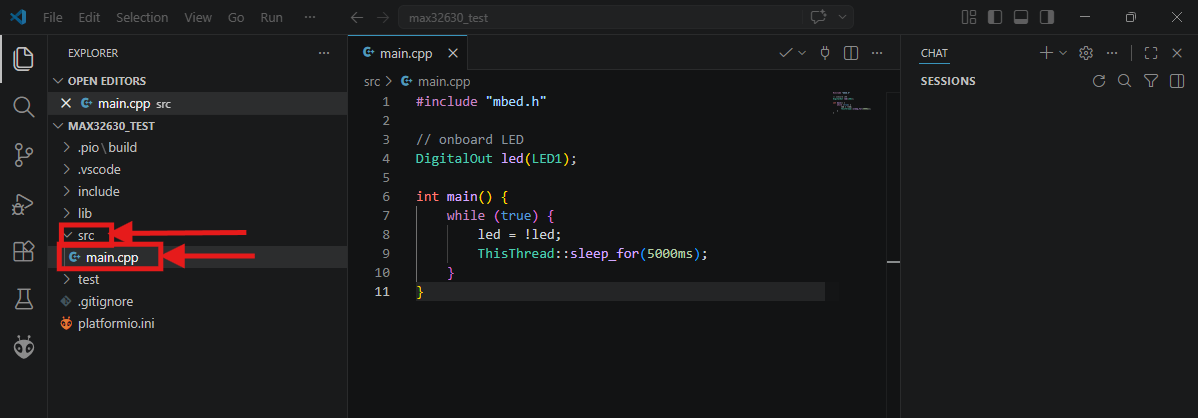
- Open
srcfolder - Create new file →
main.cpp
Paste this test code:
// onboard LED
DigitalOut led(LED1);
int main() {
while (true) {
led = !led;
ThisThread::sleep_for(500ms);
}
}
️ Important Setup (OpenOCD)
To upload code properly, we need OpenOCD.
Step 5: Download OpenOCD
- Download from:
https://gnutoolchains.com/arm-eabi/openocd/ - Download the latest
.7zfile - Extract it to
C:\
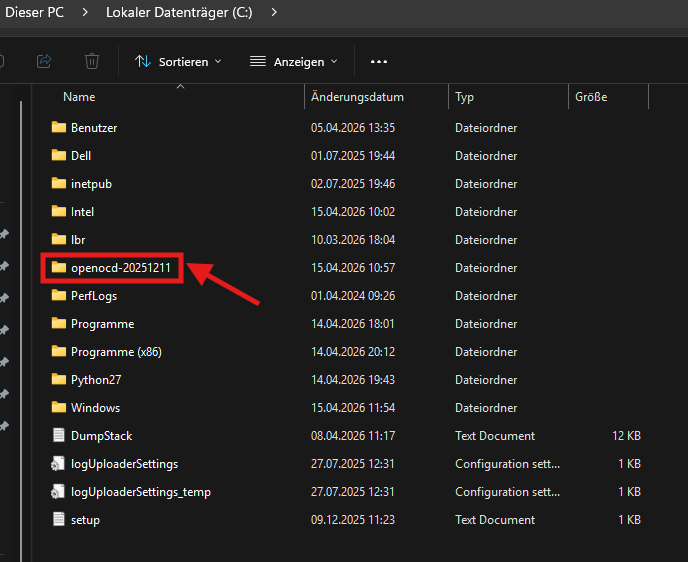
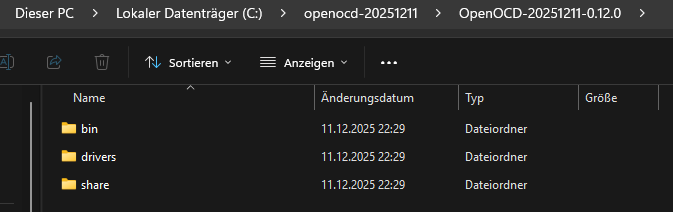
Make sure folder contains:
bindriversshare
Step 6: Find Target Config
Go to:
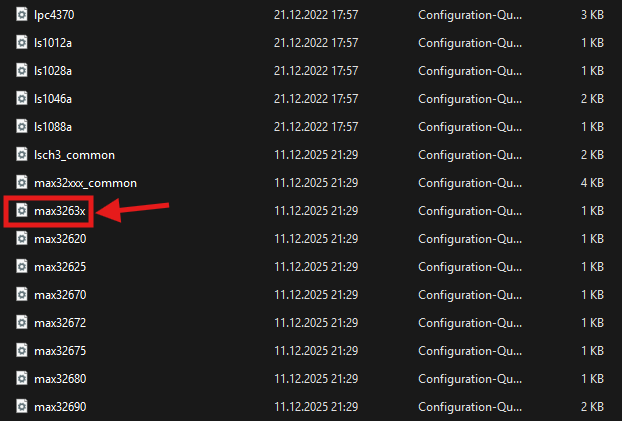
Find file:
max32630.cfgORmax3263x.cfg
Remember this name
Step 7: Update platformio.ini
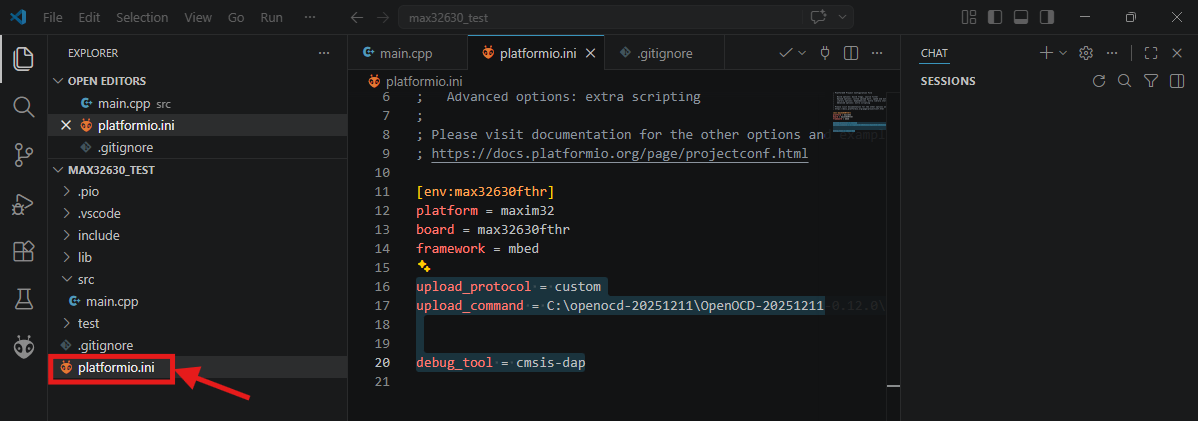
Add these lines:
Save the file
Step 8: Build & Upload

- Click
 (Build) at bottom
 - Wait for “Build Success”
- Then click → (Upload)
️ Important:
- Always Save → Build → Upload
- Do NOT upload directly
Upload Indicator (Important Observation)

During the upload process:
The MAX32625PICO board starts blinking a green LED
This indicates:
- Code is being transferred
- Communication between PC and main board is active
This is a useful visual confirmation that the upload process is working correctly.
Result

If the video does not play here, you can watch it directly using the link below.
https://drive.google.com/file/d/1YMvs5PkrrpxZdh-ltdrRpU_LBdpHd_BW/view?usp=sharing
After uploading:
To demonstrate this, I changed the timing to 0.5 seconds.
The onboard LED on the Analog Devices MAX32630FTHR starts blinking
This confirms:
- Board is working
- Code is running
- Setup is successful
Next Step
In the next update, I will:
- Connect the microphone module
- Start reading real-time sound signals
- Begin implementing sound-based detection
If there is a simpler or more efficient setup method, feel free to share your suggestions.