


I'm currently working to run example code on both the MCXA153 and MCXN236 boards from the same instance of MCUXpresso IDE on a single PC. I wanted to share my experiences here, in case anyone else is attempting this during the challenge, Also, to offer a solution I found for one of the issues I encountered after struggling with the IDE for some time. There’s still another issue described at the end of this post that I’m having difficulty understanding.
I followed the instructions on the MCXA153 Build and Run page. On this page I learned:
- To import an SDK example (like hello world) into MCUXpresso IDE.
- The guide walks you through selecting the FRDM MCX board, expanding the demo_apps category, and choosing hello_world.
- You’ll build the demo and set the debug console to UART for serial output.
- Steps include connecting the board via USB MCU-LINK port, flashing the application, and selecting the MCU-Link CMSIS-DAP debug probe. NOTE – Be sure to include the
- Instructions for opening a serial terminal (settings: 115200 baud, 8 data bits, no parity, 1 stop bit) are provided.
- Finally, you will run the demo and see terminal output.
I tried the “hello world example” on both devices to get a feel for developing on two devices from the same IDE on the same PC. I followed the instructions from the “Build and Run Page” outlined above. I was able to get the example to run on the MCXA153 the first time, but unable to successfully run again after getting the following problem, trying to run it on the MCXN236
Problem:1: “no Terminal output”
- Build
- Debug
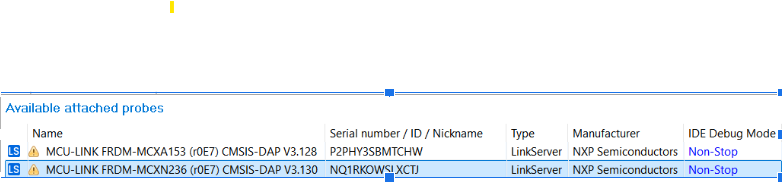
- The following dialog appears to select a probe
- I selected the MCU-Link CMSIS-DAP debug probe for the MCXN236:
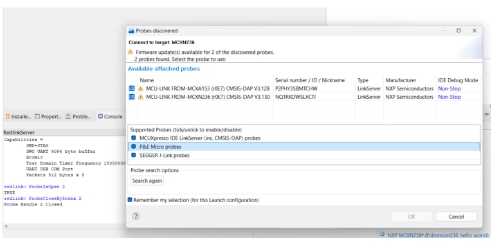
I selected the MCU-Link CMSIS-DAP debug probe for the MCXN236:
Hint: the next time you run the code, this screen does not show. to allow it to show up again , simply delete the file "frdmmcxn236_hello_world LinkServer Debug.launch", in this case for the MCXN236. Now the dialog should come up on the debug session.
Open up a serial terminal to be able to see the application's output.
Problem: empty terminal?
What could be wrong?
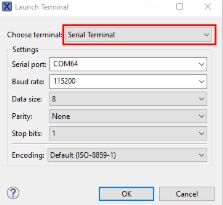
Solution : I had the wrong Serial COM port selected. It needs to be the com port that the MCXN236 is connected to . In my case it is COM4.
Select the “Terminal” window and press the “new terminal” icon. Choose a “Serial Terminal” and then set the UART settings to 115200 baudrate, 8 bit data size, no parity and 1 stop bit. Press OK.
Oh now the mcxa153 project is also working . I need to select the correct SDK, debug probe port and set the serial port at the proper COM port, in ny case COM3.
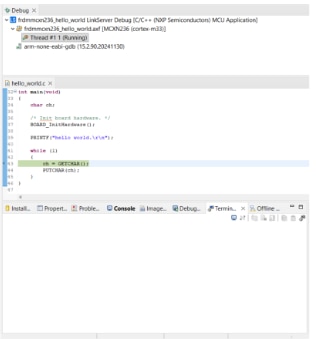
Now the debugger is running but it hangs the code here after pressing a character on the screen?
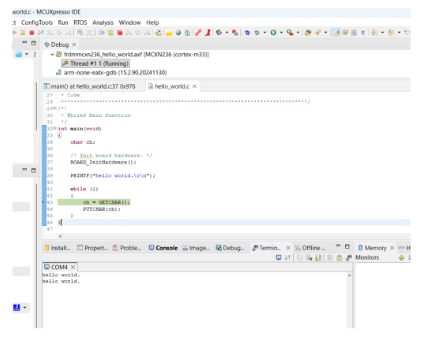
NOW I’m stuck and pondering this second Problem:
Why is it printing 2 lines of “Hello World”?
Why is it paused at the line ch = GETCHAR();
What is it expecting from the function call GETCHAR()
I was wondering If any of the challengers have this problem or have an answer? For now I’ll be continuing to run other coding examples to keep experimenting with the IDE using 2 devices.
Happy coding


