


If you like my project vote for "A Smarter Tricopter - Yuri Tikhonov" 
Good day comrades!
This week, the last before the beginning of voting, I still haven't received the parcel from HobbyKing. Nevertheless, Russia is still in game!
This week we begin a new stage: "hardware", but I must save a bit of material on the case, if the parcel with spare parts will not come.
Already done:
- Schematics were developed;
- PCB layout was made;
- PCB was made in the old-school style

- Pioner Kit was turned into a convenient programmer for external PSoC chips.
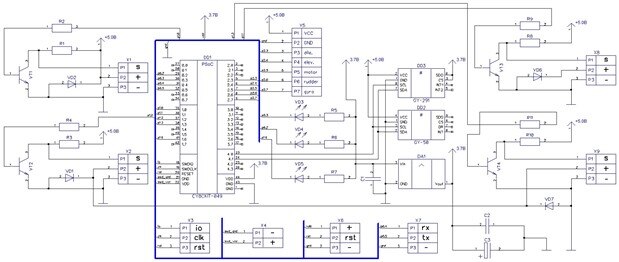
1. Initially I wanted to use PSoC at 3.3v, thus the following diagram was born, I used CAD-System DipTrace to draw it (schematics developed according to Russian standards, however, they differ a little from the western ones):
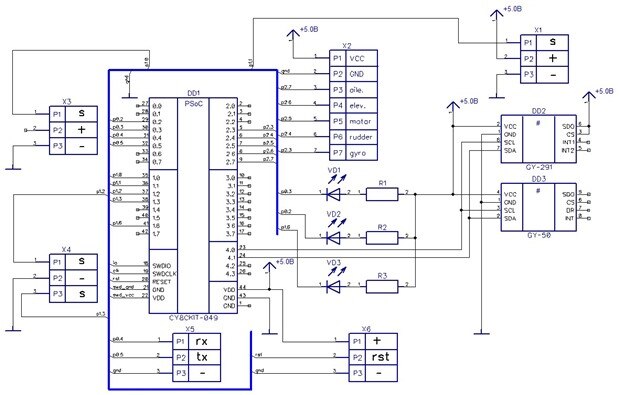
But after reading the datasheet, I found that in contrast to all "Cortex M" family MCU's, with which I worked earlier, the PSoC is able to operate at 5v! Circuitry was seriously simplified:
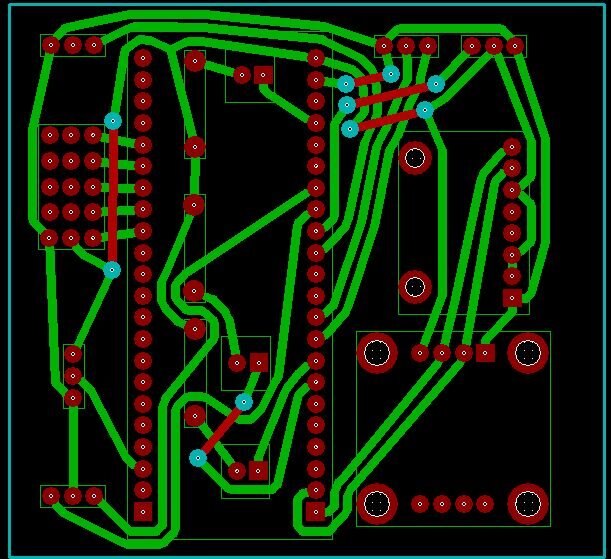
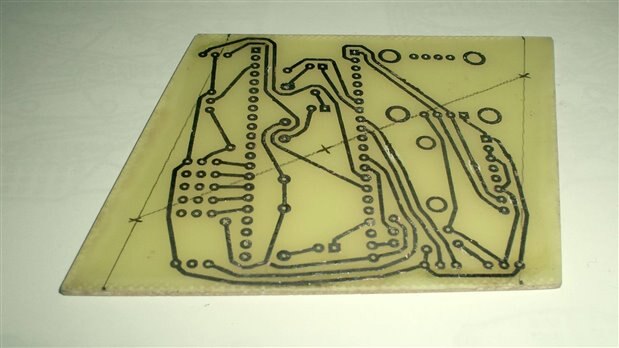
2. The next step was making the PCB, then I looked posts of other participants and saw that the level of performance was good enough! I decided to go the other way: to run the old-school tracing and to use a parallelepiped-shaped PCB. After all, we are having a creativity contest 
For tracing I used CAD-System TopoR (if you knew a little Russian, this name will make you smile). However the TopoR, Russian version of the DipTrace, and the OS Windows 7 Professional x64 have been refusing to be friends for a long time. But I wanted so much to make an unusual PCB that I managed to overcome this problem!
3. Captain Obvious reminds: December is the last month of the year! I am a PhD-student and I have a huge amount of work on the thesis. My printer worked in emergency mode and the day when I decided to make a printed-circuit-board, the printer suddenly broke down 
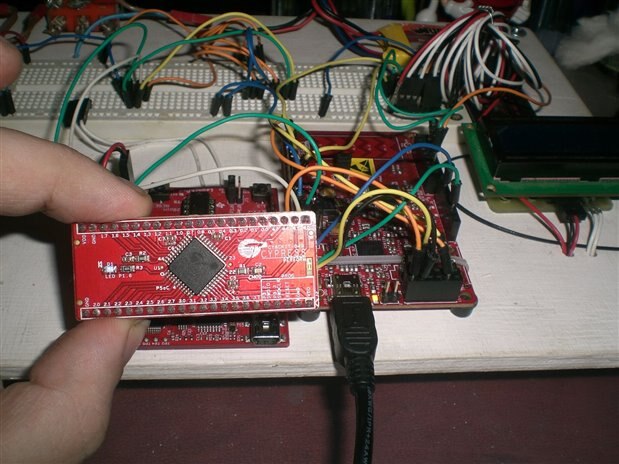
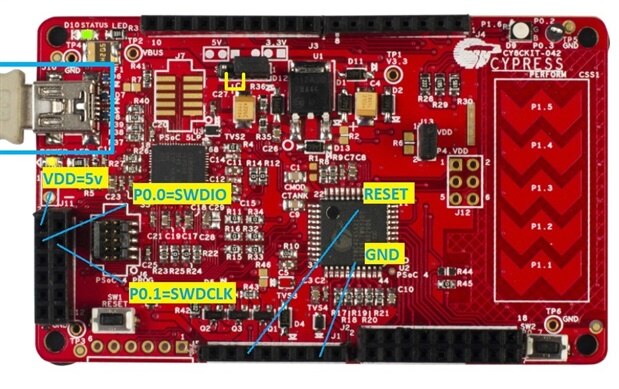
However, I found an activity: I understood that I need to flash the PSoC, and it will require the programmer. However, at the time of ordering components I forgot the programmer... I want to use the Pioneer Kit to program an external controllers. For this, I downloaded the firmware source code and decided to give it a little change, overriding SWDCLK and SWDIO lines thus to have access from outside:
However, this week gave me another surprise: the PSoC refused flatly being flashed! After long hours of torment, I found a solution!
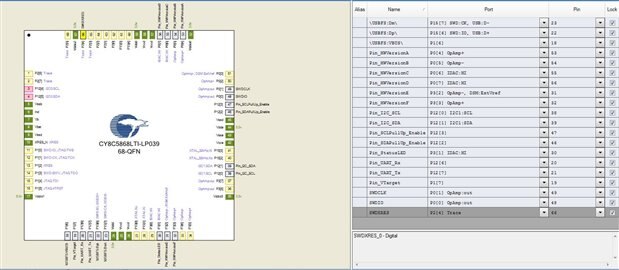
In the original: SWDCLK = P2.1 and SWDIO = P2.0. I decided to override them on P0.0 and P0.1 respectively. Guess why? Exactly! At the end, after making SWDCLK = P0.1, SWDIO = P0.0 I was surprised to find that the programmer worked, Bingo!!!
4. Meanwhile, I fixed my printer. PCB was made (the photo was made before drilling and final grinding):
Next I bought all the necessary components at a local store and soldered everything together:
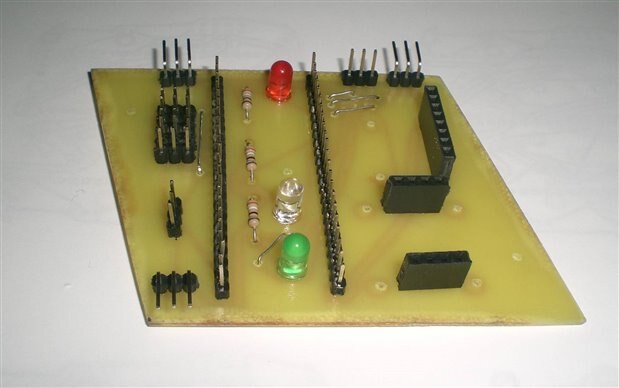
Finaly, tricopter control system looks as follows:
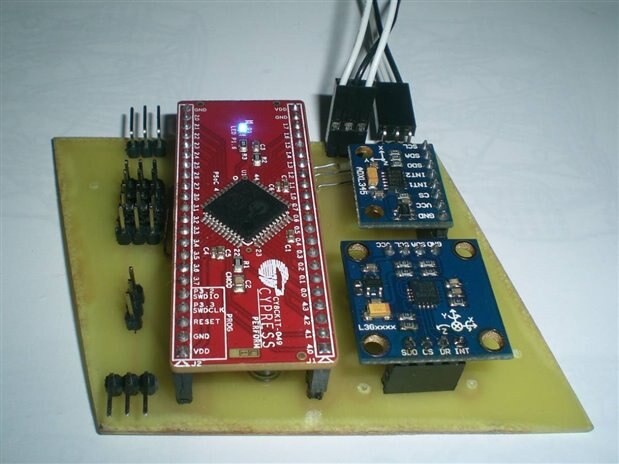
I yet did not drill the mounting holes, because I still don't have the frame...
Did you notice the location of the LEDs? Yes-Yes, this is also an echo of unusual design
5. So, let's summary the work today:
- Was written firmware for PSoC. Although the MultiWii 2.0 was taken as basis, I did a great job on revision of the code was studied every line of the program, significant structural changes were made, in general I am very pleased with the work done!
- Were manufactured and tested the control system PCB.
- Were ordered and paid all necessary parts, but the fault of HobbyKing, the majority of them is still on the way. Small details I bought in local shops, no problem with them.
Next week, if the components do not come, I'll make all the remaining details "blindly", without a clear understanding of the dimensions of the basic units of the machine + I have a stock of cool stuff This copter is not first for me, so I must successfully cope!
See you next week!
| # | link | description |
|---|---|---|
| 1 | PSoC 4 Tricopter Part #1 | Introduction |
| 2 | PSoC 4 Tricopter Part #2 | Purchase of components from Farnell and HobbyKing |
| 3 | PSoC 4 Tricopter Part #3 | PSoC firmware: upTime & Rx |
| 4 | PSoC 4 Tricopter Part #4 | PSoC firmware: UART & MultiWii GUI |
| 5 | PSoC 4 Tricopter Part #5 | PSoC firmware: EEPROM emulation |
| 6 | PSoC 4 Tricopter Part #6 | PSoC firmware: Servo & ESC control |
| 7 | PSoC 4 Tricopter Part #7 | PSoC firmware: IMU, LED's & PID |
| 8 | PSoC 4 Tricopter Part #8 | Hardware: PCB |
| 9 | PSoC 4 Tricopter Part #9 | Hardware: tricopter's frame |
| 10 | PSoC 4 Tricopter Part #10 | Hardware: YAW mechanics & motors |
| 11 | PSoC 4 Tricopter Part #11 | Hardware: ESC's, wires & misc |
| 12 | PSoC 4 Tricopter Part #12 | Final: The first fly |
If you like my project vote for "A Smarter Tricopter - Yuri Tikhonov"
-

DAB
-
Cancel
-
Vote Up
0
Vote Down
-
-
Sign in to reply
-
More
-
Cancel
-

vsluiter
in reply to DAB
-
Cancel
-
Vote Up
0
Vote Down
-
-
Sign in to reply
-
More
-
Cancel
Comment-

vsluiter
in reply to DAB
-
Cancel
-
Vote Up
0
Vote Down
-
-
Sign in to reply
-
More
-
Cancel
Children