Oh my, this is the final post of the challenge. This has been a great experience and I have learn a lot from all this. Now lets break it down.
On the project proposal I wrote all the functionality without knowing much about the PSoC4 product or the Pioneer Kit. Based on basic specs it seems possible to I set a big goal. Mostly I do this as a hobby however all I learn here I use for my regular job. So in my hobby side I dream and aim Big. On the main proposal I included a lot of peripherals which I latter learn that not all make were actually needed or become a challenge to interface.On the good side the LCD where included on the main system diagram but later learned that it was actually not needed so it was discharged. Other components were not so easy to skip. To avoid a super duper long post, I'll break it down in levels for summary.
Main Challenge:
Using a fully new development board and platform. Searching for code samples and getting use to the Pioneer kit was challenging. The key for learning to use the kit were the samples included on the Creator and the 100 projects in 100 days from element 14. Also finding samples of codes directly on the Cypress web site. I was used to run Arduino code where samples can be found everywhere but on the PSoC4 was not the case. Once I learned about the 100 projects and get a hang on the cypress web site it was all good. There is plenty of documentation for the platform and my development steps were always open the PSoC4 manual pdf and the Creator.
Once familiar with the platform the issue was knowing and learning how many physical resources the chip provides. In term of memory or processing speed I found no limit. On pins assignment and communication blocks like UART or SPI it took me a while to figure it out.
Project Challenges not completed:
For the project components that I tried to incorporate but were not possible were the sonar and Wifi. The Wifi was not required but nice to have. On the Wifi I tried to implement the code from the chip manufacturer into Creator by finishing the driver code but it was not successful. For the sonar it was a bummer. I was not able to figure out how to integrate the sonar, datasheet showed some charts for the signals and I do not have any oscilloscope to check them. I do not think that not having an oscilloscope were the deterministic factor, it was more of me not understanding how to connect it.
Project Accomplishments:
At the begging I had some issues with writing to the SDCard and thought I may run out of resources from the PSoC4 when adding more components. So I quickly learned that the Pionner kit had a PSoC5 on board that could be easily programmed and combined with the PSoC4. That plus my explorer spirit I flashed away the PSoC5 and put it to more use than a debugger. By using both chips I manage to connect the GPS, SDCard, Accelerometer, Bluetooth and an external digital sensor easily. Each one brought it own challenge but now all looks very easy. By using some Arduino compatible shields the first prototype was built. It was bulky and using the entire Pioneer kit.
Complementary to the PSoCs the project required two main components. One Android application and one web application to extract data from the PSoC and show to the user. Both were started as a proof of concept and base for development. Just enough time were assigned to these development so it is enough to know it is working but time were mostly focus on working with the Pioneer kit.
After the prototype on using both PSoCs I decided to challenge myself and move it all to the PSoC4. Having a stamp with a PSoC4 on it, this was the logic step to take. Move all into one single chip to create a cheaper solution since keeping it cheap is one my goals. Code were moved into the PSoC4 little by little. I learned how to build a bootloader and a bootable project for the PSoC4 for programming and reprogramming a chip outside of the Pioneer evaluation board. Documentation from the Cypress site and again projects from element14 where life savers.
In summary the code was moved into one PSoC4 solution and some circuitry soldered into a board to keep it simple. To reduce size without having to manufacture boards I tried to mix and use as much as already available components on different parts. For example the GPS module used has a voltage input that can be 5V and it provides a regulated output of 3.3V. The 3.3V output came handy when using the SDCard just because that is a friendly voltage level for the SD. That alone allowed me to wire up the SDCard directly to the PSoC4 since both were powered by the regulated 3.3V 100mA. The prototype will receive a 5V externally and the GPS module board takes care of leveling all out. With the pins output voltage of the PSoC4 in 3.3V eliminates the need of a bulky dip level shifter IC. For a manufactured board I would include a very tiny level shifter but with a perf board the less the better. The other module connected to the second prototype is the bluetooth module which works on 3.3V as well.
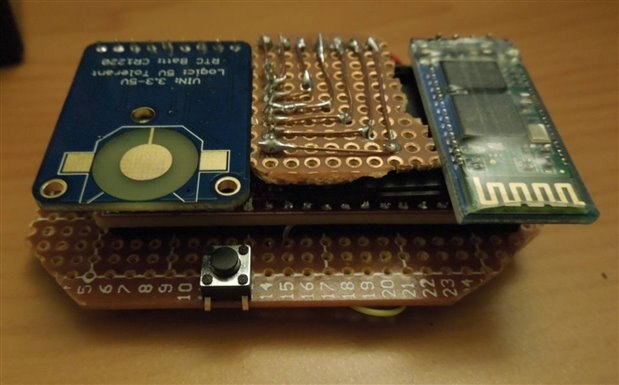
Prototype 1.2 - Button is used to activate bootloader for programming
On the top left is the GPS (upside down to reduce overall height.
On the middle is the SDCard, it is just wired up to a microSDCard jacket that holds a 2GB microSD card
On the right side is the bluetooth module. For this prototype the baud rate for the bluetooth was increaded to 57600 instead of 9600 on the first one for faster data transfer. Since the bluetooth is connected to the Rx and Tx pins that receives the new file for in field programming. In order to reprogram the board this board has to be taken out and wire the serial wires. Originally I wanted to update the board firmware via bluetooth but for some reason it doesn't work so I have to wire a regular usb serial adapter to where the bluetooth module is connected.
If look carefully there a pcb in the middle that holds the PSoC4.
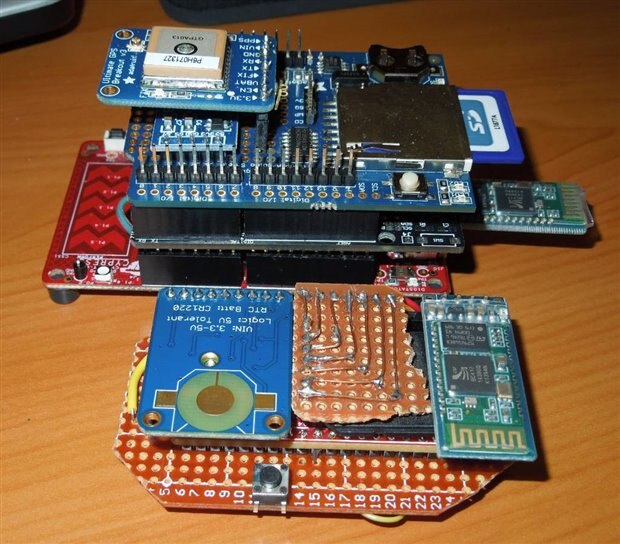
Side by side from first prototype to second prototype. Only components missing on smaller prototype is the accelerometer but apart of that is the same, way smaller right!
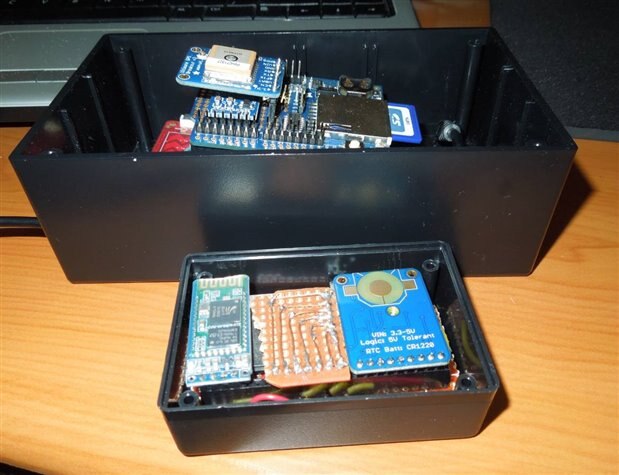
Project box greatly reduced. Small project box shall have a usb cable for powering the device (not shown here).
Final thought:
From the original concept to what was build there is a slight variation, however main components are implemented plus there are available IO ports for expansions. I spoken to my friends about the project and most of the people like it. I consider this challenge to be a personal success and a great experience for me. I took upon the build of an ambitious project with an unknown platform and manage to get the hang of it. I learned the basics of a PSoC4 and plan to use it on other personal hacks/projects as needed. Thanks to the everyone from the organizer, participants to you reading this.
Future plans:
My future plans are first take a break for bit to spend family time. Soon after I am planning on using this daily on my car with a simple add on. To actually make it every of every day use, I will incorporate the gate beeper to make my car automatically open the in or out gate when I get close to it. Than only feature will produce daily use of the project and motivates me on continue developing more. Also when gate beeper linked I want to make a PCB for this to have a good looking circuit. Going back to the sonar and the Wifi is in the back of my head and will be revisited.
About Pioneer Kit:
This is an amazing development board. For us that work regularly with Visual Studio using the Creator is very familiar and the debugger is great. I found the board to be flexible. During the challenge some of the components were updated without any problem, very easy and straight trough process. Basically all tools updated with a simple mouse click. For using a Arduino SDCard shield I had to populate the J12 port on the board and it was very well documented on how to do it. Also I flashed and re-flashed the PSoC4 and the PSoC5 chips from the board without any problem. Switched all back to factory in a moment notice very quickly when needed. I also used the Pioneer kit as a programmer for an external chip without the need to remove a few resistors from the board. The option of using an evaluation board as a programmer allow me to graduate my projects out of the evaluation board.
The Pionner Kit is an economy board but very well packed. Just by the PSoC4 is great but been able to use the PSoC5 in the same board is amazing. Once can quickly test the basics of the PSoC5 without any other hardware.
Update, screen shots requested:
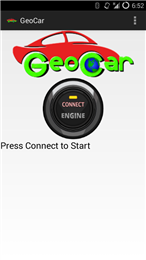
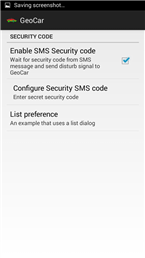
Android app Screen shots:
When click on the round button the app connects to the GeoCar via bluetooth and sends a character. When the PSoC receives that character it sends via UART all data in the GPS data file.. The PSoC receives the character as UART since the bluetooth modules behaves as a serial UART device.
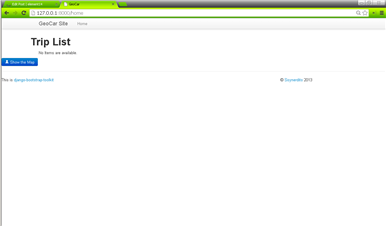
Web Application Screen shots:
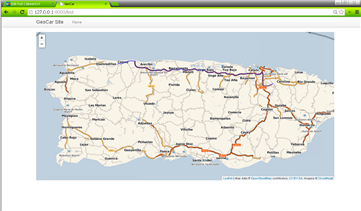
This is the main page of the application. Here data should be separated on trips to show the plotted data. However for now the only option that is programmed is the the blue button that shows all the recorded data. This page is programmed in django and it has a rest api that allow the upload of data from a client. For development the database is in sqlite but any database supported by Django may be used.
The purple line (the API said blue but I see it more close to purple) is the actual data recorded from the PSoC. There are a bunch of dots from more than one trip. Actually there are 1 GPS location for every 5 seconds on the trip.