Posts in this project
AquaFlow - Blog #1 - Introduction
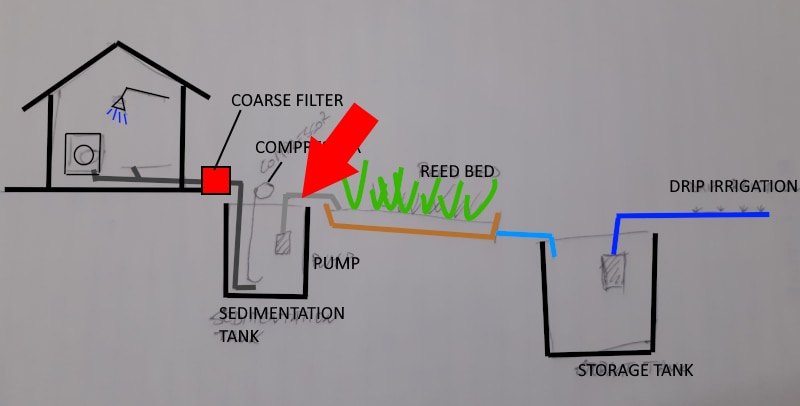
AquaFlow - Blog #2 - The coarse filter
AquaFlow - Blog #3 - The sedimentation tank
AquaFlow - Blog #4 - The reed bed
AquaFlow - Blog #5 - The storage tank
AquaFlow - Blog #6 - Conclusions
The sedimentation tank
The first sedimentation tank serves two main purposes
- Create an oxygen-reach environment so that septic decomposition does not occur. This both eliminates septic odours and supports and maintains microorganisms that oxidise the body fats and soap dissolved in the grey water.
- Let the organic matter to settle to the bottom of the tank and produce a clear water layer at the surface
1.1 The tank
To accomplish these tasks, the first sedimentation tank has been equipped with the following devices
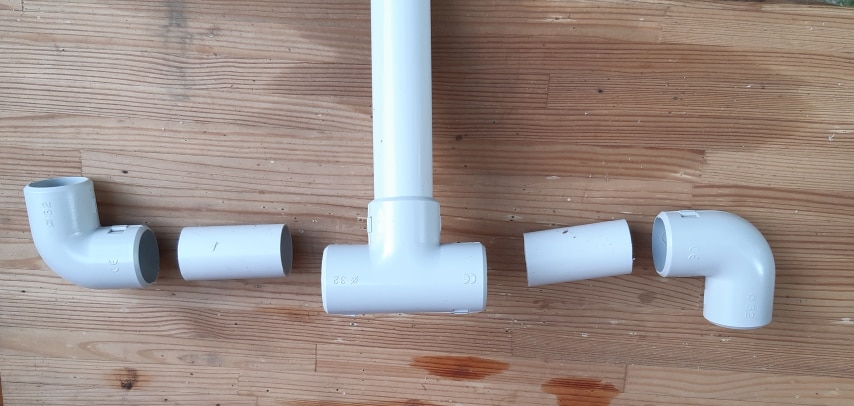
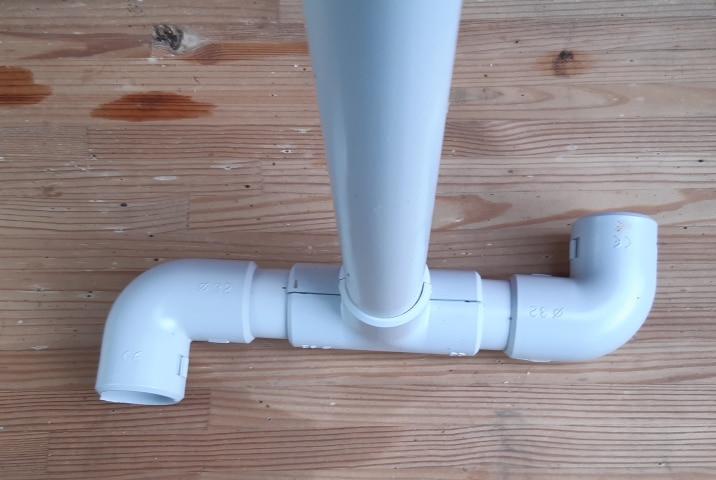
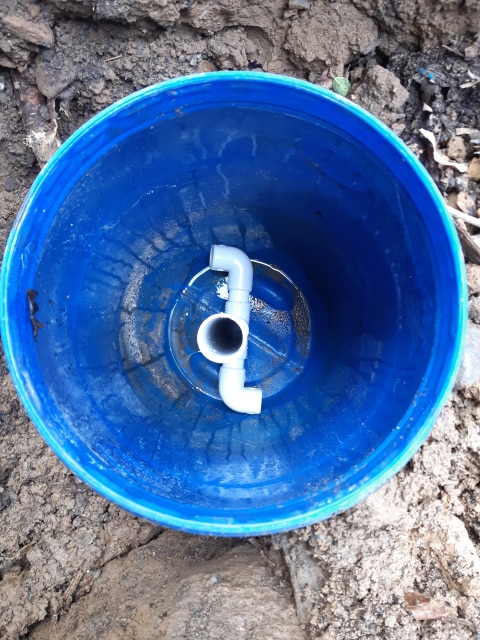
- A stilling well. The greywater inlet has been shaped with L junctions as shown in picture below. This creates a whirlpool that eases the pollutants to disperse in the volume of water. This reduces the concentration of the pollutants (body fats and soap) and make it easier for the microorganisms to digest
- A compressor. The compressor pumps air in the water and add oxygen to create an environment where microorganisms can flourish. The compressor is installed in a waterproof box with the electronic board, so more details about the compressor itself can be found in the next sections
- A pump. When water is "ready", a pump moves water to the next stage of the treatment system: the reed bed. The pump has been mounted on a 3D-printed float, so that water is taken just a few centimetres below the surface. Here we have the clearest water, because floating debrises is on the water surface, and heavy debrises has settled at the bottom of the tank. The float hosts a connection for a 16 mm plastic tube. The tube has the task to keep the float in place and to provide a visual feedback of the water level in the tank.
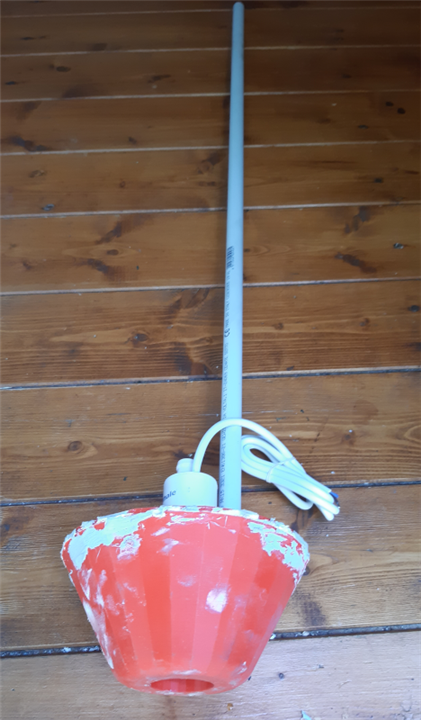
1.2 The floating pump
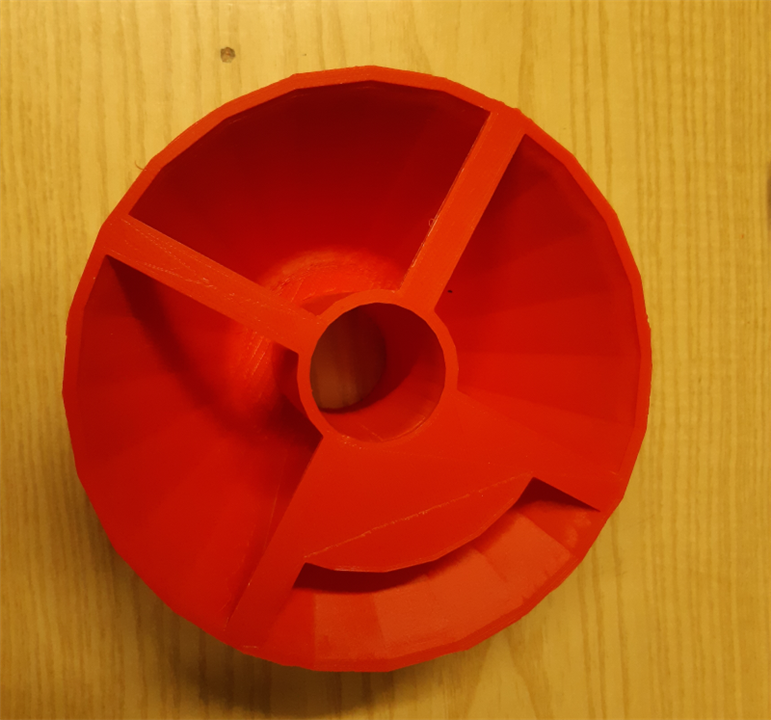
This is a sketch of how the floating pump works

This is the 3D printed floating

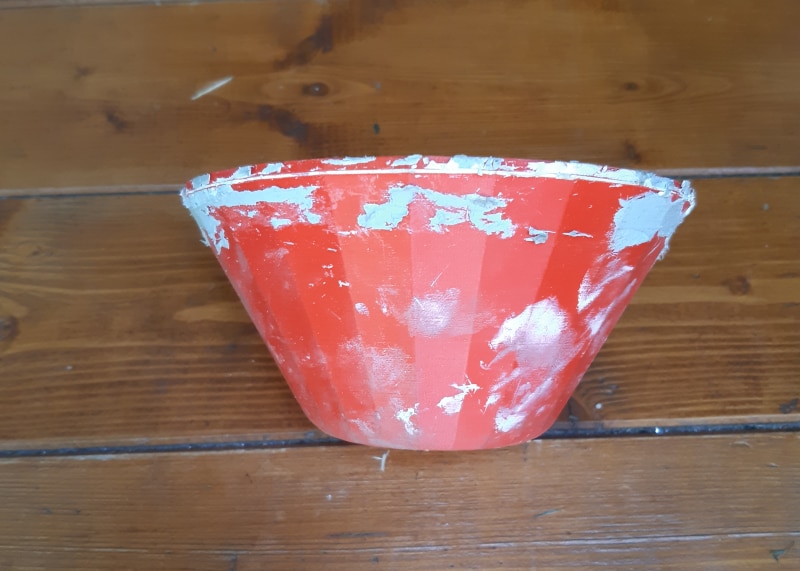
The two parts have been glued together. The assembly must be waterproof so that no water enters the floating
The pump slides into the central hole
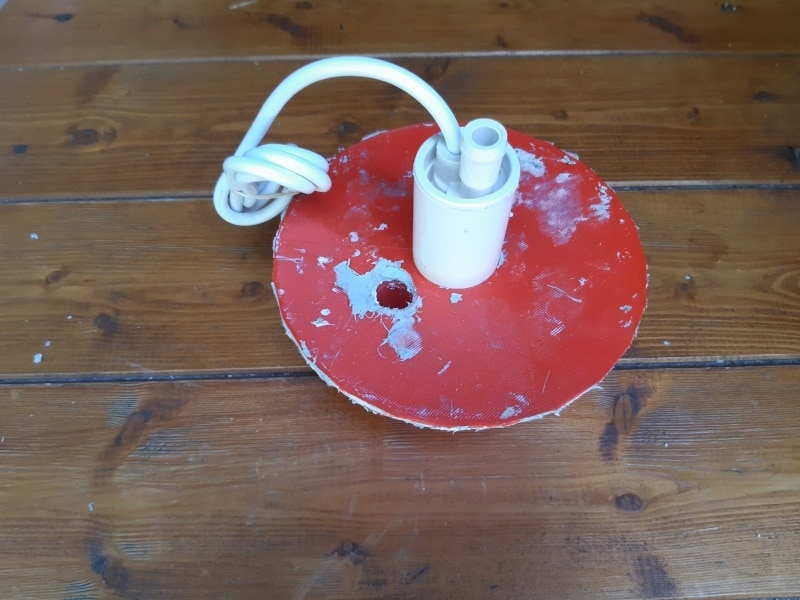

Finally I added the plastic rod

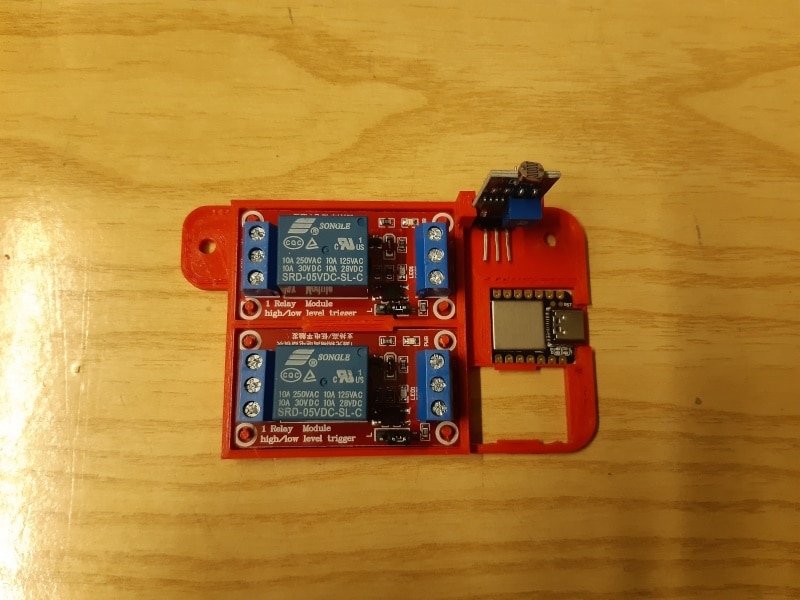
1.3 The electronic board
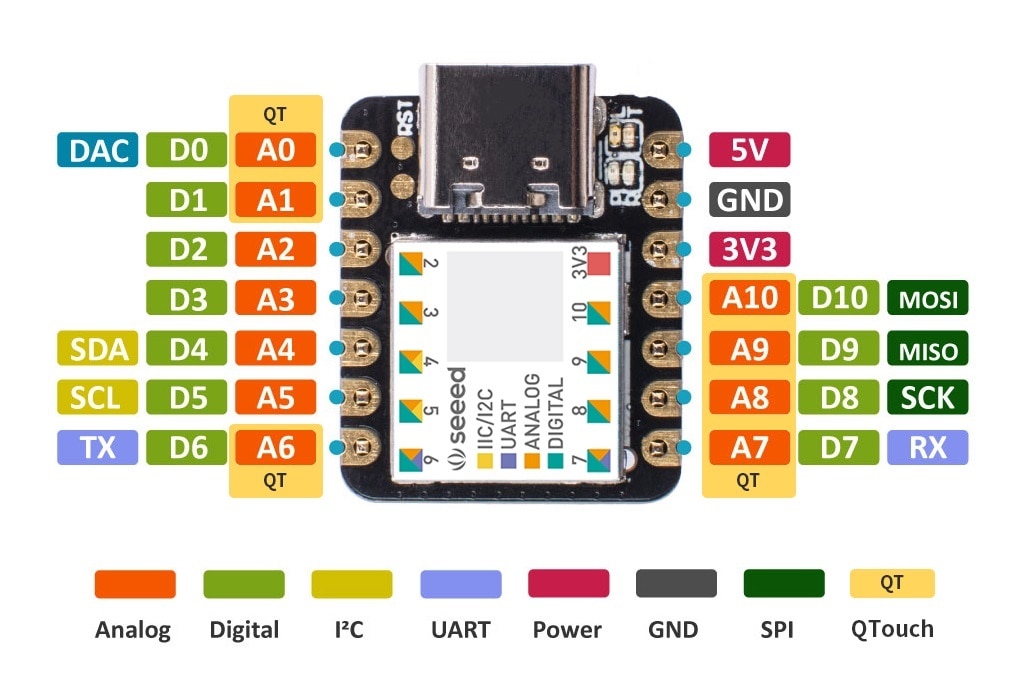
The control board is based on the Seeeduino Xiao. This board can be easily integrated in the Arduino IDE: just follow the tutorial on the Seeed Studio web site (the link is https://wiki.seeedstudio.com/Seeeduino-XIAO/#software)
Here is the schematic of the control board
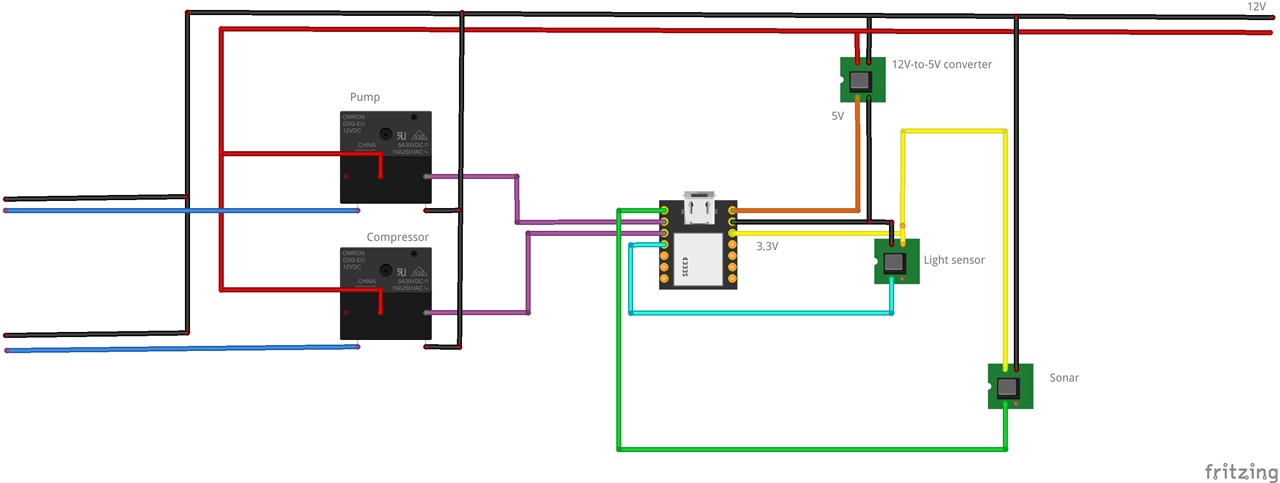
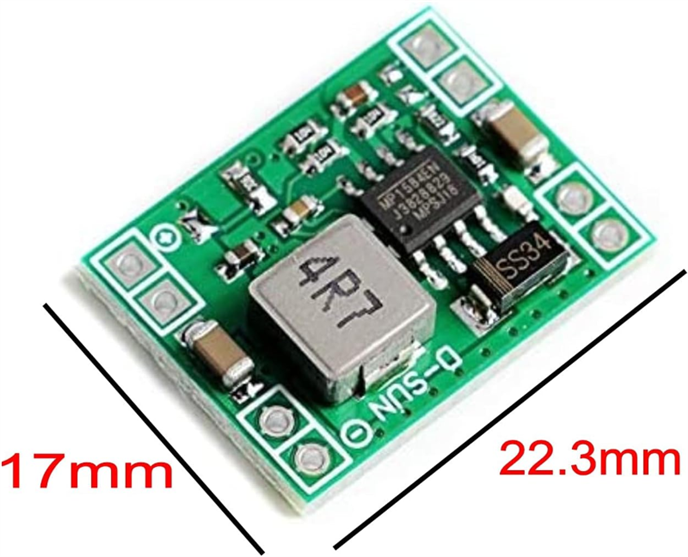
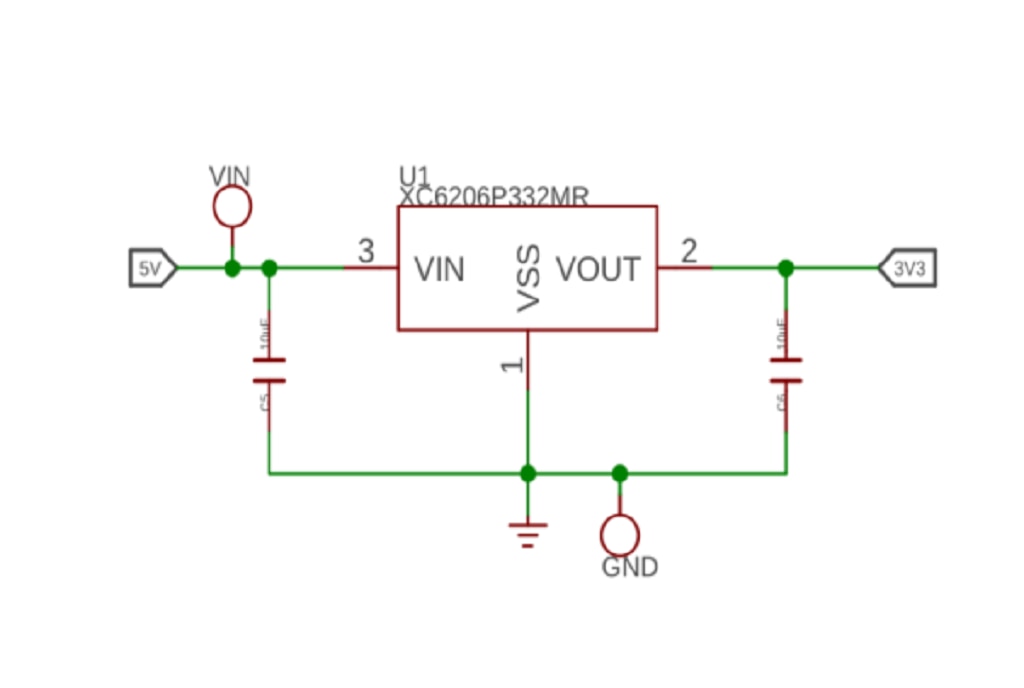
The power supply is t 12V and comes from a charge controller that charges two lead batteries by means of a PV module. The 12V line powers the pump and the compressor. A DC-DC converter converts the 12V to 5V for the Seeeduino XIAO board. Here is the DC-DC converter I used for this project
Since all the input pins of the Seeeduino XIAO board may be damaged by an input voltage higher than 3.3V, the sensors are powered with a 3.3V. To reduce voltage from 5V to 3.3V, I am going to leverage the voltage regulator on the XIAO board, which takes the voltage on the 5V pin and generate a stabilized 3.3V signal on the 3V3 pin
The Seeduino XIAO reads two sensors
- An LDR (Light Dependent Resistor). This sensor allows the Seeduino XIAO to have a coarse notion of time. In particular, this sensor let the Seeduino XIAO see the dawns and the dusks, and so can have a rough idea of when water is ready to be pumped to the next stage of the treatment system. As I mentioned, greywater should not be stored for more than 24 hours. This is especially true for the first sedimentation tank, which stores untreated greywater.
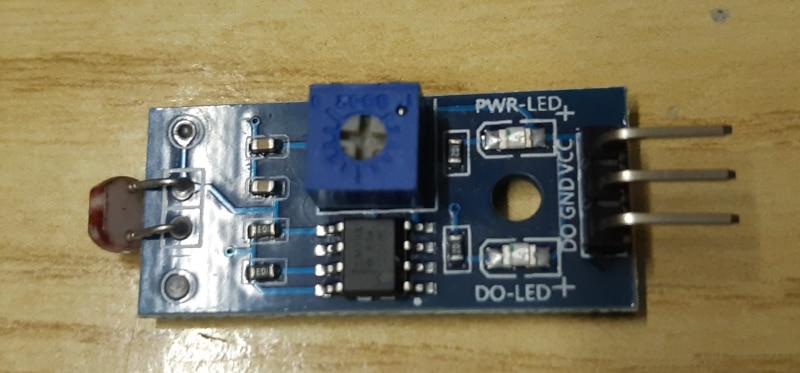
[EDIT] After some tests, I replace the LDR with a board with a digital output that reports whether the ambient brightness is above or below a threshold a threshold that can be adjusted with a simple trimmer. This makes adjustments easier, because I just need a screw driver to adjust the brightness threshold, instead of re-flashing the Arduino sketch. This is the board I used
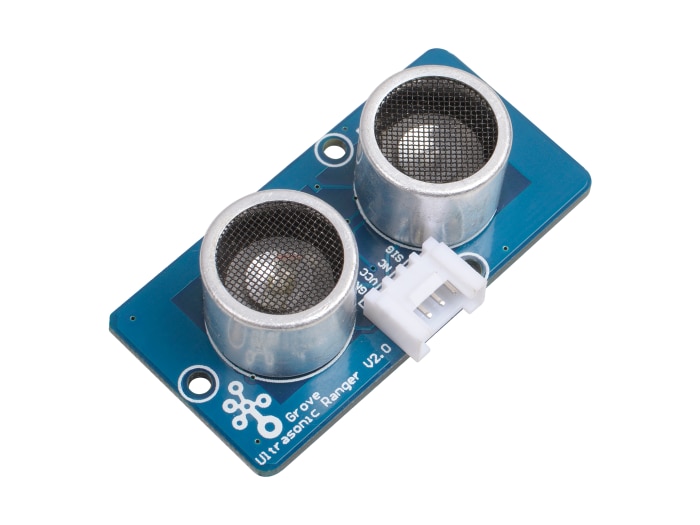
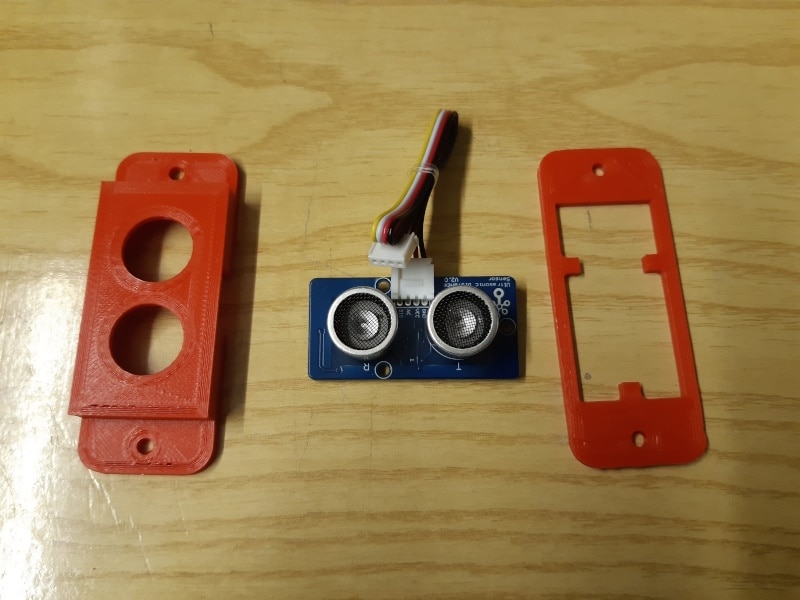
- A sonar to detect the level of the water in the tank. The Seeduino XIAO can hence check if the tank is full or empty, or when water is being flushed into the tank. The sonar sensor I chose is the Grove Ultrasonic Ranger
This is very easy to use: just follow the installation instruction on the Seeduino website and run the following minimal sketch to check that everything is working
#include "Ultrasonic.h"

Ultrasonic ultrasonic(7);
void setup()
{
  Serial.begin(9600);
}
void loop()
{
  long RangeInCentimeters;

  RangeInCentimeters = ultrasonic.MeasureInCentimeters(); // two measurements should keep an interval
  Serial.print(RangeInCentimeters);//0~400cm
  Serial.println(" cm");
  delay(250);
}
The Seeduino XIAO controls two relays
- A relay to switch on the water pump
- A relay to switch on the compressor
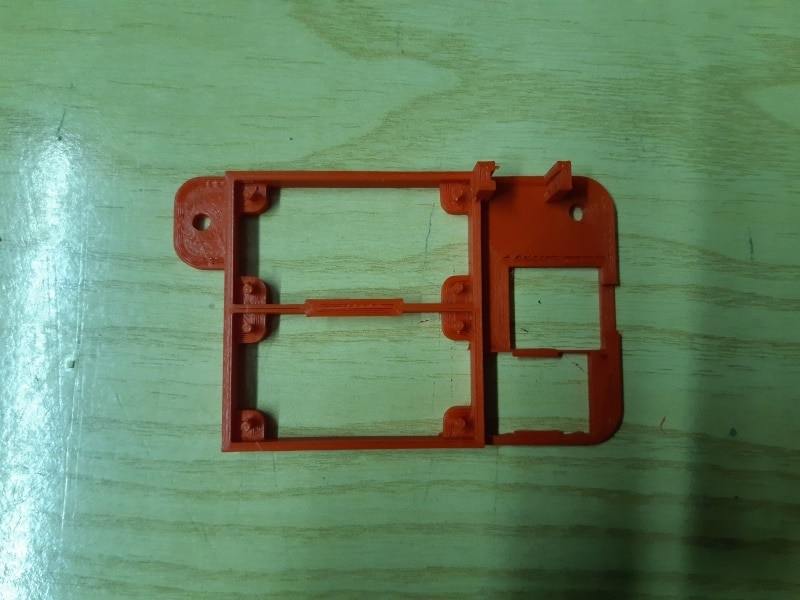
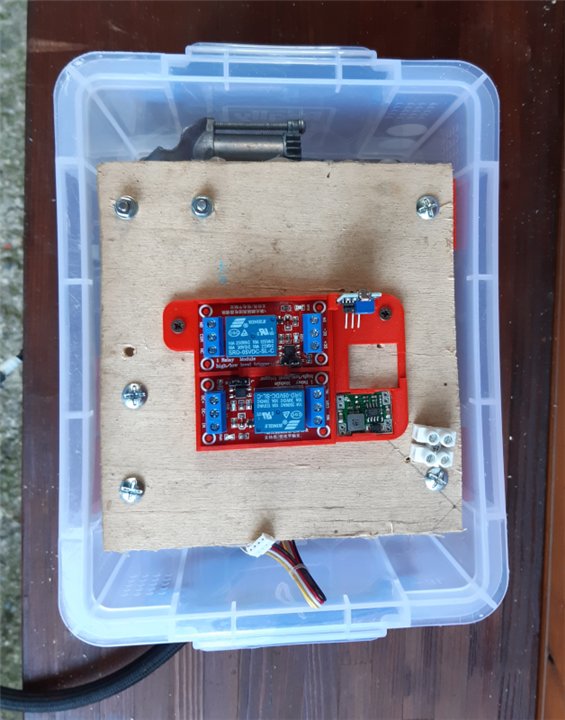
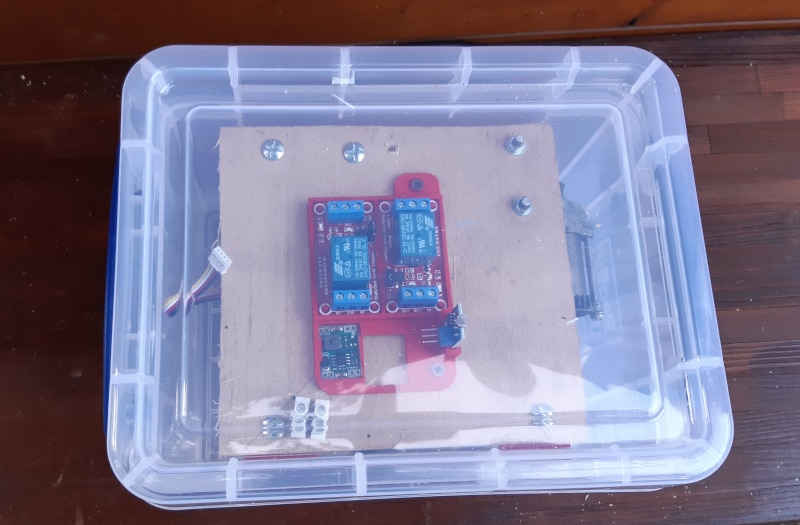
The electronic boards (Seeduino XIAO, the voltage regulator, the light sensor and the relay modules) are mounted in a 3D printed housing
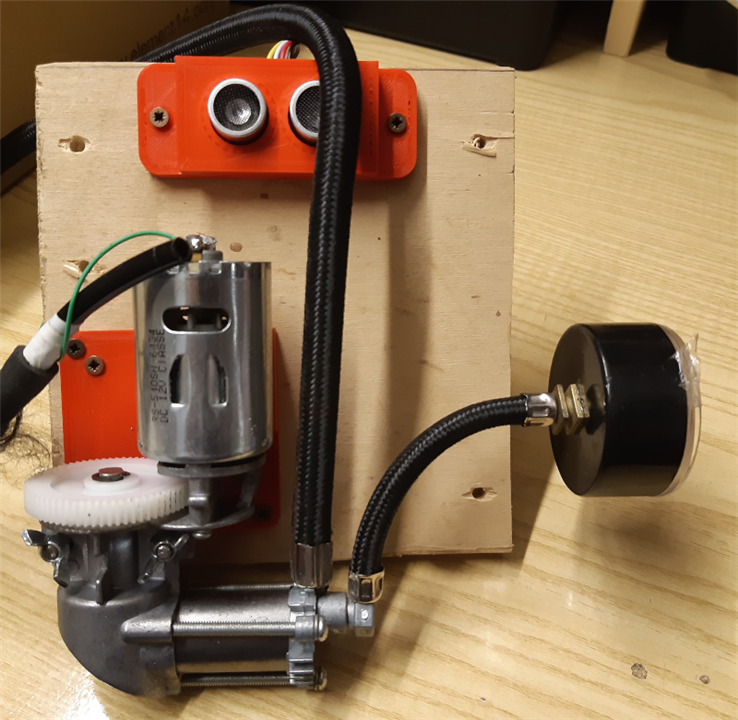
The sonar has its own housing

All the components have then been installed on a plywood board. This is the complete assembly as seen from the top and from the bottom
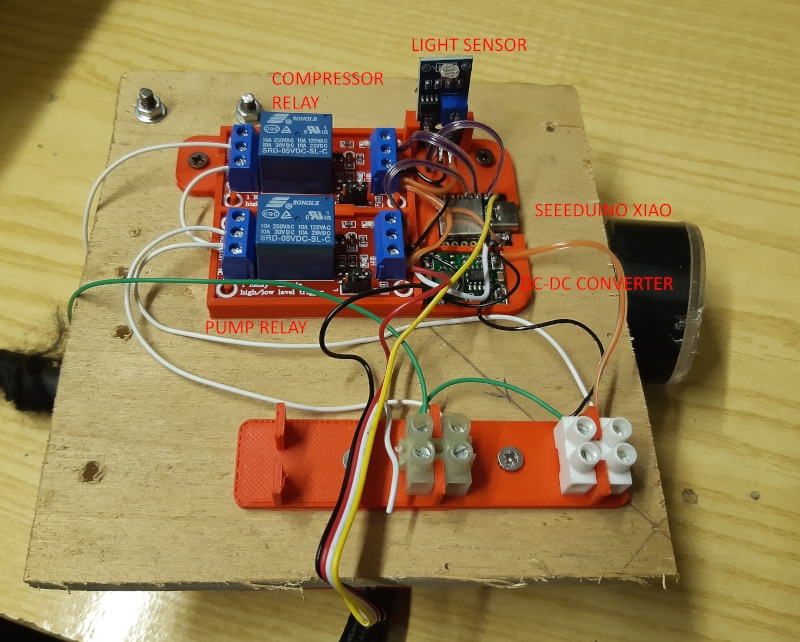
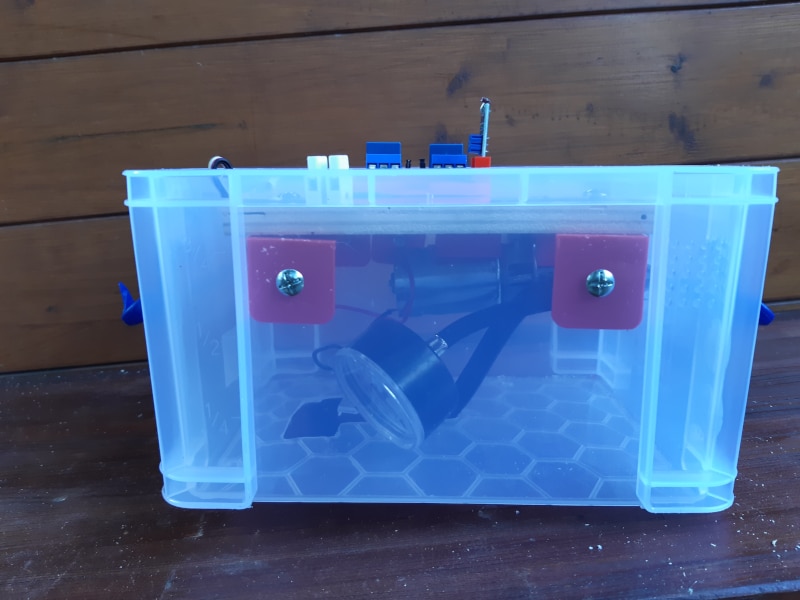
The assembly has then been installed inside a waterproof box, that will later be installed on the cover of the sedimentation tank

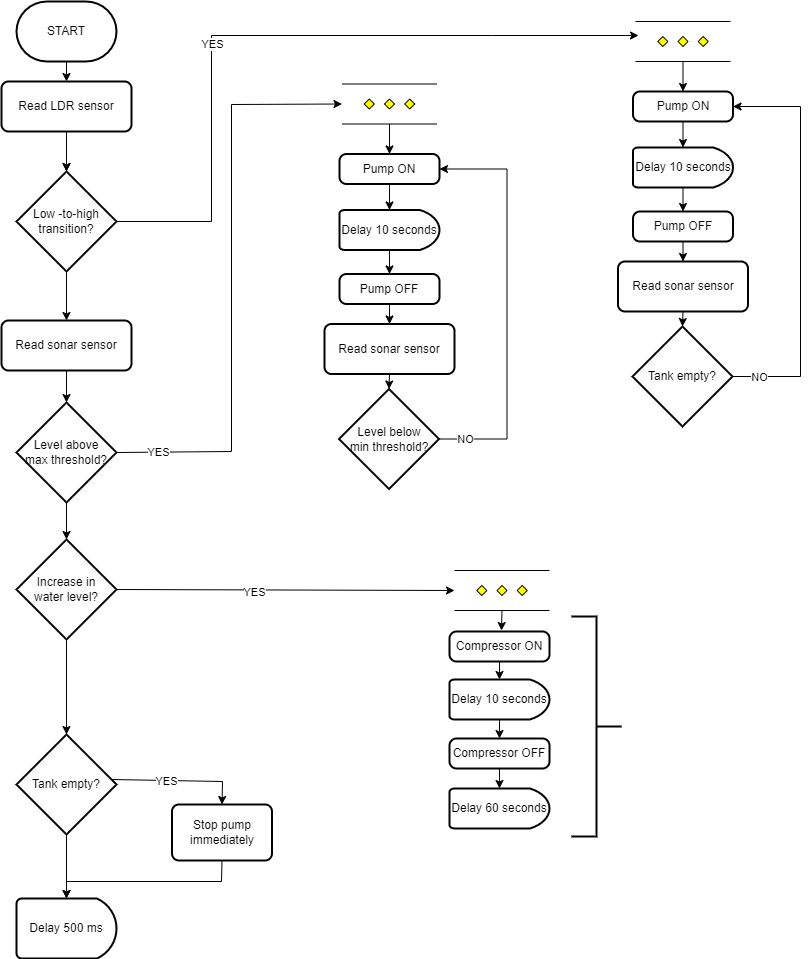
1.4 The control logic
The control logic implemented to mange the sedimentation tank follows these rules
- on dawn (i.e. when light detector output switches from 0 to 1), pump all the water in the tank to the reed bed. This is to avoid to store greywater for more than 24 hours
- when water level reaches the maximum limit, empty the tank until a safe level is reached
- when water level raises, switch on the compressor to create an oxygen-rich environment
All these rules are shown in the following diagram