Welcome to my second blog post as part of Summer of Sensors Design Challenge. In previous blog I described my plans as part of Summer of Sensors Design Challenge in the In the Air Tonight category. Time go quickly and yesterday I received my kit. Note that I am non sponsored challenger, so I had to order kit on my own and there is small probability that I received slightly different kit (differing in revision number as I will describe later) than other sponsored challengers. In this blog I will show the kit, box contents and related parts. In next blog post I will try to evaluate sensor using provided software.
Packaging
The ZMOD4510-EVK came packed in large box even it is small board. Package size is like standard sized 1000-page long book. You can store EVK on your bookshelf if you want. EVK is stored in white non-branded box which is inserted to the printed cover:
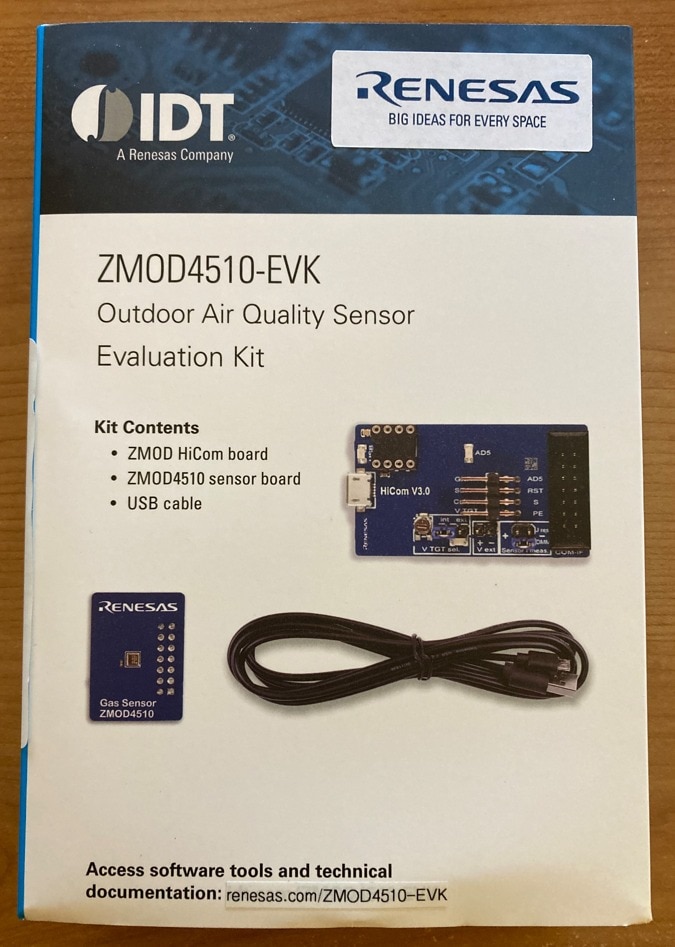
Cover shows package contents (spoiler) and brief description. As you can see there are IDT logo. IDT is company that originally invented ZMOD4510 sensor and created this kit. Later this company was acquired as a Renesas. For this reason, Renesas logo is “patched” to the box using the sticker. Similarly, URL address pointing to old IDT.com domain (which is down since IDT acquisition by Renesas) is replaced to Renesas.com using the sticker.
More interesting is opposite side of the box which contains many interesting information about kit including information which I have not find in documentation which I browsed before ordering kit:
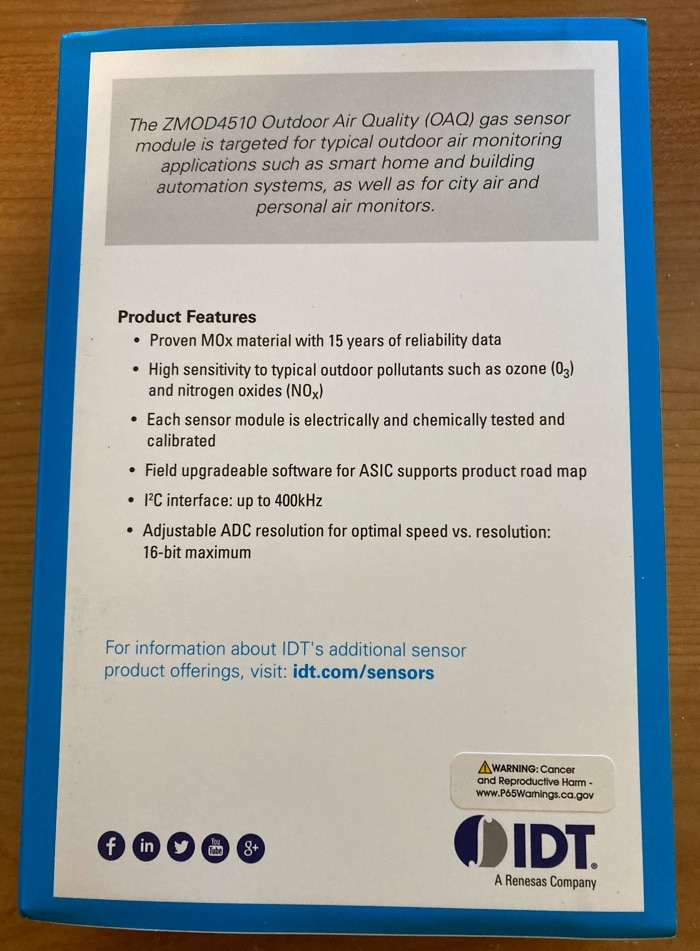
From the box you can for example deduce that sensor is designed to 15 years of running which can look bad at the first look, but gas sensors are very sensitive to aging and 15 years is good performance, I think. The other interesting information is that each sensor is chemically tested in factory, so probability that you receive bad sensor or your sensor will produce bad data is very low. After removing cover and opening white non-branded box with ESD sensitivity warning label you will see the two letters:
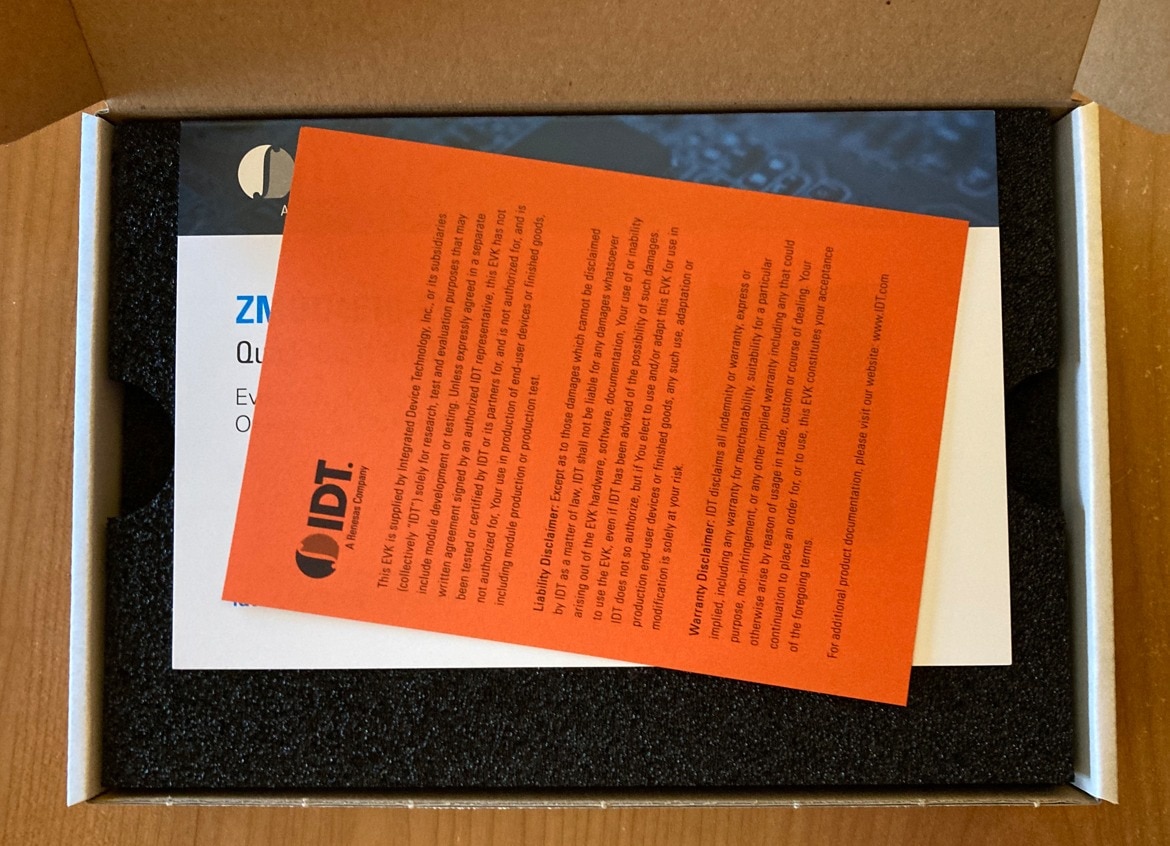
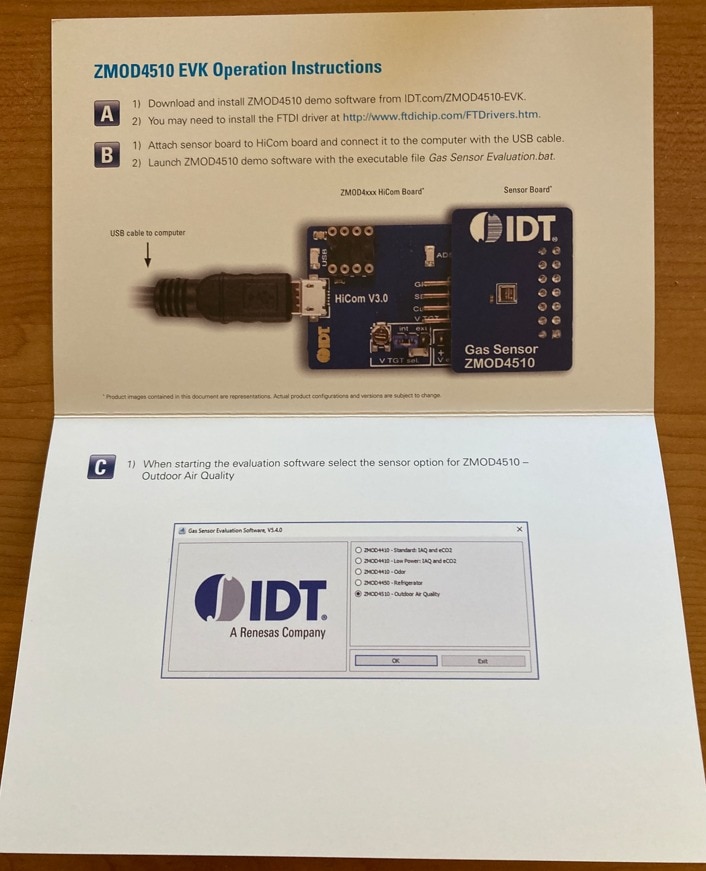
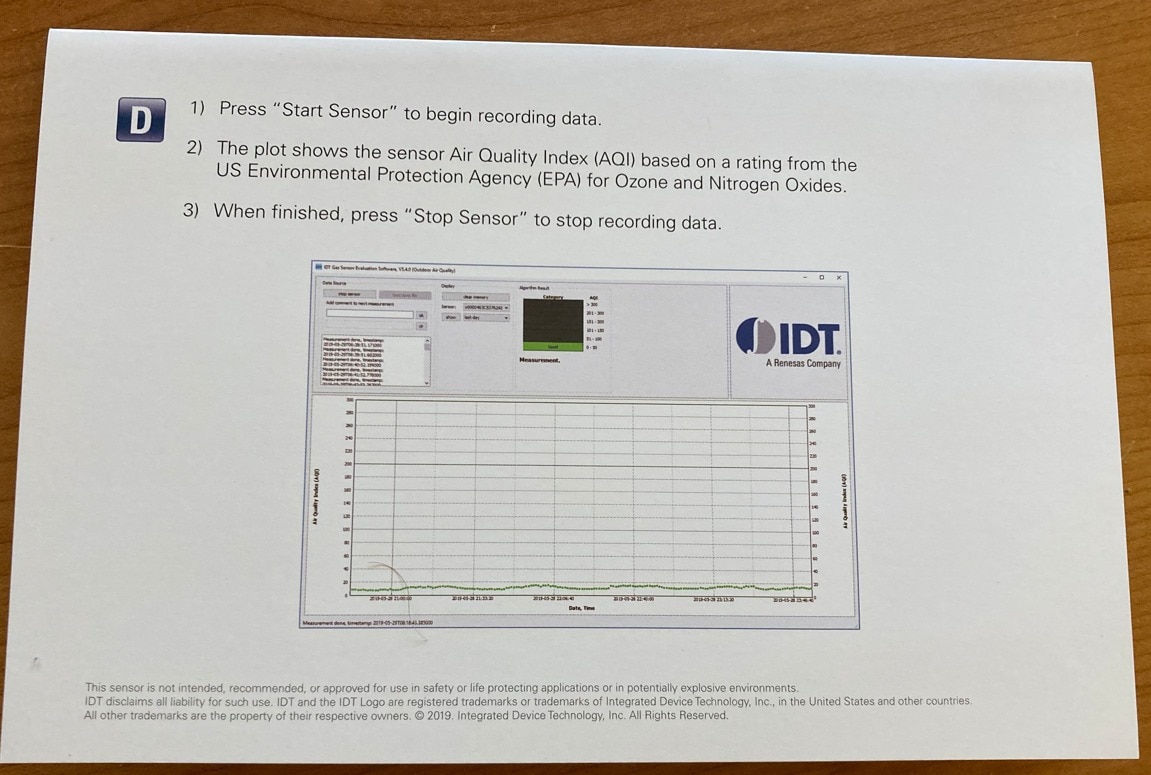
The first orange letter is warning that board is used for prototyping and should not be used in production and second letter is quick start guide. Quick start guide shows basic tutorial describing usage of software provided for evaluating sensor using evaluation board:
After removing top layer of antistatic foam, I have seen ZMOD4510 sensor first time:
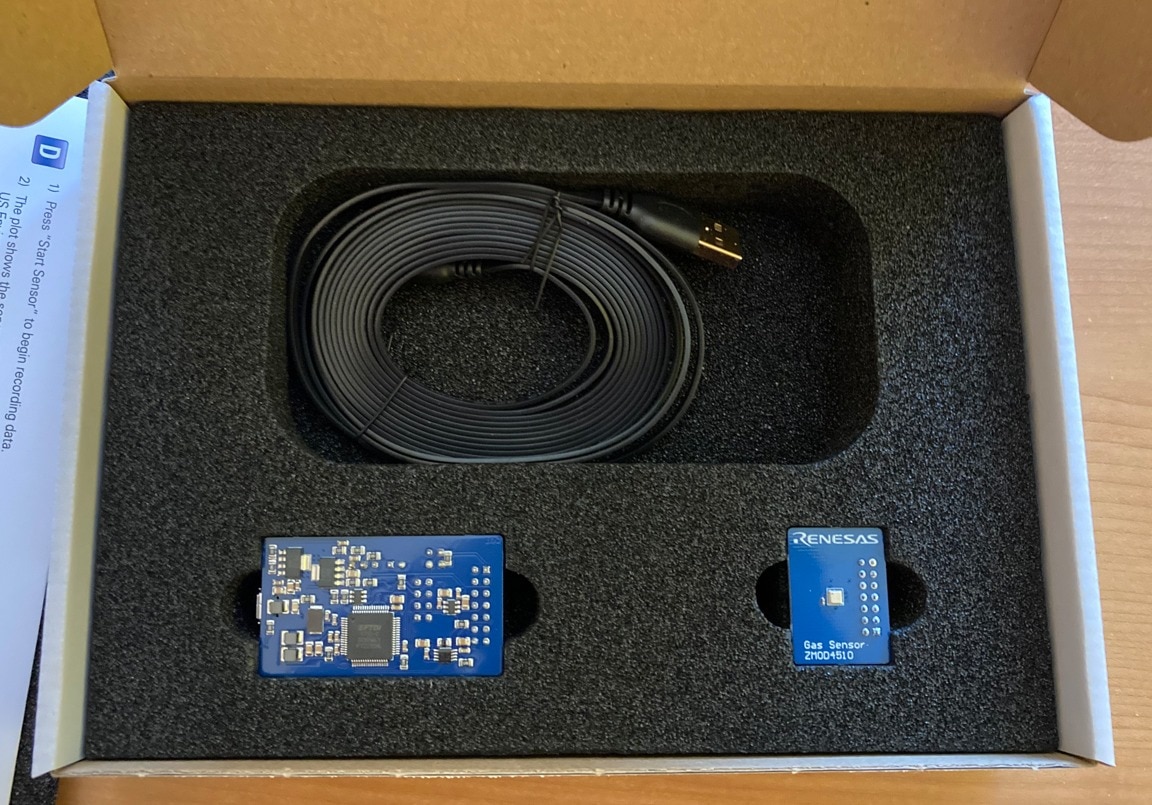
There are three things:
- Very long USB to USB micro cable. It is good that cable is long. Because it is Outdoor sensor it is nice to have long cable which can be useful for example when placing sensor outside through window.
- At right is small sensor board. It is simple PCB with ZMOD4510 sensor and one connector.
- At left is communication board with FTDI chip which is used for accessing I2C bus and sensor interface from the PC.
Sensor board
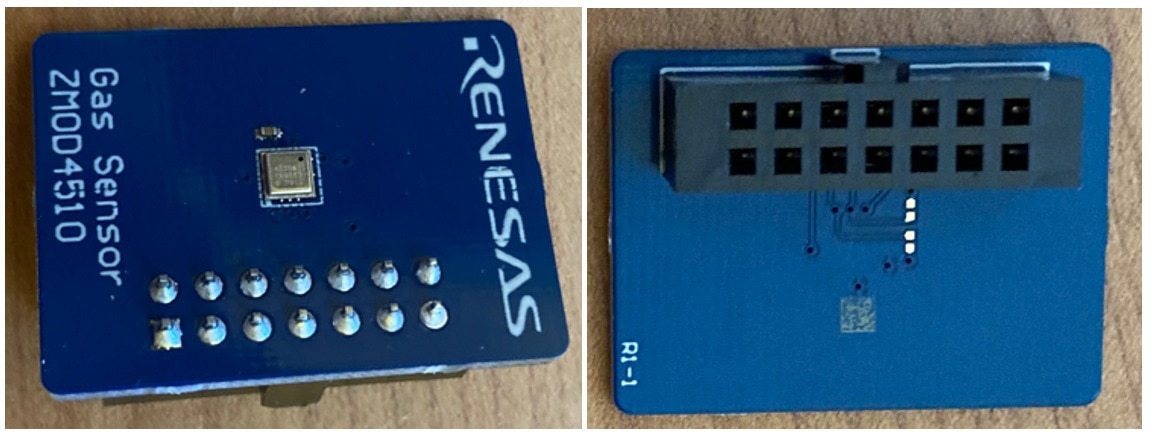
Sensor board is very simple. From the top there is sensor and decoupling capacitor. From bottom there is 14-pin connector with IDC lock and positions for I2C pullups but I2C pullups are on communication board instead and when using with different board (which I will later do) I will have to place I2C pull-up resistors externally (or solder them). Board looks as follows:
Communication Board
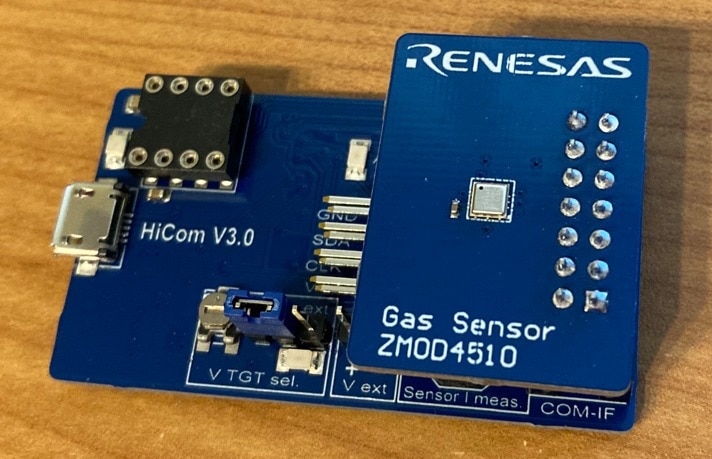
For simple evaluation of sensor there is communication board featuring FTDI FT2232 USB-to-I2C converter, some voltage regulators, IDC connector for connecting sensor board, some jumpers for switching powering mode, providing external power or measuring power consumption and DIL socket for connecting external temperature and humidity sensor (I will describe purpose of this sensor later).

Assembly
After connecting communication board with sensor board, it looks as follows:
Is ZMOD4510 outdoor or indoor?
Box contents and screenshot of SW in quick start guide answered my question and confusion which I mentioned in my previous blog. ZMOD4510 sensor is designed for outdoor operation. This is mentioned in all documents, on the box, in software GUI and so on). Label and description in Farnell store are wrong. Pay attention on this.
Revision R1-1 vs R1-2
The slight caveat of kit which I received from distributor is that it is older revision. According EVK user manual current revision is R1-2 but I received R1-1. It looks like distributor from which I ordered kit has still large stock of older boards. Note that most probably things like Stickers for adding Renesas logo and changing URL from IDT to Renesas apply only to the older R1-1 revision. As far as I know there is only one change between revision R1-1 and R1-2: Added Humidity + Temperature sensor HS300x.
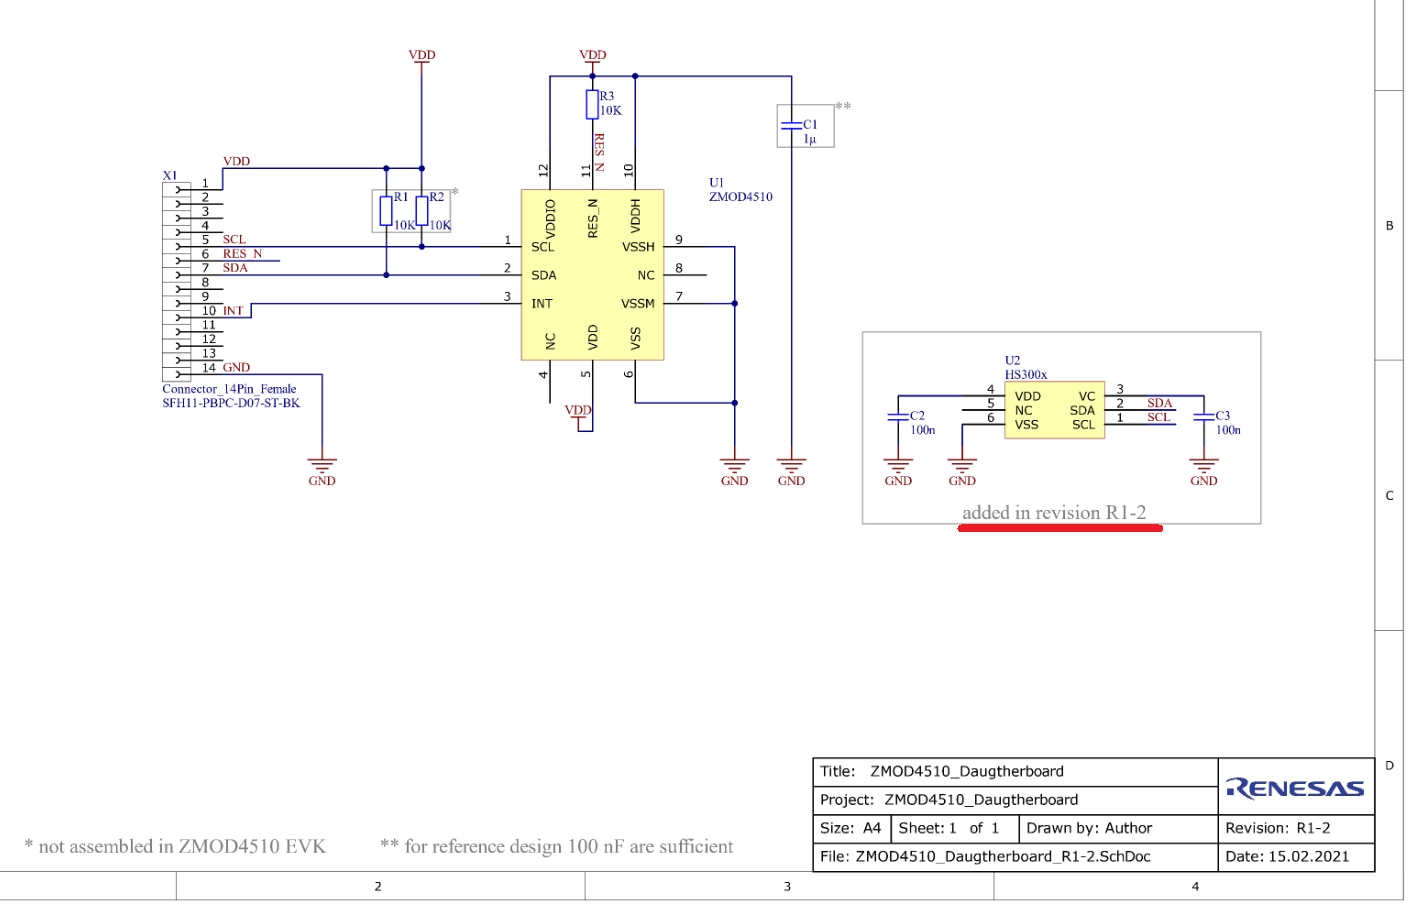
Note that I think that public schematic from user manual is wrong because I do not see any connection of HS300x sensor to the power supply (VDD) but I hope that on production boards sensor is connected to the power.
Because I am non-sponsored challenger, I am curious if other sponsored challengers also received older revision R1-1 or newer R1-2 with onboard temperature + humidity sensor. Temperature and humidity sensor is used for compensation and according to the document it is used as a compensation for slightly improving ZMOD4510 air quality measurement accuracy. Now it makes sense to me that HS4000-EVK board was added to the kit which sponsored challengers received.
Because I have older revision without this additional sensor, I will omit this compensation in my first experiments and maybe later I will try to order and get some temperature + humidity sensor for being able to fully evaluate ZMOD4510 and use it more accurately in my project.
Summary
My first impression from ZMOD4510-EVK is positive. I have not tried it yet due to limited time, but it is properly packaged, all important accessories are included and according to quick start guide it should be easy and seamless to use it. I am slightly disappointed from receiving older revision of the board, but it would be still fine, I think. Now I go to play with this board, and I will write blog about it and evaluation software in one or two weeks.
Thanks for reading this blog and stay tuned for my future blogs. If you have any questions or feedback, then feel free to comment below.
Next blog: Blog #3: Experimenting with ZMOD4510-EVK Software


-

ntewinkel
-
Cancel
-
Vote Up
0
Vote Down
-
-
Sign in to reply
-
More
-
Cancel
Comment-

ntewinkel
-
Cancel
-
Vote Up
0
Vote Down
-
-
Sign in to reply
-
More
-
Cancel
Children