My goal for this blog was to get the ZMOD4510 Arduino sample running, gathering data from the ZMOD board via I2C, and then displaying it on the Serial Console.
I'm using the Arduino MKR WIFI 1010 board (a "SAMD" board), which the documentation says is supported by their hardware and firmware.
They also support ESP32, so I could've used that board too. There are a fair number of other boards they support, but I only had those two options available here
I think the reason they don't just support all the boards is because the AQI algorithm takes a fair bit of processing power to compute, and the older chips are likely just not fast enough.
The very first step in any microprocessor project is to make sure the board works, and that it can be programmed. Start with Blink, is what I say to that!
Thankfully that part was super easy - I'm able to talk to the board and the light blinks.
The other advantage of starting with the Blink sketch is to ensure that, after hooking up wires and sensors, there are no random signals being thrown at the new circuit from whatever old sketch was still on the board from any previous project.
I usually change the Blink sketch up a little bit to change the blinking speed just to make sure it's my own sketch that is running.
I did, of course, have to select the MKR WIFI 1010 board from the boards list in the Arduino IDE - you might need to add support for SAMD boards using the Boards Manager.
The next step was to install the Arduino library for the ZMOD4510 board.
This library can be downloaded from the Renesas website.
To install it, start with the Blink sketch and pretend to add a library to it: from the menu choose Sketch - Include Library - Add .ZIP Library... and then navigate to where you saved the .zip file.
In my case the file is named Renesas_ZMOD4510_OAQ_2nd_Gen_Example_Arduino.zip - I chose to use the Gen2 example because it makes testing much quicker. The Gen1 version requires much more time before it comes up with AQI values.
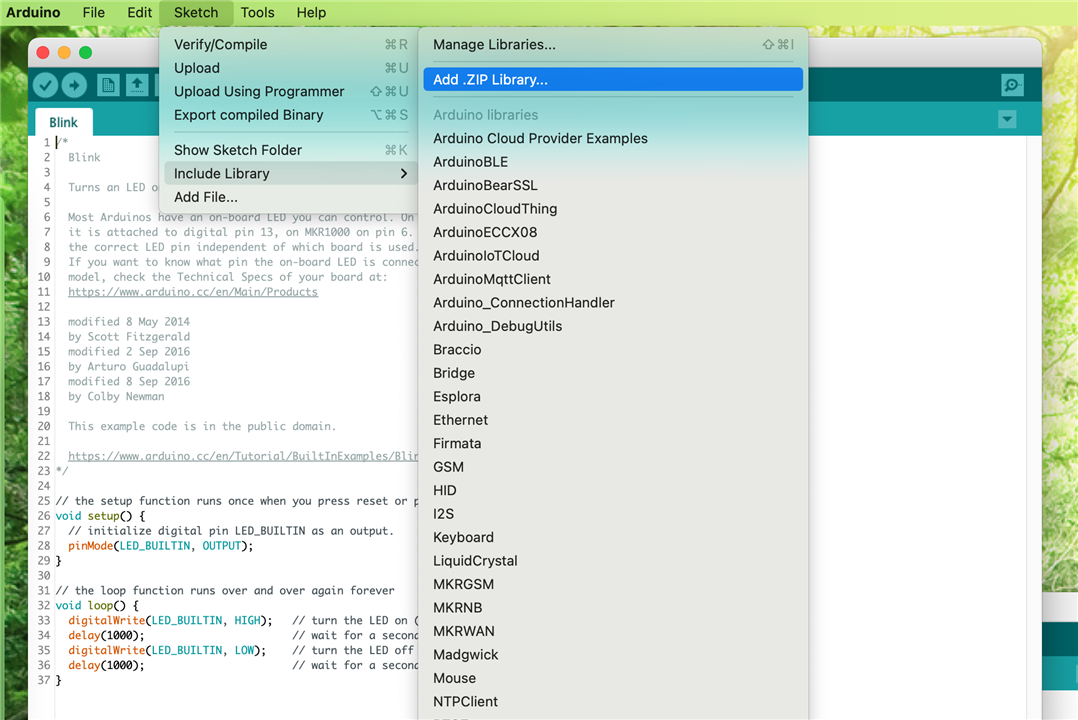
Once the library was installed, I was able to open the example sketch that comes with that library. Use File-Examples and scroll to the bottom to the Renesas library.
I think I had to re-start the Arduino IDE for this library to show up in the list.

I saved the sample and renamed it to something more memorable for myself, to make it easy for me to find and use for this challenge.
At this point I made sure the library was installed properly, and that the sketch was useable, by compiling and building the sketch, making sure the MKR WIFI 1010 board was selected, of course.
For this, just press the checkmark to "Verify" the sketch.
Success! The sample sketch compiled and built properly! It's nice when things work.
The next step was to connect the sensor board to the correct I2C pins on the MKR WIFI 1010 board.
Figuring out which pins are which wasn't super easy, as it appears that Renesas didn't really build the sensor daughterboard to be used with anything other than their own HiCom boards, and the sensor board has a lot of extra pins, none of which are marked.
I was able to refer to a blog post by vlasov01 right here on element14 from testing they did last year with a similar sensor board.
I also checked the documentation for my specific sensor board to make sure the pinouts are the same.
All of the documentation is easily available, and well organized, on the Renesas website.
Looking at the schematic for the daughterboard, it shows that pin 1 is VDD, pin 14 is GND, pin 5 is SCL, and pin 7 is SDA.
The documentation also includes top and bottom diagrams of the sensor daughterboard, which helps identify the pin configuration.
The schematics and images also include extra information for the revision 2 humidity sensor, but my board is the older version, so those parts don't exist for me, and can be ignored.
The connector part of the HiCom board schematic confirms the pinout:
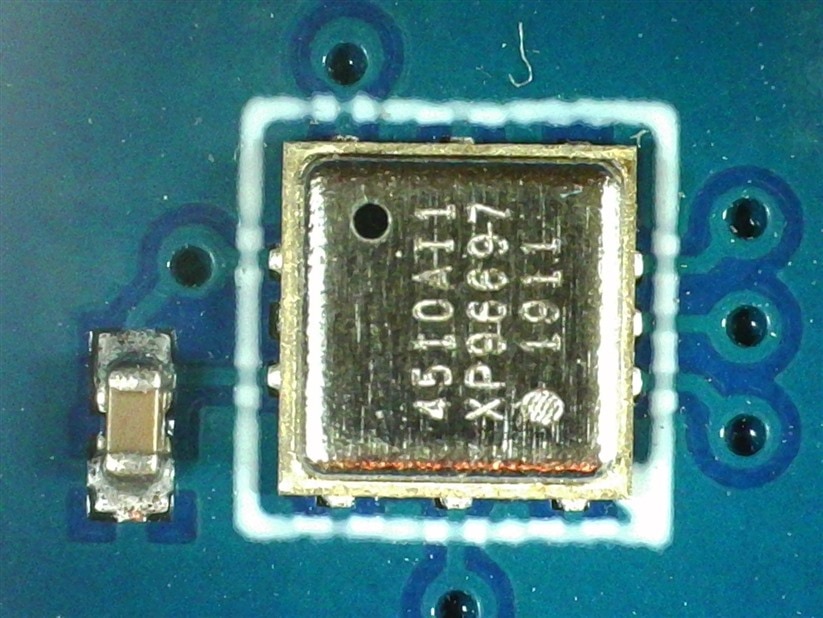
Here's a microscope closeup of the sensor itself, which didn't help me a whole lot - it's still hard to tell where the traces go.
Putting it all together, using a picture of my ZMOD4510 boards, I came up with this:
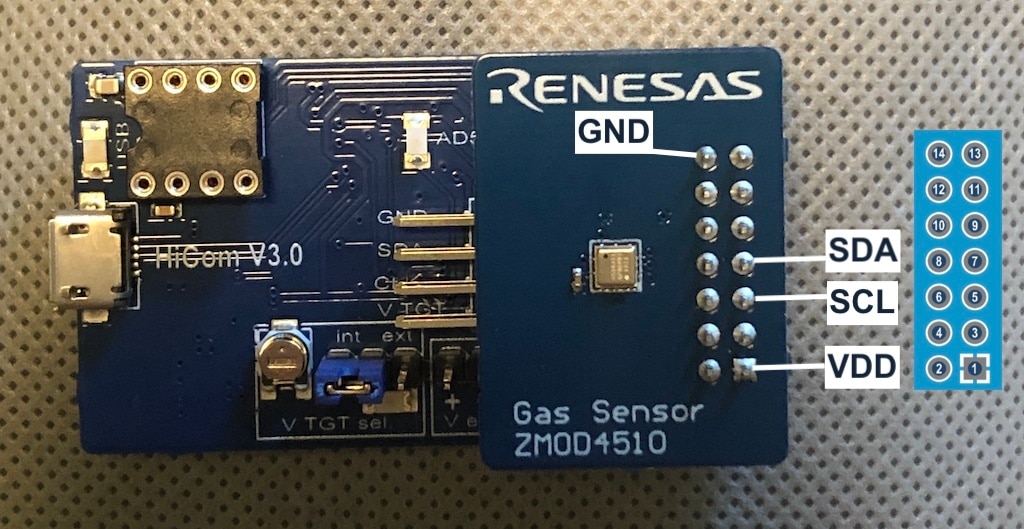
Now, I know what you're thinking: "Nico, you screwed this up last time with the HS4001 pinout!" , and I was thinking that too, which is why I double and triple checked the documentation before hooking up any wires!
Note that I will remove the daughterboard from the HiCom board to use it with my Arduino. The HiCom board is only used for testing with the Renesas Windows application.
For the Arduino MKR WIFI 1010 side, the documentation, including pinouts are easily available directly from the Arduino website.
The I2C pins are easy to find using their pinout diagram:

And they're almost even easier to find just by looking at the board itself!
I love how the Arduino boards have the labels marked right on the headers. Look at the labels by pins 11 and 12.
At this point I felt confident enough to hook up all the wires and test it out with the sample sketch.
Running the sketch, I was then able to see the debug data streaming in via the serial console!
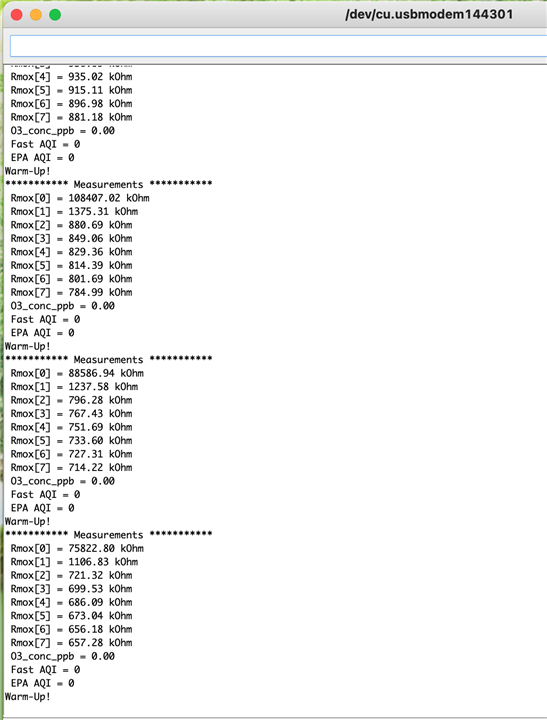
After it gathered data for a while, it started showing the "Fast AQI" results:
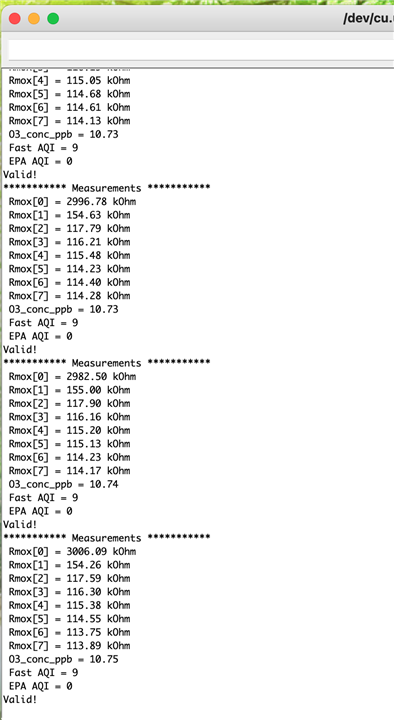
And, in addition to being thankful that everything worked and no magic smoke was released, I was also thankful to see that 9 is "good" air quality!
The ground level ozone is also very good at around 11.
Living on an island and on the edge of a protected woodland park has its benefits!
Hooray!
It was really nice to be able to get to this point with the ZMOD4510 sensor, especially after the trouble I had finding what I needed for testing the HS4001 sensor.
It also means I'm able to use this air quality sensor anywhere, not just limited to where my computer is.
I'm thankful that Renesas provided this easy to use Arduino library and sample sketch, as it really does make life so much easier, and testing becomes so much quicker this way!
I do wish they had included a tutorial on doing all of the above, or at least providing some documentation on the pinout of the sensor board, but as this product is marketed to professionals I'm guessing the target market would not have any difficulty figuring it out.


-

DAB
-
Cancel
-
Vote Up
0
Vote Down
-
-
Sign in to reply
-
More
-
Cancel
Comment-

DAB
-
Cancel
-
Vote Up
0
Vote Down
-
-
Sign in to reply
-
More
-
Cancel
Children