


In this post, I will show how everything is coming together and works. After a frustrating 2 ½ weeks with my code not working with the temperature sensors I got that issue solved. I did post the solution but here it is again. There was an error with Energia compiling the code for the MSP432 Red. Before I knew this, an error showed up while compiling saying “analogRead” was not declared. This was odd but I declared it in my code and everything compiled but wouldn’t read the sensors. I searched the internet for solutions and finally found a forum where this issue was brought up. There was a reply saying that 1 week ago Energia released an update to correct this issue.... Really…. So, I did an update and everything compiled and ran exactly as it should have. Now that all is good I can continue with my project!!!
Code completed and working:
//Winter Survival Suit Temperature
//Dale Winhold
//C = (F - 32)/ 1.8; Convert to celcius
#include "SPI.h"
#include "OneMsTaskTimer.h"
#include "LCD_SharpBoosterPack_SPI.h"
LCD_SharpBoosterPack_SPI myScreen;
int llPin = A14;       //Temperature sensor Left Leg
int rlPin = A13;       //Temperature sensor Right Leg
int laPin = A11;       //Temperature sensor Left Arm
int raPin = A9;        //Temperature sensor Right Arm
int ltPin = A8;        //Temperature sensor Left Torso
int rtPin = A6;        //Temperature sensor Right Torso
int LLegValue = 0;
int RLegValue = 0;
int LArmValue = 0;
int RArmValue = 0;
int LTorsoValue = 0;
int RTorsoValue = 0;
int SettempValue = 25;
String LLegStr;
String RLegStr;
String LArmStr;
String RArmStr;
String LTorsoStr;
String RTorsoStr;
String SettempStr;
// setup
void setup() {
    Serial.begin(9600);
    myScreen.begin();
   // setup LCD
    myScreen.clearBuffer();
    myScreen.setFont(0);
    myScreen.text(3, 1, "Set Temp:   c");
    myScreen.text(3, 14, "L-Leg       c");
    myScreen.text(3, 27, "R-Leg       c");
    myScreen.text(3, 40, "L-Arm       c");
    myScreen.text(3, 53, "R-Arm       c");
    myScreen.text(3, 66, "L-Tor       c");

    myScreen.text(3, 79, "R-Tor       c");

    myScreen.flush();
}

void loop()
{
  LLegValue = analogRead(llPin);    //Reading Temperature

  RLegValue = analogRead(rlPin);

  LArmValue = analogRead(laPin);

  RArmValue = analogRead(raPin);

  LTorsoValue = analogRead(ltPin);

  RTorsoValue = analogRead(rtPin);

  LLegStr = String((LLegValue-32)*5/9);        //Converting F to C
  RLegStr = String((RLegValue-32)*5/9);
  LArmStr = String((LArmValue-32)*5/9);
  RArmStr = String((RArmValue-32)*5/9);
  LTorsoStr = String((LTorsoValue-32)*5/9);
  RTorsoStr = String((RTorsoValue-32)*5/9);

  SettempStr = String(SettempValue);

//Display temperature
    myScreen.setFont(0);
    myScreen.text(60, 1, SettempStr + "");
    myScreen.text(60, 14, LLegStr + "");
    myScreen.text(60, 27, RLegStr + "");
    myScreen.text(60, 40, LArmStr + "");
    myScreen.text(60, 53, RArmStr + "");
    myScreen.text(60, 66, LTorsoStr + "");
    myScreen.text(60, 79, RTorsoStr + "");
    myScreen.flush();
//Heat on or off
if (((LLegValue-32)*5/9) < (SettempValue-3)) //Heat On
{
  digitalWrite(40, HIGH); //Power on to Relay Module to open power supply to carbon fiber
  myScreen.setFont(0);
  myScreen.text(85, 14, "H"); //Displays heat on icon
}
if (((LLegValue-32)*5/9) > (SettempValue+3))  //Heat off
{
  digitalWrite(40, LOW);  //Power off to Relay Module to close power supply to carbon fiber
  myScreen.setFont(0);
  myScreen.text(85, 14, "L"); //Displays heat off icon
}
if (((RLegValue-32)*5/9) < (SettempValue-3))
{
  digitalWrite(39, HIGH);
  myScreen.setFont(0);
  myScreen.text(85, 27, "H");
}
if (((RLegValue-32)*5/9) > (SettempValue+3))
{
  digitalWrite(39, LOW);
  myScreen.setFont(0);
  myScreen.text(85, 27, "L");
}
if (((LArmValue-32)*5/9) < (SettempValue-3))
{
  digitalWrite(38, HIGH);
  myScreen.setFont(0);
  myScreen.text(85, 40, "H");
}
if (((LArmValue-32)*5/9) > (SettempValue+3))
{
  digitalWrite(38, LOW);
  myScreen.setFont(0);
  myScreen.text(85, 40, "L");
}
if (((RArmValue-32)*5/9) < (SettempValue-3))
{
  digitalWrite(37, HIGH);
  myScreen.setFont(0);
  myScreen.text(85, 53, "H");
}
if (((RArmValue-32)*5/9) > (SettempValue+3))
{
  digitalWrite(37, LOW);
  myScreen.setFont(0);
  myScreen.text(85, 53, "L");
}
if (((LTorsoValue-32)*5/9) < (SettempValue-3))
{
  digitalWrite(36, HIGH);
  myScreen.setFont(0);
  myScreen.text(85, 66, "H");
}
if (((LTorsoValue-32)*5/9) > (SettempValue+3))
{
  digitalWrite(36, LOW);
  myScreen.setFont(0);
  myScreen.text(85, 66, "L");
}
if (((RTorsoValue-32)*5/9) < (SettempValue-3))
{
  digitalWrite(35, HIGH);
    myScreen.setFont(0);
  myScreen.text(85, 79, "H");
}
if (((RTorsoValue-32)*5/9) > (SettempValue+3))
{
  digitalWrite(35, LOW);
  myScreen.setFont(0);
  myScreen.text(85, 79, "L");
}
delay(100);
}
Hope it made sense!!
The suit:
All the carbon fiber is sewn into the suit (Thanks to my daughter Chrystal) and I have run tests for how many volts makes the carbon fiber heat up enough, but not to hot. For the legs and torso strips I need to have 14.8v to get me 52 deg C (125 deg F) which I found a very comfortable warmth. For the same result in the arms I required 7.4v, go figure, Chrystal made the carbon fiber ½ the length in the arms!! (Made my life easier). For fun, I ran the 14.8v to the arms to see how hot the carbon fiber would get, I disconnected the power when the temperature reached 86 deg C (187 deg F). Here again as suggested by DAB, I am doing a quick disconnect to all the carbon fiber as well as a manual over ride in case the computer should fail. Being a survival suit, the need to survive can’t rely solely on the computer working so I am putting over ride switches to each area for manual operation of the heater (this is not completed yet). Pictures below:

The wiring:
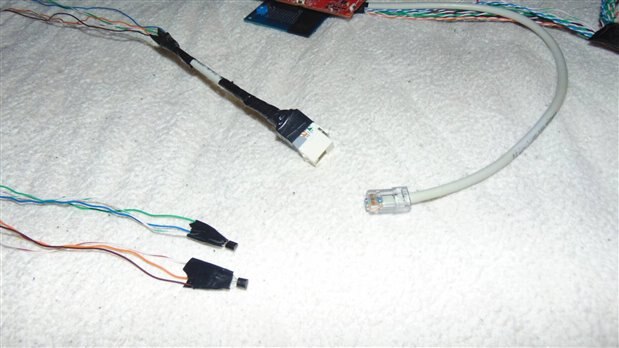
I ran CAT5e wires to the sensors. I found this was a nice light weight wire that was easy to use. As per DAB’s suggestion, I did a quick disconnect for the sensors in the legs (and the carbon fiber explained later). Since I am using CAT5e I wired in the usual male/female connector as my quick disconnect. It works very well as shown in the pictures:

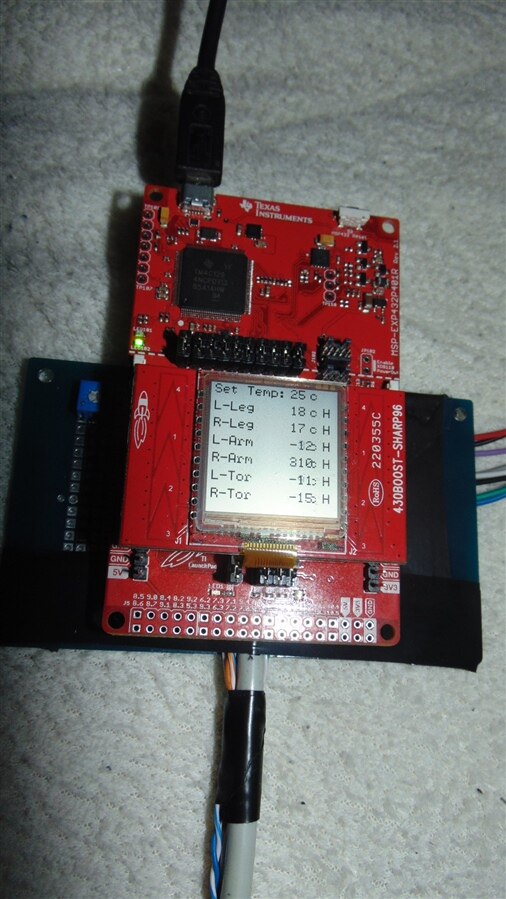
I only had the leg sensors attached at this time, as you can see the four real weird temperatures and 2 correct ones!!
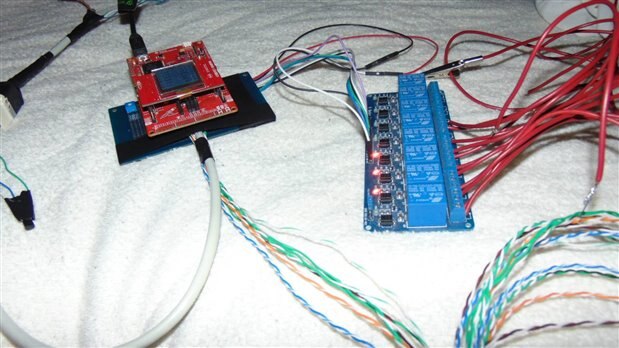
All hooked up!!
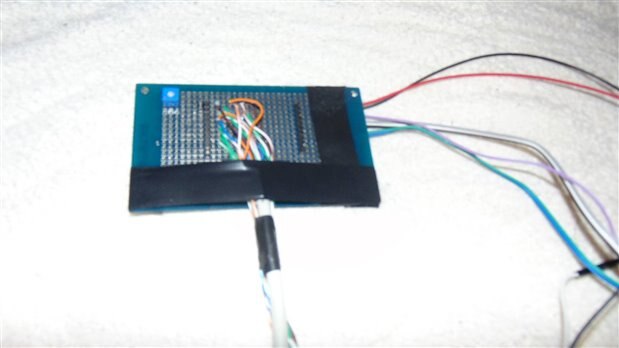
For a bit of a laugh, here is a picture of my home made board I through together that connects to the bottom of the MSP432. I did a PCB layout on AutoCAD, printed out an acid etch transfer and found I didn't have any blank PCB board left. No one in town had any either. I hope to get some in so I can make this a little more prettier.
Things to complete:
So, what is left to do? Here is my list:
- Solder the sensors to the leads
- Attach everything to the suit
- Add in the carbon fiber power quick disconnects
- Heater manual over ride
- Case for computer and switch
- Make pockets in the suit to hold the power supplies (Ohhhh Chrystal!!!)
- Water proof the computer and hardware
- Testing of completed suit
I want to thank everyone (dougw balearicdynamics Jan Cumps msimon mcb1 DAB **Sorry if I missed anyone**) for their help these past few weeks with my frustrations. I'm so happy those issues are out of the way!!
I also want to send an extra special thank you to DAB for the excellent suggestions he gave me to add into the suit. I'm using them all!! I truly can't thank you enough!!
Dale Winhold
Top Comments