


OK, so I've realized that my current blog format might not allow me to complete the 15 required posts, as they are quite time-consuming to create. So I am going to shorten them, post more frequently and try to focus each one on a single area of development and cover that area in more detail. This should make it easier to create the required number of blog posts and serve to provide more information on the design and project progress.
The nutrient feed system:
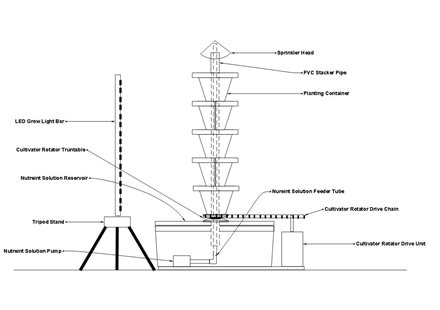
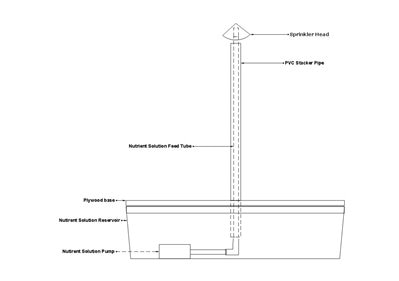
In this post, I will cover the nutrient feed system for my vertical farming design. Just for clarity I have included drawings of the entire system and the proposed nutrient feed system. These are drawings of the original design, which has been modified to some degree as development has progressed.
Here's an overview of the nutrient feed system modifications that have been implemented to date. Details and pictures of these mods are presented below.
- The pump has been replaced with a larger unit.
- There is no longer a separate PVC stacking pipe and nutrient feed tube. This now consists of a single PVC feeder pipe connected to the pump and nutrient dispersal halo via rubber tubing. However, the PVC stacking pipe may be reintroduced before completing the project if any stability issues arise.
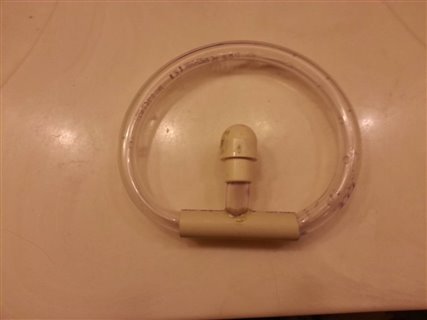
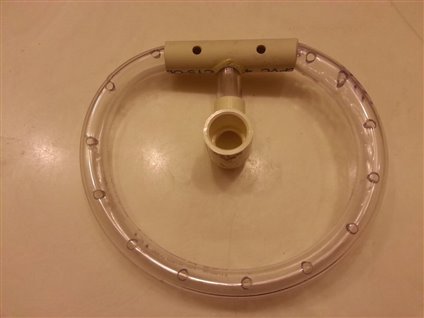
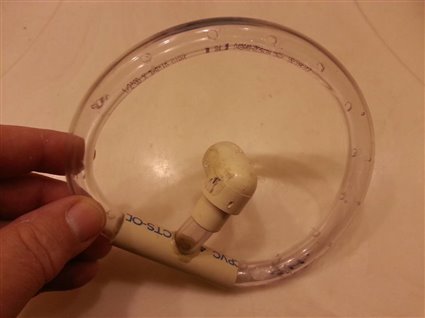
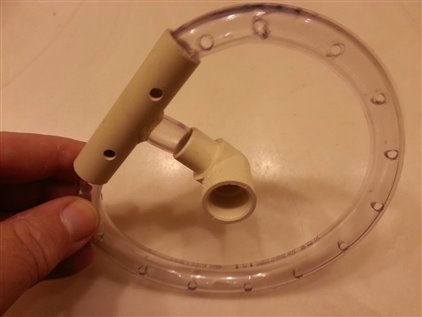
- The sprinkler head has been replaced with what I am calling the nutrient dispersal halo, which was built from perforated rubber tubing and scrap PVC.
Nutrient Feed System details:
The nutrient feed system consists basically of six separate elements:
- The reservoir.
- The pump.
- The aerator. I do not have this part yet. But it should be simple to acquire as it will consist of an aquarium bubbler device.
- The PVC feed pipe.
- The dispersal halo.
- The control timer/relay.
Each element will be covered in detail below.
The Reservoir:
The nutrient reservoir consists simply of a re-purposed 14 gallon plastic storage tub. The lid has been modified to accommodate the nutrient feed pipe. It will be further modified, to allow easy access to the nutrient solution and pump,p once the entire system is assembled. My plan is to cut the lid in half and create a hinge by gluing a single length of bicycle tire inner-tube along the length of each half each half.
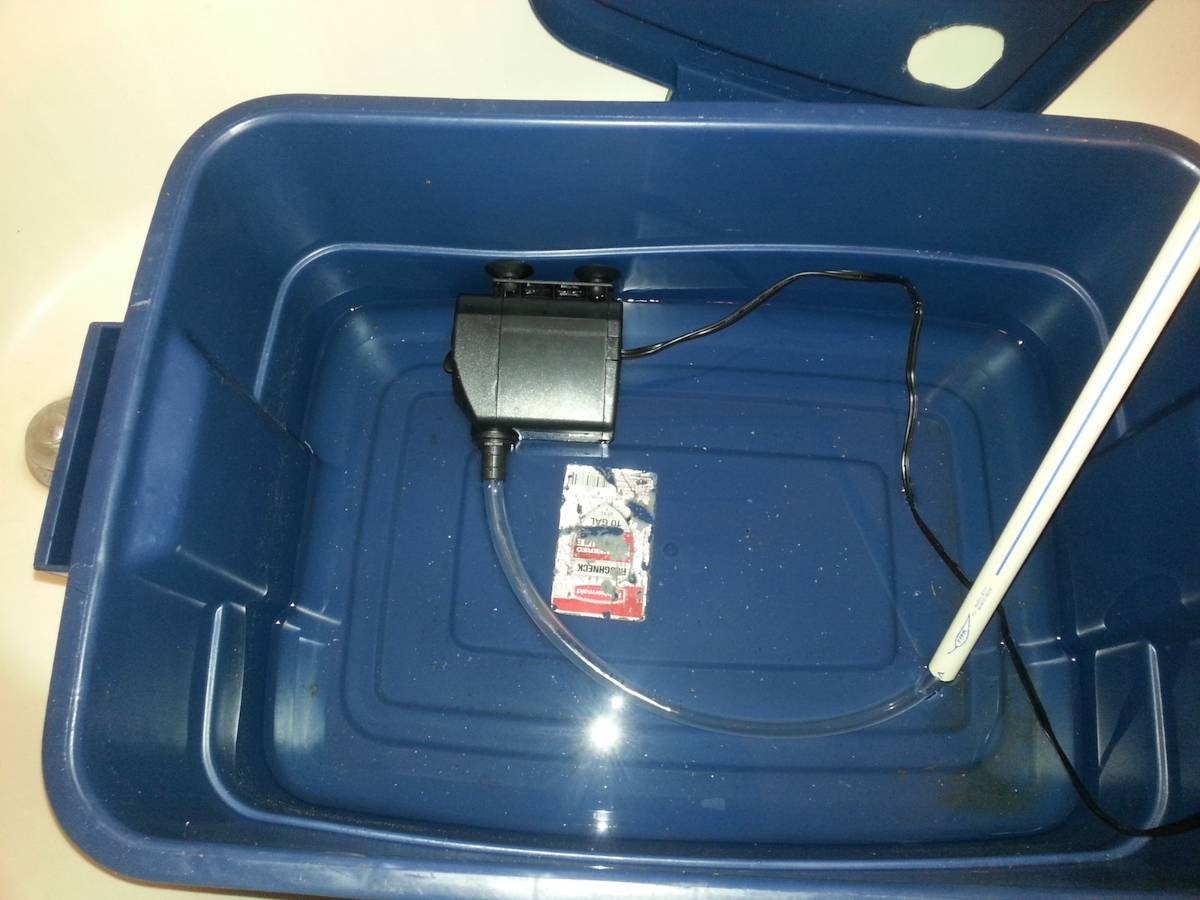
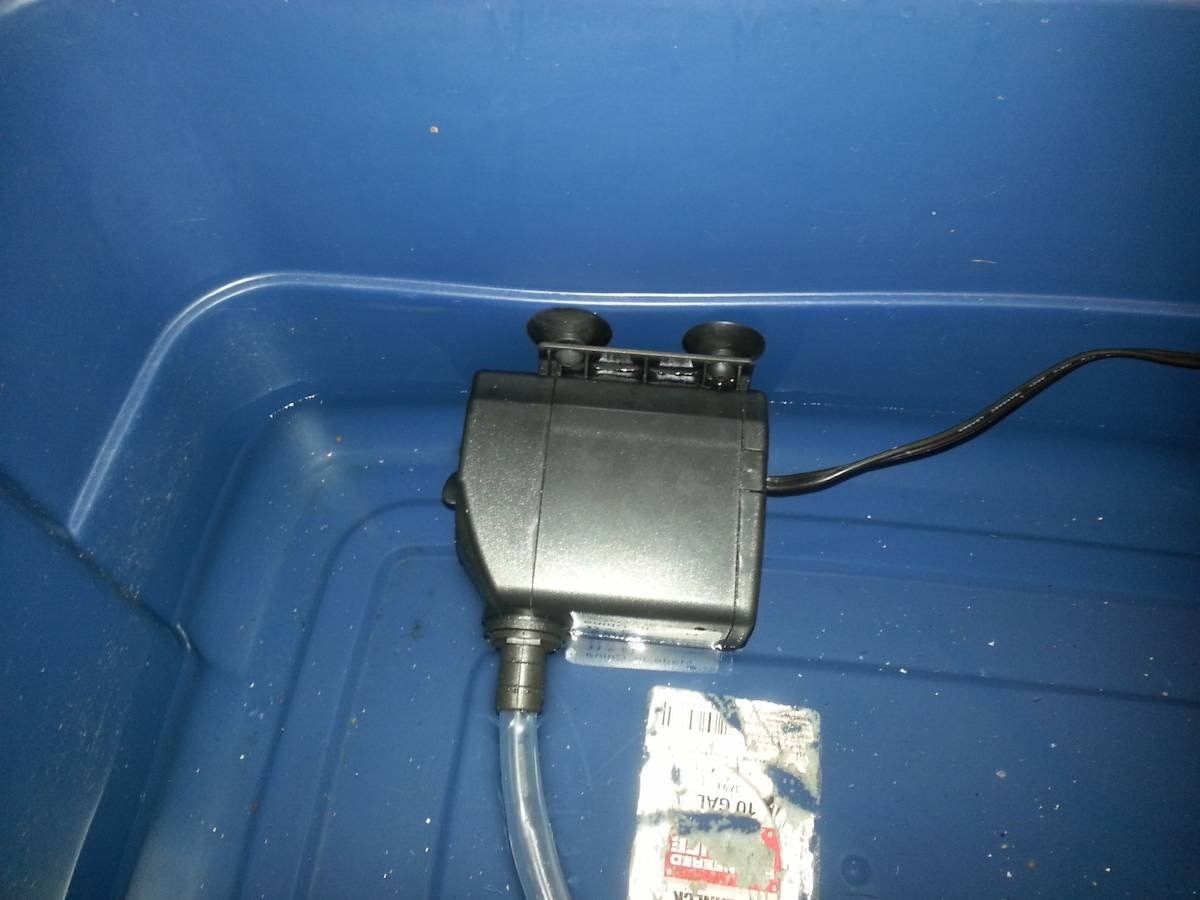
The pump:
My original pump was a 70GPH model with a head lift of only 30". This was obviously not going to do the job as the required head lift is a minimum of around 60". I now have a 740GPH pump. I purchased this pump online for the same price paid for the 70GPH pump at a local home improvement store. Around $18... The new pump has a head lift of around 102". This may be a bit of overkill, but I believe I have a method for controlling this and making it work very well for the system. These are landscaping fountain water feature style pump. They are relatively inexpensive, very available, come in many sizes and are well suited for the task at hand. In my application head lift is the most important specification as I need to pump nutrient solution vertically and to a specific height. See Table 1 below for specs on some of theses pumps.
| Model | GPH | Max Head Lift | Power Consumption | Aprox. Price |
|---|---|---|---|---|
Total Pond Model # MD11060
| 40 - 70 GPH (Adjustable) | Adjustable from 18" - 30" | 1Amp @ 120VAC Approx. 96W | $18.00 |
Model number N/A 740 GPH Submersible Pump Aquarium Fish Tank Powerhead Fountain Pump
| 740 GPH Max (Adjustable, range N/A) | 102" | 110-120VAC 55W | $18.00 |


Table 1.
This is the 740GPH pump I'm currently using. But it may have to be reduced to lower the water pressure at the dispersal halo. I'm getting a lot of splatter right now. And I'm also concerned about the effect on the growing medium in the top container.
PVC feeder pipe:
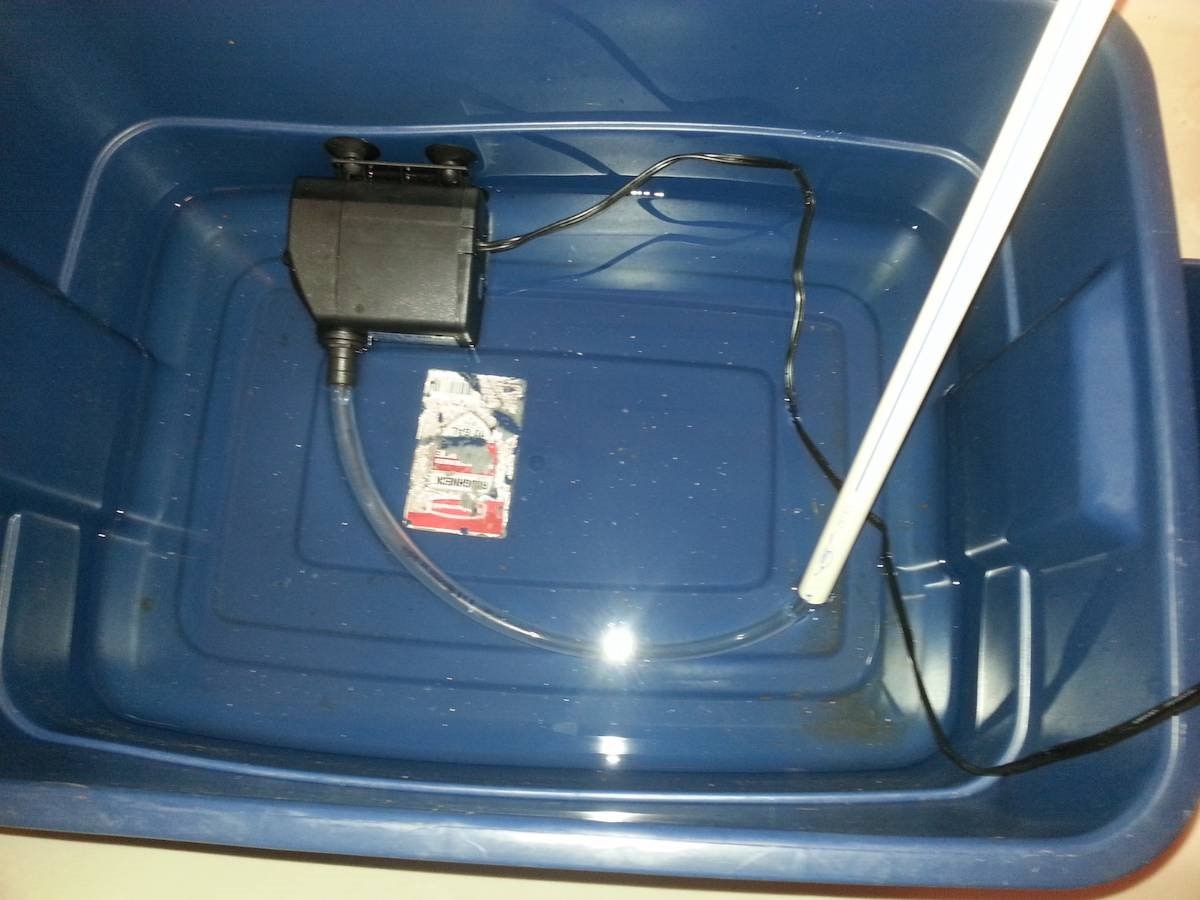
Not much to say here. I simply did away with the outer, stacking, pipe and now have a single, approx. 40" x 3/8", length of PVC pipe that feeds up through reservoir lid, the rotator unit and the middle of the stacked containers. The container stack simply rotates around the feeder pipe, which remains stationary. The feeder pipe will be connected to the pump via a 90-degree elbow, for stability, and small length of rubber tubing. Currently the rubber tubing is connected directly to the feeder pipe. The dispersal halo is also connected via a 90-degree elbow and rubber tubing. The picture below shows the lower portion of the feeder pipe in the reservoir. There is a video log at the end of this blog post that shows the pipe in place with the growing containers stacked over it.
The aerator:
The aerator will be a simple aquarium bubbler. I do not have this part yet but It will be placed in the bottom of the reservoir to oxygenate the nutrient solution.
Nutrient dispersal halo:
In the original design, my intent was to design, and have 3D printed, a custom sprinkler head for nutrient dispersal. But after seeing one of the other challenger's, shanesissons, solution for nutrient dispersal I borrowed from him to create a new and much simpler design. Shane created a simple perforated tubing solution for his Ferris Farm design. I have adopted that idea but formed the single length of tubing into a halo shape as it is more suited to my application.
Nutrient feed pump timer/controller:
I wasn't sure what to use in order to control the nutrient feed pump. The intention is to have the pump activate automatically several times to day to flood the plants containers. So. I knew it had to consist of a relay and timer circuit of some sort. And as I've reached my budget for this project it was time to get creative and find something to re-purpose. So, luckily, I found an old hot water heater timer in my shed and realized it had everything I needed and then some.
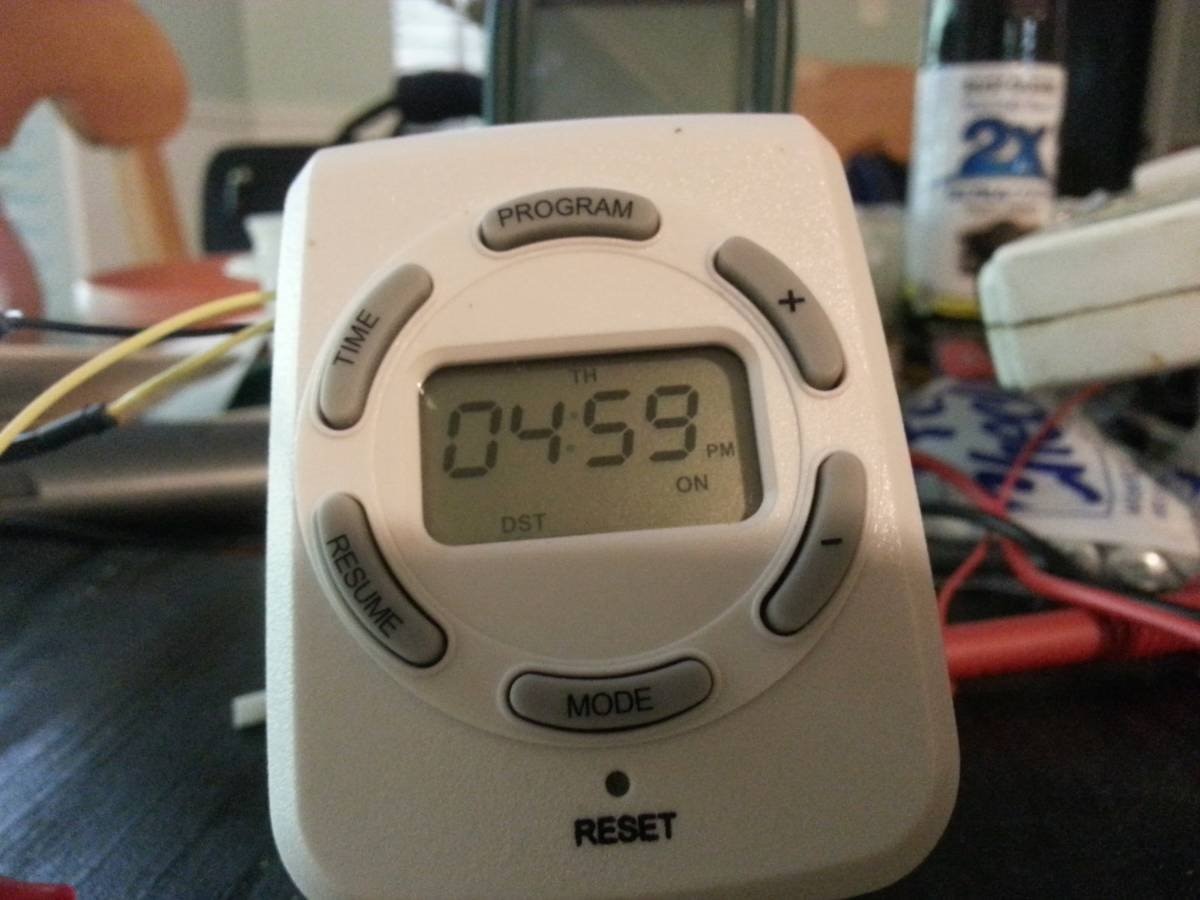
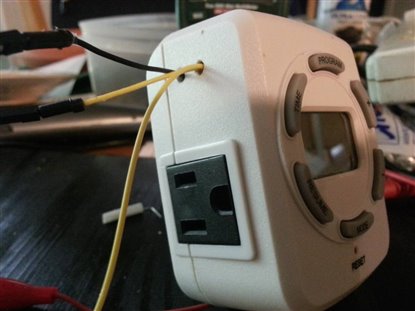
I believe I paid about $10 for this unit when I first purchased it. It's really quite nice actually. It provides 8 programmable on off cycle times. But I wanted the ability to log the on/off times of the unit and the ability to control the relay directly from the MCU. So, I hacked the device and was able to bring its relay control line into the EFM32ZG via one of the analog comparator pins on that are broken out on expansion header. I used a comparator pin because the output voltage of the timer's control line is only 1.3V. I believe this was not enough to drive a standard 3.3V GPIO input pin on the MCU. I also connected the other, input, side of the control line to a GPIO pin on the EFM32ZG expansion header. Again, the output pin from the MCU is 3.3V so I will use a small 1K x 1K resistive voltage divider to bring that down to 1.65V, which should be safe for controlling the timer device relay. NOTE: You will notice that the common of the timer device, black wire, is connected to the Raspberry Pi expansion header. This is simply for convenience as the RPi common is connected to the EFM32ZG common and this device provides only one common connection on the expansion header.
Now I can set the timer via it's provided front panel programming capability and also acquire, via the analog comparator connection, the timer relays on or off cycles. Or, I can control the the internal relay directly from the EFM32ZG via the direct connection between the MCU and the relay control line. The analog comparator alternate function of the MCU is quite handy. The comparator is configured to provide two separate functions when it is triggered by the timer device's control line. One, it will basically echo the level transitions of the comparator inputs to an output pin on the MCU. Two, it will generate an interrupt so that the software can respond to the transition. This allows me to both easily echo the transition back to the timer to activate the relay, and to send the transition event to my cloud based IoT logging service. Here's some pictures of the hack. And again, this is covered in the video log at the end of the post.
The device.
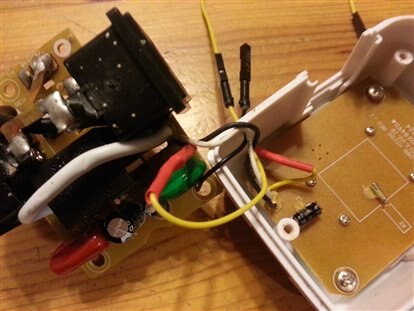
The hack.
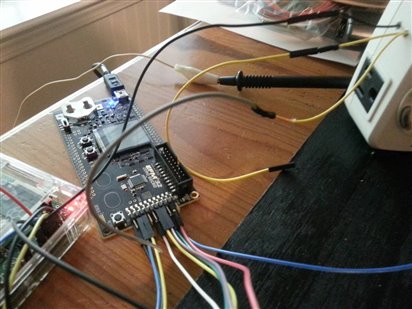
The connection to the MCU.
I think that covers the entire nutrient feed system pretty well. Please take a minute to view the video below to see most of the individual nutrient feed subsystem actually working. I have not tested everything together yet. But the subsystems are working well enough to believe that the entire system will work very well when fully assembled. xxx
Cheers, good luck on the challenge and happy farming!
Rick
Top Comments