


Another week of building has come and gone. I was unfortunately extremely busy again this week, but I was able to squeeze in a good amount of time to make some progress. I have also tweaked the design a bit. These changes will result in a more usable final product.
The pond liner arrived early this week. I ordered a 20 mil thick sheet of black HDPE that was 6 x 15 ft. The roll that arrived was more like 9 x18 ft, but I'm not complaining. I cut a 6' x 5' section and did my best to fit it neatly in the bottom reservoir. It was very difficult. The HDPE was not easy to bend into the corners, and the excess around the edges did not staple down very well in a few spots. It doesn't look as pretty as I would have liked, but this material is tough. I am satisfied that it will provide a leak proof seal for many years.

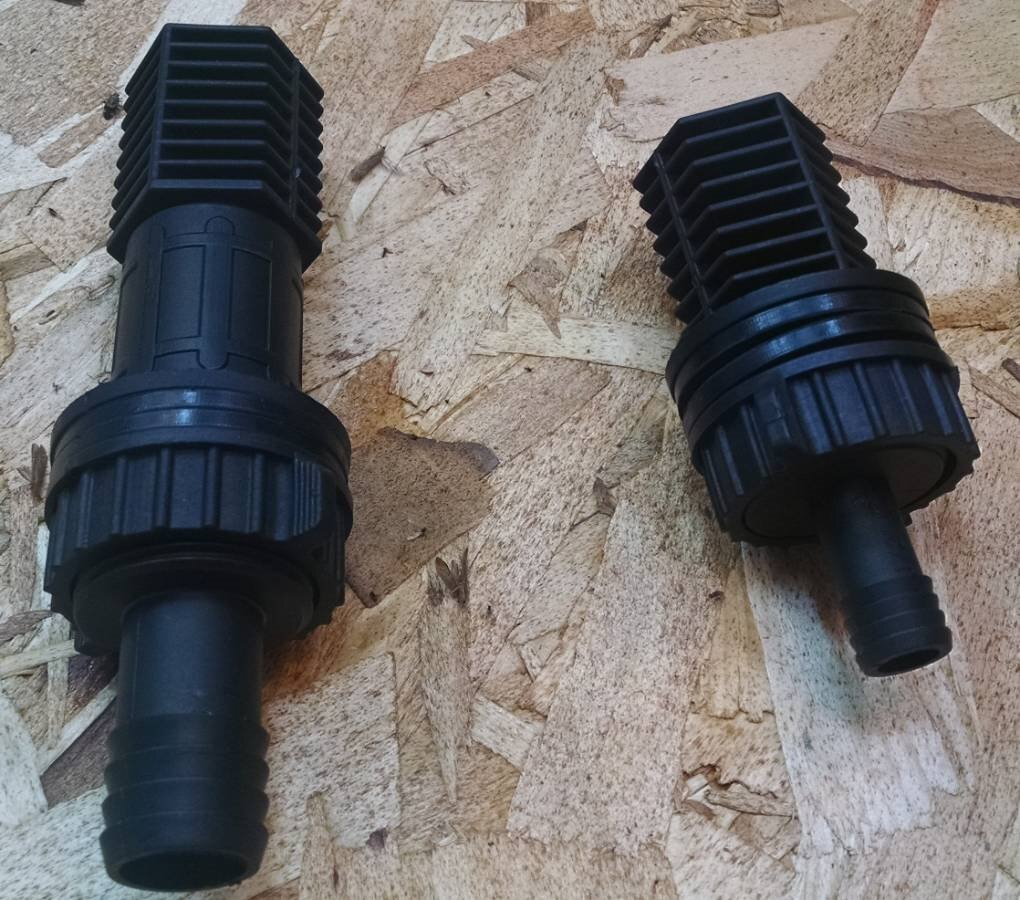
I also went to the local hydroponics store and picked up a couple of fittings for the grow beds. I have not made beds out of wood and pond liner before, so I wanted to try out both standard ebb and flow fittings and Uniseals. Shown below are 1/2” and 3/4” ebb and flow bulkheads. These bulkheads go through a hole in the bottom of the bed, and are sealed on either side. They have 1/2” and 3/4” tubing connectors on one side and media screens on the other. I also picked up 1/2” Uniseals which are a less expensive option. The Uniseals are a rubber fitting that uses the pressure of an inserted pipe to form a seal between the liner and the Uniseal.
Each bed had two 1.25” holes drilled in them for the fittings. One hole will be for pumping the solution in, and the other will be an overflow return in case something goes crazy and the pump doesn't shut off. The beds were then covered in liner. For the bulkheads, a hole was cut in the liner that was slightly smaller than the hole in the plywood. Then the bulkheads were screwed on. For the Uniseals, a small X was cut in the liner in the middle of the place where the Uniseal was to be inserted. The Uniseal was forced in the hole, and a small section of 1/2” PVC was shoved into the hole.
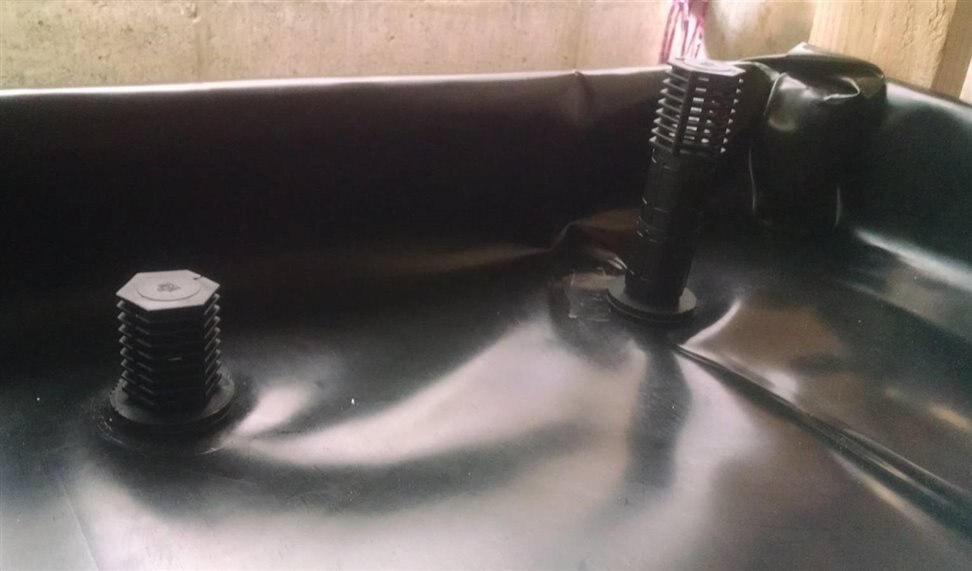
Here is the lower bed:

Here it is with the media screens attached:
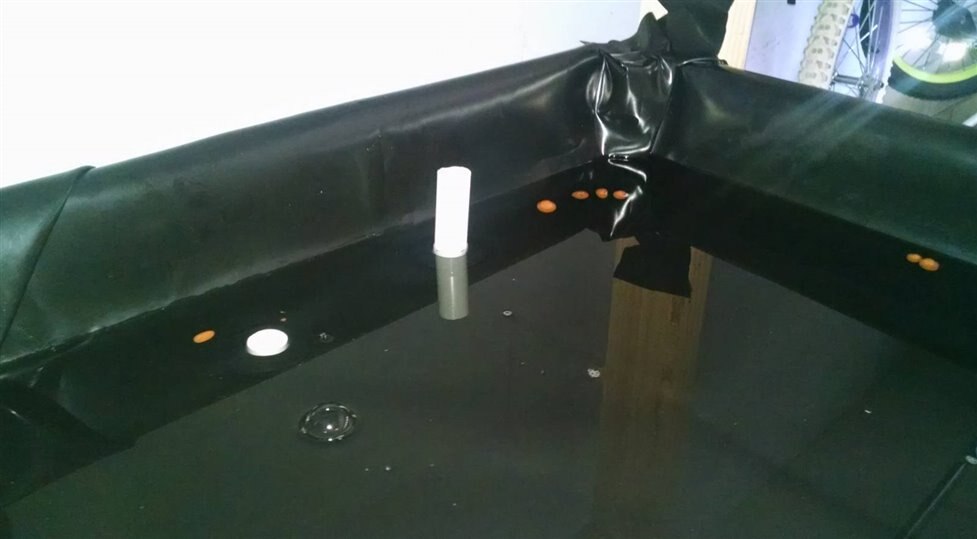
Unfortunately, as you can see in the above picture, I tore a very small hole with my wrench when I was inserting the bulkhead on the right. I tried to patch it with a small piece of liner and a heat gun, but it didn't work well enough. The leak is very small, but it is enough to rot the wood over time.
Here is the upper bed filled with a little bit of water to test for leaks:
These seals work great so far. Now for some homemade media screens to keep the hydroton/pebble media out of the plumbing.
Now with that done, I was left with a few problems that I sat down to think about. The first problem was that the top level was too high to be practical for use. The bottom of this level is at 6' tall. Adding a media bed would make it taller. I would have to stand on a stool or ladder to tend to plants at the back. It also didn't fit well in the space I wanted to put it, and I wasn't super excited about another water and rock filled bed on top of 120VAC. Finally, I still needed to build a section for the germination stage of growth. With all these considerations in mind, I found a solution that should solve most of my problems.
I have decided not to use the third level as another grow area for mature greens. Instead it will be used for germination. This will allow me to cut the top shorter to fit the whole assembly in the space I wanted since germination requires far less room. Also, the germinating seeds will be able to take advantage of the heat generated from the CFLs below them. They will still require some heat from a seedling heat mat, but with proper control, this will save me a few of Watts.
So I cut the top off and lowered it about 10.” I added an old 4' fluorescent shop light that will hang just a couple of inches above seedlings in humidity domes. I then covered the back of the whole assembly in a thicker mylar that has a black plastic backing. This will provide light reflection as well as a small amount of insulation. I also added a seedling heat mat that will be controlled by relay.
Here is the entire assembly so far: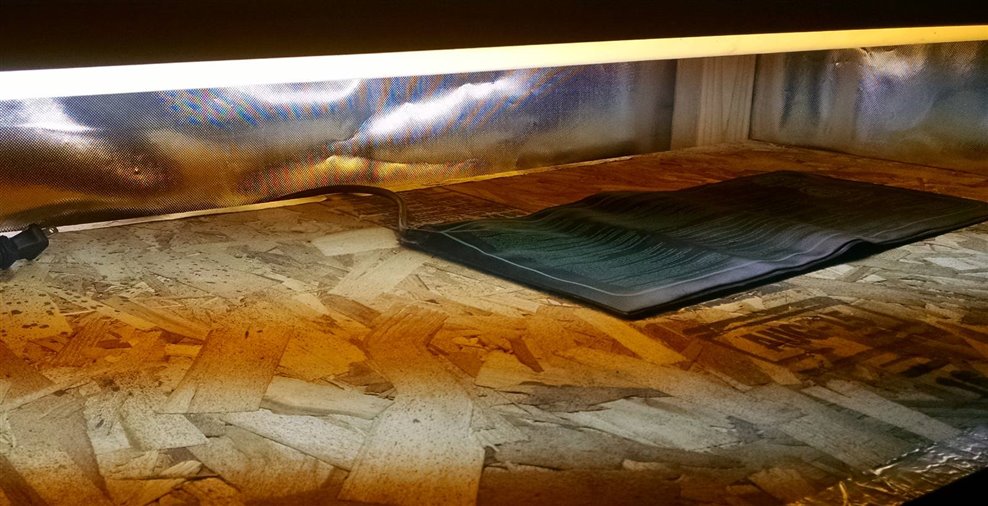
Another design change I have made is that I will not be using OpenHAB for a web interface. I will instead be writing my own interface with Node.js, Express, Socket.io, and D3.js. I will be writing a C++ program to handle the data collection, storage, and communication with the gateway. This will add a bit of work, but I think it will provide a much better solution in the long run.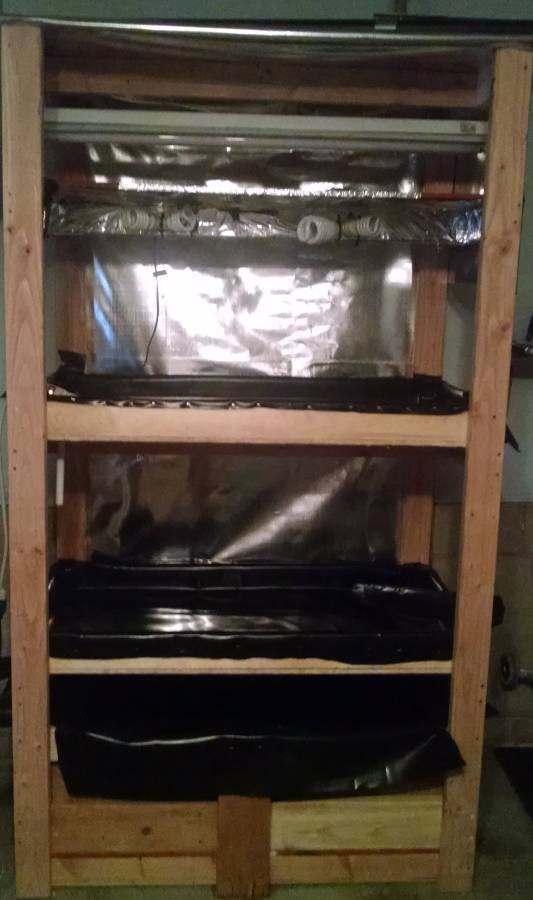
I will finish the plumbing this week, test the pumps, and get sensors and relays wired. I'm also going to begin work on the software for the webserver.
Top Comments