Off Grid Solar Power
If you have been reading this blog, you know that Bonesnapper Ridge is completely off-grid, with no power, and no water. However, there is an old telephone box way out on a part of the property that I couldn't / wouldn't run wires to. Very odd that is here, but nothing else. Being off-grid is the main reason this blog exists, but specific to this topic is power.
I have always been interested in Solar Power, in fact, my first professional job working in IT was with a company called Realgoods. They were a semi-large mail-order company that sold "green" products as well as solar power equipment. Eventually, they sold to a company called Giam, and then sold and traded a few more times over the years that I wasn't paying attention to. I promise that will be relevant later. It's been a dream of mine to generate my own power for a very long time.
Now that I have this property and the need, I can finally build this system. And I am very excited.
The Spec
Typically when people spec out their solar power system, they look at their previous electric utility bills to see how many Kilowatt Hours they consume on average. That data was not available to me at my last shop/home. My landlord there was illegally reselling utility power to me at an increased rate and refused to show me the bill or tell me what my consumption was.
What I did was do some estimations on the appliances and computers in my home, and then estimations on shop equipment. For the shop, I also had to estimate runtimes for my equipment as well. This was hard because sometimes I am much more busy than at other times. So, I went for the biggest power draw, on a long run time and based the calculations off of that. That would be running my CNC router at full tilt for 5 hours.
The CNC spindle at full tilt (example: running deep cuts through oak, or other hardwoods) is 4000w max. The stepper motors I believe were somewhere around 600w max, and the dust collection was about 900w max. That's about 5500w. That is also running at full tilt, my normal operation is probably around 1200w max on the spindle, 100-200w on the stepper motors. Running that at the MAX estimation is 5500w * 5 hours is 27500 Watt Hours. So I came up with a battery configuration for 28800 Watt Hours.
There is my first variable: 28800 Watt Hours of battery.
Panels are expensive, and I learned there is a huge market for used panels. People like to upgrade to the latest and greatest. It turns out there is a complete industry for buying these used panels and reselling them. I have located the ones that I want, but have not gone to pick them up yet.
They are 270w watt panels. I plan to get 40 of them for the array, and they are cheap enough I'll pick up a few more for "spares" in case one or more fail.
The next thing I really dug into was brands of equipment for inverters/charge controllers etc. I had several people suggesting different brands to me, and really they were only going off their personal experience with each brand, and in most cases, it was the only brand they had worked with, so of course it was their favorite! I looked at Magna-sine, Schneider/Conext Midnight, Sol-Ark, Growatt, EG, and Victron.
After talking to several people about their experiences with each, and evaluating my own semi-unique requirements, I went with Victron.
I selected Victron for their amazing build quality, very complete documentation, and ... their adoption of Open Source. Almost all of the other vendors I looked at are very "black-box", they do not publish information on any of their software or protocols. Victron however does publish all of that information. They have one product called the CerboGX that is a data collection point for all of their other products, and they have released the software that runs on it as an image for the Raspberry Pi.
I have a few of their products running in my current solar power system, and I was able to connect to it with an ESP32 and get serial data from it. I am then logging all of that data in InfluxDB, as well as publishing it to an MQTT broker. Their documentation of the protocols allowed me to see what all of the data tag definitions were and what units, as well as tables for lookups. As a bonus, all Victron equipment is a pretty blue color!
I also need 240v. With the Victron equipment, the best way to do that is to use two 120vac inverters in a Split-Phase system, where the two inverters connect to each other via a serial connection. They output a synchronized frequency for 240vac.
I wanted to have plenty of peak power so I can run some big peak-type equipment, such as my TIG welder, which spikes pretty high, but is not sustained like the CNC machine. Also to have the ability to run a few things at the same time, such as running my table saw, while the air compressor decides to charge, without blowing out circuits, or damaging the inverters.
I initially came up with 15kw as a safe bet, but looking at the available Victron equipment, there was not a combination that would get me 15kw. So I went with two 10kw inverters.
For the batteries, I know that I needed 28800Wh or capacity, and for reasons I will explain later, I went with a brand called KiloVault, and their HLX+ 3600 12v 300Ah batteries.
Here is the general BOM that I came up with:
- 2x Victron Quattro 10k Inverters
- 1x Victron RS 450/200-tr Charge Controller (450v/200A input from panels)
- 1x Victron Lynx Shunt
- 1x Victron Lynx Power In
- 1x Victron Lynx Distributor
- 8x KiloVault 300Ah 12v LiFePO4 Batteries
- Misc breakers, switches, and fuses.
The Purchase
This is only slightly interesting, but I'll add it because I thought it was a fun sequence of events that spanned decades.
I ran an RFQ on this purchase and contacted three different suppliers. Two of them came back with the *exact* same pricing that Amazon provided while promising me a "deal". The third supplier was a company called altE (altestore.com). I knew about this company because they have a warehouse in a neighboring town, and I knew someone who works there. And... This is the company that Realgoods turned into. They also have a house brand battery that was on sale, called KiloVault. Their pricing and pre-order support was fantastic so I went with them. I could also pick it up at their warehouse and save a ton on shipping. Only a few of the smaller items needed to be drop shipped to me which was fine.
The building (PAW)
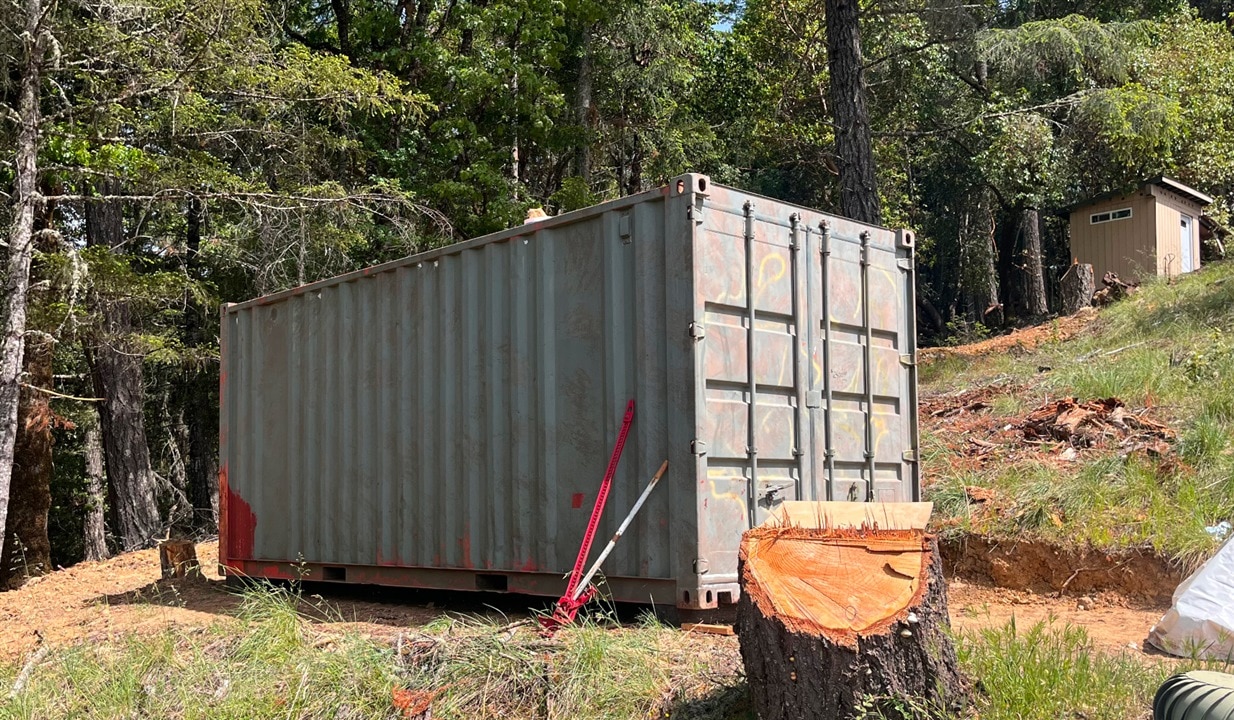
I also needed a building to put my inverters/batteries and equipment in. I initially thought that I would build this out of cinder block, but after doing the estimations on that, as well as stick built, metal siding, etc, I found that buying a shipping container was quite a bit cheaper, and would function better overall. I wanted this building to be semi-fire-resistant because a fire *will* come through here at some point, and I wanted this large investment to be somewhat protected. Better than being in a building made of wood anyway. I understand it's not a fail-safe, but it's better than nothing...
I am also going to put all of my data in this building as a sort of "Data Center" for the property. That way, if a fire comes through, all of my critical data will be in there ( as well as cloud backed up) and it should be fairly safe.
Inside the shipping container, I built a 12' x 8' building out of 2x4 and 1/2" plywood with R13 insulation all the way around to keep it sort of climate controlled. I have some ideas for that but I need data from a full season to see how much or little I need to do in the summer and winter.
I placed the building on a landing below the house because it was in between the panels and the house/shop, it was a good place to be out of the way, and there are not a lot of trees around it (anymore) that could threaten it during a fire. It's about 170' from the house/shop and 250 from the panels.
My property is named Bonesnapper Ridge after my favorite cat who is no longer with me. His name was Bonesnapper, and he was the coolest cat I have ever met. While here, and providing my own utilities, I have been thinking about it like I have my own utility company that provides to one customer. I kept thinking about it as "Bonesnapper Ridge Power and Water", and it finally came to the front of my brain and I got the acronym. Power And Water PAW. Bonesnappers PAW? Get it? Corny but perfect.

The container (PAW) in its final resting place.

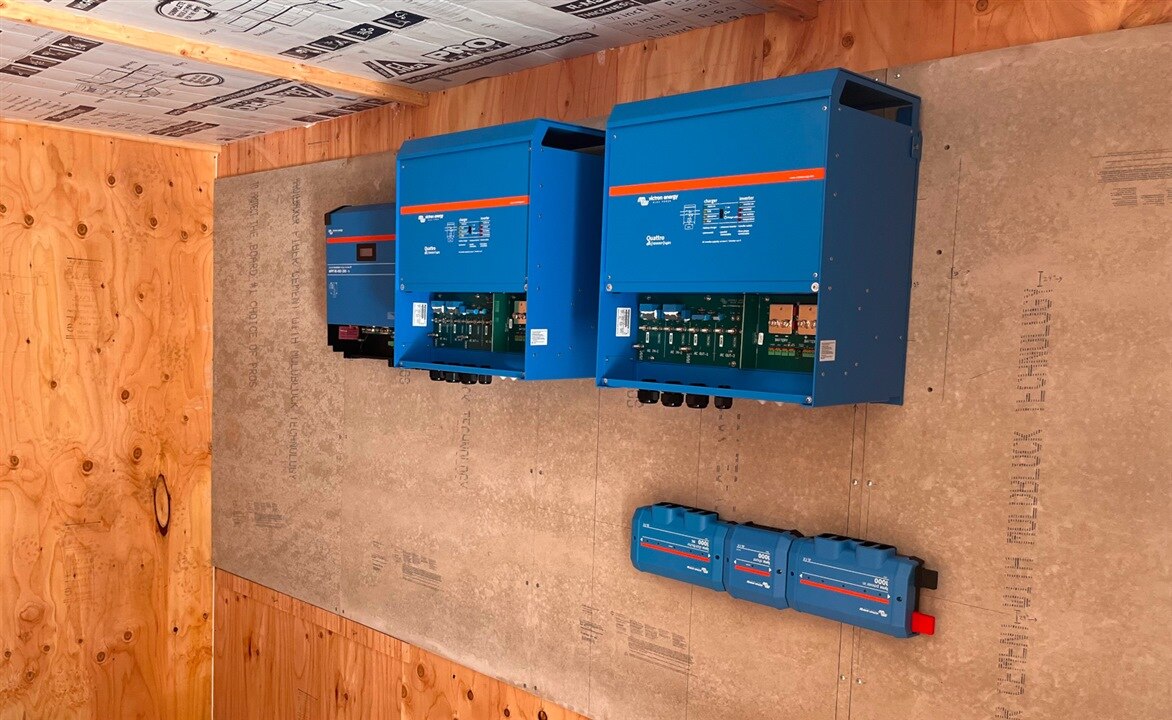
This is inside the container, inside the room I built. I have hung the main components and carefully measured distances between them per device spec, as well as placing the smaller parts equal distance from each inverter to make sure my cable lengths are the same length to each inverter. From left to right (TOP) Charge Controller, Inverter A, Inverter B. (BOTTOM) Lynx Distributor, Lynx Shunt, Lynx Power In. Everything is mounted on concrete backer board with 1/2 ply behind. I used 3/16" toggle bolts to mount through the backerboard and plywood. The inverters are pretty heavy, but the toggle bolts should hold them no problem.
The Conductors
As you know if you have been reading this blog, I am on a north-facing slope, and putting the panels on my house or shop is not an option. Down the hill about 1000' I get great sun all year round, and about 420' down the hill I get pretty decent sun (4h on winter solstice). Due to the cost of the conductor to run that distance, I went with the compromise at 420ish ft.
This is something I thought about quite a bit. There are a lot of variables here, and I think I have finally solved it. But here goes the explanation:
It's 250' from the panels to PAW, and 170' from PAW to the house/shop. From the panels to PAW, I need to move about 10kw, and from PAW to the house/shop about 20kw. Part of the decision to put PAW where it is was due to how much the conductor would cost to move 240v 83A that distance. I was looking at having 4/0 conductors for a single phase 240v situation, which means two hots, a neutral, and a ground. So three times the overall distance of the very expensive 4/0 conductor (talking like almost $10/ft). If I put PAW near the panels, then I am running a lower voltage up the hill, meaning higher amperage and a bigger conductor. I can configure the panels in a way that they are running at a higher voltage with lower amperage, and smaller cheaper conductors. I'll set them up in a way that they will be about 400vdc. From PAW up to the house, I need to move 240v @83A.
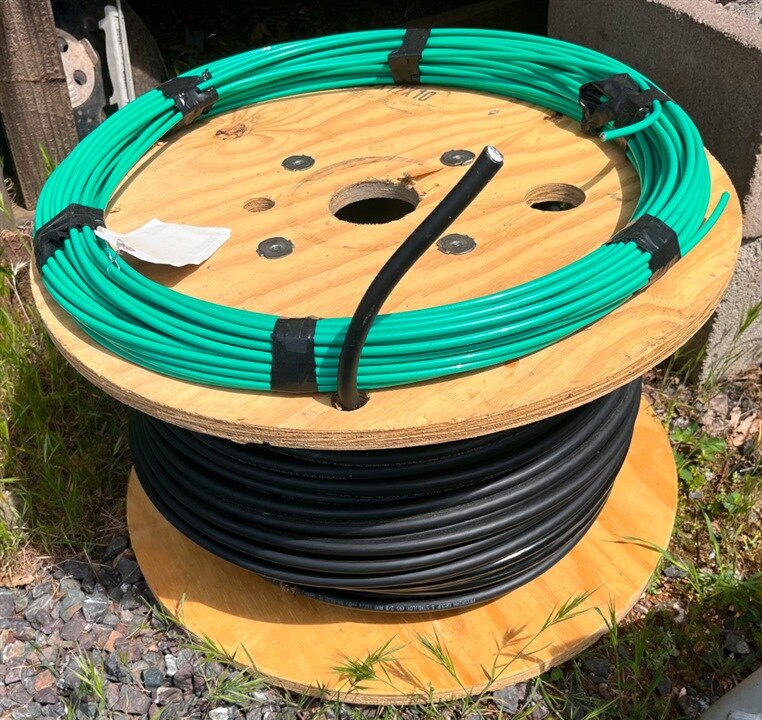
After a LOT of research, I came up with 2ga conductor from PAW to house/shop. That would just get me by for the max load. My cousin who is a licensed commercial electrician, convinced me to go bigger on the conductor and conduit and to also go aluminum instead of copper. This ended up being much less expensive, and I am future proofing in case I need to add more power sometime later. That would be adding a third 10k inverter, adding one more conductor and getting three-phase 30kw out of the system. The conductor I settled on is a 2/0 Aluminum XHHW, which is about half the price of the 2ga copper. I'll also run a slightly smaller copper ground along with that.
The 2/0 conductor and ground has been acquired and will be scheduling the trenching this evening or tomorrow.

What is left to do?
Quite a bit. Really all I have done on this project is purchase most of the equipment and build the room inside of the shipping container. I have the batteries, inverters, charge controller, and accessories stored inside the house (and taking up a lot of space!).
Here is the punch list:
- Dig Trench from house/shop to PAW
- Lay 2" Conduit & pull 2/0 conductors through
- Lay 1" Conduit & pull Cat5e
- Build backboard & pour concrete at house/shop side
- Penetrate the shipping container for power & data.
- Run conductor from backboard to the house.
- Physical installation of all equipment in PAW
- Charge Batteries (I need to get them to a specific voltage before they are installed)
- Make all 4/0 battery and inverter cables
- Connect Batteries and inverters.
- Install breaker panel in PAW and connect inverters to it.
- Break out circuits for PAW
- Break out 80A circuit for heading up to the house/shop
- Drive halfway across California with large trailer to buy panels
- Build panel rack system
- Install panels
- Trench from PAW to panel site
- Lay conduit
- Pull conductor
- Lots of configuration of Victron equipment
- Custom monitoring hardware and software to collect all data from inverters, batteries, shunts, panels, etc. Into InfluxDB and MQTT.
This project is far from complete, but it's going to move pretty quickly from here. I am prioritizing getting the trench and conductor up to the house, batteries charged and installed, everything connected, my few solar panels hooked up and the generator installed. Then I can abandon the small system in the house and get running on this.
I currently do not have a fridge because I don't have enough power in the small system that I am currently running on. I thought that would be fine, and it has been for some time, but there's only so much rice and lentils I can eat... I need to get a fridge running so I can get back to my meal prep routine and have some fresh foods that are not in a box or can...
So that's it so far, I'd love to hear what you all think. Any ideas on anything, setup, data collection etc.
I am pretty sure there will be a full video of the complete build. I have been filming as I go so far. Ill make sure to get timelapse of the conduit going in this week.
Thanks all, hope to hear from you!
-Kaleb

-

dougw
-
Cancel
-
Vote Up
0
Vote Down
-
-
Sign in to reply
-
More
-
Cancel
-

KalebTheMaker
in reply to dougw
-
Cancel
-
Vote Up
0
Vote Down
-
-
Sign in to reply
-
More
-
Cancel
Comment-

KalebTheMaker
in reply to dougw
-
Cancel
-
Vote Up
0
Vote Down
-
-
Sign in to reply
-
More
-
Cancel
Children