element14 Community
element14 Community
    Register Log In
  • Site
  • Search
  • Log In Register
  • Community Hub
    Community Hub
    • What's New on element14
    • Feedback and Support
    • Benefits of Membership
    • Personal Blogs
    • Members Area
    • Achievement Levels
  • Learn
    Learn
    • Ask an Expert
    • eBooks
    • element14 presents
    • Learning Center
    • Tech Spotlight
    • STEM Academy
    • Webinars, Training and Events
    • Learning Groups
  • Technologies
    Technologies
    • 3D Printing
    • FPGA
    • Industrial Automation
    • Internet of Things
    • Power & Energy
    • Sensors
    • Technology Groups
  • Challenges & Projects
    Challenges & Projects
    • Design Challenges
    • element14 presents Projects
    • Project14
    • Arduino Projects
    • Raspberry Pi Projects
    • Project Groups
  • Products
    Products
    • Arduino
    • Avnet Boards Community
    • Dev Tools
    • Manufacturers
    • Multicomp Pro
    • Product Groups
    • Raspberry Pi
    • RoadTests & Reviews
  • Store
    Store
    • Visit Your Store
    • Choose another store...
      • Europe
      •  Austria (German)
      •  Belgium (Dutch, French)
      •  Bulgaria (Bulgarian)
      •  Czech Republic (Czech)
      •  Denmark (Danish)
      •  Estonia (Estonian)
      •  Finland (Finnish)
      •  France (French)
      •  Germany (German)
      •  Hungary (Hungarian)
      •  Ireland
      •  Israel
      •  Italy (Italian)
      •  Latvia (Latvian)
      •  
      •  Lithuania (Lithuanian)
      •  Netherlands (Dutch)
      •  Norway (Norwegian)
      •  Poland (Polish)
      •  Portugal (Portuguese)
      •  Romania (Romanian)
      •  Russia (Russian)
      •  Slovakia (Slovak)
      •  Slovenia (Slovenian)
      •  Spain (Spanish)
      •  Sweden (Swedish)
      •  Switzerland(German, French)
      •  Turkey (Turkish)
      •  United Kingdom
      • Asia Pacific
      •  Australia
      •  China
      •  Hong Kong
      •  India
      •  Korea (Korean)
      •  Malaysia
      •  New Zealand
      •  Philippines
      •  Singapore
      •  Taiwan
      •  Thailand (Thai)
      • Americas
      •  Brazil (Portuguese)
      •  Canada
      •  Mexico (Spanish)
      •  United States
      Can't find the country/region you're looking for? Visit our export site or find a local distributor.
  • Translate
  • Profile
  • Settings
Project Videos
  • Challenges & Projects
  • element14 presents
  • Project Videos
  • More
  • Cancel
Project Videos
Documents Creating an ESD (Or Lightning!) Detector! -- Episode 669
  • Documents
  • Members
  • Mentions
  • Sub-Groups
  • Tags
  • More
  • Cancel
  • New
Join Project Videos to participate - click to join for free!
Related
Recommended
Engagement
  • Author Author: cstanton
  • Date Created: 12 Jun 2025 3:42 PM Date Created
  • Last Updated Last Updated: 13 Jun 2025 2:16 PM
  • Views 11406 views
  • Likes 7 likes
  • Comments 9 comments

Creating an ESD (Or Lightning!) Detector! -- Episode 669

Clem builds a custom ESD detector to identify electrostatic discharge events that can interfere with electronic circuits and cause unexpected glitches. Based on a proven design by Charles Wenzel, the detector outputs a logic-safe pulse that can trigger test equipment like oscilloscopes, helping correlate ESD with system faults. The video covers circuit design, case integration using EMI-shielded enclosures, and real-world testing scenarios. Download the design files and see how you can build your own low-cost debugging tool.

Watch the Episode

You don't have permission to edit metadata of this video.
Edit media
x
image
Upload Preview
image

Understanding the ESD Detector

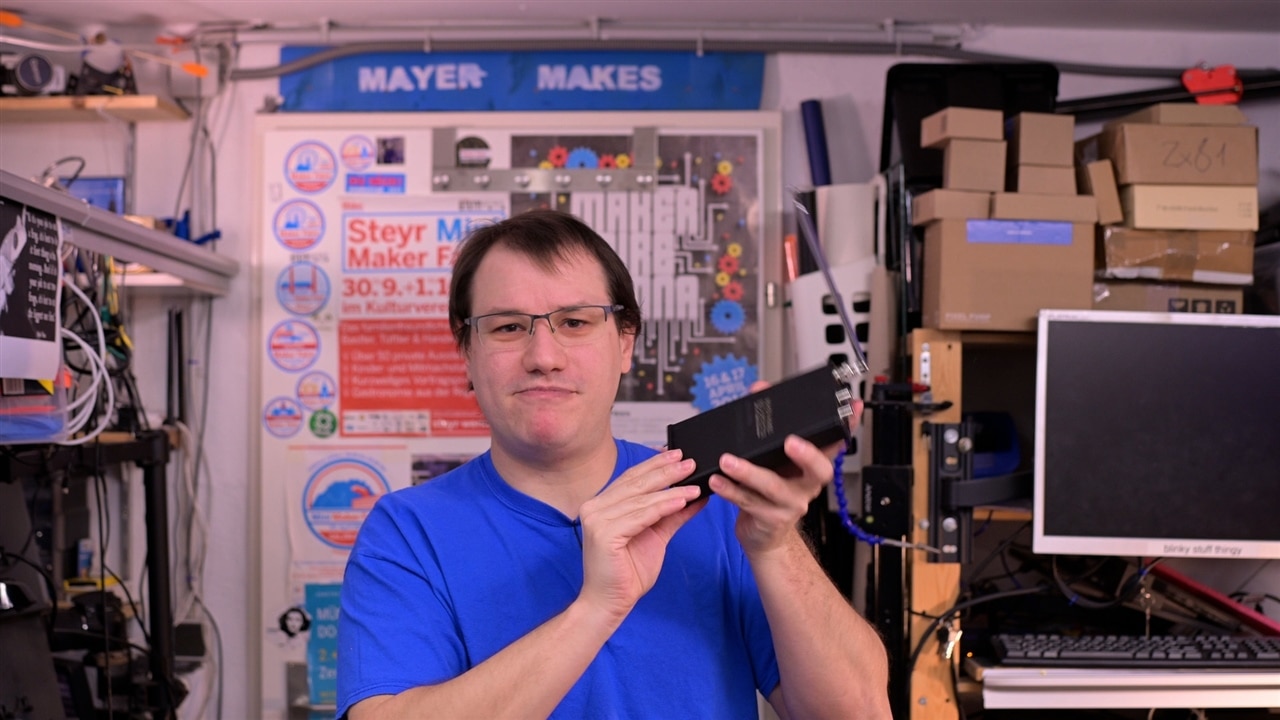
Electrostatic discharge (ESD) is a common issue in electronics, capable of causing unexpected glitches or disruptions in circuits. In his latest project, Clem shares a practical approach to addressing this challenge by building a custom ESD detector. The device helps identify and correlate ESD events, such as static discharges or motor firings, with system anomalies, making it a valuable tool for debugging.
Understanding the ESD Detector

image

The Circuit Design

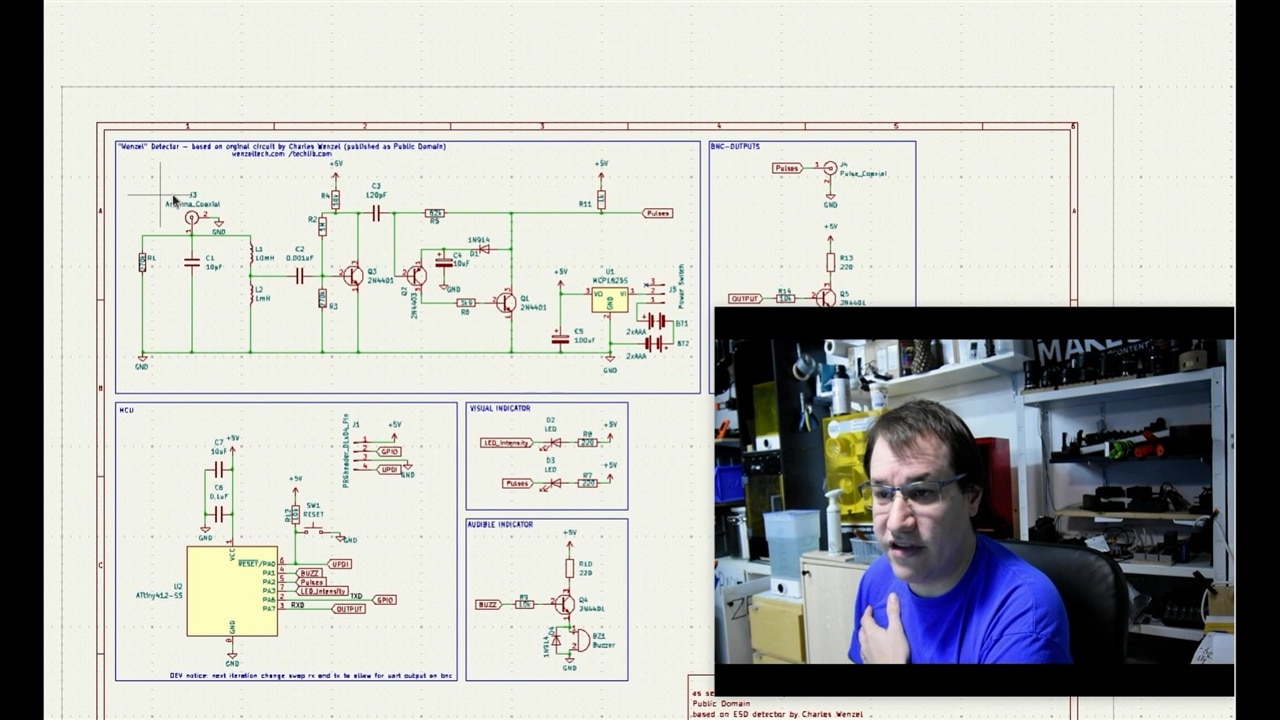
The ESD detector Clem built is designed to monitor for electrostatic discharge events and output a signal when one occurs. This signal can trigger test equipment like oscilloscopes, allowing users to observe the exact behaviour of a system during an ESD event. This functionality is especially useful for identifying issues in systems where timing and signal behaviour are critical.
The Circuit Design

Clem based his ESD detector on a design by Charles Wenzel of Techlib.com. Wenzel’s circuit is known for its sensitivity and reliability, which makes it a strong foundation for detecting subtle ESD events. Clem obtained permission from Wenzel to adapt and use the design, emphasising the importance of adhering to licensing terms and respecting intellectual property. This step ensures ethical practices and fosters collaboration within the electronics community.
Demonstrating the Detector

image

Demonstrating the Detector

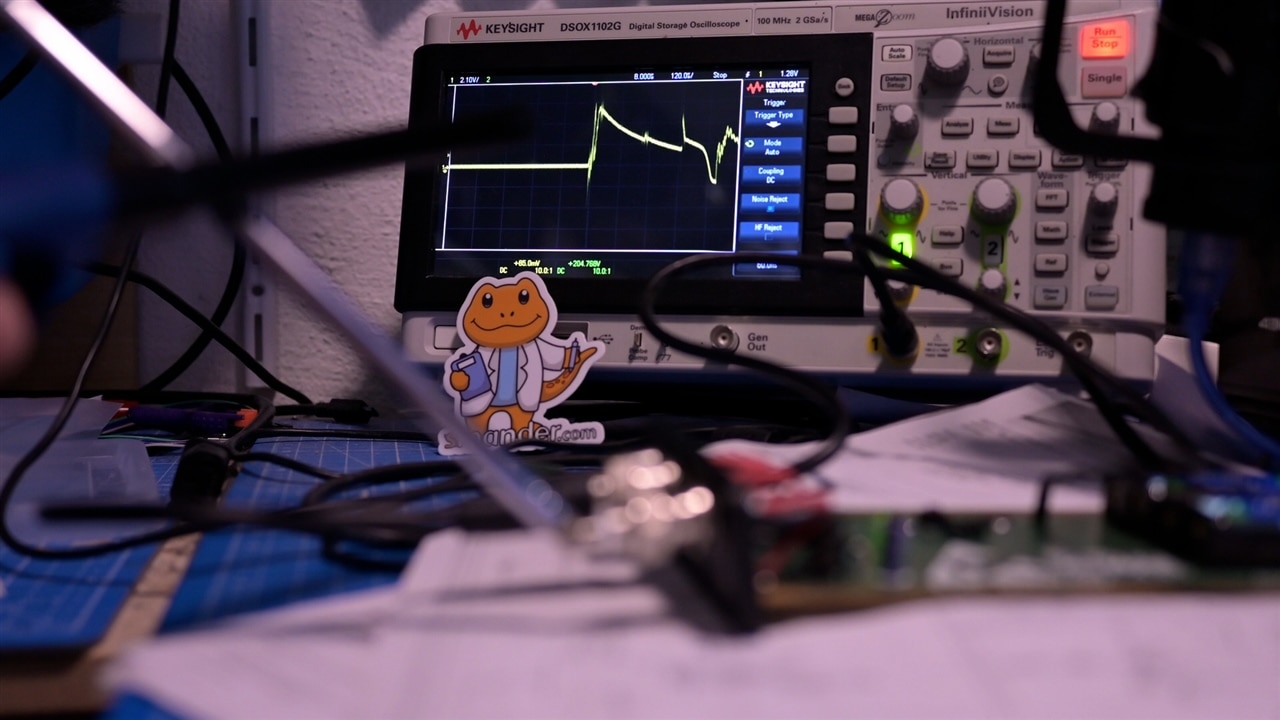
In his video, Clem tests the ESD detector in several scenarios, demonstrating its utility in real-world applications. Examples include:

Detecting static discharges from common sources.
Monitoring motor firings to identify noise-induced disruptions.
Capturing the precise timing of glitches that align with ESD events.

These demonstrations show how the detector can help isolate and address problems that might otherwise remain un-diagnosed.
Importance of Licensing and Attribution

image

Importance of Licensing and Attribution

Clem also discusses the broader implications of using existing designs and materials in DIY projects. By seeking permission to use Wenzel’s circuit and crediting the original creator, Clem reinforces the importance of following licensing requirements. This practice not only respects the work of others but also contributes to a more collaborative and innovative community.
Why Build an ESD Detector?

Why Build an ESD Detector?

For those working with electronics, ESD-related issues can be difficult to identify and resolve. An ESD detector provides a straightforward way to monitor and analyse these events, making it a useful tool for debugging complex systems. Clem’s project offers a clear, practical solution to a common problem, along with insights into the importance of responsible project development.

image

Watch the Full Build

For a detailed walk-through and demonstration, watch Clem’s video to learn more about building and using an ESD detector in your own projects.

image

Supporting Files and Links

  • Wenzel Detector Original Circuit
  • New Lightning Dietector by Charles Wenzel
  •  Supporting files for Episode 669 of element14 presents 

Bill of Materials

Product Name Manufacturer Quantity Buy Kit
HAMMOND Metallgehäuse, S, Aluminium, stranggepresst, 54.61 mm, 103.89 mm, 120.14 mm, IP54 Hammond MFG 1 Buy Now
MULTICOMP PRO Schallwandler, Durchsteckmontage, 1V bis 2V, 10mA, 80dB, 2.048kHz MULTICOMP PRO 1 Buy Now
PANASONIC Elektrolytkondensator, 10 µF, 63 V, ± 20%, Radial bedrahtet, 5000 Stunden bei 105°C, Polarisiert PANASONIC 1 Buy Now
MULTICOMP PRO Chipwiderstand, Oberflächenmontage, 82 kohm, ± 5%, 100 mW, 0603 [Metrisch 1608] MULTICOMP PRO 1 Buy Now
ONSEMI Kleinsignaldiode, Einfach, 100 V, 200 mA, 1 V, 4 ns, 4 A ON SEMI 1 Buy Now
MULTICOMP PRO Chipwiderstand, Oberflächenmontage, 270 kohm, ± 1%, 100 mW, 0603 [Metrisch 1608] MULTICOMP PRO 1 Buy Now
ATTINY412-SSNR Microchip 1 Buy Now
BOURNS Induktivität, radial bedrahtet, Baureihe RLB, 10mH, 34mA, 39 Ohm, ± 10% BOURNS 1 Buy Now
MULTICOMP PRO Keramikvielschichtkondensator, SMD, 120 pF, 50 V, 0603 [Metrisch: 1608], ± 2%, C0G / NP0 MULTICOMP PRO 1 Buy Now
MULTICOMP PRO Bipolarer Einzeltransistor (BJT), NPN, 40 V, 600 mA, 625 mW, TO-92, Durchsteckmontage MULTICOMP PRO 1 Buy Now
MULTICOMP PRO Bipolarer Einzeltransistor (BJT), PNP, 40 V, 600 mA, 625 mW, TO-92, Durchsteckmontage MULTICOMP PRO 1 Buy Now
MULTICOMP PRO Keramikvielschichtkondensator, SMD, 10 pF, 50 V, 0603 [Metrisch: 1608], ± 0.5pF, C0G / NP0 MULTICOMP PRO 1 Buy Now
KEMET Keramikvielschichtkondensator, SMD, AEC-Q200, 1000 pF, 50 V, 0603 [Metrisch: 1608], ± 5% KEMET 1 Buy Now
MICROCHIP LDO-Festspannungsregler, 2.1V bis 6V, 210mV Dropout, 5Vout, 500mAout, SOT-223-3 Microchip 1 Buy Now
MULTICOMP PRO Chipwiderstand, Oberflächenmontage, 1 Mohm, ± 1%, 100 mW, 0603 [Metrisch 1608] MULTICOMP PRO 1 Buy Now
MULTICOMP PRO Chipwiderstand, Oberflächenmontage, 3.9 kohm, ± 1%, 100 mW, 0603 [Metrisch 1608] MULTICOMP PRO 1 Buy Now
PANASONIC Elektrolytkondensator, 100 µF, 16 V, ± 20%, Radial bedrahtet, 2000 Stunden bei 85°C, Polarisiert PANASONIC 1 Buy Now
Additional Parts
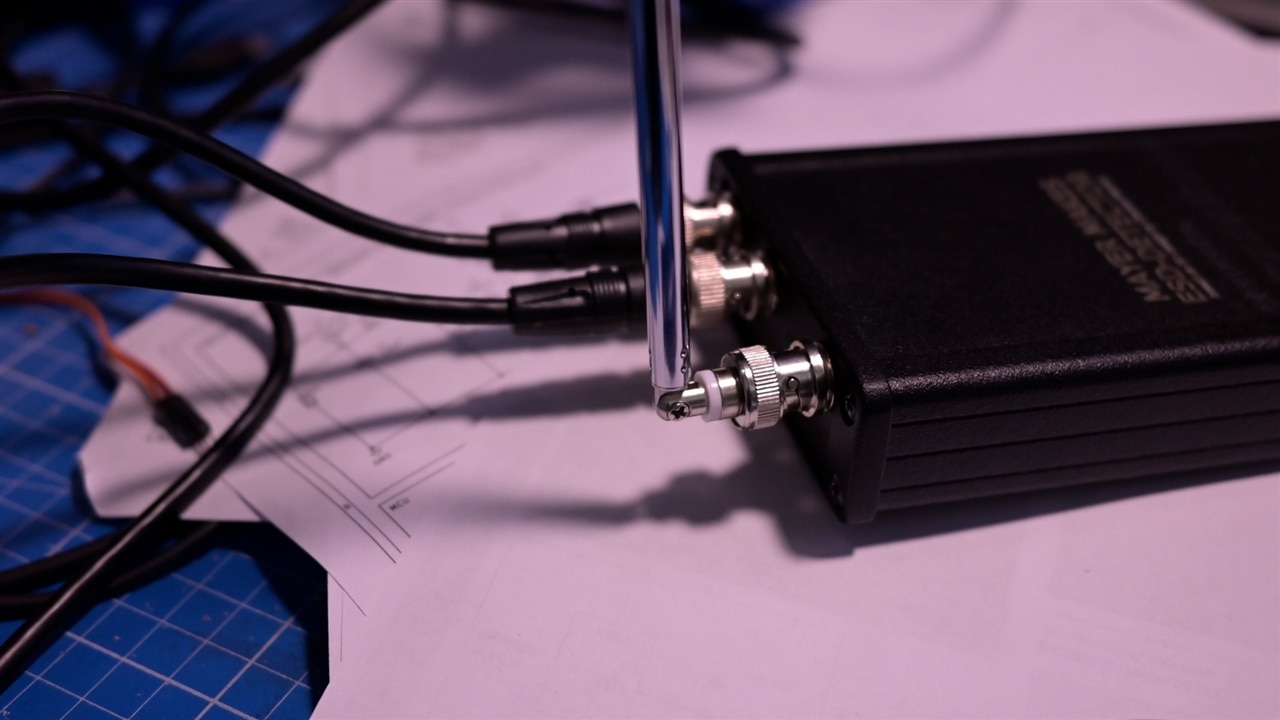
BNC connectors Panel mount
Power switch
BNC antenna
 

element14 presents

element14 presents  |  About Clem  |  Project Videos

  • static electricity detector
  • emc testing
  • esd troubleshooting
  • esd detector
  • electrostatic discharge detector
  • esd detection circuit
  • esd in electronics
  • diy esd tester
  • emi shielding enclosure
  • element14 presents
  • charles wenzel esd circuit
  • attiny412 project
  • electronics debugging tool
  • esd oscilloscope trigger
  • friday_release
  • custom test equipment
  • Share
  • History
  • More
  • Cancel
Actions
  • Share
  • More
  • Cancel
  • Sign in to reply

Top Comments

  • DAB
    DAB 1 month ago +1
    Great build Clem. In my past, I was involved with several projects that had very tough EMI requirements. So I fully understand the importance of knowing where your circuits are susceptible to ESD events…
  • genebren
    genebren 1 month ago +1
    Great build! Sometimes you just have to build the tools that you need to do your job. I have worked on a lot of projects that require a tool that did not exist or was quite expensive, so we have often…
  • michaelkellett
    michaelkellett 1 month ago +1
    Hello Clem, You might want to consider changing your video a bit because you don't describe the circuit correctly and this may be very confusing. The input network of R1, C1 , L1 and L2 is a 300kHz…
  • mayermakes
    mayermakes 22 days ago in reply to michaelkellett

    Thanks for pointing that out. While I can't change the video after the fact, we can at least have these things documented here for future readers and maybe pin the comment. I looked through my notes to see why  I mixed that up. 
    Since the video was done a few months ago, I can´t remember really but I assume that I thought about a different simpler design that I also tried in preperation of the video while recording.  Iscraped the simpler design as it did not reliably trigger on smaller sparks, but kept it in memory while recording.
    Analog circuits are not my usualy game so I might just have defaulted to darlington pair once I spotted two transistors close to each other.
    Sorry for the error and thank you for pointing it out!

    • Cancel
    • Vote Up 0 Vote Down
    • Sign in to reply
    • More
    • Cancel
  • mayermakes
    mayermakes 22 days ago in reply to genebren

    thank you. I plan to make a lot more "purpose driven" tools for such cases.

    • Cancel
    • Vote Up 0 Vote Down
    • Sign in to reply
    • More
    • Cancel
  • mayermakes
    mayermakes 22 days ago in reply to DAB

    Indeed ferrites are friends, but with one caveat: you need to have an assortment ready and compare them. I have the Würth ferrite design kit for example and choosing the wrong ferrite can even have a negative impact. So I sort by main frequency to be filtered and then try the next 3-4 up and down the kit to check their behaviour  usually the ideal value is within this range.

    • Cancel
    • Vote Up 0 Vote Down
    • Sign in to reply
    • More
    • Cancel
  • mayermakes
    mayermakes 22 days ago in reply to beacon_dave

    it is indeed a treasure chest made of awesome circuits!

    • Cancel
    • Vote Up 0 Vote Down
    • Sign in to reply
    • More
    • Cancel
  • DAB
    DAB 28 days ago in reply to beacon_dave

    I agree, the Franklin Bells was just genius.

    When I replaced my weather station, I upgraded to include a lightning sensor.

    So far it has done a fair job of alerting me about an approaching thunderstorm before I hear thunder.

    It does scare the dog when it beeps, but that is a small price to pay for the early alert.

    • Cancel
    • Vote Up 0 Vote Down
    • Sign in to reply
    • More
    • Cancel
  • beacon_dave
    beacon_dave 29 days ago

    That's an interesting project and an interesting site. 

    • Lightning Detectors
    • New Lightning Detector

    On a side note, I've always liked the idea of the Franklin Bells storm warning device and it looks like there could even be a circuit here for that as well. 

    • Cloud Charge Monitor
    • One-Transistor Cloud Charge Monitor

    And down another rabbit hole I go, field mills ...

    (what's that over there on the table ? a toolbox that says 'build me'  Rabbit )

    • Cancel
    • Vote Up +1 Vote Down
    • Sign in to reply
    • More
    • Cancel
  • michaelkellett
    michaelkellett 1 month ago

    Hello Clem,

    You might want to consider changing your video a bit because you don't describe the circuit correctly and this may be very confusing. 

    The input network of R1, C1 , L1 and L2 is a 300kHz band pass filter and impedance matching network.

    Q2 and Q1 are not a Darlington pair but a rather neat mono-stable.

    These things are correctly described by Wenzel at https://techlib.com/electronics/lightning.html

    How about hanging a scope on your design to show the Q1, Q2 part of it in operation ?

    MK

    • Cancel
    • Vote Up +1 Vote Down
    • Sign in to reply
    • More
    • Cancel
  • genebren
    genebren 1 month ago

    Great build!  Sometimes you just have to build the tools that you need to do your job. I have worked on a lot of projects that require a tool that did not exist or was quite expensive, so we have often had to build the tool that we needed. I can see how your tool could be very useful in hardening products by finding their weak spots.  Well done!

    • Cancel
    • Vote Up +1 Vote Down
    • Sign in to reply
    • More
    • Cancel
  • DAB
    DAB 1 month ago

    Great build Clem.

    In my past, I was involved with several projects that had very tough EMI requirements.

    So I fully understand the importance of knowing where your circuits are susceptible to ESD events.

    One thing I learned was that ferrite beads are your friend and should be used liberally on all inputs and outputs.

    • Cancel
    • Vote Up +1 Vote Down
    • Sign in to reply
    • More
    • Cancel
element14 Community

element14 is the first online community specifically for engineers. Connect with your peers and get expert answers to your questions.

  • Members
  • Learn
  • Technologies
  • Challenges & Projects
  • Products
  • Store
  • About Us
  • Feedback & Support
  • FAQs
  • Terms of Use
  • Privacy Policy
  • Legal and Copyright Notices
  • Sitemap
  • Cookies

An Avnet Company © 2025 Premier Farnell Limited. All Rights Reserved.

Premier Farnell Ltd, registered in England and Wales (no 00876412), registered office: Farnell House, Forge Lane, Leeds LS12 2NE.

ICP 备案号 10220084.

Follow element14

  • X
  • Facebook
  • linkedin
  • YouTube