

Milos scavenges parts from a broken robot vacuum to build a custom Wi-Fi controlled robot platform. By repurposing motors, encoders, and a swivel wheel, he creates the Platypus Bot—a budget-friendly robot inspired by the TurtleBot3. Using 3D-printed parts, common hardware, and a drill battery for power, Milos walks through the design, assembly, and programming stages, including joystick control via UDP. Perfect for makers looking to save money and build from what they already have.
Watch the Project Video
Have you ever searched online for parts that you needed for your robotics projects online, only to finally found the perfect part, whether that’s a board, or a motor, but there was something odd when you went to the site. Instead of the price, you saw the ask for quote. At that point you knew that that part was too expensive and out of reach for you hobby projects. While a lot of these parts have high justifiable prices for a company, if you’re working on your own smaller hobby projects, you need to find a way of finding parts cheaper. One way to do such a thing is to salvage parts like motors and sensors from old devices. In this video, Milos shows how you can reuse some of the parts from an old 10$ vacuum cleaner robot!
Idea & Design
Robot vacuum cleaner have exploded and they are everywhere, a brand new one can be found for less than a 100$. Which is impressive considering all of the necessary electronics and programming that are needed for it to be able to circumnavigate your whole house or apartment on its own! These little robots usually have two driven wheels and a third smaller swivel wheel that is not actuated. For the robot to be able to handle hundreds of hours of work, those motors had to be made durable, and this is the reason why they are such a good choice for your robotics projects! In half an hour, using a screw driver (and just a tiny bit of force), Milos managed to completely disassemble the robot and sort out what parts seem useful for his projects.

For the robot Milos wanted to build, he only needed the drive motors and the small swivel wheel. His idea for this project was to make a robot that resembles the popular turtlebot3 platform, that is used all over the world for teaching robotics. Another great thing about these motors is that because the vacuum robots need to keep their position to know where they are in the apartment, all of them come with encoders on the wheels, which is a big plus!
Milos got to work designing his robot platform, named the Platypus Bot, since it’s inspired by the Turtle Bot, with the difference being, it’s made out of random bits, which is kinda what nature did when it was making the platypus!
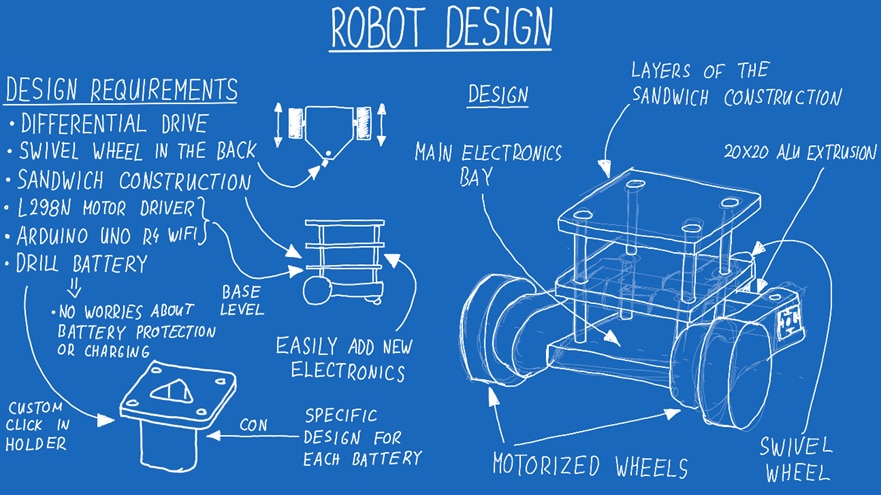
It’s a differential drive system with two wheels in the front and the swivel wheel in the back, and he decided that the body of the robot should have a sandwich style structure, so that levels can easily be added to the robot, which means we can easily add more electronics and sensors down the line! For powering the robot, to stick with the theme of the build, he went with a battery from his power drill, since that battery already has built in protection, and there is no need for making a new charger for it!
The rest of the robot is made out of widely available hardware like M3 and M4 screws and a single piece of 20x20 aluminium extrusion (though the chassis can be designed without it) and of course 3D printed parts. Milos decided to go with PETG for this build, but PLA would work just fine as well. Here are some pictures of the finished CAD model.


This is the completely bare-bones version with no additional levels. But, if we want to go the extra mile to capture the full functionality of the turtle bot, we can add two more levels, one having the Raspberry Pi and the top level having a 360 degree LIDAR.


For now, Milos just wants to drive around the robot, but he plans on going deeper into robotics and showing some SLAM algorithms and how this robot can be programmed to go to the next level.
Electronics
Since the whole idea was to keep it as beginner friendly and budget friendly as possible, the electronics are simple as it gets. Milos decided to use the new Arduino Uno R4 WiFi, since it has WiFi capabilities which are needed for the communication, and the L298N motor driver, which is probably the most widely available motor driver for hobbyists.

Testing
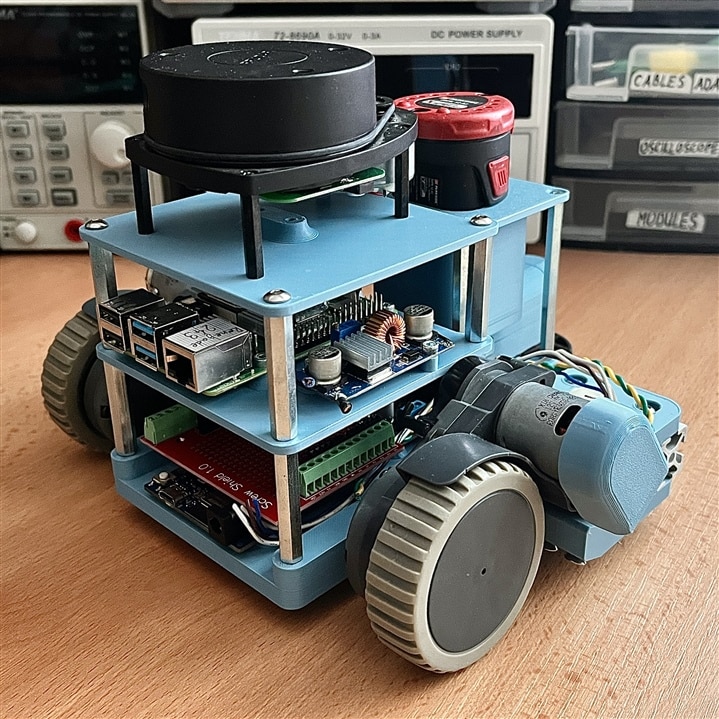
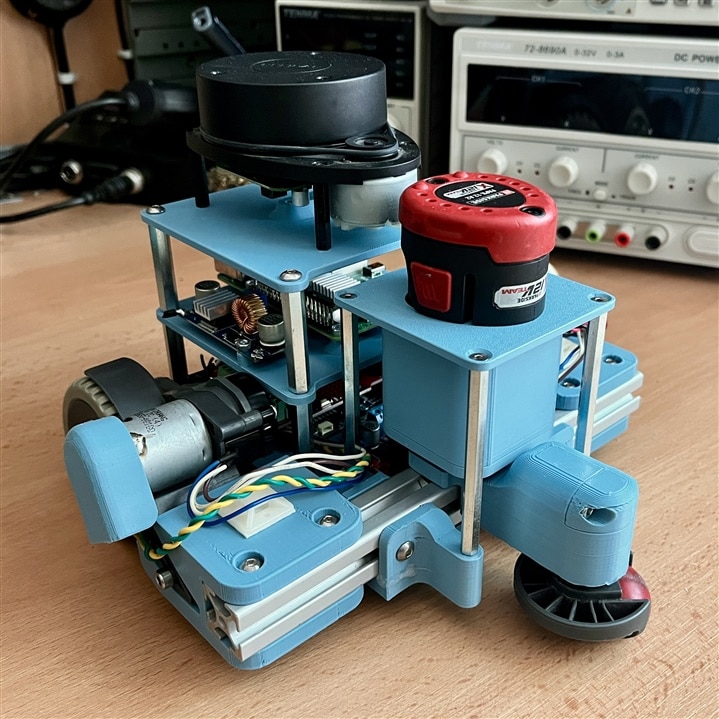
After a quick assembly the robot was ready to roll! Control is done using UDP, and he controlled the robot using a joystick connected to the PC where a Python script converted all of the joystick movements into PWM values for the Arduino and sent them using UDP. Here are a couple of pictures of the finished Platypus Bot! If you decide to make your own version of the Platypus Bot, make sure to share it here so we can see your creation!
Supporting Links and Downloads
- Episode 671 Resources - including github repo snapshot
Bill of Materials
| Product Name | Manufacturer | Quantity | Buy Kit |
|---|---|---|---|
| Arduino Uno R4 WiFi - ABX00087 | ARDUINO | 1 | Buy Now |
| L298N Motor Driver - 105990007 | SEEED STUDIO | 1 | Buy Now |
Additional Parts
| Product Name | Manufacturer | Quantity |
|---|---|---|
| Broken/old robot vacuum cleaner | n/a | 1 |
| Aluminum 20x20 profile | n/a | 1 |
| Battery powered drill | n/a | 1 |
| PLA or PETG filament | n/a | 1 |
| M3 and M4 screws | n/a | 1 |


