element14 Community
element14 Community
    Register Log In
  • Site
  • Search
  • Log In Register
  • About Us
  • Community Hub
    Community Hub
    • What's New on element14
    • Feedback and Support
    • Benefits of Membership
    • Personal Blogs
    • Members Area
    • Achievement Levels
  • Learn
    Learn
    • Ask an Expert
    • eBooks
    • element14 presents
    • Learning Center
    • Tech Spotlight
    • STEM Academy
    • Webinars, Training and Events
    • Learning Groups
  • Technologies
    Technologies
    • 3D Printing
    • FPGA
    • Industrial Automation
    • Internet of Things
    • Power & Energy
    • Sensors
    • Technology Groups
  • Challenges & Projects
    Challenges & Projects
    • Design Challenges
    • element14 presents Projects
    • Project14
    • Arduino Projects
    • Raspberry Pi Projects
    • Project Groups
  • Products
    Products
    • Arduino
    • Avnet Boards Community
    • Dev Tools
    • Manufacturers
    • Multicomp Pro
    • Product Groups
    • Raspberry Pi
    • RoadTests & Reviews
  • Store
    Store
    • Visit Your Store
    • Choose another store...
      • Europe
      •  Austria (German)
      •  Belgium (Dutch, French)
      •  Bulgaria (Bulgarian)
      •  Czech Republic (Czech)
      •  Denmark (Danish)
      •  Estonia (Estonian)
      •  Finland (Finnish)
      •  France (French)
      •  Germany (German)
      •  Hungary (Hungarian)
      •  Ireland
      •  Israel
      •  Italy (Italian)
      •  Latvia (Latvian)
      •  
      •  Lithuania (Lithuanian)
      •  Netherlands (Dutch)
      •  Norway (Norwegian)
      •  Poland (Polish)
      •  Portugal (Portuguese)
      •  Romania (Romanian)
      •  Russia (Russian)
      •  Slovakia (Slovak)
      •  Slovenia (Slovenian)
      •  Spain (Spanish)
      •  Sweden (Swedish)
      •  Switzerland(German, French)
      •  Turkey (Turkish)
      •  United Kingdom
      • Asia Pacific
      •  Australia
      •  China
      •  Hong Kong
      •  India
      •  Korea (Korean)
      •  Malaysia
      •  New Zealand
      •  Philippines
      •  Singapore
      •  Taiwan
      •  Thailand (Thai)
      • Americas
      •  Brazil (Portuguese)
      •  Canada
      •  Mexico (Spanish)
      •  United States
      Can't find the country/region you're looking for? Visit our export site or find a local distributor.
  • Translate
  • Profile
  • Settings
Project Videos
  • Challenges & Projects
  • element14 presents
  • Project Videos
  • More
  • Cancel
Project Videos
Documents DIY RF Modulator + Raspberry Pi Pico = Gaming on a Sony Watchman FD-10A CRT -- Episode 682
  • Documents
  • Members
  • Mentions
  • Sub-Groups
  • Tags
  • More
  • Cancel
  • New
Join Project Videos to participate - click to join for free!
Related
Recommended
Engagement
  • Author Author: cstanton
  • Date Created: 10 Sep 2025 10:35 PM Date Created
  • Last Updated Last Updated: 10 Sep 2025 10:41 PM
  • Views 417 views
  • Likes 10 likes
  • Comments 5 comments

DIY RF Modulator + Raspberry Pi Pico = Gaming on a Sony Watchman FD-10A CRT -- Episode 682

Andy takes a 1987 Sony Watchman portable CRT TV and transforms it into a working retro arcade system—without modifying the TV itself. Using a Raspberry Pi Pico, custom NTSC video generation, a hand-built RF modulator, and an Atari joystick, he codes an original Space Invaders–style game that broadcasts wirelessly to the Watchman. Along the way, he tackles composite video generation from scratch, resistor ladder DAC design, precise timing with PIO and DMA, and building RF circuitry from a 1985 magazine schematic.

Watch the Project

You don't have permission to edit metadata of this video.
Edit media
x
image
Upload Preview
image

Why the Sony Watchman?

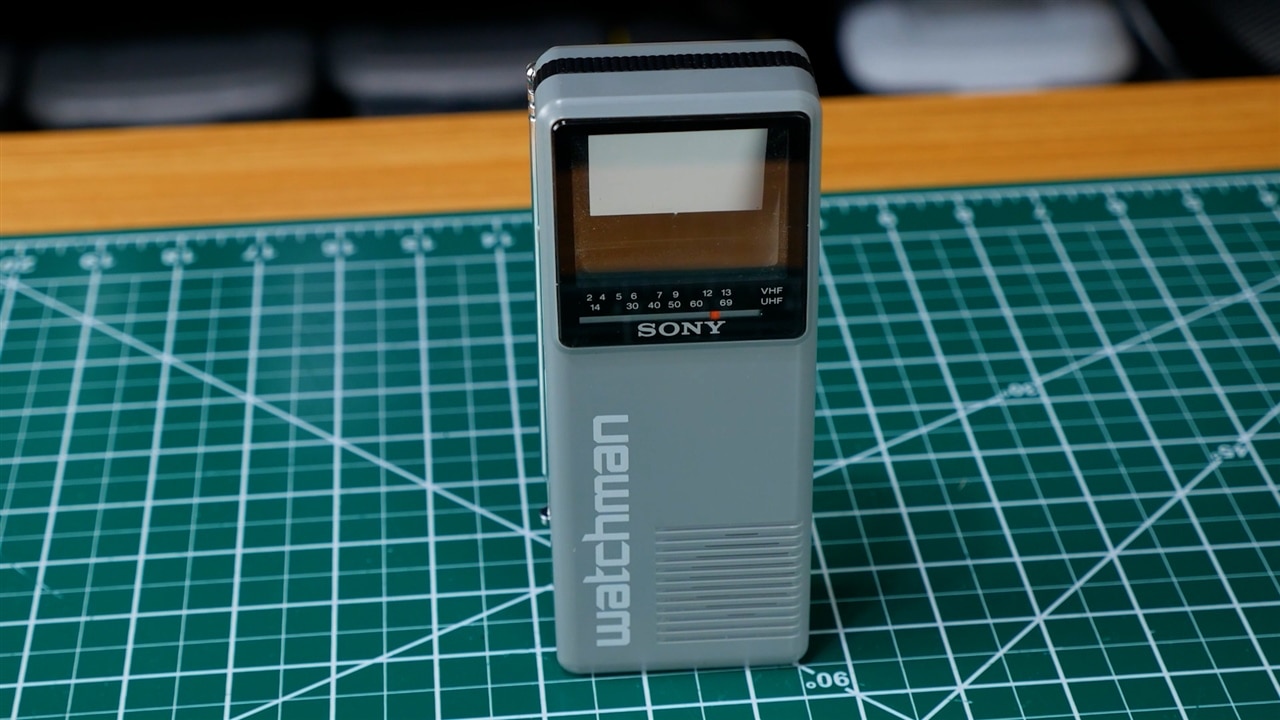
Andy set out to transform a Sony Watchman portable CRT television from 1987 into a fully functioning retro-style video arcade. The challenge was to achieve this without making any permanent modifications to the TV itself. With no video inputs, only an antenna and headphone jack, the Watchman wasn’t built with gaming in mind. But by combining modern microcontrollers with some old-school RF circuitry, Andy proved that it could still be done.

image

The Hardware at the Core

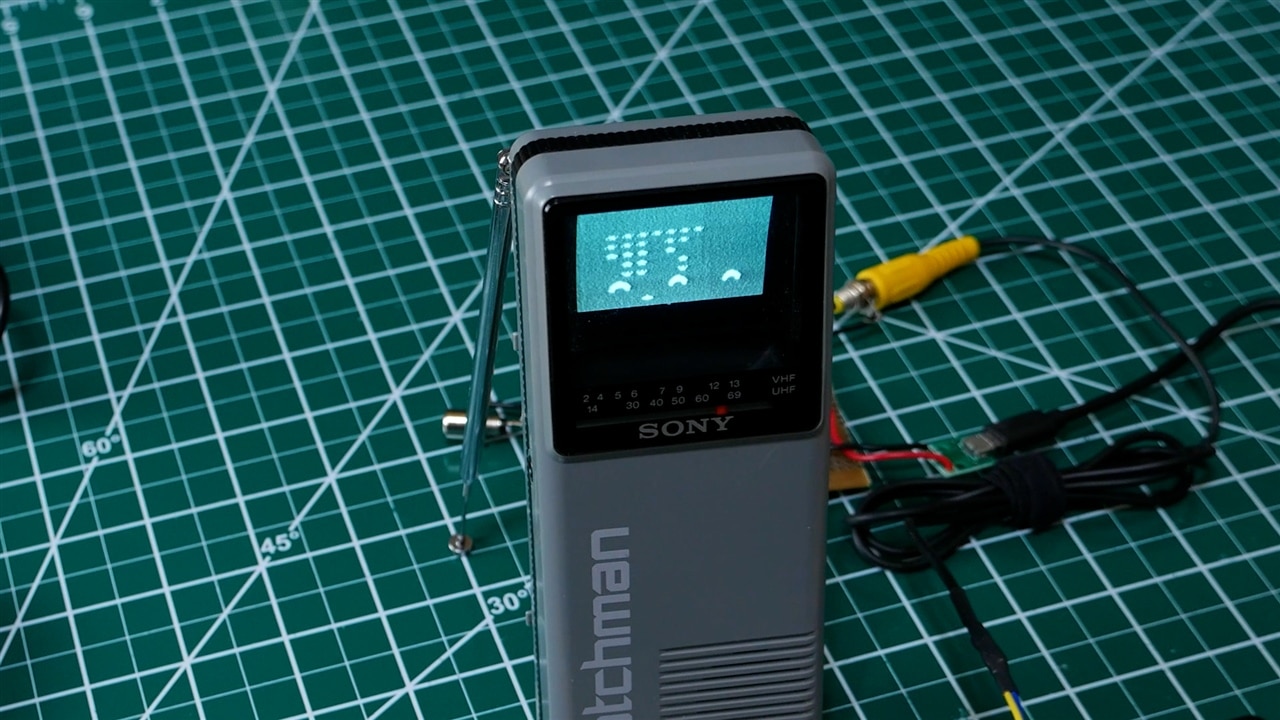
The Watchman model FD-10A has a unique design, featuring a flattened CRT tube with a vertical layout that shows the inside of the tube rather than using a mirror. Powered by four AA batteries, it was originally designed for analogue broadcasts, something long gone in the US since the late 2000s. To breathe new life into it, Andy needed to generate his own TV signal, which meant building a low-powered RF transmitter.

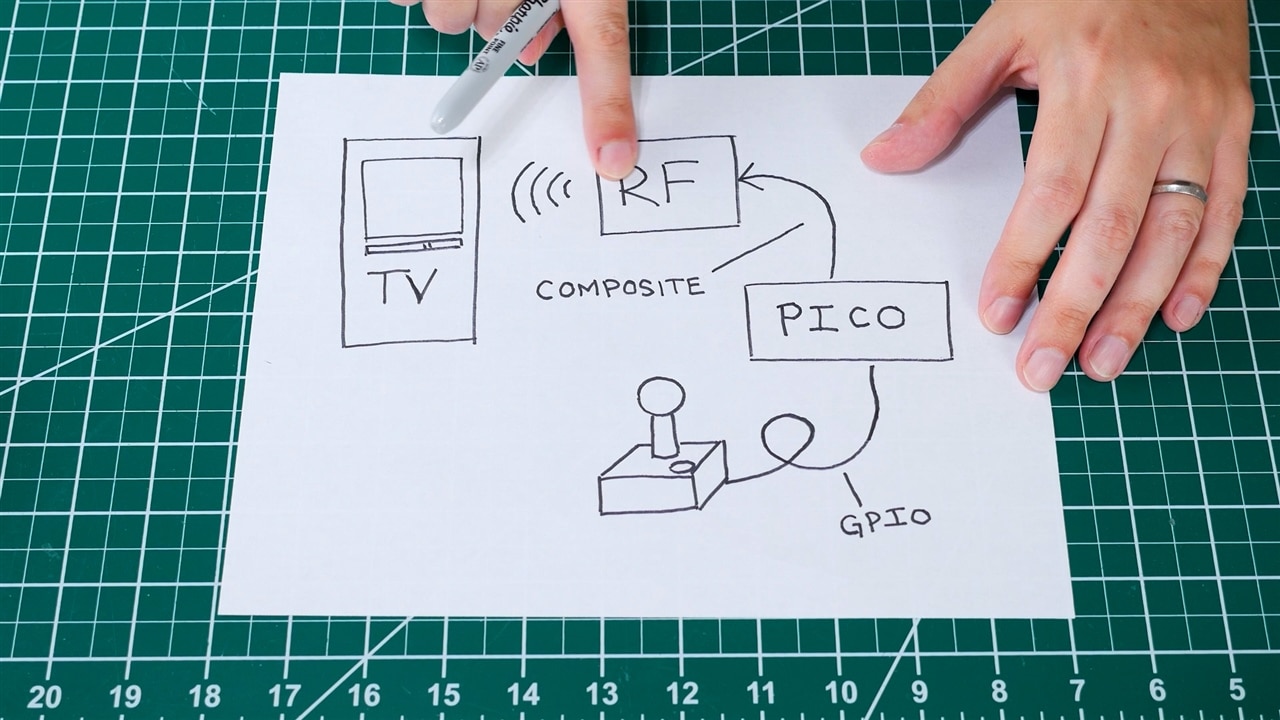
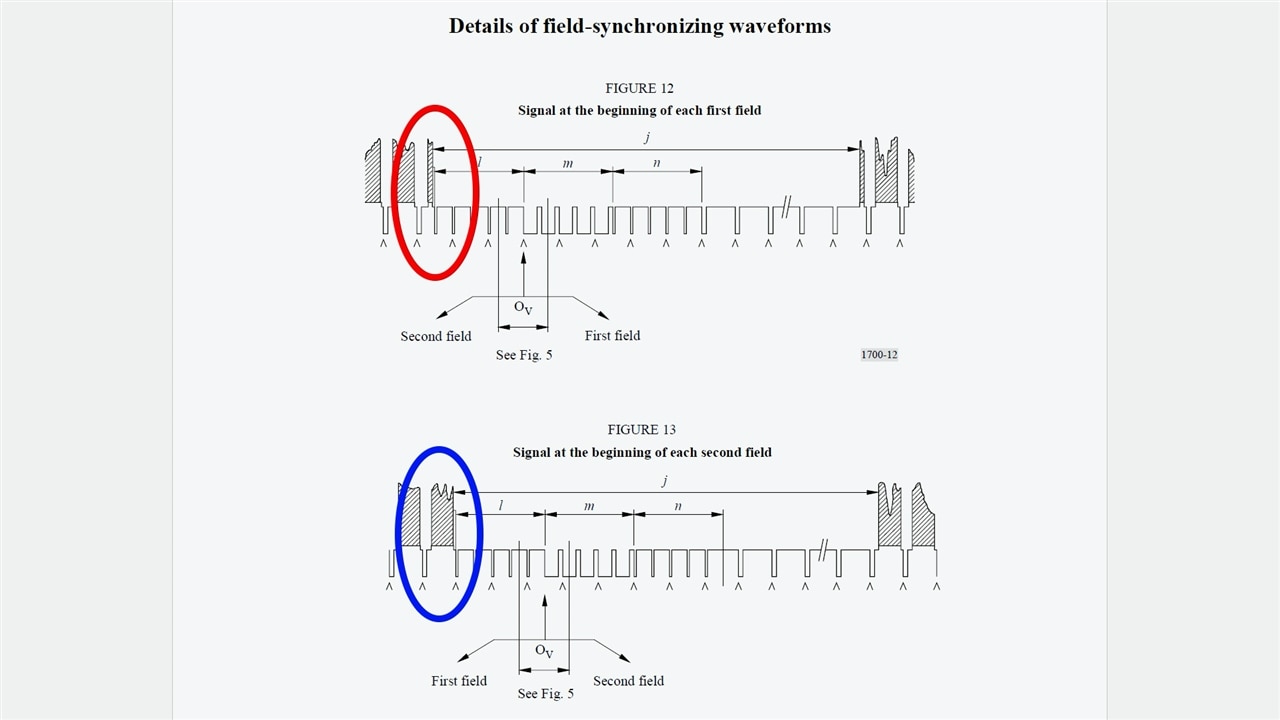
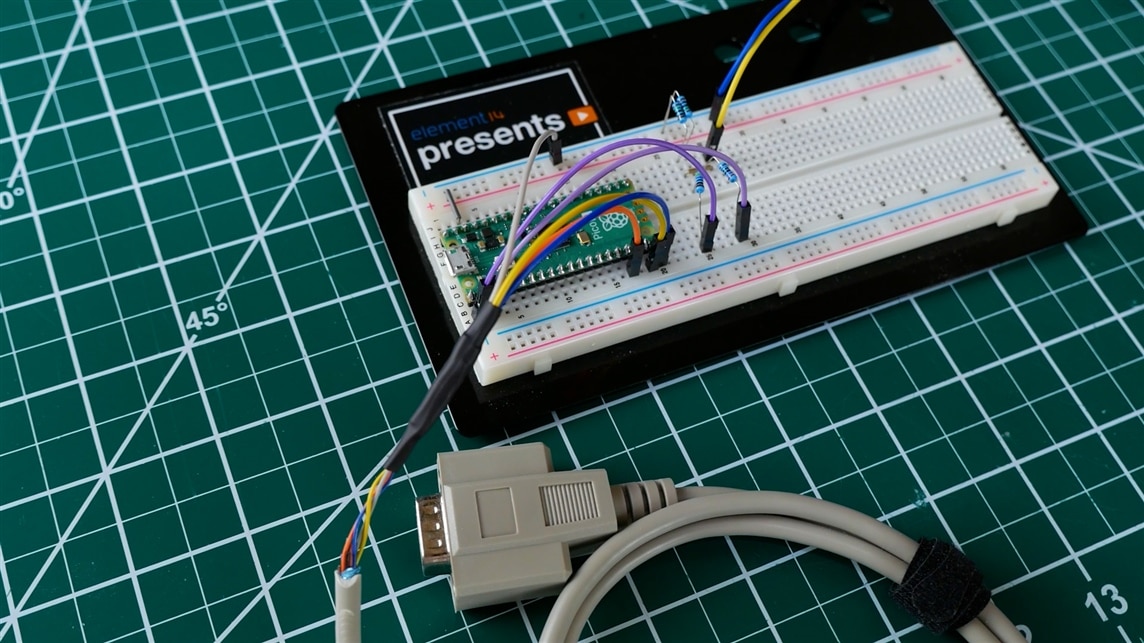
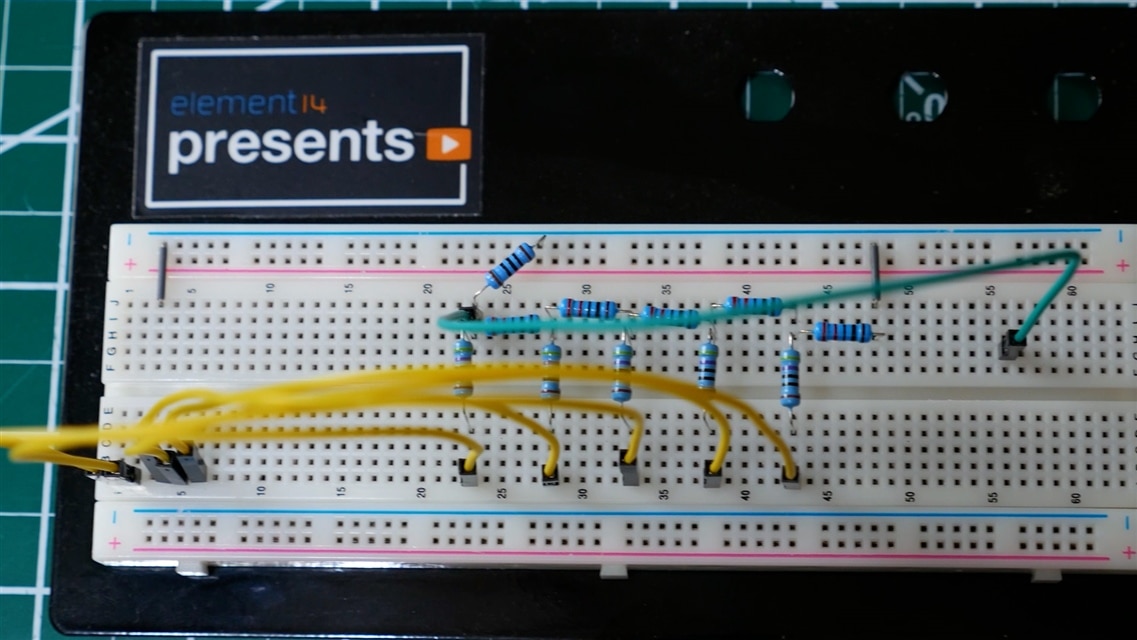
The hardware core of the build is a Raspberry Pi Pico, chosen to run the custom arcade game. Since the Pico lacks video output, Andy implemented composite video generation entirely in software, starting with a resistor ladder DAC to convert digital signals into analogue voltages. After testing with simple waveforms, he coded precise NTSC signal timings, using the Pico’s PIO (programmable I/O) and DMA (direct memory access) to offload the heavy lifting and free the CPU for game logic. To keep visuals smooth, he implemented double buffering, allowing frames to alternate cleanly without tearing or skipped frames.

image

Bringing in RF Modulation

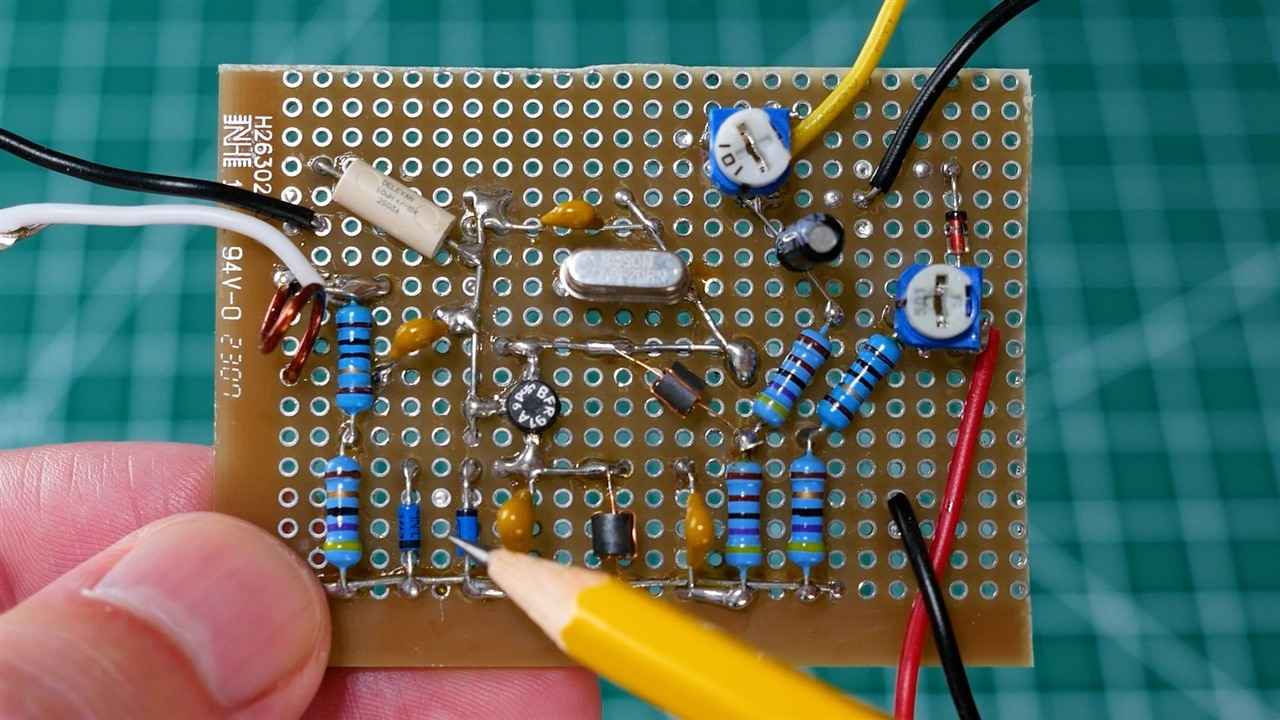
Rather than hack the Watchman for composite input, Andy looked back to the technology of the era. He dug up a 1985 magazine schematic for a DIY RF modulator and set about building one on protoboard. This involved careful soldering on a board with a ground plane, winding custom inductors, sourcing a now-obsolete BFR91 transistor, and working around some ambiguous component specifications. It wasn’t straightforward—especially when it came to selecting the right inductors—but Andy pieced the circuit together and added modern conveniences like a USB breakout for power.

imageimage

Coding the Game

For the game itself, Andy coded an original title called Cosmic Attack, inspired by classics like Space Invaders. Graphics were designed by hand on graph paper before being translated into byte arrays, mimicking the workflow of early developers. He even wrote his own sprite and text rendering routines, since the Pico lacks built-in graphics hardware. Input was handled by an Atari 7800 joystick, wired to the Pico through a simple DB9 connector.

image

Overcoming the Challenges

There were hurdles along the way: video standards mismatches, failed attempts with existing code libraries, tricky timing requirements, and uncertainty around RF component choices. But overcoming those challenges was part of the fun. The result is a working prototype arcade system powered by nothing more than a Raspberry Pi Pico, a handful of components, and a lot of persistence.

imageimage

A Watchman Reborn

After countless refinements, the system came to life. The Pico’s video output was fed into the homemade RF modulator, which in turn broadcast wirelessly to the Watchman’s antenna. Scanning the channels revealed the game running on the tiny 2-inch screen, proving the concept worked!

Andy plans to revisit the project again in the future to refine the design further, but for now, the Watchman has been given a second life as a portable retro gaming machine.

imageimage

  • retro arcade build
  • ntsc video raspberry pi pico
  • resistor ladder dac video
  • homebrew arcade console
  • sony watchman fd-10a
  • sony watchman arcade mod
  • pio dma video output pico
  • atari joystick raspberry pi pico
  • watchman fd-10a retro gaming
  • raspberry pi pico arcade
  • diy rf modulator
  • retro gaming on crt
  • vintage tv gaming project
  • friday_release
  • pico microcontroller game system
  • composite video generation pico
  • Share
  • History
  • More
  • Cancel
Actions
  • Share
  • More
  • Cancel
  • Sign in to reply

Top Comments

  • colporteur
    colporteur 20 hours ago +1
    What was covered in a television repair course 50 years ago you did in less than 15 minutes of video. Great job.
Parents
  • DAB
    DAB 2 days ago

    Nice project.

    While I am not a gamer, I appreciate going back in time to when we had to build our own video graphics.

    I used a similar approach for a heads down display for a search and rescue helicopter system I helped build back in 1982 where we put flight parameters on a FLIR screen so the pilots could fly in 0-0 visibility.

    So thanks for the trip down memory lane.

    • Cancel
    • Vote Up 0 Vote Down
    • Sign in to reply
    • More
    • Cancel
Comment
  • DAB
    DAB 2 days ago

    Nice project.

    While I am not a gamer, I appreciate going back in time to when we had to build our own video graphics.

    I used a similar approach for a heads down display for a search and rescue helicopter system I helped build back in 1982 where we put flight parameters on a FLIR screen so the pilots could fly in 0-0 visibility.

    So thanks for the trip down memory lane.

    • Cancel
    • Vote Up 0 Vote Down
    • Sign in to reply
    • More
    • Cancel
Children
No Data
element14 Community

element14 is the first online community specifically for engineers. Connect with your peers and get expert answers to your questions.

  • Members
  • Learn
  • Technologies
  • Challenges & Projects
  • Products
  • Store
  • About Us
  • Feedback & Support
  • FAQs
  • Terms of Use
  • Privacy Policy
  • Legal and Copyright Notices
  • Sitemap
  • Cookies

An Avnet Company © 2025 Premier Farnell Limited. All Rights Reserved.

Premier Farnell Ltd, registered in England and Wales (no 00876412), registered office: Farnell House, Forge Lane, Leeds LS12 2NE.

ICP 备案号 10220084.

Follow element14

  • X
  • Facebook
  • linkedin
  • YouTube