


Mark builds a motion-activated “haunted painting” using an ESP32, a MAX98357 I²S audio board, and a PIR motion sensor to make a framed photo whisper or talk when someone walks by. The project is simple to wire, fits neatly inside a photo frame, and can be customised for Halloween, cosplay, or even pranks. Mark walks through the full build, from cutting the frame and soldering components to programming the ESP32 in Arduino, so you can easily recreate it. Perfect for anyone wanting to mix art, electronics, and a bit of Halloween mischief.
Watch the Project
The Old Forgotten Question
More than 30 years ago, Mark was playing saxophone in a pop band. That experience exposed him to different cultures and creative environments, including people who viewed art in unconventional ways. One friend in particular was always experimenting with interactive pieces: a curtain that opened and closed when someone entered a room, a cigarette lighter that warned, “Don’t do it!”, and even a glass that refilled itself each time someone took a sip.
Among all her ideas, there was one she never managed to realise. Long before Harry Potter or affordable hobby electronics, she wanted a photo frame that whispered to anyone who walked by. The thought of a painting quietly saying “psst...” to a passerby was both strange and amusing, a piece of art that felt alive.
Mark recently remembered that idea while preparing for Halloween. He contacted his old friend, who was surprised but delighted that her concept was finally being built. As Mark put it, he was “more than happy to build that prototype”, a talking, motion-activated picture frame, as his next Halloween decoration.
That old idea became the starting point for Mark’s project, a motion-activated “haunted painting” that uses an ESP32, MAX98357 I²S audio board, and PIR motion sensor to trigger eerie sounds when motion is detected.
Building the Haunted Painting
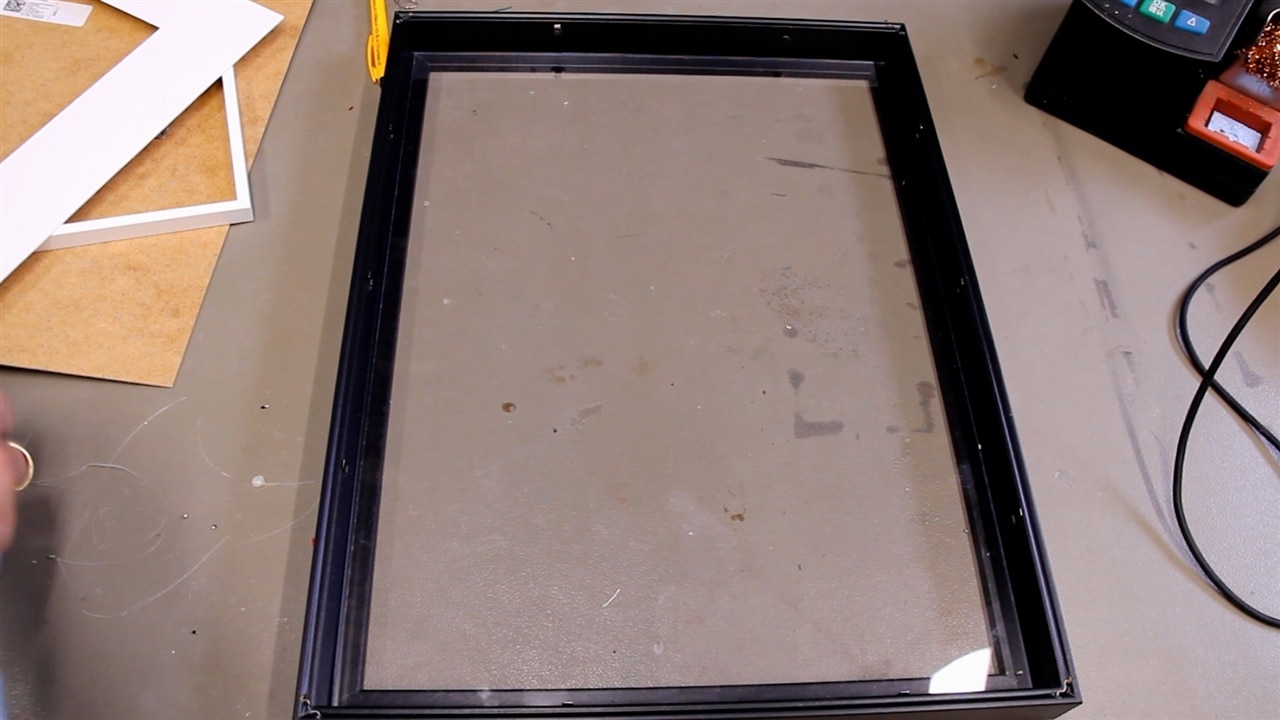
Mark began by choosing a raised photo frame, explaining in the video:
“I picked a raised frame. That way, I can use the hollow space between picture and back to mount all electronics.”
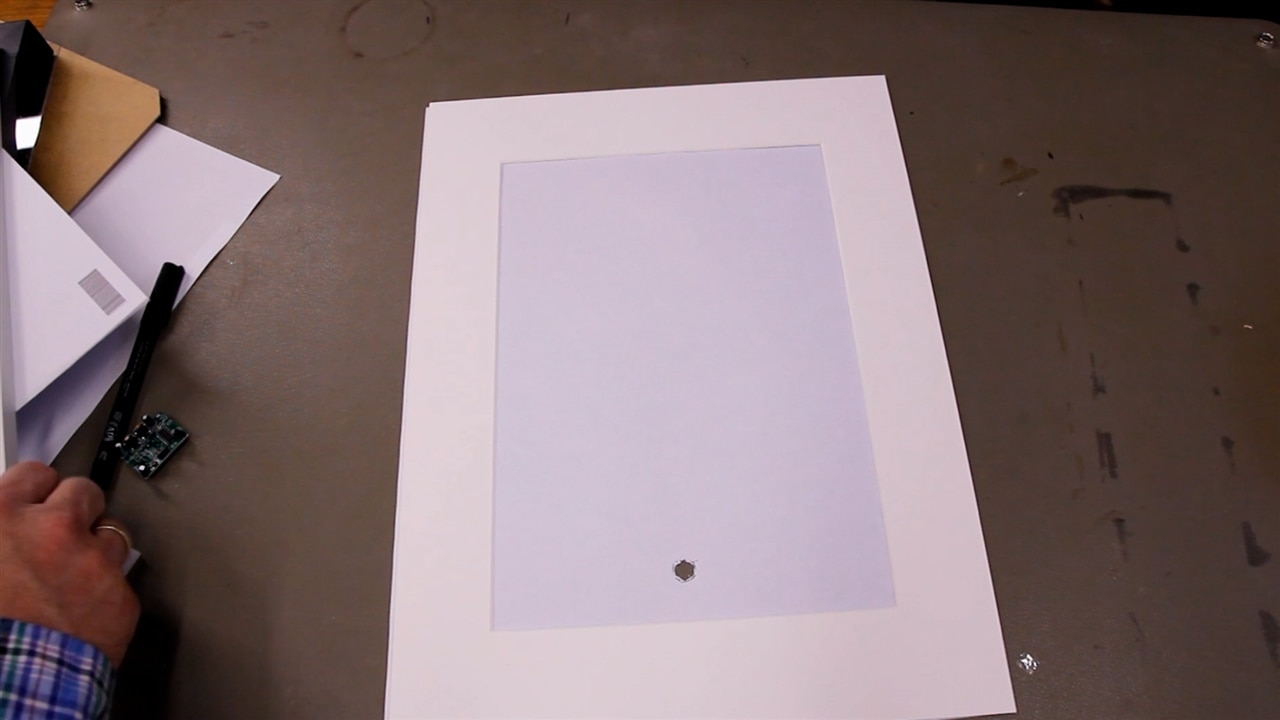
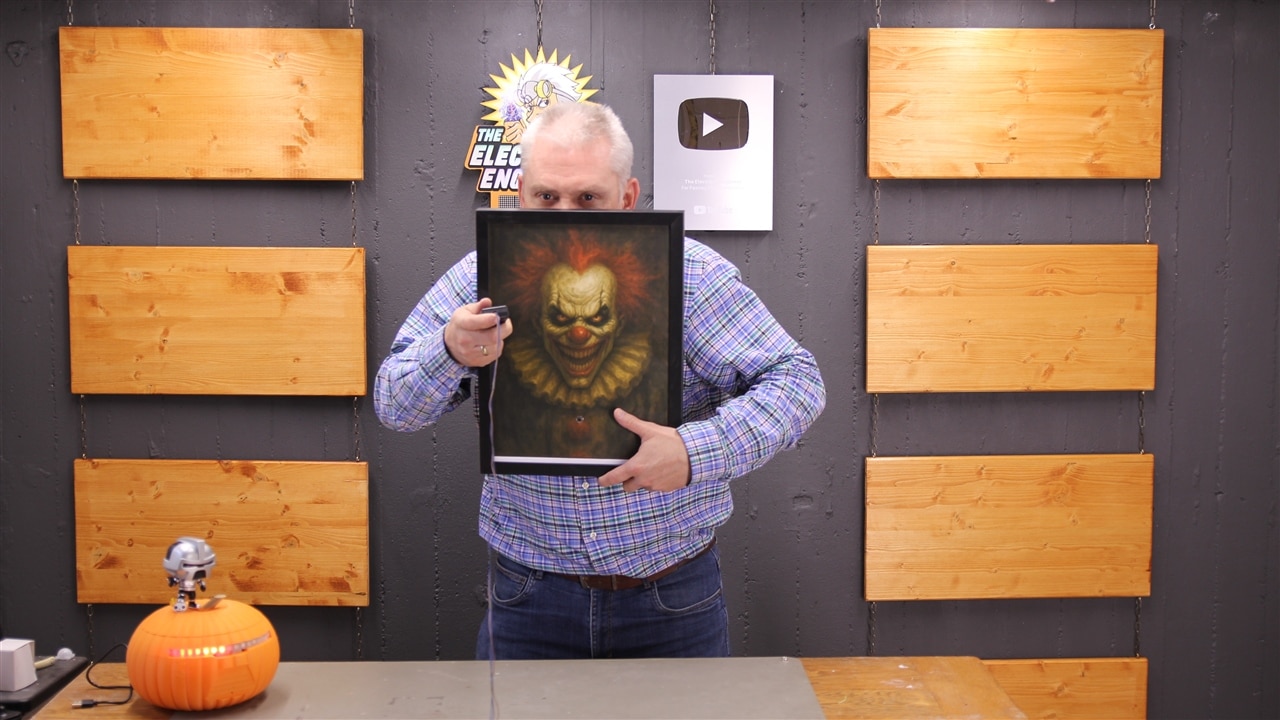
He used a printed image of a clown — “you can use any painting,” he added — and made a small circular hole for the PIR sensor. It can detect motion through Plexiglas, but he wasn’t sure about glass, saying,
“It will work behind Plexiglas but I’m not sure that it will also work behind real glass. I didn’t try.”
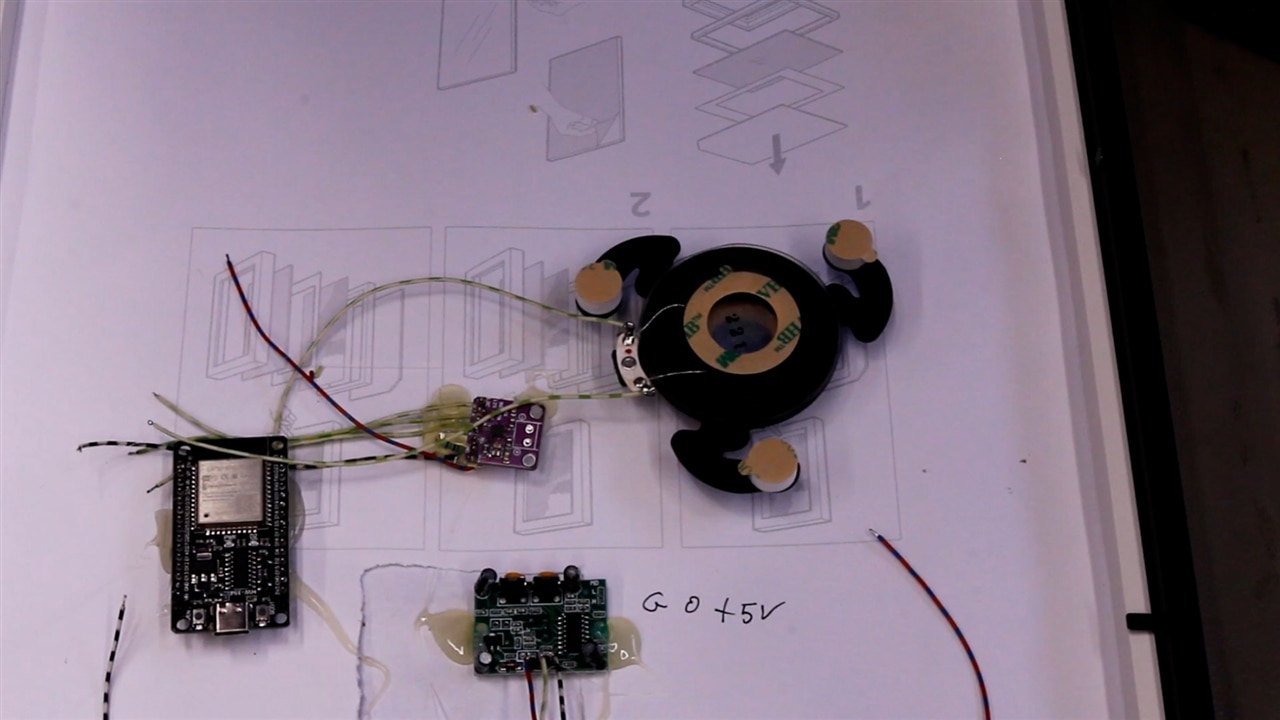
Behind the frame, the ESP32, audio board, motion sensor, and speaker exciter were glued in place. The exciter turned the backboard of the frame into the speaker itself — a compact way to produce sound without visible components. “So the whole back wall will become part of the speaker,” he noted, ensuring that nothing would spoil the illusion from the front.
All wiring was done directly rather than on a PCB. Mark pointed out that it was quicker and sufficient for the small build:
“With only a few wires, I will not even bother to make a PCB. I’ll just wire it directly and put it inside the frame.”
Hardware Overview
Components used:
- Large photoframe
- Scary photo, or whatever photo you think is best for your taste
- ESP32 Doit Devkit V1
-
MAX98357 I²S Audio Board
-
PIR Motion Sensor
-
Speaker or Exciter
-
Hot glue and jumper wires
The motion sensor outputs a high signal when detecting movement, triggering the ESP32 to play one of several stored sound files such as “laugh.mp3” or “pst.mp3.” The MAX98357 handles the I²S digital audio output.
Mark wired the ESP32 pins as follows:
| Component | Pin |
|---|---|
| I²S DOUT | GPIO 18 |
| I²S BCLK | GPIO 19 |
| I²S LRC | GPIO 21 |
| PIR Sensor | GPIO 5 |
He emphasised simplicity: “It’s really quick and dirty,” he said. “It fits the theme: Halloween.”
Software and Code
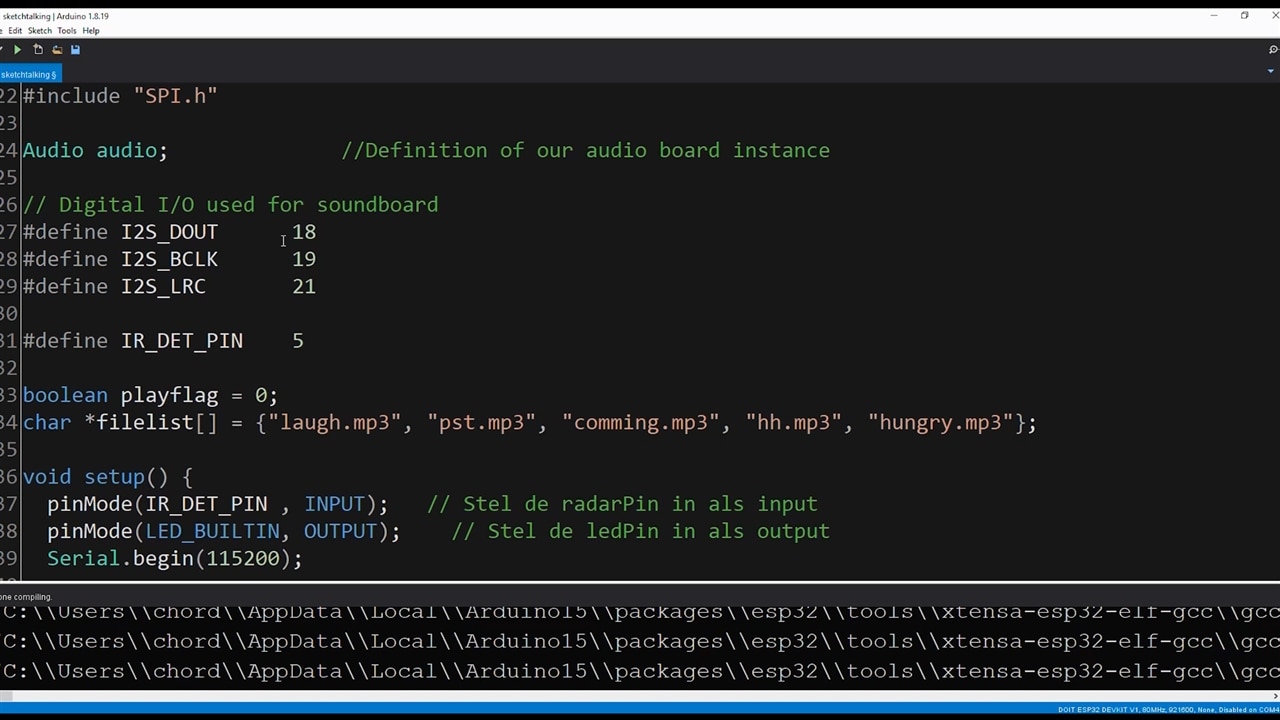
Programming was done in the Arduino IDE (version 1.x), since version 2.x removes the SPIFFS upload tool needed to transfer audio files. “Make sure you’re using version one and not version two,” Mark reminded.
The core of the program initialises the ESP32, mounts SPIFFS storage, and plays a default sound at boot. It then continuously checks the PIR sensor and triggers random audio clips on detection.
Below is an excerpt from the project’s main sketch:
#define I2S_DOUT 18
#define I2S_BCLK 19
#define I2S_LRC 21
#define IR_DET_PIN 5
boolean playflag = 0;
char *filelist[] = {"laugh.mp3", "pst.mp3", "comming.mp3", "hh.mp3", "hungry.mp3"};

void loop() {
  audio.loop();
  if (digitalRead(IR_DET_PIN) == 1) {
    if (playflag == 0) {
      int randNumber = random(0, 5);
      playflag = 1;
      if (!audio.connecttoFS(SPIFFS, filelist[randNumber])) {
        playflag = 0;
      }
    }
  } else {
    digitalWrite(LED_BUILTIN, LOW);
  }
}
Each time the motion sensor triggers, one of five preloaded MP3s plays through the I²S audio board. The audio_eof_mp3() routine resets the play flag, allowing new sounds on the next detection.
“It looks at pin five to see if there is movement,” Mark said in the video. “If there is a high level on pin five, then it will start playing an audio file if it’s not already playing one.”
Adjusting the Motion Sensor and Frame
The PIR sensor used includes two potentiometers for tuning: one for sensitivity, and one for timeout delay.
Mark explained:
“If you have too many triggers of sound, you might want to take it down a bit. Or if you want more triggers, you kick it up a notch.”
The timeout delay prevents constant retriggering. “You can say, ‘I don’t want to activate this more than once every minute or half an hour,’” he said, noting that users can fine-tune it depending on placement.
Mark purposely chose a raised frame, ensuring that they could use the hollow space between the picture and back to mount all of the electronics, highlighting the following points:
- Find a nice spot in the photo where you can make a small circular hole to fit the PIR motion detector. It will work behind Plexiglas, real glass may reflect.
- Use hot glue to fixate all the components at the back of the frame.
- Connect the wires, according to the schematic.
- Program the ESP32 and upload the sound files.
- Connect to power
Final Assembly
Once glued and wired, the frame’s front appeared unchanged, aside from a barely visible motion sensor:
“All you see here is a little sensor,” Mark said, flipping the frame over. “If you want to do it perfectly, you could put the sensor somewhere in the painting so it becomes part of it.”
After programming, testing, and uploading sound files, Mark powered it up. As someone walked by, the painting whispered, buzzed, and laughed, exactly as imagined decades earlier.
The result is a compact, reproducible Halloween project that combines basic electronics, creative design, and some nostalgia.
As Mark concluded:
“Have fun scaring your neighbors.”
Supporting Links and Files
Bill of Materials
| Product Name | Manufacturer | Quantity | Buy Kit |
|---|---|---|---|
| ASX08808-TP-R, Exciter, 80Hz to 10.5kHz, 8 ohm, 103dBA, 20W, Round, Square Frame, Bare Mount | PUI Audio | 1 | Buy Now |
| Product Name | |||
| ESP32 Doit Devkit V1 ( other boards will work after adjusting the sketch) | |||
| Audio Board I2s with Max98357 | |||
| Movement Detection module | |||
| wires | |||
| Photo Frame A3 to your liking | |||
Top Comments
-

beacon_dave
-
Cancel
-
Vote Up
+1
Vote Down
-
-
Sign in to reply
-
More
-
Cancel
Comment-

beacon_dave
-
Cancel
-
Vote Up
+1
Vote Down
-
-
Sign in to reply
-
More
-
Cancel
Children