

Clem takes a broken robot vacuum and transforms it into a modular, network-controlled platform powered by Raspberry Pi 5, tackling real-time control, power challenges, and GPIO quirks along the way
Time to Clean-Up!
Network-Controlled Modular Robot Built from a “Rubbish” Vacuum Base
In this project, Clem takes what most people would consider e-waste,a broken vacuum robot, and transforms it into a capable, network-controlled robotics platform. What begins as a humorous premise quickly evolves into a thoughtful exploration of modular design, real-time control, and pragmatic engineering decisions.
As Clem himself frames it:
“Of course, the only sensible thing to do is to build a network controlled robot… out of a robot vacuum, because I had that since 2016.”
This blend of practicality and experimentation underpins the entire build.
From Overengineered to Practical
The project did not start with this stripped-back philosophy. Clem initially considered a fully custom design, complete with 3D-printed components and bespoke mechanics. However, this quickly proved too complex and time-intensive for the intended outcome.
Instead, he pivoted toward reusing an older robot vacuum platform,a decision grounded in efficiency.
“This was actually the first project that I did… it was just the vacuum… and this time, we’re powering it with a Raspberry Pi 5… and I want to have it real time controllable from any network device.”
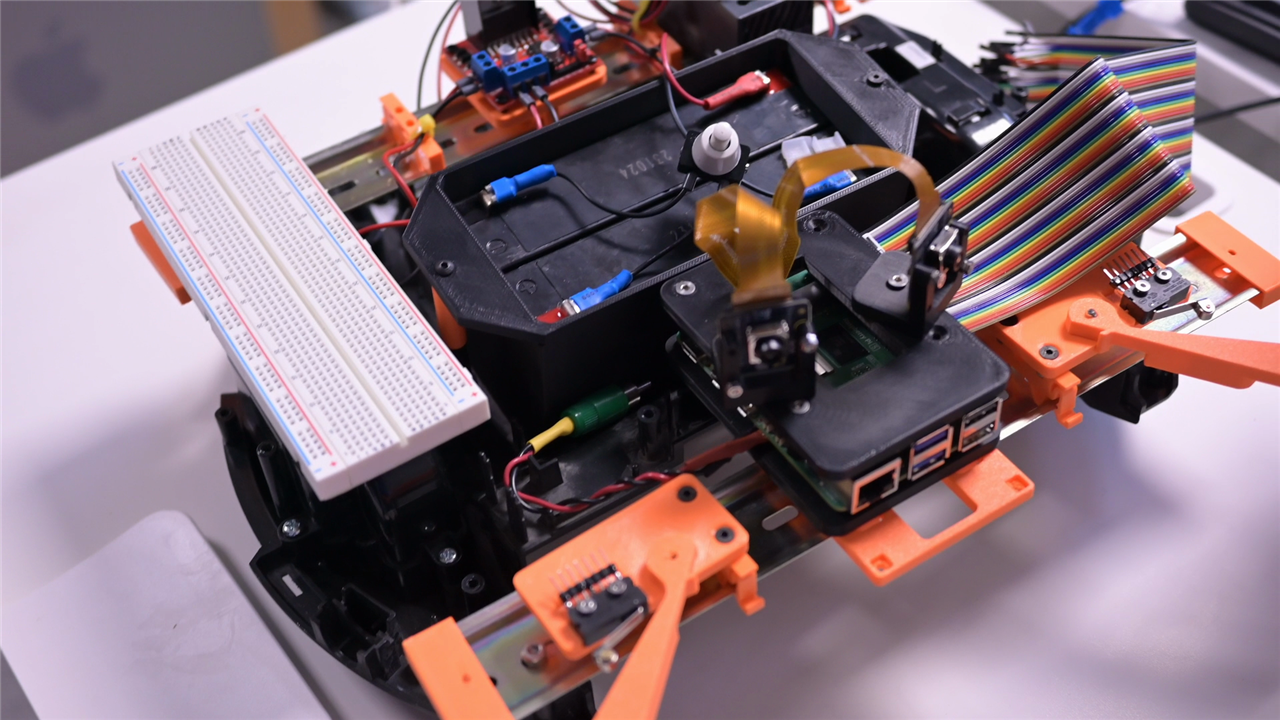
The reused chassis provides motors, wheels, and a compact structure,allowing Clem to focus on control systems and modularity rather than mechanical fabrication. One of the defining features of this build is the use of DIN rails. While typically associated with industrial control systems, Clem repurposes them to enable rapid iteration and experimentation.
“I just slap on some DIN rails on the robot’s chassis… which means you can just attach whatever you want,sensors, controllers, additional dev boards.”
This approach transforms the robot into a flexible platform rather than a fixed design. Custom and community-sourced mounts support components such as the Raspberry Pi, motor drivers, bump sensors, and power systems. The addition of limit switches mounted on articulated arms introduces basic collision detection, something not explicitly detailed in the original blog draft.
A particularly practical addition is the DIN-mounted USB power interface. This allows Clem to separate logic and high-power systems:
“This allows me to disconnect the Raspberry Pi whenever I just want to power up all the 12-volt systems… I don’t have to worry about my Pi not shutting down properly.”
Core Hardware and Vision System
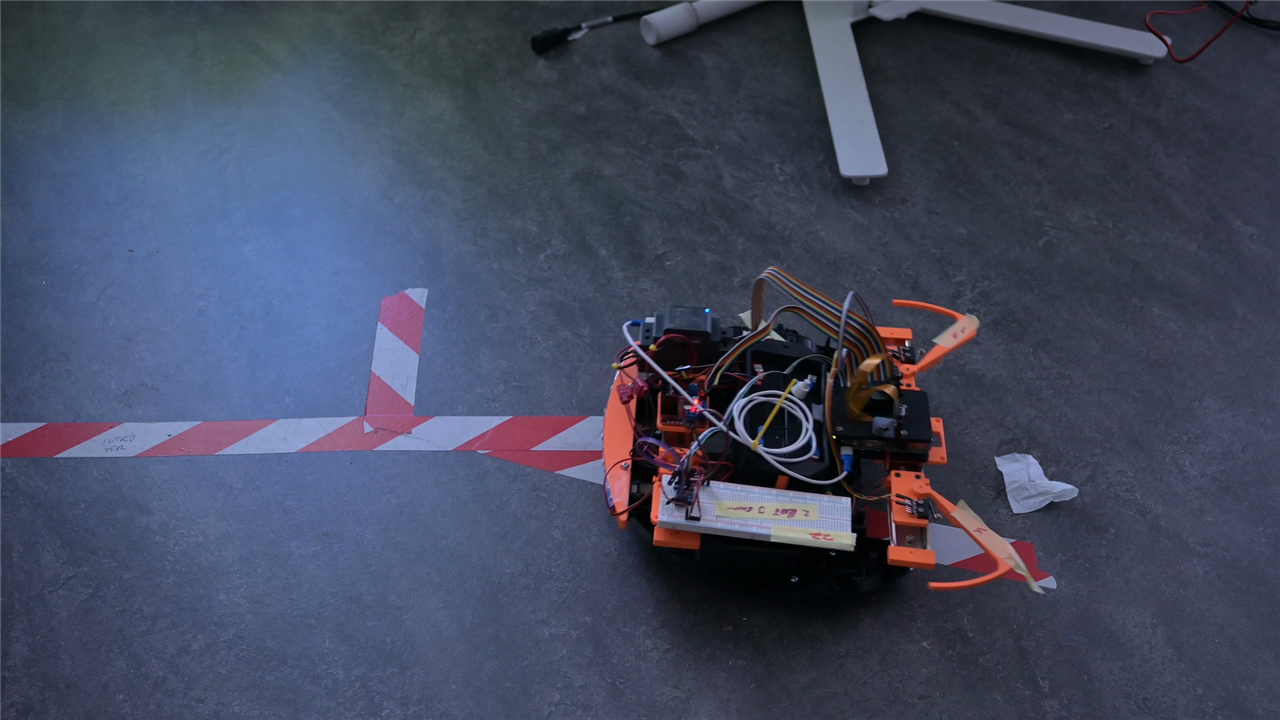
At the center of the system is a Raspberry Pi 5, paired with dual camera modules. These are configured to stream video simultaneously, widening the robot’s field of view.
“With two cameras, we can widen the field of view… which means it’s a lot easier to navigate around.”
The cameras themselves are NoIR (infrared-sensitive) modules, which introduces an unusual visual effect:
“Why are the colors off? Well… this is how the world looks if you can see infrared light.”
This choice has a practical advantage, improved low-light performance, making the robot viable for remote inspection tasks even in dim environments.
Power Delivery: Stability Over Elegance
Powering a Raspberry Pi 5 alongside motors is non-trivial, and Clem’s solution deliberately deviates from typical lightweight robotics design.
Rather than lithium-based batteries, he opts for two 6V sealed lead-acid batteries wired in series:
“The cheapest, heavyweight solution… is just classic lead-acid batteries… I actually need more weight… otherwise it will slip.”
This decision illustrates a key engineering trade-off: the added mass improves traction for the spring-loaded drivetrain while still delivering sufficient current.
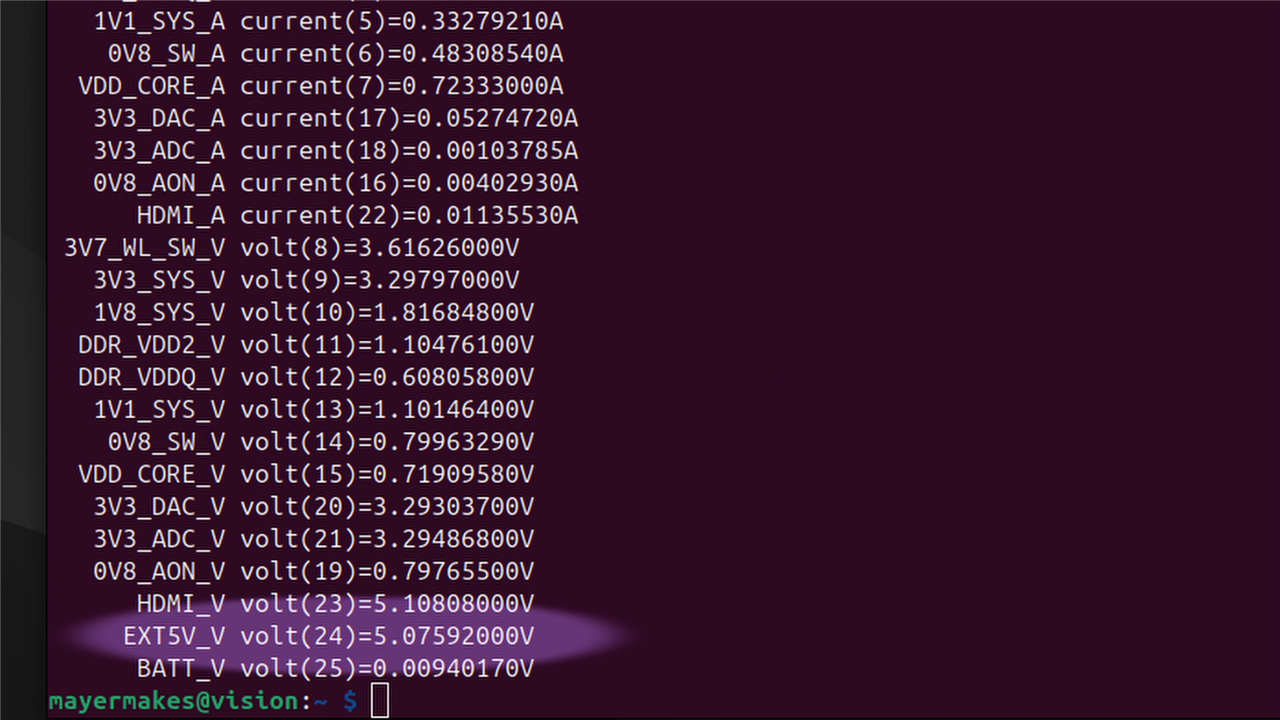
Fine-tuning the voltage regulator proved critical. Clem highlights an often-overlooked nuance:
“I don’t measure that with a multimeter… I need to know what the Raspberry Pi sees… I want it to always see 5.0 to 5.1 volts.”
This insight is particularly valuable for anyone attempting similar builds, as it avoids common brownout issues under load.
A Deliberate Choice: No ROS, FastAPI and Real-Time Control
Unlike many robotics platforms, this build intentionally avoids ROS (Robot Operating System). Clem instead develops a lightweight, purpose-built system tailored to his exact requirements.
“I’m not using ROS… I just rather do it from scratch and just how I want it to be.”
This decision simplifies the software stack, reduces overhead, and keeps the system highly responsive, though it does place more responsibility on custom implementation. The robot is controlled over a network using a Python backend built with FastAPI and served via Uvicorn. This combination enables near real-time responsiveness.
“I wanted to have real time controls… using the keyboard arrows… Flask, Bottle… none of these would yield any form of real time controls.”
The final implementation exposes both HTTP endpoints for video streaming and a WebSocket interface for command control. The structure is clear in Clem’s code:
@app.websocket("/ws")
async def ws_endpoint(websocket: WebSocket):
    await websocket.accept()
    while True:
        cmd = await websocket.receive_text()
        if cmd == "forward":
            forward()
            await websocket.send_text("FORWARD")
Motor control is implemented using the GPIO Zero library, with simple high/low signals driving an L298N motor driver:
def forward():
    L1.on(); L2.off()
    R1.on(); R2.off()
This straightforward approach is also the result of trial and error. Clem encountered significant issues with GPIO behavior on the Raspberry Pi 5:
“Raspberry Pi 5 works a bit different GPIO-wise… none of them worked like I wanted them to… the LED function… that’s your friend.”
This reinforces a critical takeaway: abstraction libraries can sometimes be more reliable than lower-level attempts, particularly on newer hardware.
Video Streaming vs Responsiveness
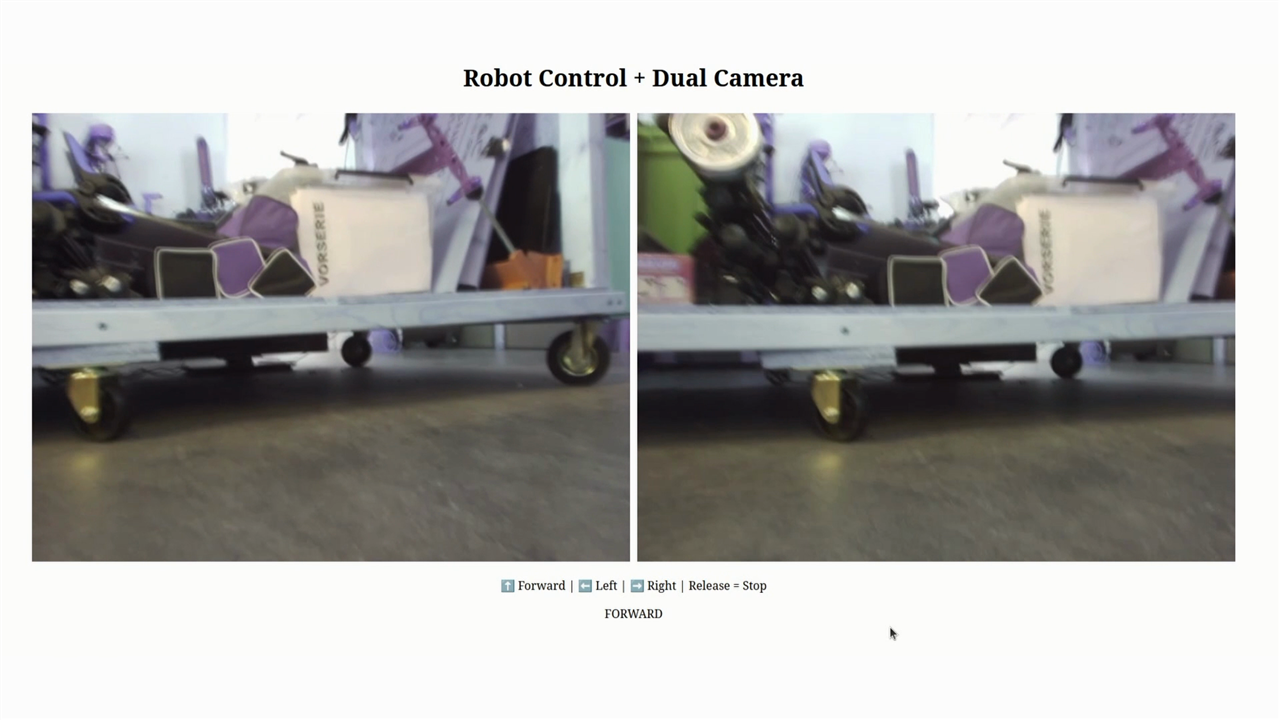
While control latency has been minimized, video streaming introduces a new bottleneck.
“The bottleneck… is now the video stream… two times 640 by 480… there’s a lot of stuff going on.”
Lower resolutions improve responsiveness, but Clem chooses higher quality for usability. This trade-off highlights the challenge of balancing perception and control in networked robotics. Early testing revealed hardware limitations, notably incomplete wiring of the motor driver, preventing reverse movement:
“I couldn’t run the motors backwards… once I got stuck in a corner, I was stuck.”
Incremental testing allowed Clem to isolate and resolve these issues without overcomplicating the system early on. This iterative approach is consistent throughout the project. Despite its technical depth, the project retains a playful objective, retrieving a dropped tool:
“Of course the robot can just hand me a broom… it works… kind of.”
More importantly, Clem positions this build as a foundation for future work. The system is not yet autonomous, but it is designed to become so.
“Now we have a fully real-time controllable robot… but it’s not autonomous yet… what kind of sensors and processing power should we add?”

Looking Ahead
The modular DIN rail system, combined with network-based control and expandable hardware, makes this robot an ideal experimentation platform. Potential upgrades include:
- Autonomous navigation using additional sensors
- Integration with SLAM or lightweight mapping systems
- Enhanced safety systems (e.g., physical kill switch)
- Machine vision processing using the onboard cameras
By prioritising flexibility over perfection, Clem has created a system that is both functional and extensible. It’s a reminder that effective engineering often comes down to making the right compromises, and knowing when to abandon complexity in favour of progress.
As Clem demonstrates, sometimes the best robotics platform isn’t built from scratch, it’s rescued, repurposed, and re-imagined.
Supporting Links and Downloads
- DIN rail clip by PasticXYZ
- Low profile Raspberry Pi DIN Rail mount by Duckington
- Episode 719 Resources - Turning a Broken Robot Vacuum into a Network-Controlled Raspberry Pi 5 Rover
Bill of Materials / Parts
| Product Name | Manufacturer | Quantity | Buy Kit |
|---|---|---|---|
| RPI5-8GB-SINGLE | Raspberry pi | 1 | Buy Now |
| Rechargeable Battery, 6 V, Lead Acid, 3.3 Ah, Quick Connect, 1 | Multicomp pro | 2 | Buy Now |
| Battery Charger, Desktop, Lead Acid, EU, UK, ALCT Series, 230VAC Supply Voltage | Ansmann | 1 | Buy Now |
| Isolated DIN Rail Mount DC/DC Converter, Railway, 4:1, 30 W, 1 Output, 5 V, 6 A | MEAN WELL | 1 | Buy Now |
| Daughter Board, Raspberry Pi NoIR Camera Board, Version 2, Sony IMX219 8-Megapixel Sensor | Raspberry pi | 2 | Buy Now |
| DIN Mounting Rail, Standard DIN Rail, Hellermanntyton Terminal Blocks, 2 m, 15 mm | 1 | Buy Now | |
| Development Board, L298N, H-Bridge Motor Driver, Motor Control | Seed/ various | 1 | Buy Now |
| Product Name | |||
| Broken Vacuum robot | |||


