

Table of contents

Abstract
An interactive Arduino haunted house featuring horror warning displays, a floating ghost hologram, an ultrasonic sensor-controlled automatic door, and a flashing lightning effect.
Project
Haunted Hologram House 2.0 – Transforming a Miniature Haunted House into an Interactive Arduino Halloween Experience
Introduction
Greetings everyone!
Halloween is all about spooky decorations, mysterious houses, creepy characters and unexpected surprises!
A few days ago, I created a miniature Haunted Hologram House using cardboard, foam sheets, popsicle sticks and a smartphone-based floating ghost illusion.
The original version was mainly a decorative project. It had a two-storey haunted house structure, spooky exterior decorations and a floating ghost hologram created using a transparent sheet.
But I wanted to take this project further.
What if the haunted house could actually interact with visitors?
What if it could display scary warning messages, automatically open its entrance when someone approaches and create a lightning effect inside the house?
That gave me the idea for Haunted Hologram House 2.0!
Instead of rebuilding the entire structure, I decided to upgrade my existing miniature house by integrating three electronic modules.
The three main modules are:
-
Horror Warning Display: An Arduino-based TFT screen displaying different horror characters and warning messages.
-
Ghost Hologram: The original smartphone-based floating ghost illusion, retained from Version 1.0.
-
Automatic Haunted Door: An ultrasonic sensor detects visitors within 10 cm, opens the entrance using a 9g servo motor and activates a flashing lightning-style lighting effect.
The project combines handmade construction, Arduino electronics, a simple optical illusion and mechanical automation.
Let's start building!
PART 1 – HAUNTED HOUSE DESIGN AND CONSTRUCTION
Before adding electronics, I needed a suitable structure to accommodate all the components.
I wanted a two-storey haunted house with enough internal space for the hologram chamber, electronic displays, wiring and automatic door mechanism.
The original structure was made using easily available materials such as cardboard, foam sheets and popsicle sticks.
Step 1: Preparing the Base and Structural Support
I started by preparing the foundation of the miniature haunted house.
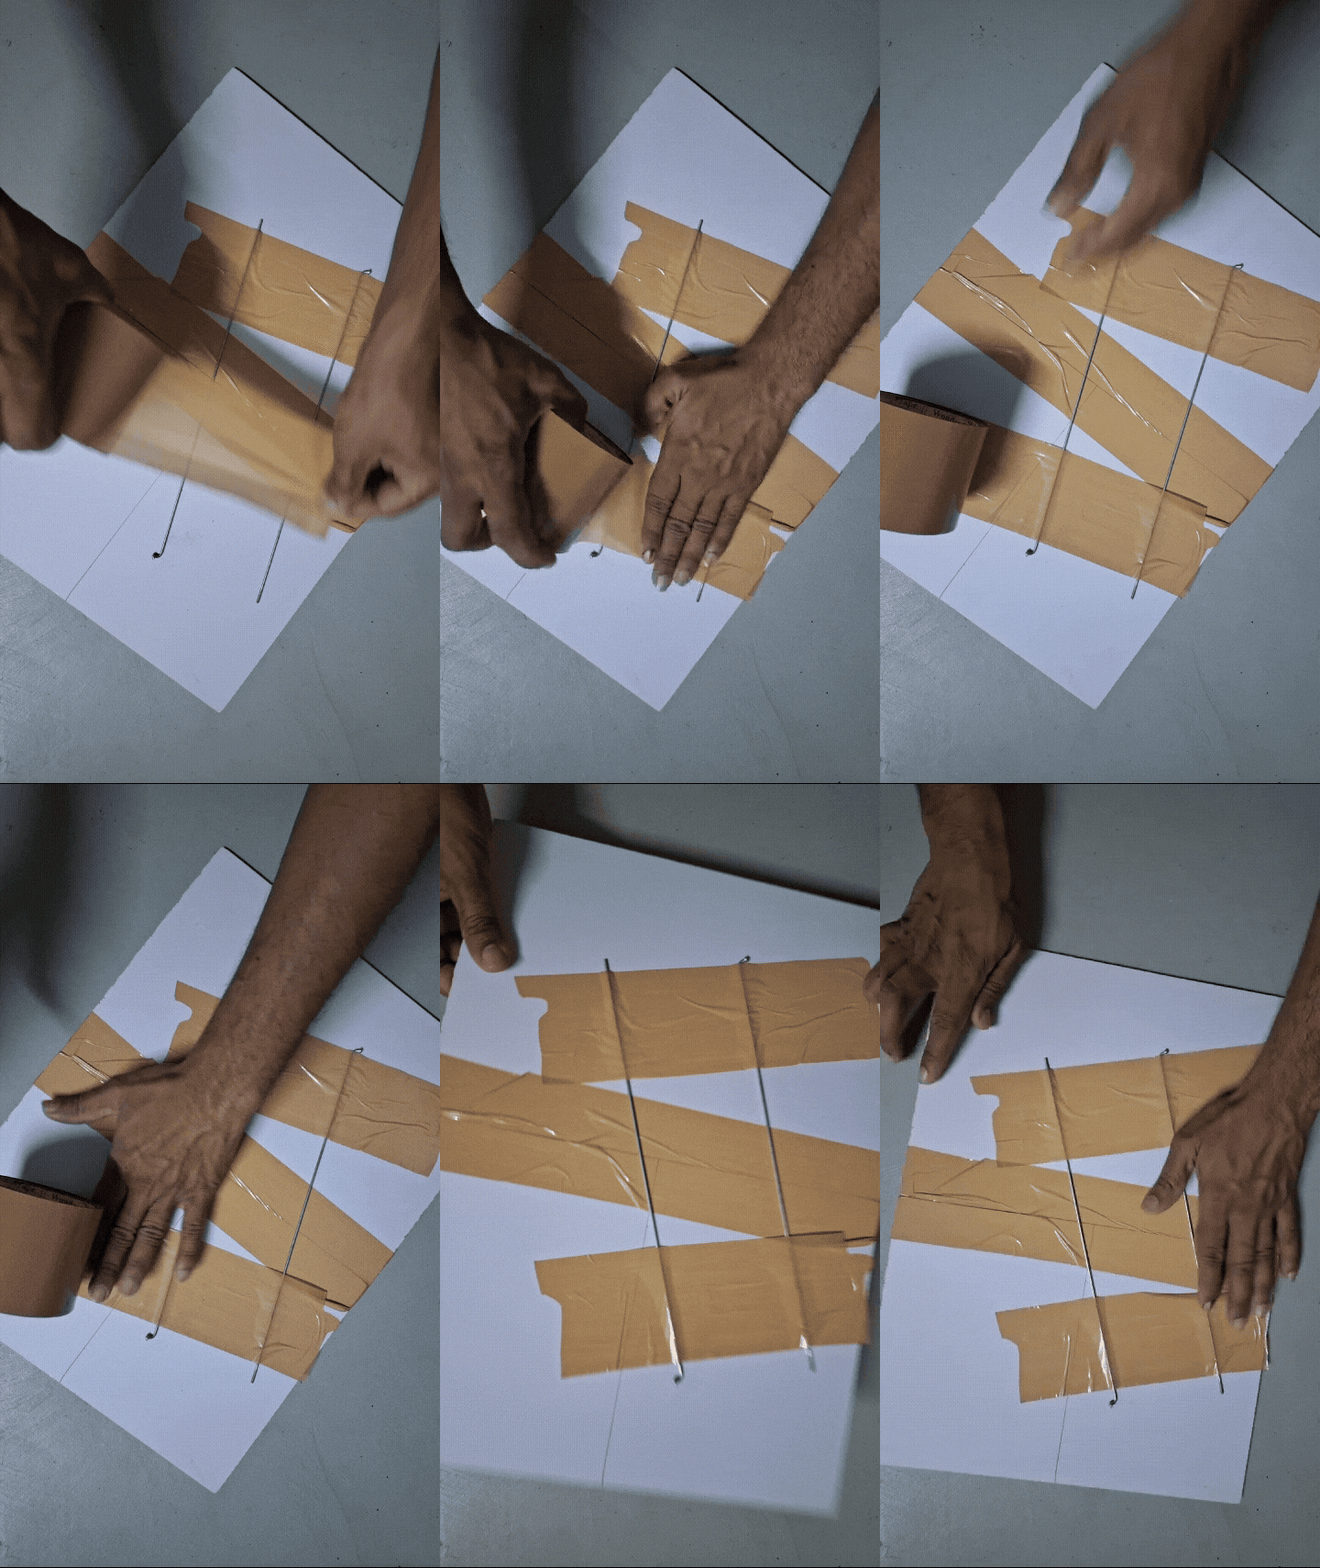
For the base, I used two foam sheets and placed a steel rod taken from a bicycle wheel between them.
The steel rod provides additional structural support and helps prevent the base from bending.
After positioning the rod, I joined the foam sheets together to create a stronger foundation for the house.
I wanted the base to be sufficiently rigid because the project would eventually contain several electronic modules, a smartphone and additional decorations.
Step 2: Designing the Two-Storey House Frame
After preparing the foundation, I started designing the main house structure.
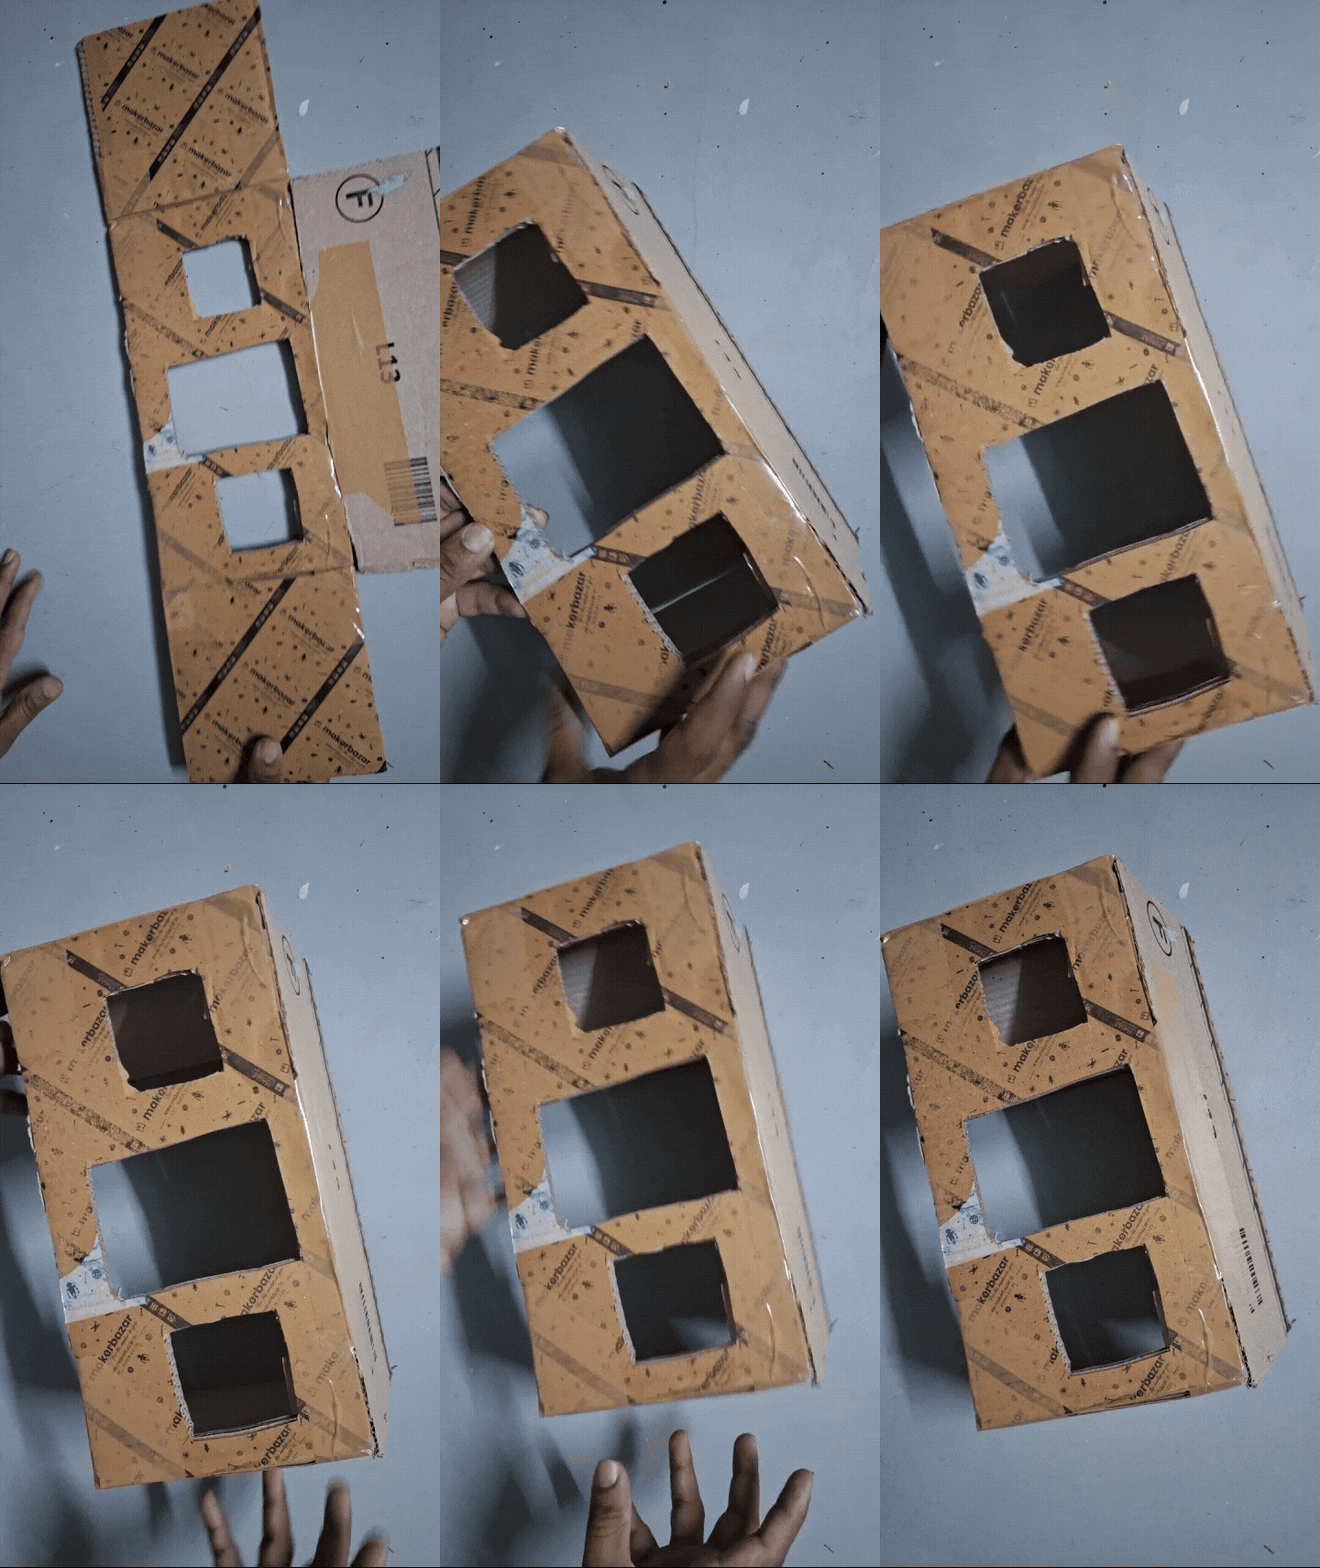
I took a cardboard box, dismantled it and cut the cardboard into different sections according to the required structure.
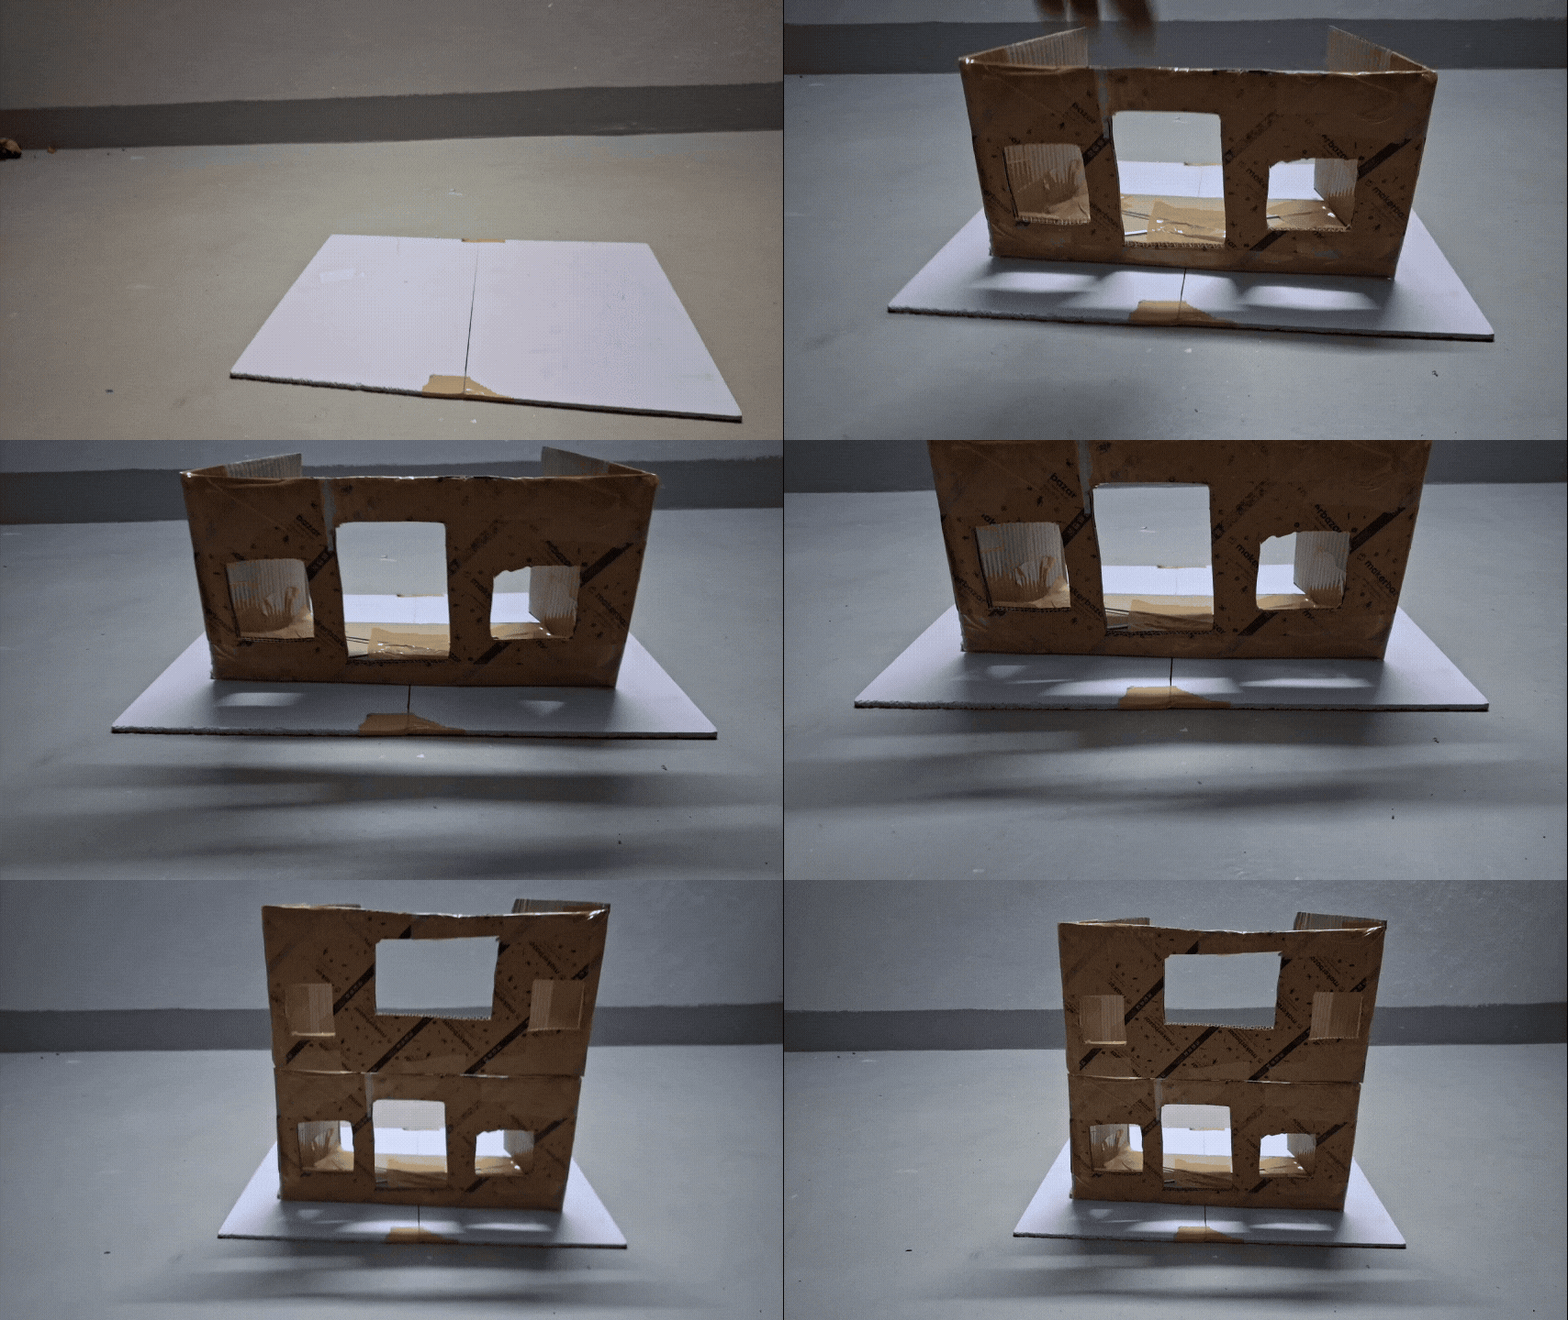
I divided the house into two main levels:
-
Ground floor
-
First floor
I assembled the cardboard pieces using adhesive tape and glue.
The ground floor was designed to accommodate the entrance and lower sections of the haunted house. The upper floor was used for the additional architectural details and the hologram arrangement.
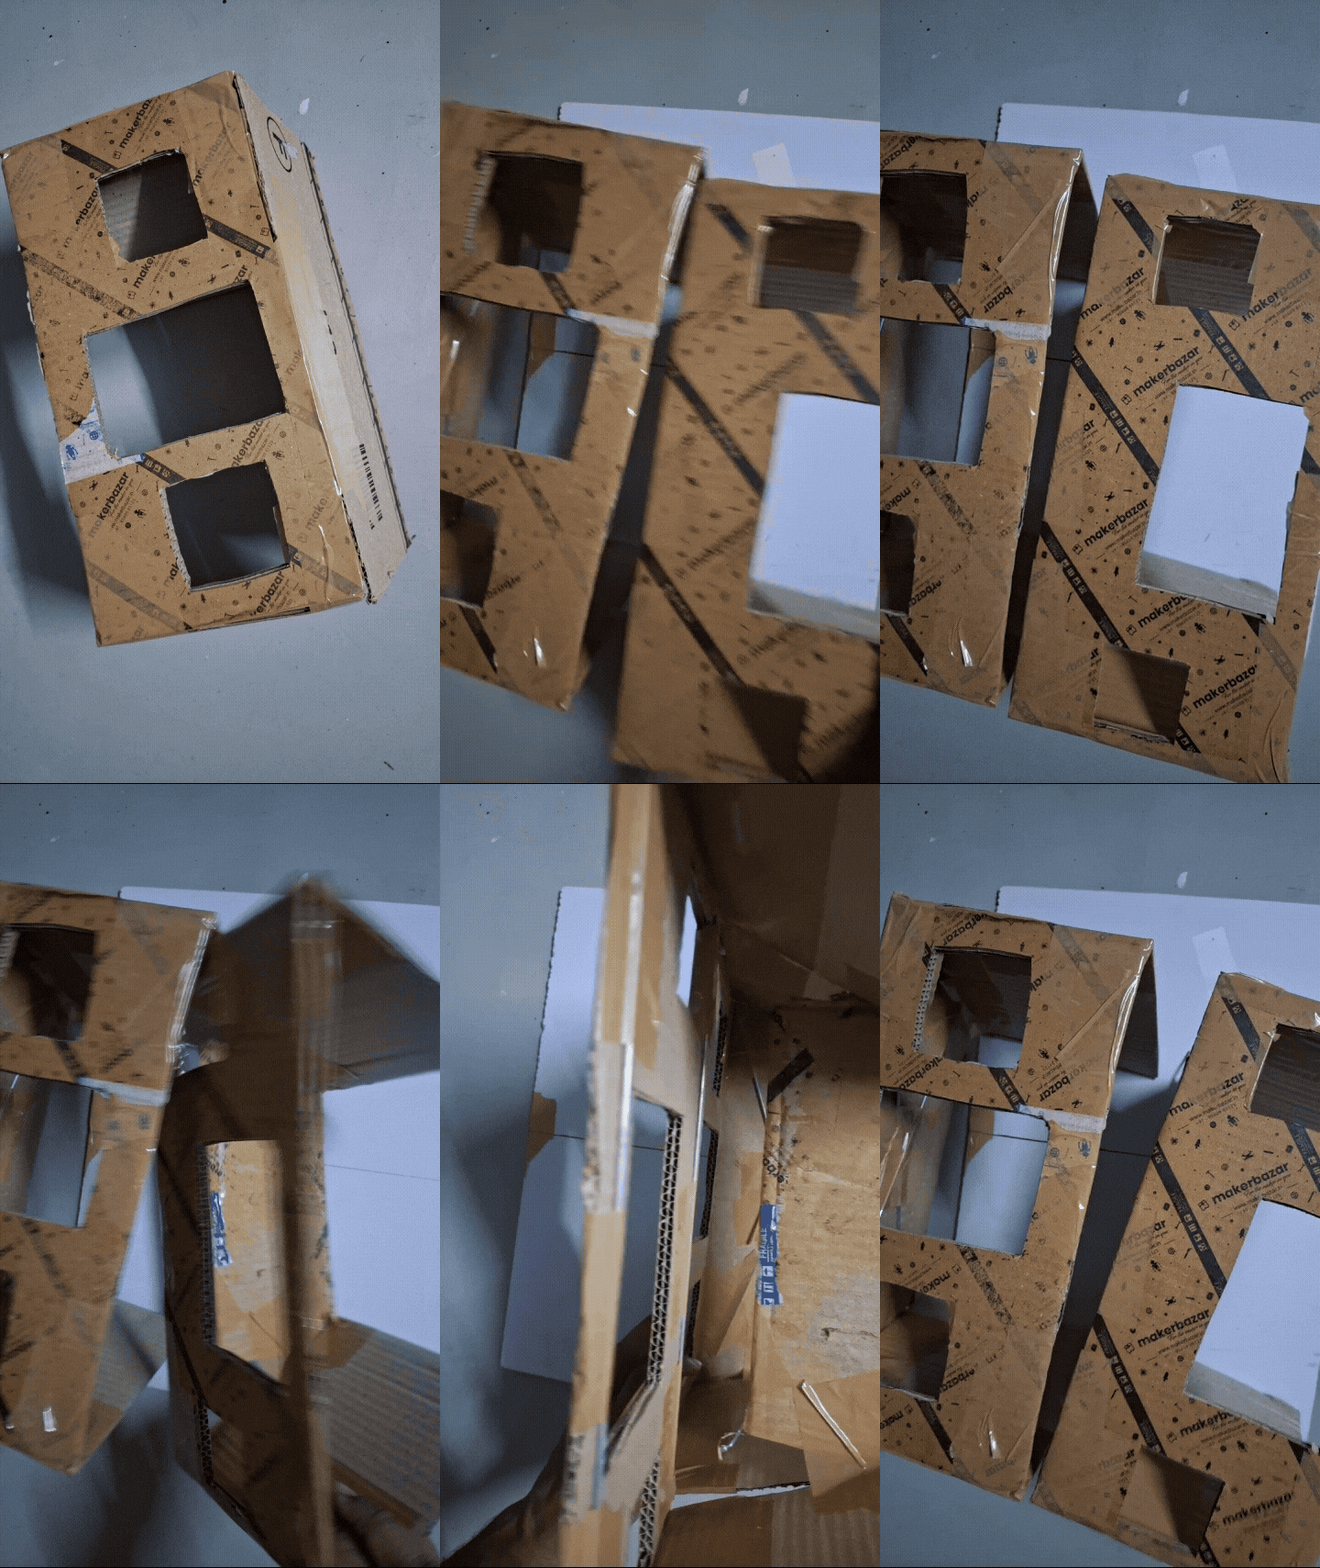
One important design decision was to keep the rear panel accessible.
Since I planned to install electronics inside the house, a removable or accessible rear section would make wiring adjustments, maintenance and troubleshooting much easier.
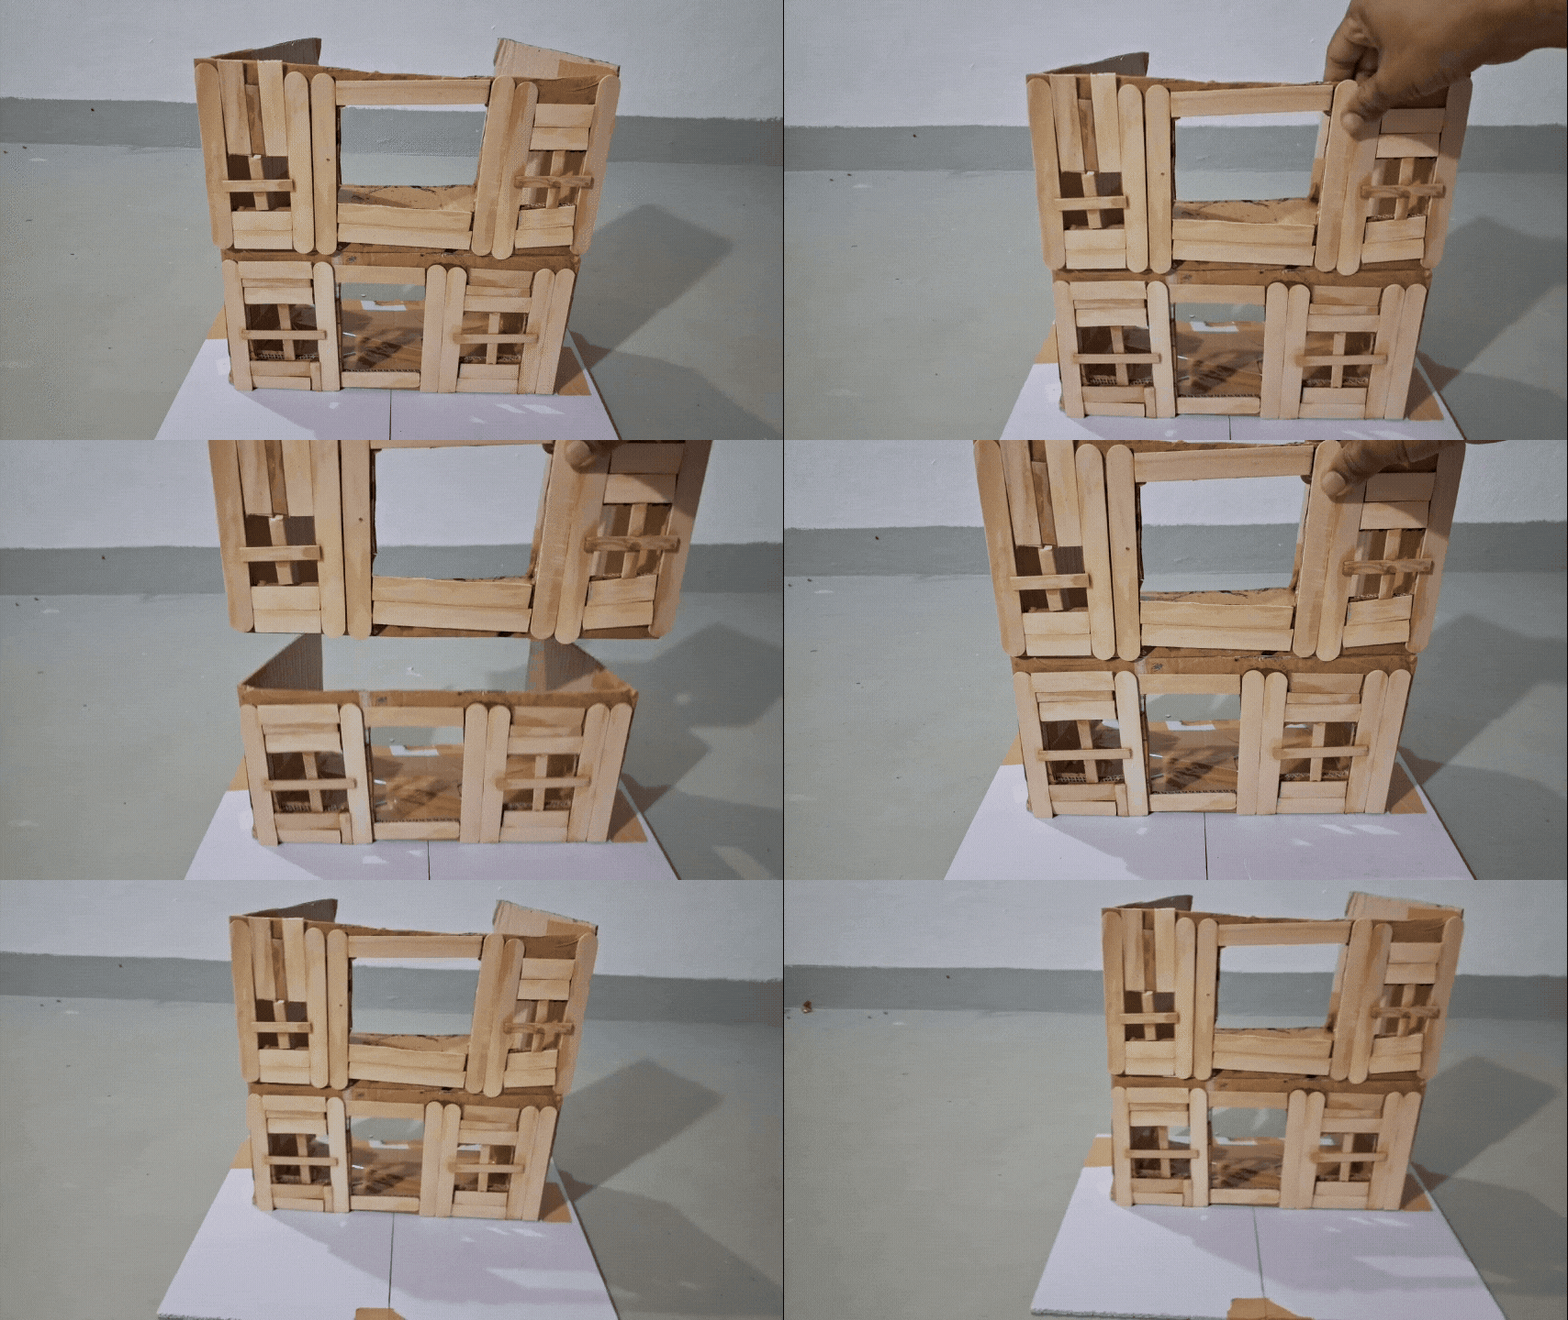
I assembled both floor structures separately and then joined them to create the complete two-storey frame.
Step 3: Creating the Wooden-Style Exterior
Once the main cardboard frame was ready, I started working on the exterior appearance.
I wanted the house to look old, abandoned and slightly creepy rather than like a clean miniature building.
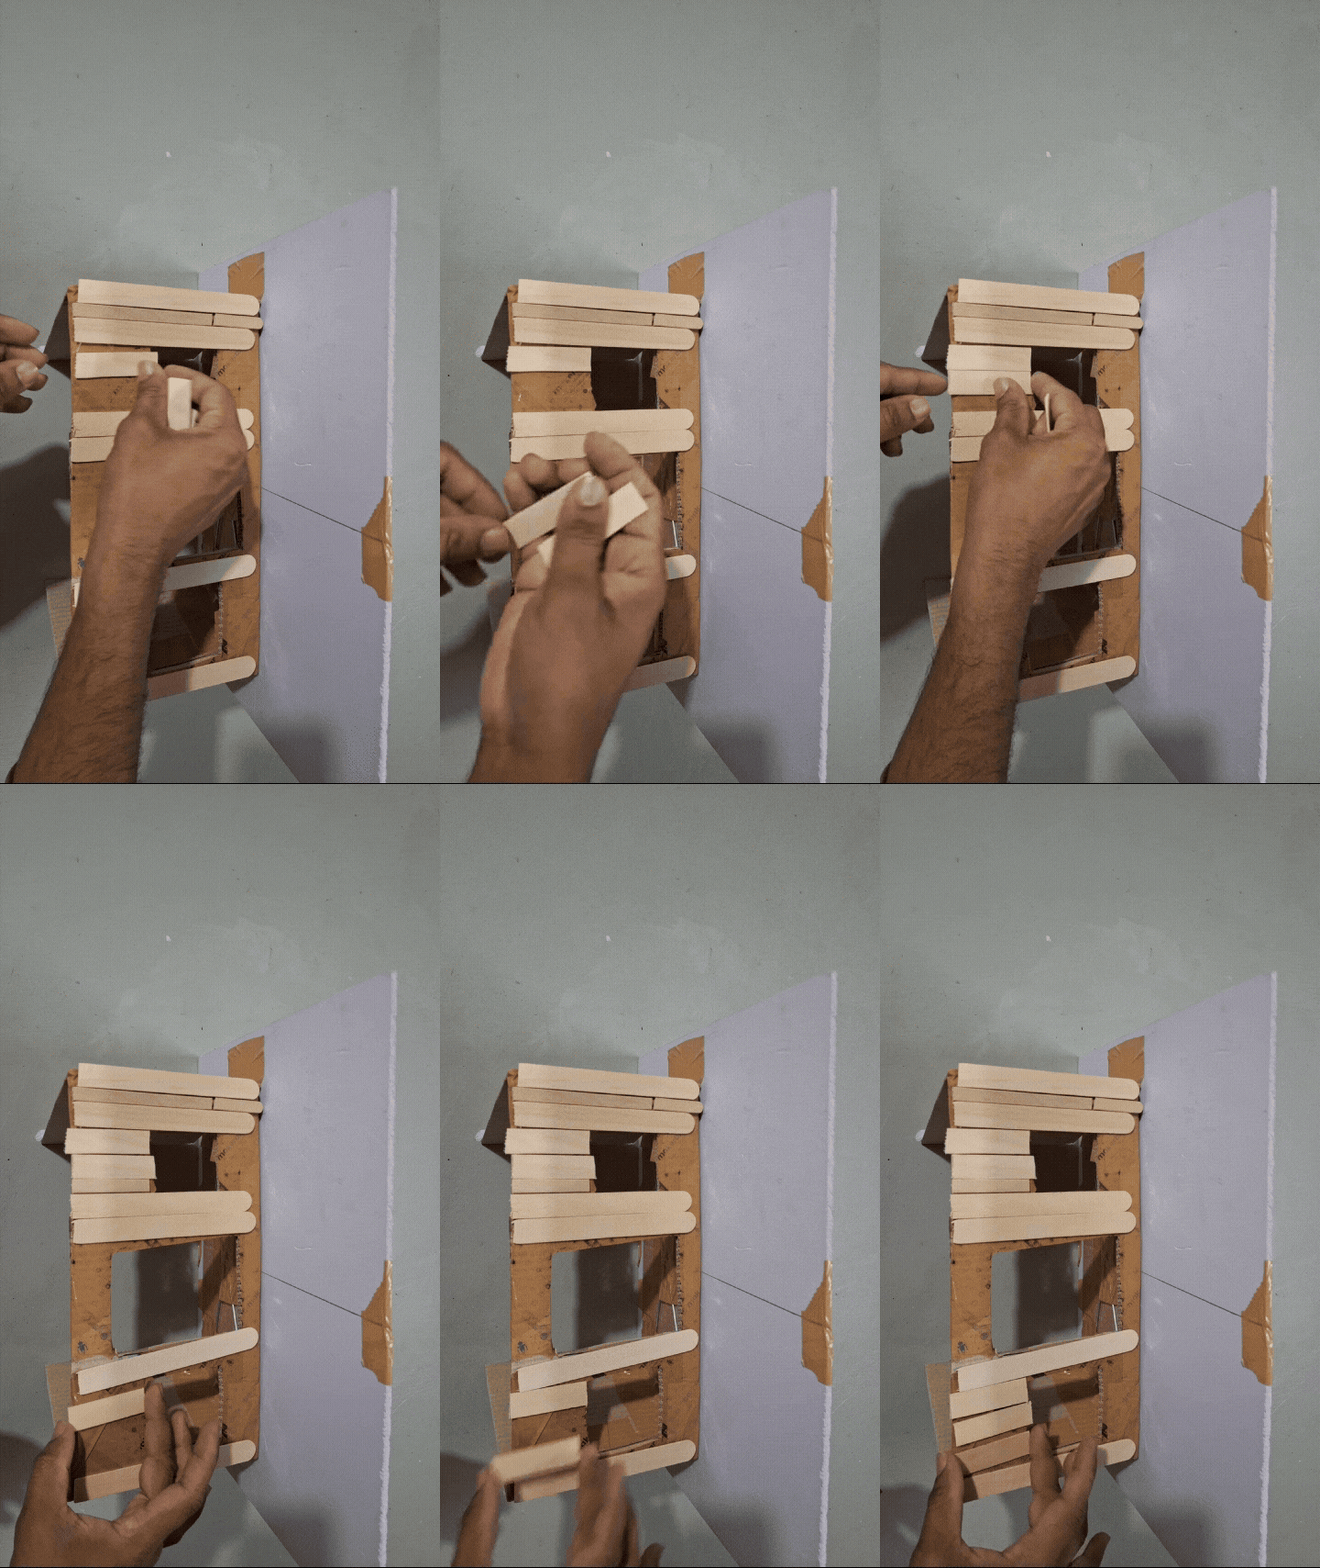
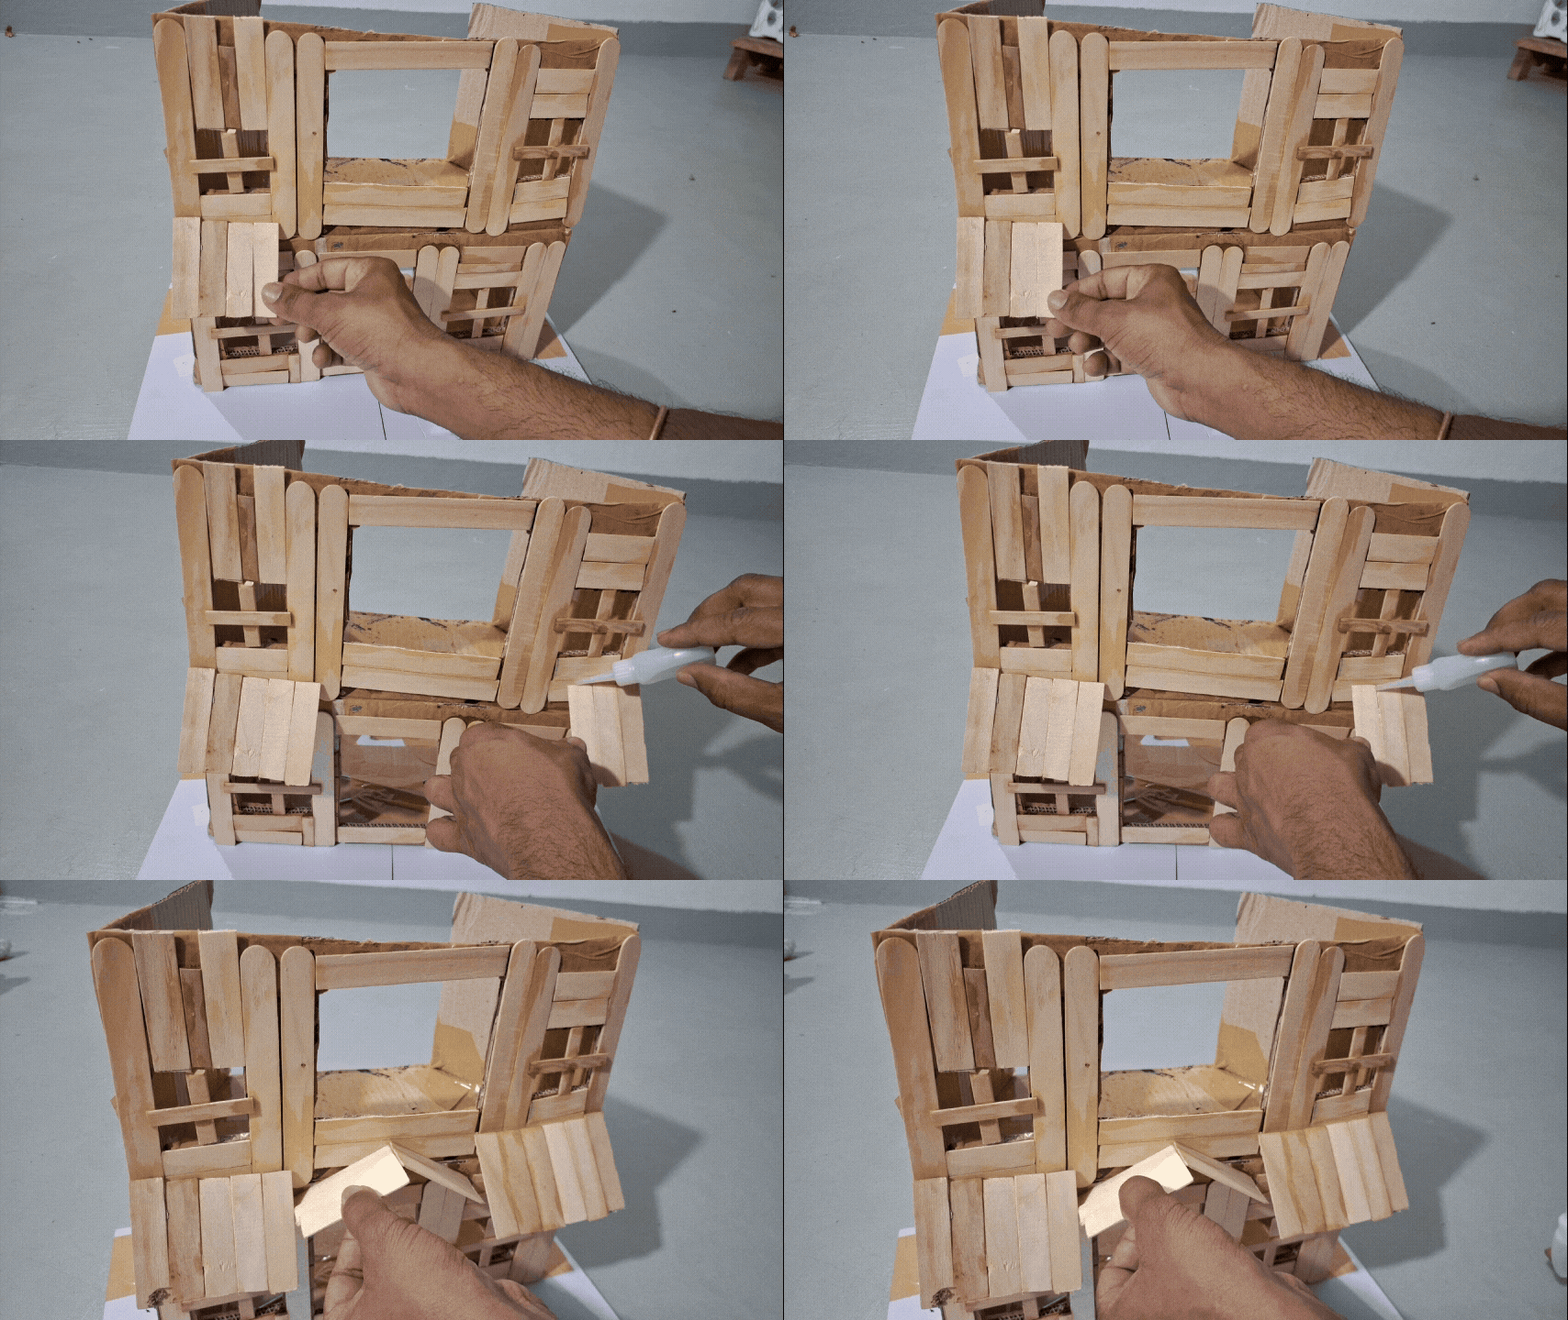
For this, I used large popsicle sticks and attached them to selected front panels.
The popsicle sticks create a wooden-house appearance and add texture to the otherwise plain cardboard surfaces.
I also prepared the entrance, upper-floor sections and small portico-style structures to give the house a more interesting architectural appearance.
I used glue to secure the decorative pieces and allowed the structure to dry before moving to the painting stage.
Step 4: Painting and Final House Decoration
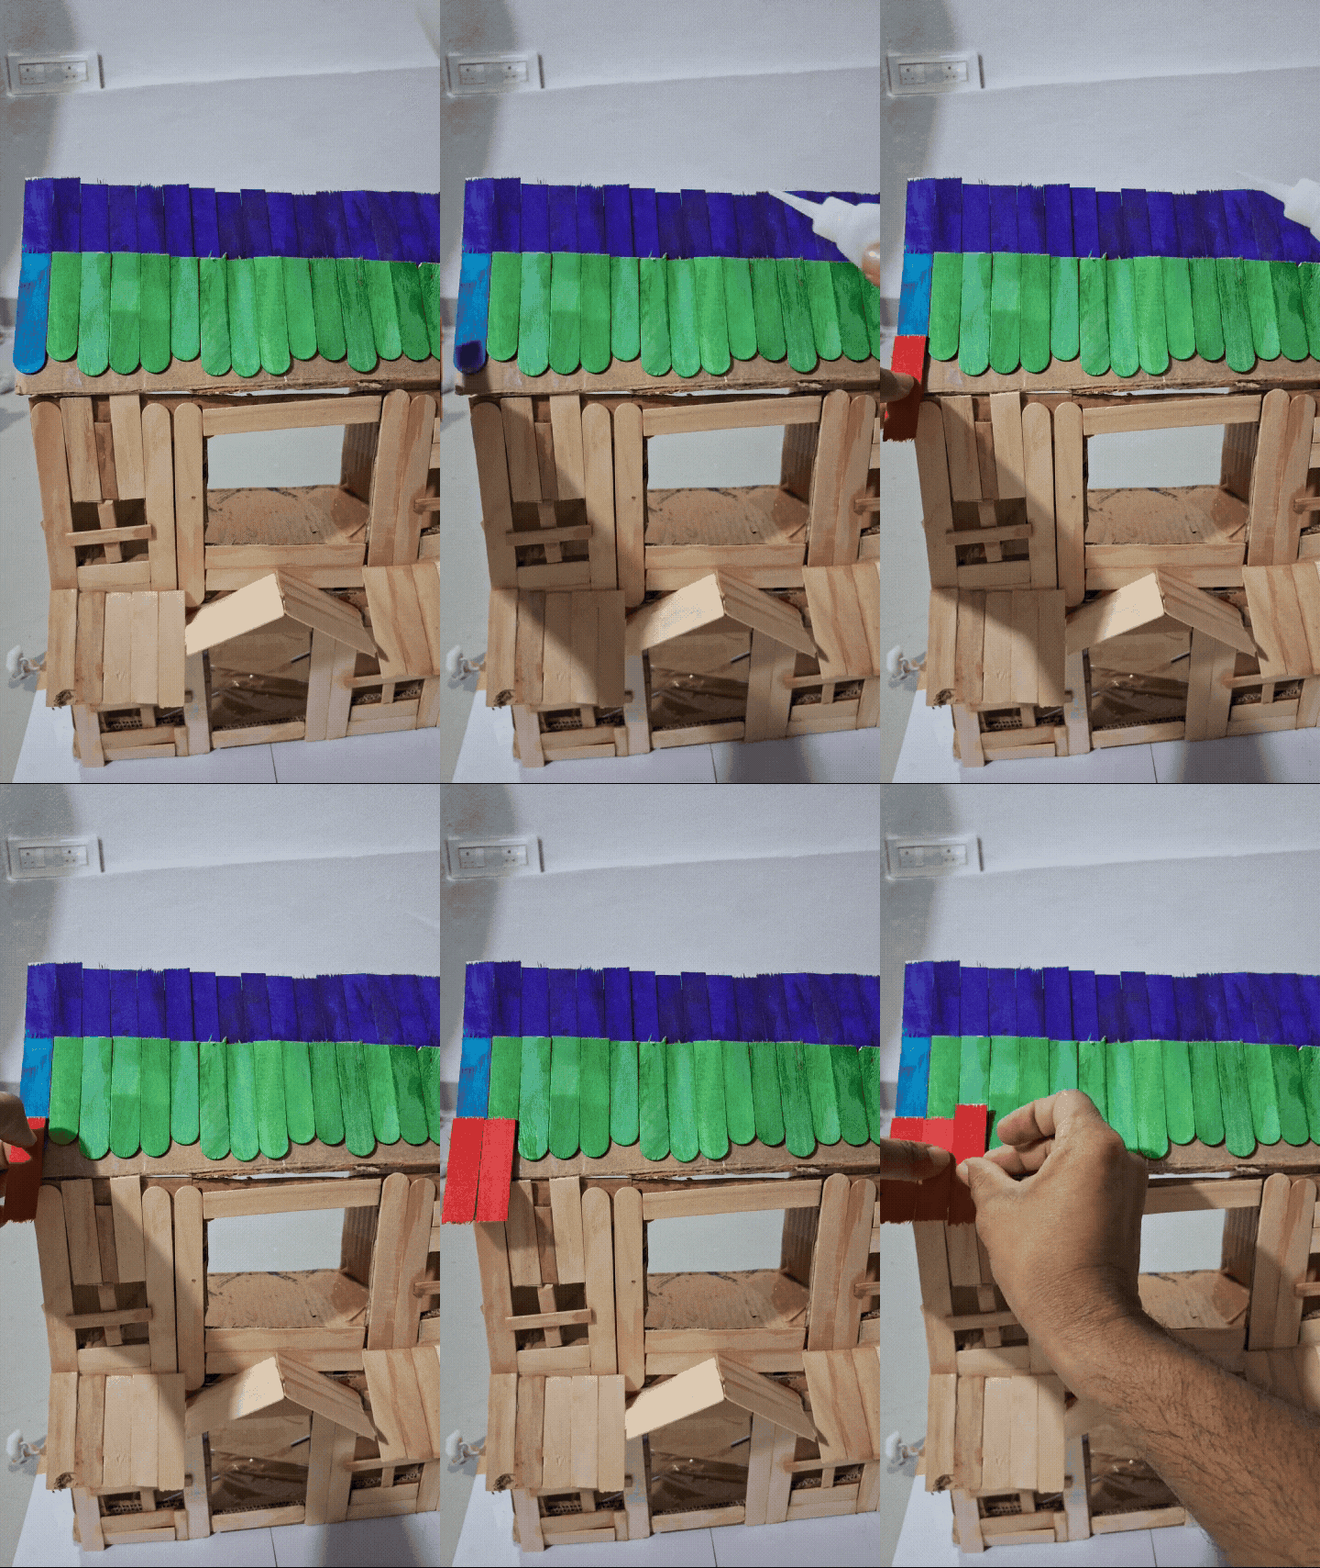
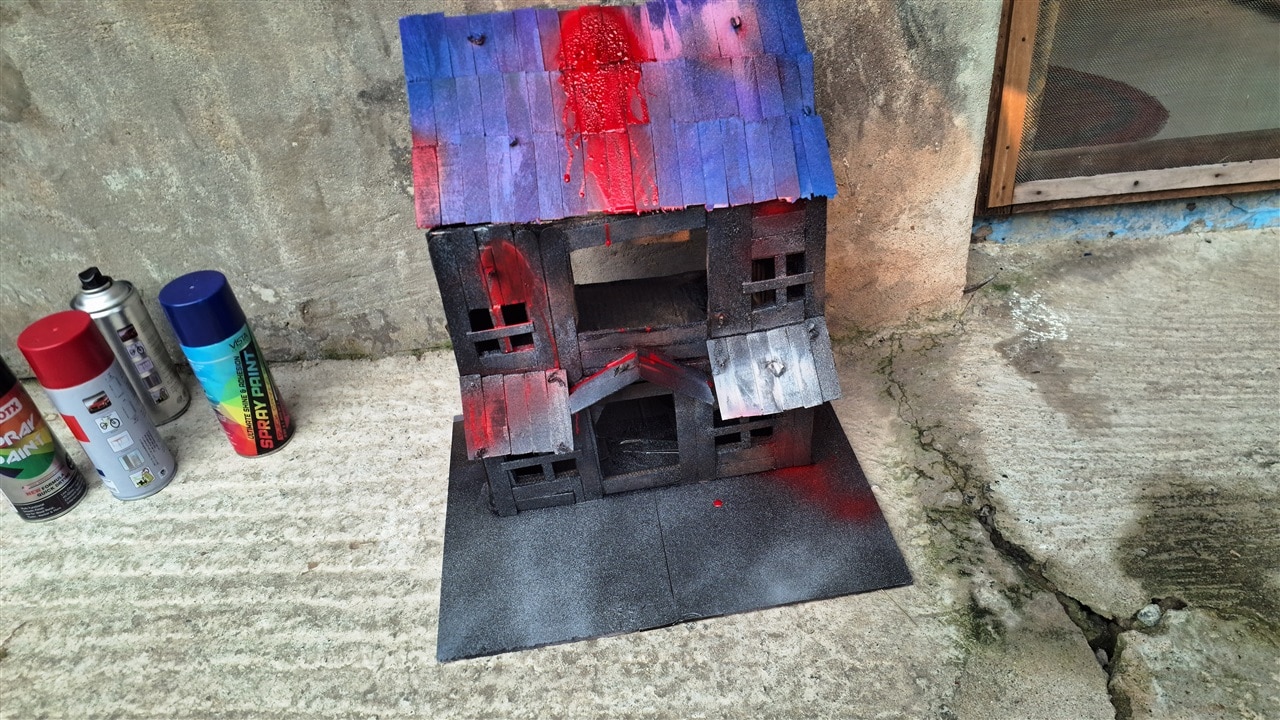
After completing the exterior construction, I started painting the house.
I mainly used black as the background colour and added red, grey and blue shades to create an old and spooky appearance.
I also added selected red paint effects to create a more mysterious Halloween atmosphere.
To complete the surroundings, I added artificial grass and creeper plants around the roof and base.
These decorations help make the miniature house look more abandoned and give it a proper Halloween appearance.
After completing the exterior, I kept the rear section accessible for installing the electronic modules.
PART 2 – CREATING THE FLOATING GHOST HOLOGRAM
The floating ghost is one of the main attractions of the original Haunted Hologram House.
I wanted to retain this feature in Version 2.0 rather than replace it with a conventional electronic display.
The hologram uses a smartphone, a transparent sheet and a specially prepared ghost video.
Step 5: Building the Hologram Chamber
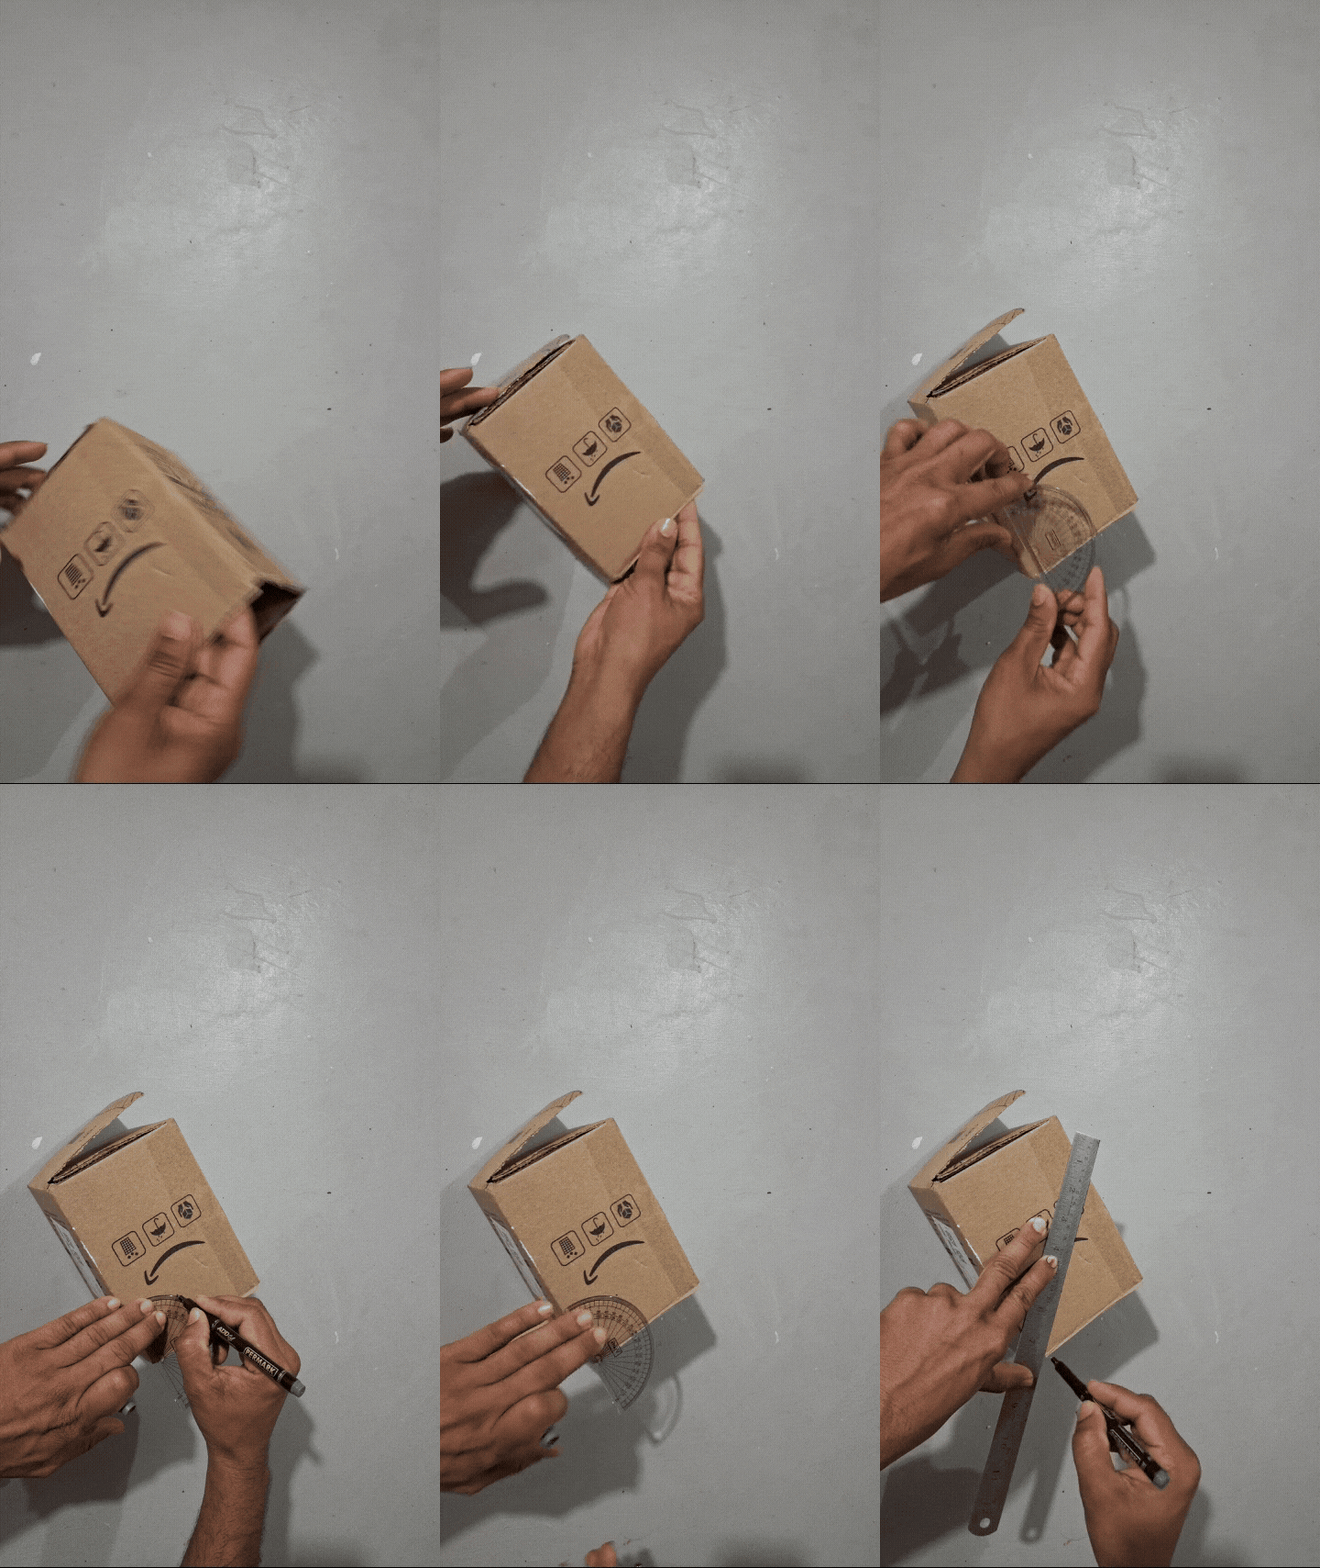
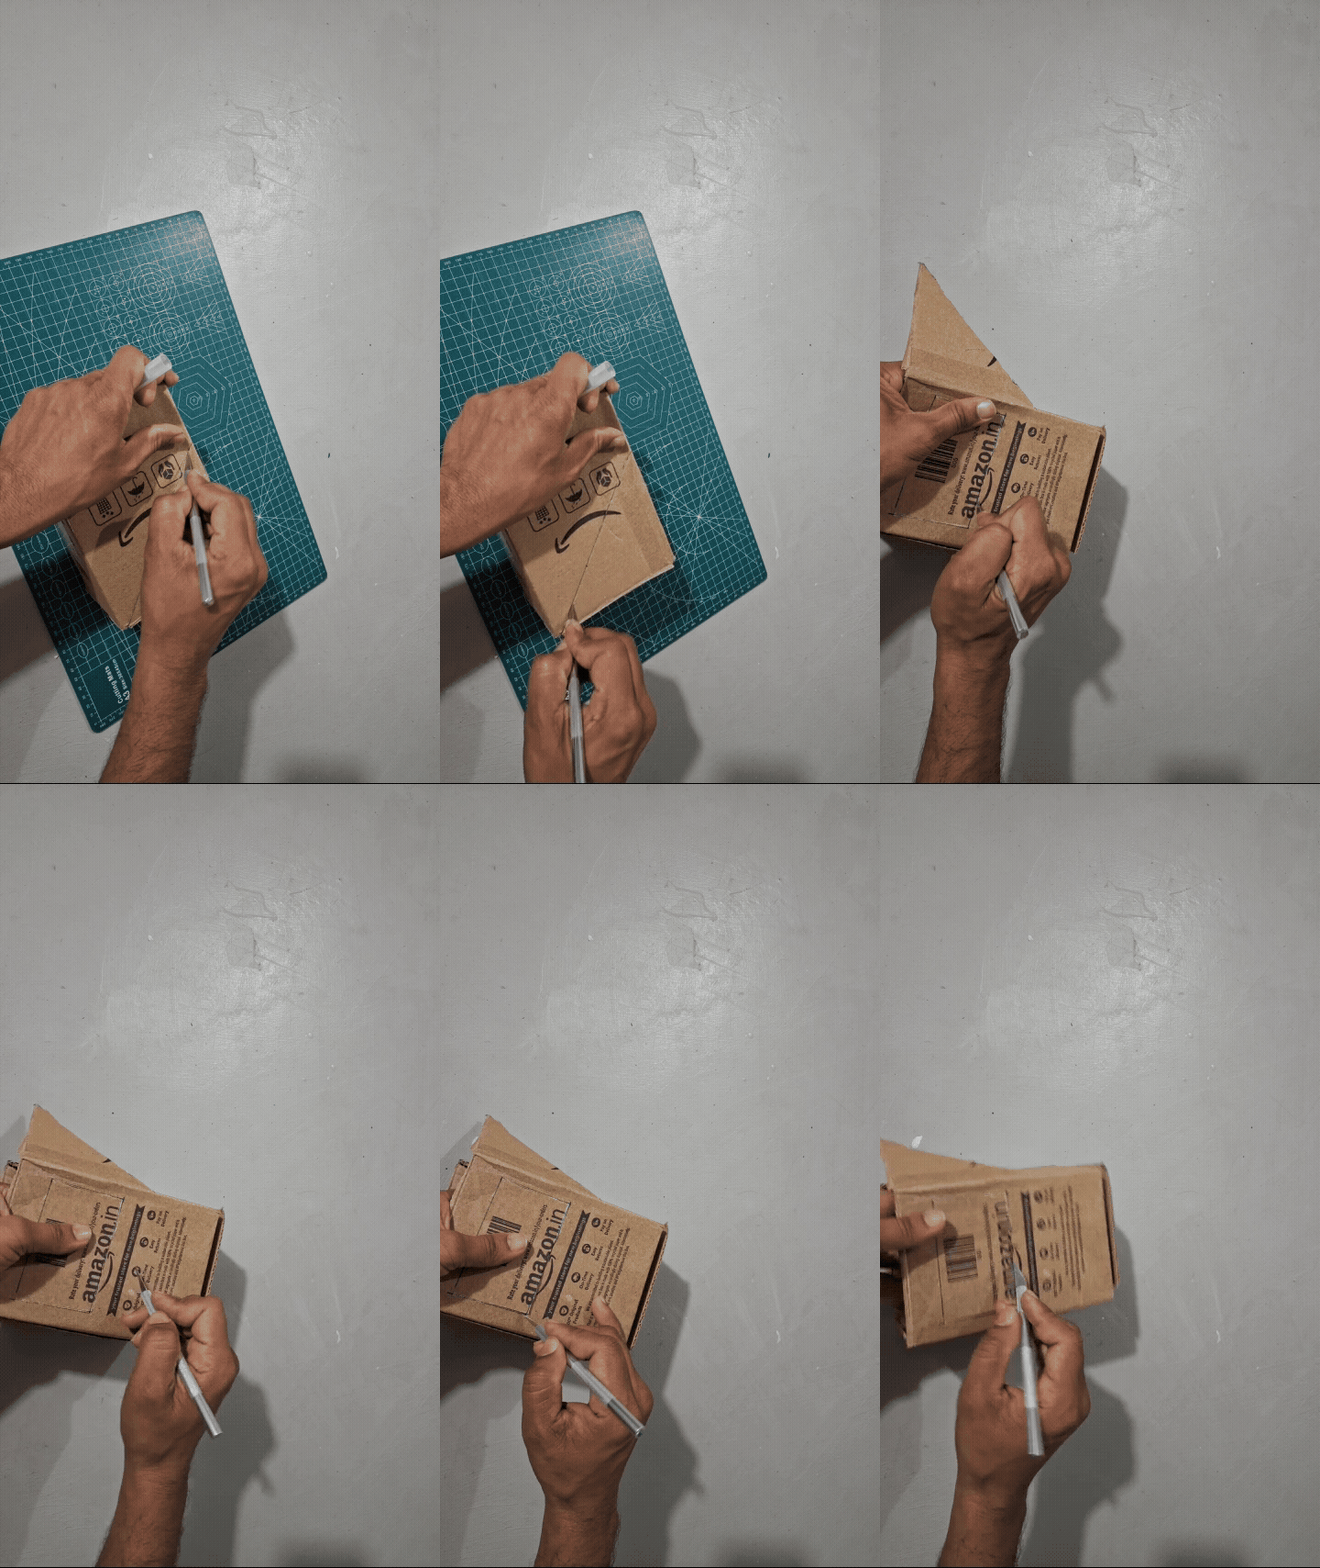
First, I prepared a small cardboard chamber for the hologram arrangement.
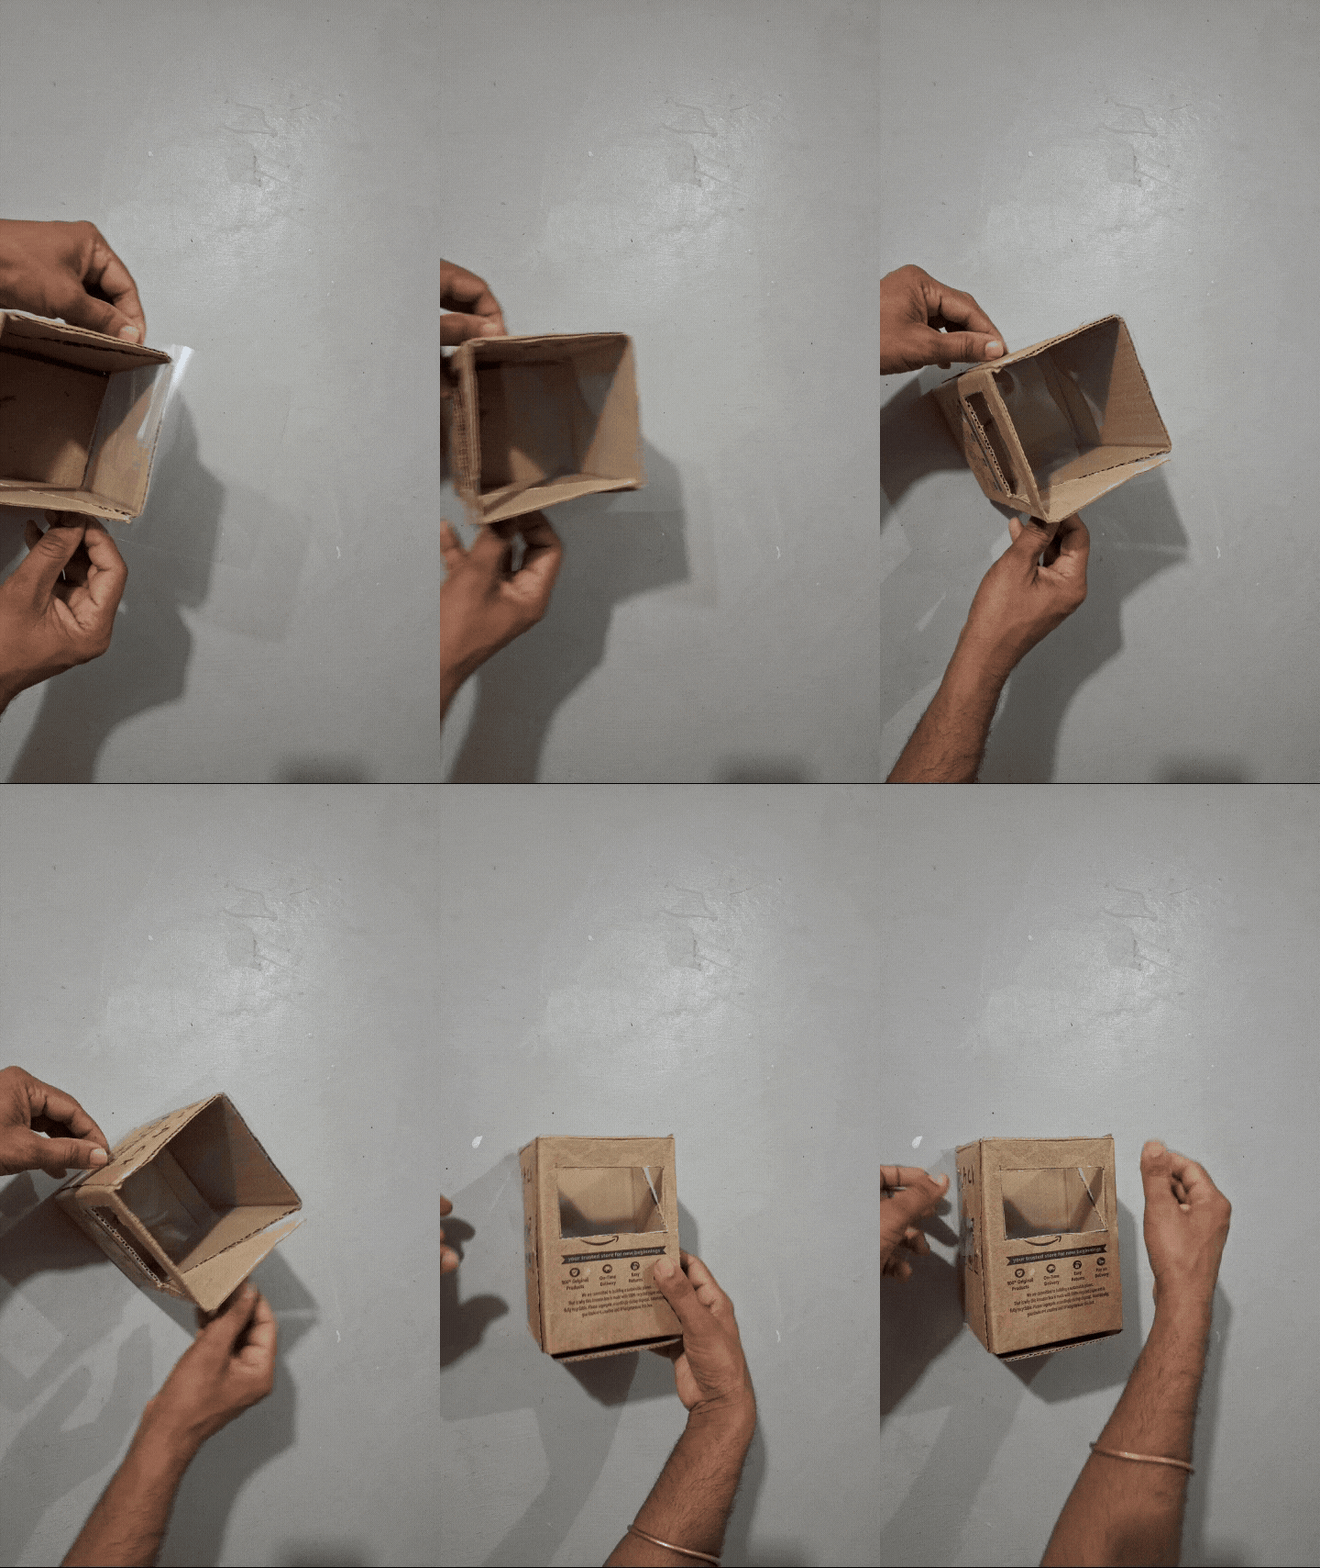
I cut the viewing section at approximately 45 degrees and positioned a transparent acrylic/plastic sheet inside it.
I also created an opening on the upper side of the chamber so that a smartphone could be inserted.
The transparent sheet acts as the reflector for the hologram illusion.
The smartphone is positioned so that its ghost video can reflect from the angled transparent sheet and become visible through the front viewing window.
Step 6: Installing the Smartphone and Testing the Ghost Effect
After preparing the chamber, I inserted the smartphone through the upper opening.
The smartphone plays a specially prepared ghost video.
When the video image reflects from the transparent sheet, the ghost appears to float inside the haunted house.
I adjusted the smartphone position and viewing arrangement to achieve the desired effect.
I then installed the hologram chamber inside the upper section of the house, keeping the viewing window accessible from the front.
This completes the hologram portion of the project.
The original optical illusion remains an important feature of Version 2.0.
PART 3 – ELECTRONIC UPGRADE 2.0
Now comes the main upgrade!
The original house was primarily decorative, so I wanted to add electronic functionality without changing its overall appearance.
I divided the electronics into three independent modules.
Electronic components
-
2 × Arduino Uno boards
-
1 × 2.8-inch Arduino-compatible TFT display shield
-
1 × Ultrasonic distance sensor
-
1 × 9g servo motor
-
1 × 5V relay module
-
1 × 5W / 12V COB LED
-
Connecting wires
-
Jumper wires
-
Suitable power supplies
Step 7: Designing the Three-Module Electronic System
Before installing the electronics, I separated the functions into three modules.
Module 1 – Horror Warning Display
Arduino Uno + 2.8-inch TFT display shield.
This module displays animated horror illustrations and warning messages.
Module 2 – Ghost Hologram
Smartphone + transparent reflector.
This module creates the floating ghost illusion and operates independently.
Module 3 – Automatic Haunted Door
Arduino Uno + ultrasonic sensor + 9g servo motor + relay-controlled lighting.
This module detects approaching visitors, opens the door and activates the lightning-style lighting effect.
I preferred this modular arrangement because it makes testing and troubleshooting easier. Each module can be developed separately before integrating it into the miniature house.
PART 4 – MODULE 1: HORROR WARNING DISPLAY
The first electronic addition is the horror warning display.
I wanted visitors to see something unexpected when they looked at the front of the haunted house.
Instead of using a simple static image, I created multiple horror characters and warning messages that appear sequentially on the TFT display.
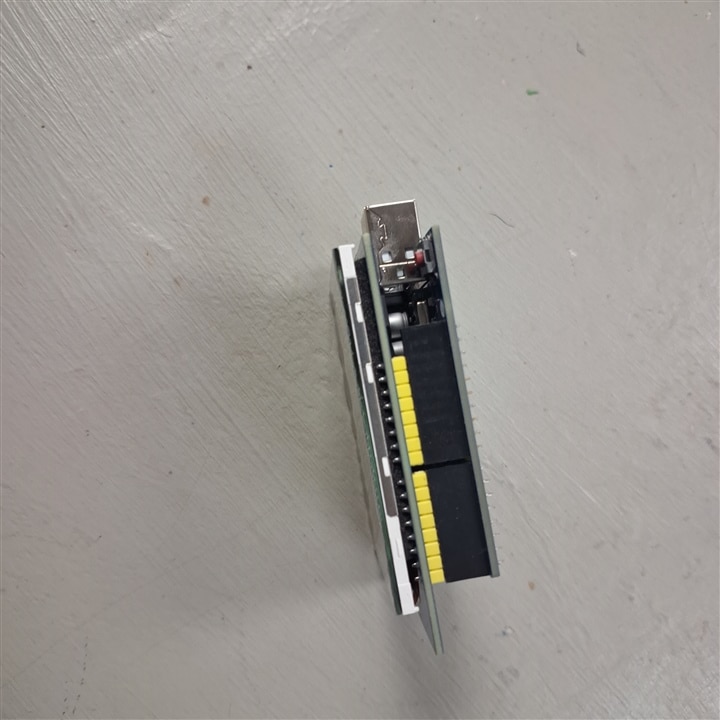
Step 8: Installing the TFT Display Module
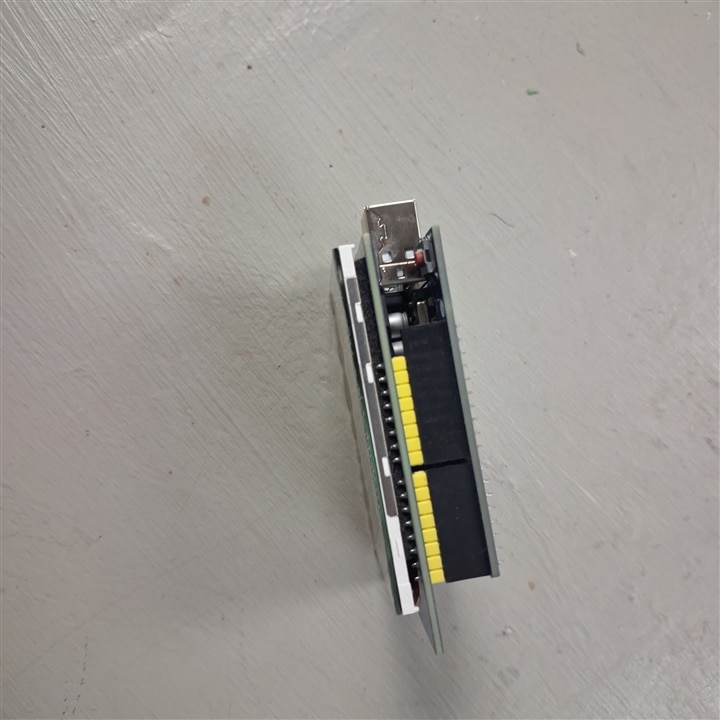
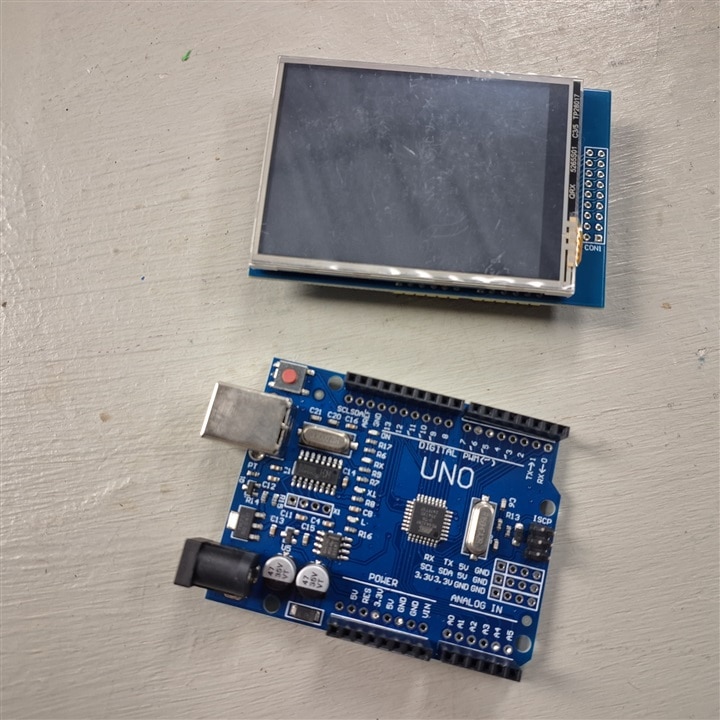
For this module, I used an Arduino-compatible 2.8-inch TFT display shield.
The display shield is mounted directly onto the compatible Arduino board, making the display arrangement compact.
I positioned the display on the front section of the haunted house so visitors could easily see the horror characters and warning messages.
The idea was to make the display look like part of the haunted house rather than an externally attached electronics board.
Step 9: Designing the Seven Horror Scenes
For the display software, I created different horror illustrations using graphics functions.
Instead of loading separate image files for every character, the graphics are drawn using geometric shapes such as circles, rectangles, triangles and lines.
I also created reusable functions for decorative borders, thick lines, warning text and other visual effects.
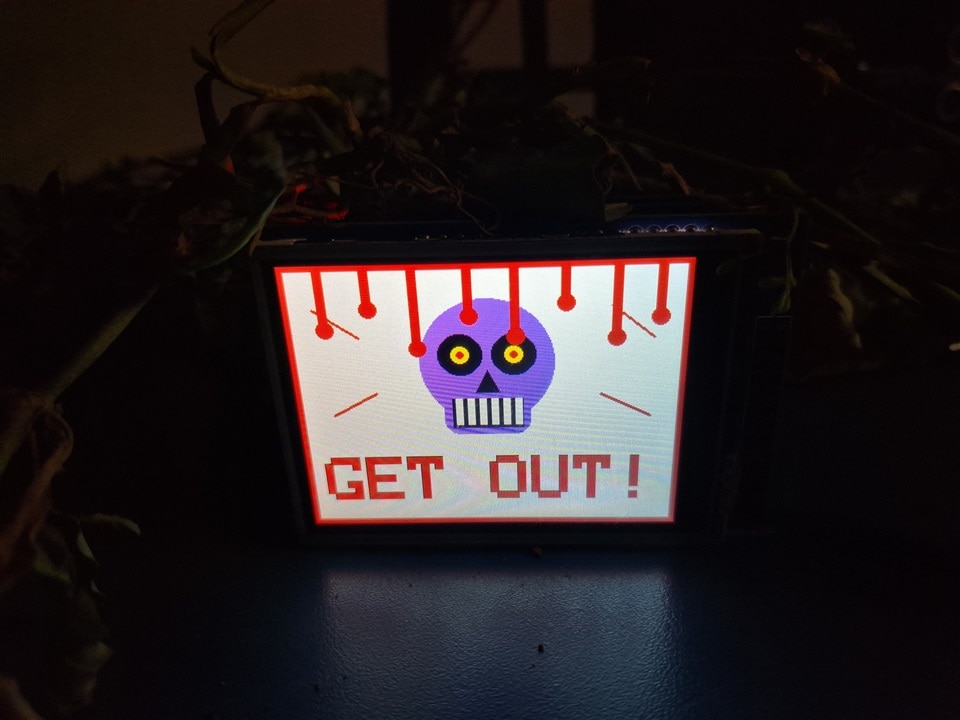
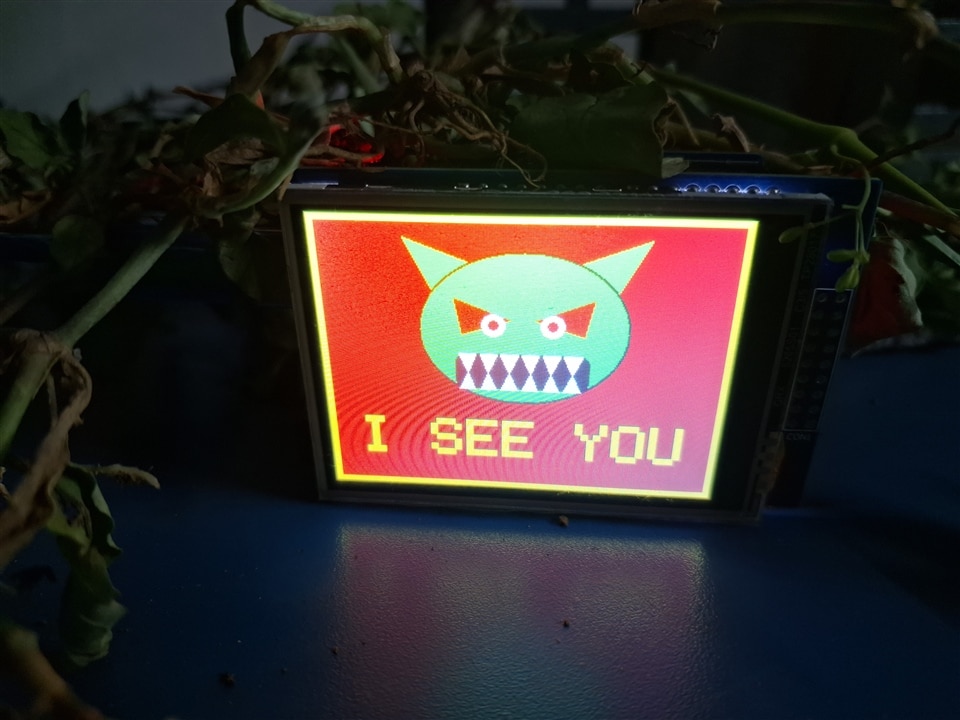
The program contains seven horror scenes:
-
Screaming Skull – GET OUT!
-
Demon Face – I SEE YOU
-
Bloody Hand – HELP ME
-
Watching Eyes
-
Evil Pumpkin
-
Spider – IT BITES
-
Grave – YOU'RE NEXT
Each scene has its own background colours, character artwork and warning message.
This approach makes the display more interesting than showing the same warning continuously.
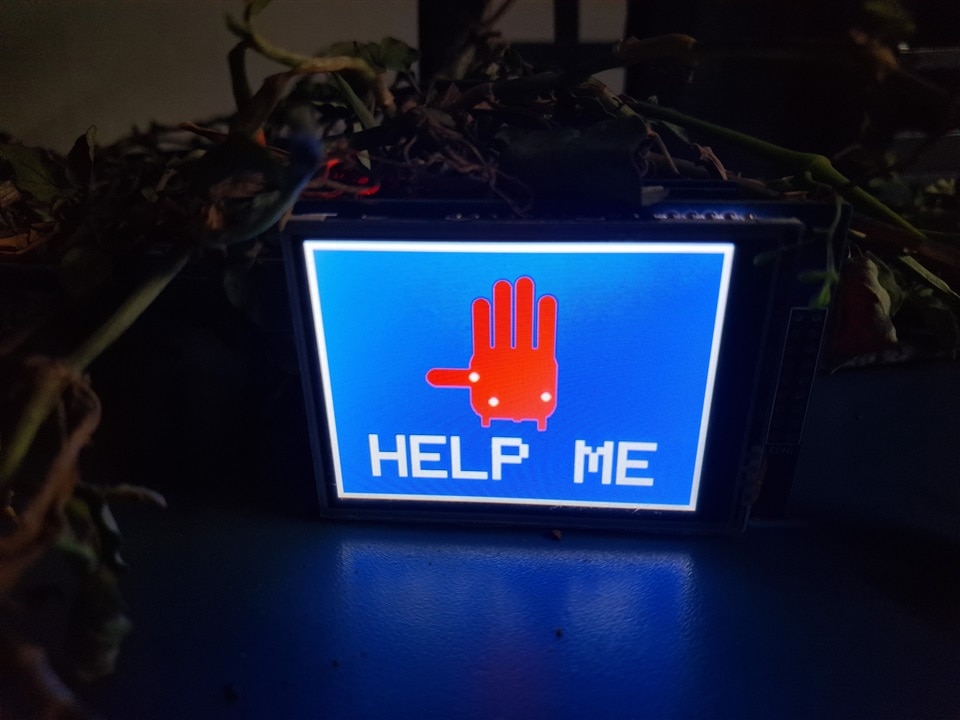
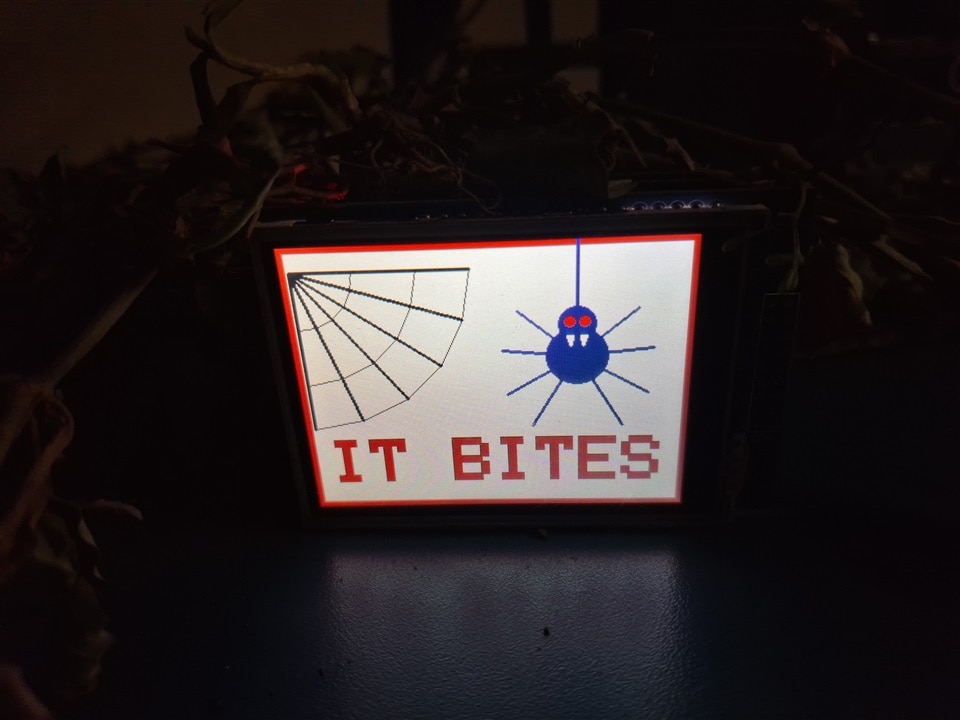
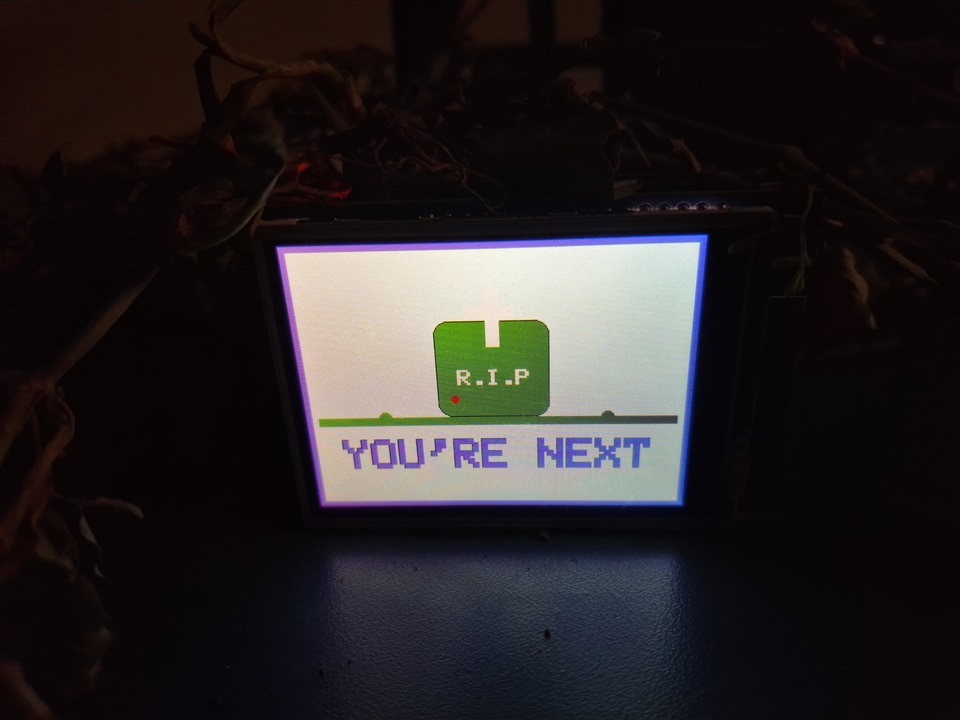
Step 10: Display Animation and Scene Transitions
After creating the individual horror scenes, I arranged them into a continuous sequence.
Each scene is displayed for approximately 3.5 seconds, followed by a short white flashing transition before the next scene appears.
The display automatically cycles through all seven scenes.
This gives the haunted house a continuously changing warning screen and creates the feeling that something inside the house is watching visitors.
PART 5 – MODULE 2: GHOST HOLOGRAM INTEGRATION
The second module is the hologram system retained from the original project.
Unlike the warning display and automatic door, this module does not require an Arduino controller.
The smartphone continues to play the ghost video, and the transparent reflector creates the floating image.
I integrated the hologram chamber into the existing house structure and positioned it so that visitors can see the ghost through the front viewing window.
The main advantage of retaining this design is that I can continue using the original hologram arrangement without adding another electronic display controller.
PART 6 – MODULE 3: AUTOMATIC HAUNTED DOOR
Now comes the interactive mechanical part of the project!
I wanted the entrance door to open automatically whenever someone approaches the haunted house.
For this, I used an ultrasonic distance sensor and a small 9g servo motor controlled by the second Arduino Uno.
Step 11: Installing the Ultrasonic Sensor
The ultrasonic sensor is responsible for detecting visitors approaching the entrance.
I positioned the sensor near the front entrance so that it can measure the distance between the house and an approaching person.
The sensor uses two main signal connections:
-
TRIG – Sends the ultrasonic trigger pulse.
-
ECHO – Receives the reflected ultrasonic signal.
The Arduino calculates the distance based on the time taken by the ultrasonic pulse to travel and return.
I configured the detection threshold to 10 cm.
When the measured distance is 10 cm or less, the Arduino identifies that someone has approached the entrance.
Step 12: Installing the 9g Servo Motor and Automatic Door
For opening and closing the entrance, I used a compact 9g servo motor.
I connected the servo mechanism to the miniature door so that its rotational movement could open and close the entrance.
The Arduino controls the servo position based on the distance measured by the ultrasonic sensor.
The working sequence is:
When someone approaches within 10 cm:
-
The sensor detects the approaching person.
-
The Arduino commands the servo to rotate to approximately 80 degrees.
-
The entrance door opens.
When the person moves away beyond the detection threshold:
-
The Arduino detects that the visitor has moved away.
-
The servo returns to its initial zero-degree position.
-
The entrance closes.
This gives the haunted house an automatic entrance without requiring visitors to touch the door.
Step 13: Adding the Thunder and Lightning Lighting Effect
Opening the door is interesting, but I wanted to make the experience more dramatic.
So I added a lightning-style flashing lighting effect.
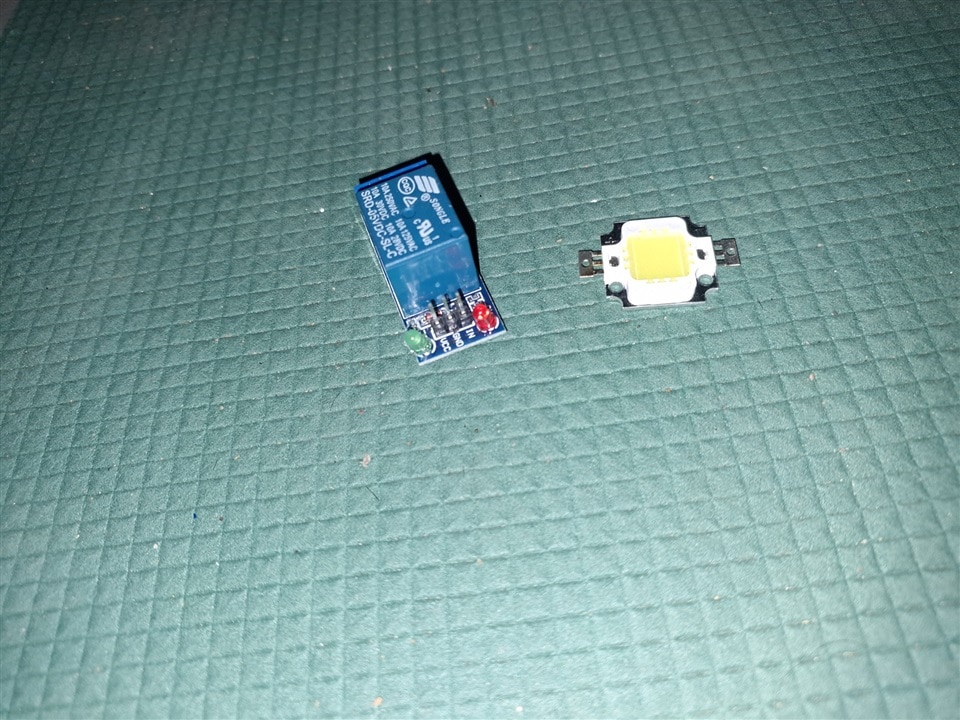
For this, I selected a 5W / 12V COB LED as the light source and a 5V relay module for switching the lighting circuit.
The intended operation is to activate the lighting effect when the door opens and switch it off when the door closes.
The sequence is:
-
Someone approaches the entrance.
-
The ultrasonic sensor detects the person.
-
The servo opens the door.
-
The lightning-style light starts flashing.
-
When the person moves away, the door closes and the light turns off.
The flashing effect is controlled through a timed Arduino routine.
I used millis() in the supplied door program to generate rapid LED transitions without blocking the main lighting routine.
The COB light requires a separate suitable 12V power supply, with the relay switching its power circuit. It must not be connected directly to an Arduino output pin.
PART 7 – FINAL ASSEMBLY AND INTEGRATION
Step 14: Integrating All Three Modules
After preparing the individual modules, I started installing them into the existing haunted house.
The TFT warning display is positioned at the front so visitors can see the horror messages.
The smartphone hologram chamber is installed inside the house, with the transparent reflector facing the front viewing window.
The ultrasonic sensor and servo mechanism are installed near the entrance.
I also arranged the lighting components inside the structure to create the desired illumination effect.
I kept the rear section accessible to make it easier to adjust wiring and perform maintenance.
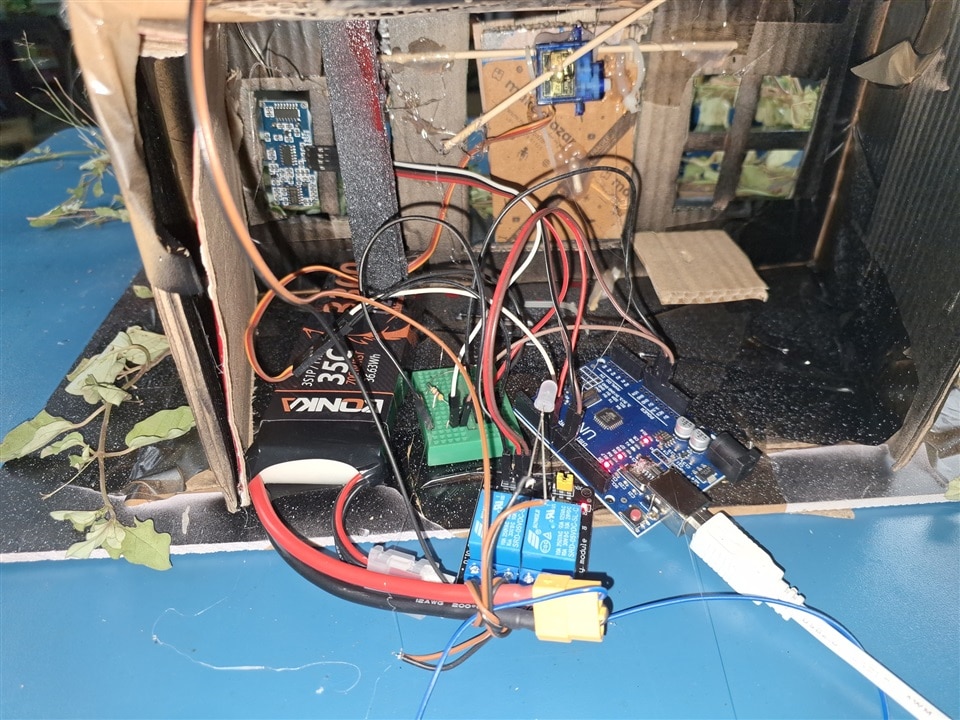
Step 15: Testing the Complete Haunted House
Once the modules were installed, I checked their individual functions and the overall integration.
The main things to verify are:
-
The warning display cycles through all seven horror scenes.
-
The smartphone hologram is visible through the front window.
-
The ultrasonic sensor detects a visitor at the 10 cm threshold.
-
The servo opens and closes the entrance correctly.
-
The lightning-style lighting activates and switches off with the door operation.
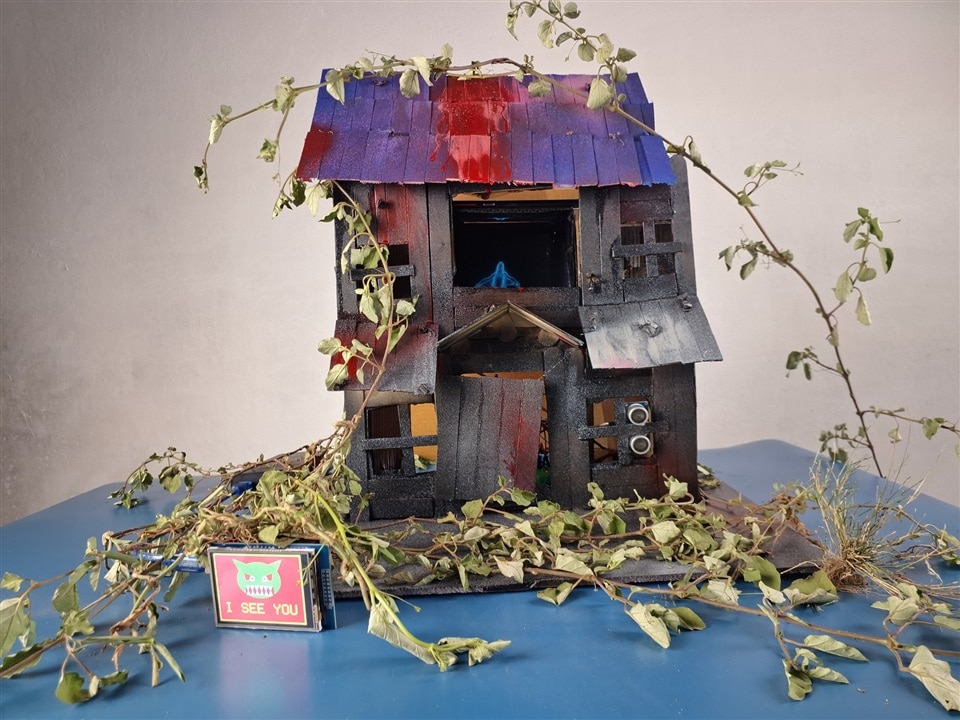
Final Result – Haunted Hologram House 2.0!
And finally, my Haunted Hologram House has evolved from a simple decorative miniature into an interactive Arduino-based Halloween project!
The original Version 1.0 introduced the handmade haunted house structure and floating ghost hologram.
With Version 2.0, I added three separate electronic functions:
-
A horror warning display featuring seven different characters and messages.
-
The original floating ghost hologram.
-
An ultrasonic sensor-based automatic entrance door with servo control and a lightning-style lighting effect.
What I particularly enjoyed about this project was combining different technologies into a single miniature setup.
The house structure is handmade using inexpensive materials, the hologram uses a simple optical illusion, and the new electronic features bring movement and interaction into the project.
It was also interesting to divide the electronics into independent modules rather than developing everything as one complicated system.
There is always room for further improvements, and I would like to explore additional interactive effects in future versions.
So, what do you think? Would you dare to approach this haunted house?
Thanks for checking out my project!
Happy making and Happy Halloween!
Humanix Tech Lab
Project Files and Resources
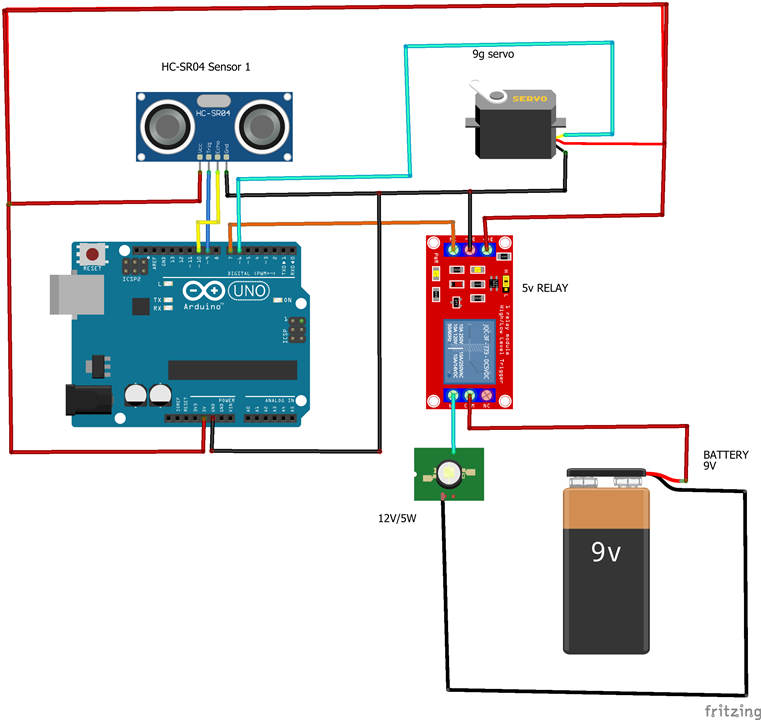
I will provide the relevant Arduino source code, wiring diagrams and additional project resources so other makers can understand the implementation and experiment with their own haunted house designs
// =====================================================
// HAUNTED WARNING BOARD - Arduino UNO + 2.8" TFT shield
// Libraries: "Adafruit GFX Library" + "MCUFRIEND_kbv"
// Board:     Arduino Uno
// Screen:    320 x 240 (landscape). The original 480x320
//            design is scaled by 2/3 so circles stay round.
// =====================================================

#include <Adafruit_GFX.h>
#include <MCUFRIEND_kbv.h>
#include <math.h>
#include <string.h>
#include <avr/pgmspace.h>

MCUFRIEND_kbv tft;

// =====================================================
// COLOURS (same values as your ESP32 version)
// =====================================================

#define BLACK   0x0000
#define WHITE   0xFFFF
#define RED     0xF800
#define GREEN   0x07E0
#define YELLOW  0xFFE0
#define CYAN    0x07FF
#define ORANGE  0xFD20

// Scene 1: Skull
#define SKULL_BG       0xDFFF
#define SKULL_ART      0x801F
#define SKULL_TEXT     0xD000
#define SKULL_DETAIL   0x0000
#define SKULL_EYE      0xFFE0

// Scene 2: Demon
#define DEMON_BG       0xE000
#define DEMON_ART      0x07E0
#define DEMON_TEXT     0xFFE0
#define DEMON_OUTLINE  0x6000
#define DEMON_RED      0xF800
#define DEMON_EYE      0xFFFF

// Scene 3: Bloody hand
#define HAND_BG        0x215F
#define HAND_ART       0xF800
#define HAND_TEXT      0xFFFF
#define HAND_DETAIL    0x0000

// Scene 4: Watching eyes
#define EYES_BG        0xFD20
#define EYES_ART       0x4010
#define EYES_TEXT      0x07FF
#define EYES_DETAIL    0x0000
#define EYES_GLOW      0xFFE0

// Scene 5: Pumpkin
#define PUMPKIN_BG     0x05F5
#define PUMPKIN_ART    0xFD20
#define PUMPKIN_TEXT   0xFFFF
#define PUMPKIN_DETAIL 0x0000
#define PUMPKIN_GREEN  0x0320

// Scene 6: Spider
#define SPIDER_BG      0xF7DE
#define SPIDER_ART     0x4010
#define SPIDER_TEXT    0xD000
#define SPIDER_DETAIL  0x0000
#define SPIDER_EYE     0xF800

// Scene 7: Grave
#define GRAVE_BG       0xDFFF
#define GRAVE_ART      0x03E0
#define GRAVE_TEXT     0x801F
#define GRAVE_DETAIL   0x0000
#define GRAVE_CROSS    0xFFFF

// =====================================================
// SCALING LAYER
// All scene code below uses the ORIGINAL 480x320
// coordinates. These helpers scale them to 320x240.
// =====================================================

#define OFFY 13   // vertical centring (240 - 320*2/3) / 2

static int X(int v) { return (v * 2 + 1) / 3; }
static int Y(int v) { return (v * 2 + 1) / 3 + OFFY; }
static int S(int v) { int r = (v * 2 + 1) / 3; return r < 1 ? 1 : r; }

void sCircle(int x, int y, int r, uint16_t c) {
  tft.fillCircle(X(x), Y(y), S(r), c);
}

void sRect(int x, int y, int w, int h, uint16_t c) {
  tft.fillRect(X(x), Y(y), S(w), S(h), c);
}

void sRound(int x, int y, int w, int h, int r, uint16_t c) {
  tft.fillRoundRect(X(x), Y(y), S(w), S(h), S(r), c);
}

void sRoundLine(int x, int y, int w, int h, int r, uint16_t c) {
  tft.drawRoundRect(X(x), Y(y), S(w), S(h), S(r), c);
}

void sTri(int x0, int y0, int x1, int y1, int x2, int y2, uint16_t c) {
  tft.fillTriangle(X(x0), Y(y0), X(x1), Y(y1), X(x2), Y(y2), c);
}

void sLine(int x0, int y0, int x1, int y1, uint16_t c) {
  tft.drawLine(X(x0), Y(y0), X(x1), Y(y1), c);
}

void sThick(int x0, int y0, int x1, int y1, uint16_t c) {
  int ax = X(x0), ay = Y(y0), bx = X(x1), by = Y(y1);
  for (int d = -1; d <= 1; d++) {
    tft.drawLine(ax + d, ay, bx + d, by, c);
    tft.drawLine(ax, ay + d, bx, by + d, c);
  }
}

// Adafruit_GFX has no ellipse, so draw one with horizontal lines
void ellipseRaw(int cx, int cy, int rx, int ry, uint16_t c) {
  if (ry < 1) ry = 1;
  for (int y = -ry; y <= ry; y++) {
    long t = (long)ry * ry - (long)y * y;
    int dx = (int)(rx * sqrt((float)t) / ry);
    tft.drawFastHLine(cx - dx, cy + y, 2 * dx + 1, c);
  }
}

void sEllipse(int cx, int cy, int rx, int ry, uint16_t c) {
  ellipseRaw(X(cx), Y(cy), S(rx), S(ry), c);
}

// filled ellipse with a 2 px outline
void sEllOut(int cx, int cy, int rx, int ry, uint16_t fill, uint16_t line) {
  int a = X(cx), b = Y(cy), r1 = S(rx), r2 = S(ry);
  ellipseRaw(a, b, r1 + 2, r2 + 2, line);
  ellipseRaw(a, b, r1, r2, fill);
}

// =====================================================
// COMMON GRAPHICS
// =====================================================

void border(uint16_t c) {
  for (int i = 0; i < 5; i++) tft.drawRect(i, i, 320 - 2 * i, 240 - 2 * i, c);
}

// Heavy warning text, auto-sized to fit 320 px
void warningText(const __FlashStringHelper *msg, uint16_t colour) {
  int n = strlen_P((PGM_P)msg);
  int size = 6;
  while (size > 3 && n * 6 * size > 300) size--;

  int x = (320 - n * 6 * size) / 2;
  int y = 172;

  tft.setTextSize(size);

  tft.setTextColor(BLACK);                       // outline
  for (int dy = -1; dy <= 1; dy += 2)
    for (int dx = -1; dx <= 1; dx += 2) {
      tft.setCursor(x + dx, y + dy);
      tft.print(msg);
    }

  tft.setTextColor(colour);                      // thick text
  for (int dy = 0; dy <= 1; dy++)
    for (int dx = 0; dx <= 1; dx++) {
      tft.setCursor(x + dx, y + dy);
      tft.print(msg);
    }
}

void drips(uint16_t colour) {
  const int xs[8]  = {40, 95, 150, 215, 270, 330, 390, 440};
  const int len[8] = {60, 35, 85, 45, 70, 30, 75, 50};
  for (int i = 0; i < 8; i++) {
    tft.fillRect(X(xs[i]), 0, S(12), Y(len[i]), colour);
    tft.fillCircle(X(xs[i] + 6), Y(len[i]), S(10), colour);
  }
}

void scratches(uint16_t colour) {
  sThick(35, 35, 85, 70, colour);
  sThick(390, 35, 440, 75, colour);
  sThick(45, 175, 100, 145, colour);
  sThick(380, 150, 440, 180, colour);
}

// =====================================================
// SCENE 1: SCREAMING SKULL
// =====================================================

void screenSkull() {
  tft.fillScreen(SKULL_BG);
  border(SKULL_TEXT);

  sCircle(240, 105, 82, SKULL_ART);
  sRound(185, 135, 110, 70, 20, SKULL_ART);

  sCircle(207, 95, 27, SKULL_DETAIL);
  sCircle(273, 95, 27, SKULL_DETAIL);
  sCircle(207, 95, 11, SKULL_EYE);
  sCircle(273, 95, 11, SKULL_EYE);
  sCircle(207, 95, 5, SKULL_TEXT);
  sCircle(273, 95, 5, SKULL_TEXT);

  sTri(240, 115, 225, 145, 255, 145, SKULL_DETAIL);

  sRect(195, 155, 90, 42, SKULL_DETAIL);
  for (int i = 0; i < 6; i++) sRect(200 + i * 15, 155, 9, 38, SKULL_BG);

  drips(SKULL_TEXT);
  scratches(SKULL_TEXT);
  warningText(F("GET OUT!"), SKULL_TEXT);
}

// =====================================================
// SCENE 2: DEMON FACE
// =====================================================

void screenDemon() {
  tft.fillScreen(DEMON_BG);
  border(DEMON_TEXT);

  sTri(135, 65, 105, 5, 185, 35, DEMON_ART);
  sTri(345, 65, 375, 5, 295, 35, DEMON_ART);

  sEllOut(240, 115, 120, 95, DEMON_ART, DEMON_OUTLINE);

  sTri(160, 75, 225, 100, 170, 120, DEMON_RED);
  sTri(320, 75, 255, 100, 310, 120, DEMON_RED);

  sCircle(205, 108, 13, DEMON_EYE);
  sCircle(275, 108, 13, DEMON_EYE);
  sCircle(205, 108, 6, DEMON_RED);
  sCircle(275, 108, 6, DEMON_RED);

  sRound(160, 145, 160, 48, 12, DEMON_OUTLINE);

  for (int i = 0; i < 6; i++) {
    sTri(165 + i * 25, 145, 185 + i * 25, 145, 175 + i * 25, 170, DEMON_EYE);
    sTri(165 + i * 25, 193, 185 + i * 25, 193, 175 + i * 25, 170, DEMON_EYE);
  }

  warningText(F("I SEE YOU"), DEMON_TEXT);
}

// =====================================================
// SCENE 3: BLOODY HAND
// =====================================================

void screenHand() {
  tft.fillScreen(HAND_BG);
  border(HAND_TEXT);

  const int fingerTop[4] = {45, 22, 18, 40};
  for (int i = 0; i < 4; i++) {
    sRound(190 + i * 26, fingerTop[i], 22, 135, 11, HAND_ART);
    sRoundLine(190 + i * 26, fingerTop[i], 22, 135, 11, HAND_DETAIL);
  }

  sRound(186, 110, 108, 100, 24, HAND_ART);   // palm
  sRound(130, 140, 80, 26, 13, HAND_ART);     // thumb

  sRect(200, 200, 10, 22, HAND_ART);          // wrist drips
  sRect(240, 200, 10, 14, HAND_ART);
  sRect(272, 200, 10, 25, HAND_ART);

  sCircle(190, 150, 5, HAND_TEXT);
  sCircle(280, 175, 5, HAND_TEXT);
  sCircle(215, 185, 4, HAND_TEXT);

  warningText(F("HELP ME"), HAND_TEXT);
}

// =====================================================
// SCENE 4: EYES IN THE DARK
// =====================================================

void eyePair(int cx, int cy, int radius, uint16_t eyeColour) {
  int separation = radius * 3 / 2;

  for (int side = -1; side <= 1; side += 2) {
    int x = cx + side * separation;

    sEllipse(x, cy, radius, radius * 6 / 10, eyeColour);
    sEllipse(x, cy, radius / 5 + 1, radius * 5 / 10, EYES_DETAIL);

    sTri(x - radius, cy - radius,
         x + radius, cy - radius,
         x - side * radius, cy - radius / 4,
         EYES_DETAIL);
  }
}

void screenEyes() {
  tft.fillScreen(EYES_BG);
  border(EYES_TEXT);

  sRound(20, 15, 440, 190, 25, EYES_ART);

  eyePair(95, 65, 20, EYES_GLOW);
  eyePair(240, 55, 28, RED);
  eyePair(385, 70, 22, EYES_GLOW);
  eyePair(150, 150, 26, RED);
  eyePair(335, 150, 32, EYES_GLOW);

  warningText(F("NOT ALONE"), EYES_TEXT);
}

// =====================================================
// SCENE 5: EVIL PUMPKIN
// =====================================================

void screenPumpkin() {
  tft.fillScreen(PUMPKIN_BG);
  border(PUMPKIN_TEXT);

  sRect(228, 8, 24, 40, PUMPKIN_GREEN);                         // stem
  sEllOut(240, 115, 150, 95, PUMPKIN_ART, PUMPKIN_DETAIL);      // body

  sTri(165, 95, 215, 95, 190, 48, PUMPKIN_DETAIL);              // eyes
  sTri(265, 95, 315, 95, 290, 48, PUMPKIN_DETAIL);
  sTri(240, 108, 225, 135, 255, 135, PUMPKIN_DETAIL);           // nose

  sEllipse(240, 165, 100, 36, PUMPKIN_DETAIL);                  // mouth
  for (int i = 0; i < 4; i++) {
    sTri(175 + i * 31, 137, 200 + i * 31, 137, 187 + i * 31, 163, PUMPKIN_ART);
    sTri(190 + i * 31, 197, 215 + i * 31, 197, 202 + i * 31, 171, PUMPKIN_ART);
  }

  sTri(230, 35, 190, 15, 215, 55, PUMPKIN_GREEN);               // leaf

  warningText(F("TRICK OR DIE"), PUMPKIN_TEXT);
}

// =====================================================
// SCENE 6: SPIDER AND WEB
// =====================================================

void screenSpider() {
  tft.fillScreen(SPIDER_BG);
  border(SPIDER_TEXT);

  const int webX = 10, webY = 10;

  // cos/sin(0,18,36,54,72,90 deg) * 210, precomputed (no float math)
  const int ex[6] = {210, 199, 169, 123, 64, 0};
  const int ey[6] = {0, 64, 123, 169, 199, 210};
  const int rings[3] = {35, 70, 100};

  for (int k = 0; k < 6; k++)
    sThick(webX, webY, webX + ex[k], webY + ey[k], SPIDER_DETAIL);

  for (int r = 0; r < 3; r++)
    for (int k = 0; k < 5; k++)
      sLine(webX + ex[k] * rings[r] / 100,     webY + ey[k] * rings[r] / 100,
            webX + ex[k + 1] * rings[r] / 100, webY + ey[k + 1] * rings[r] / 100,
            SPIDER_DETAIL);

  const int sx = 345, sy = 125;
  const int lx[4] = {-70, -90, -85, -55};
  const int ly[4] = {-60, -10, 50, 95};

  for (int i = 0; i < 4; i++) {
    sThick(sx, sy, sx + lx[i], sy + ly[i], SPIDER_ART);
    sThick(sx, sy, sx - lx[i], sy + ly[i], SPIDER_ART);
  }

  tft.fillRect(X(sx - 2), 0, S(5), Y(80), SPIDER_ART);          // thread

  sCircle(sx, sy, 38, SPIDER_ART);                              // body
  sCircle(sx, sy - 42, 22, SPIDER_ART);                         // head
  sCircle(sx - 9, sy - 46, 6, SPIDER_EYE);
  sCircle(sx + 9, sy - 46, 6, SPIDER_EYE);

  sTri(sx - 12, sy - 28, sx - 4, sy - 28, sx - 8, sy - 14, WHITE);   // fangs
  sTri(sx + 12, sy - 28, sx + 4, sy - 28, sx + 8, sy - 14, WHITE);

  warningText(F("IT BITES"), SPIDER_TEXT);
}

// =====================================================
// SCENE 7: GRAVE
// =====================================================

void screenGrave() {
  tft.fillScreen(GRAVE_BG);
  border(GRAVE_TEXT);

  sRect(15, 205, 450, 12, GRAVE_ART);                           // ground

  sRound(170, 75, 140, 130, 18, GRAVE_ART);                     // stone
  sRoundLine(170, 75, 140, 130, 18, GRAVE_DETAIL);

  sRect(232, 35, 16, 75, GRAVE_CROSS);                          // cross
  sRect(212, 55, 56, 16, GRAVE_CROSS);

  tft.setTextSize(2);                                           // R.I.P
  tft.setTextColor(GRAVE_CROSS);
  tft.setCursor(X(195), Y(140));
  tft.print(F("R.I.P"));
  tft.setCursor(X(195) + 1, Y(140));
  tft.print(F("R.I.P"));

  sCircle(190, 180, 5, RED);
  sCircle(100, 205, 7, GRAVE_ART);
  sCircle(380, 205, 7, GRAVE_ART);

  warningText(F("YOU'RE NEXT"), GRAVE_TEXT);
}

// =====================================================
// TRANSITION EFFECT
// =====================================================

void blink(uint16_t sceneColour) {
  for (int i = 0; i < 3; i++) {
    tft.fillScreen(WHITE);
    delay(35 + random(50));
    tft.fillScreen(sceneColour);
    delay(35);
  }
}

// =====================================================
// SETUP / LOOP
// =====================================================

void setup() {
  Serial.begin(9600);

  uint16_t id = tft.readID();
  Serial.print(F("LCD ID: 0x"));
  Serial.println(id, HEX);
  if (id == 0xD3D3) id = 0x9341;     // common fallback for 2.8" shields

  tft.begin(id);
  tft.setRotation(1);                // landscape 320x240 (try 3 if upside down)
  tft.fillScreen(BLACK);

  randomSeed(analogRead(A5));        // A5 is not used by the shield
}

void loop() {
  screenSkull();   delay(3500); blink(SKULL_BG);
  screenDemon();   delay(3500); blink(DEMON_BG);
  screenHand();    delay(3500); blink(HAND_BG);
  screenEyes();    delay(3500); blink(EYES_BG);
  screenPumpkin(); delay(3500); blink(PUMPKIN_BG);
  screenSpider();  delay(3500); blink(SPIDER_BG);
  screenGrave();   delay(3500); blink(GRAVE_BG);
}
.
#include <Servo.h>

#define TRIG_PIN 9
#define ECHO_PIN 10
#define SERVO_PIN 6
#define LED_PIN 7

#define DETECT_DISTANCE 10

Servo doorServo;

bool doorOpen = false;

unsigned long previousMillis = 0;
const int blinkInterval = 60;  // Fast blinking
bool ledState = false;

float readDistance() {
  digitalWrite(TRIG_PIN, LOW);
  delayMicroseconds(2);

  digitalWrite(TRIG_PIN, HIGH);
  delayMicroseconds(10);

  digitalWrite(TRIG_PIN, LOW);

  unsigned long duration = pulseIn(ECHO_PIN, HIGH, 30000);

  if (duration == 0) {
    return -1;
  }

  return duration * 0.0343 / 2.0;
}

void setup() {
  Serial.begin(9600);

  pinMode(TRIG_PIN, OUTPUT);
  pinMode(ECHO_PIN, INPUT);
  pinMode(LED_PIN, OUTPUT);

  digitalWrite(LED_PIN, LOW);

  doorServo.attach(SERVO_PIN);
  doorServo.write(0);

  Serial.println("Automatic Door System Ready");
}

void loop() {
  float distance = readDistance();

  if (distance > 0) {

    Serial.print("Distance: ");
    Serial.print(distance);
    Serial.println(" cm");

    if (distance <= DETECT_DISTANCE && !doorOpen) {
      doorServo.write(80);
      doorOpen = true;

      Serial.println("DOOR OPEN");
    }

    else if (distance > DETECT_DISTANCE && doorOpen) {
      doorServo.write(0);
      doorOpen = false;

      digitalWrite(LED_PIN, LOW);
      ledState = false;

      Serial.println("DOOR CLOSED");
    }
  }

  // Thunder / strobe effect while door is open
  if (doorOpen) {

    unsigned long currentMillis = millis();

    if (currentMillis - previousMillis >= blinkInterval) {
      previousMillis = currentMillis;

      ledState = !ledState;
      digitalWrite(LED_PIN, ledState);
    }

  } else {
    digitalWrite(LED_PIN, LOW);
    ledState = false;
  }

  delay(10);
}