


Hello Element14 community. As part of “Make a Connection” Project14 competition I made a SuperTuxKart racing console using Arduino Uno Q, Meccano like building set, my own gyroscope and accelerator shield, Linux driver and bunch of python script to connect everything together.
See it in the action
Mechanical Base
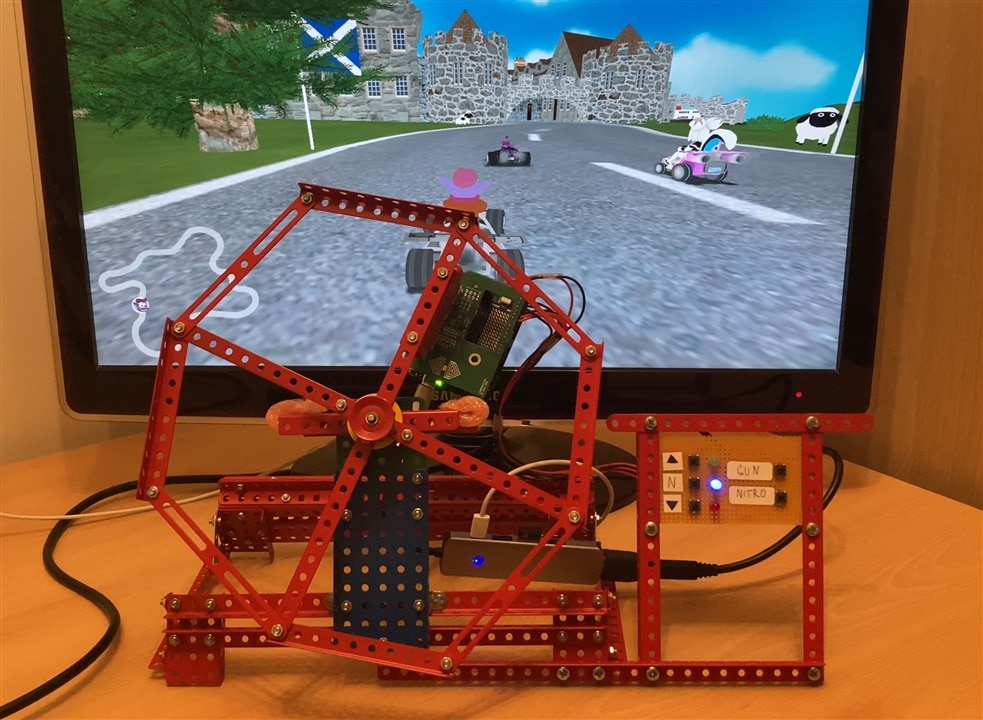
Mechanical base is built from building set called Merkur. It is very similar to Meccano well known in UK. Merkur is Czech (or Czechoslovak back in time) alternative to Meccano. They are more or less same, except pitch of holes is metric (10mm) in case of Merkur and imperial (12.7mm) in case of Meccano. Both building sets are from metal, so they are heavier than Lego for example, and build is also much more mechanical strong.
Gaming on Arduino Uno Q
Core part of the project is Open-Source Game called SuperTuxCart. It is easily available for download in nearly every Linux package repository, however for my project I need to modify it to control race by my custom DIY device.
Uno Q is interesting hardware because it not only contains feature rich microcontroller for real-time task, it also contains powerful MPU with high-performance ARM Cores capable of running Linux, but it also has pretty powerful Qualcomm Ardeno GPU. This project utilizes all 3 parts extensively.
I tested gaming on Uno Q and of course, GPU is not the most powerful on the market. It should be equivalent to mobile GPUs. With tweaks on game quality in settings, I was able to play even at Full HD resolution at decent FPS.
Gyroscope on Custom Arduino Shield
Motion detection is done by STM LSM6DSV16X 6-axis accelerometer and gyroscope. This is one of the most feature rich sensor in this category on the market. Inside the chip there are various engines which process data from raw sensor, auto calibrate it, and provide highly accurate mostly noise free data.
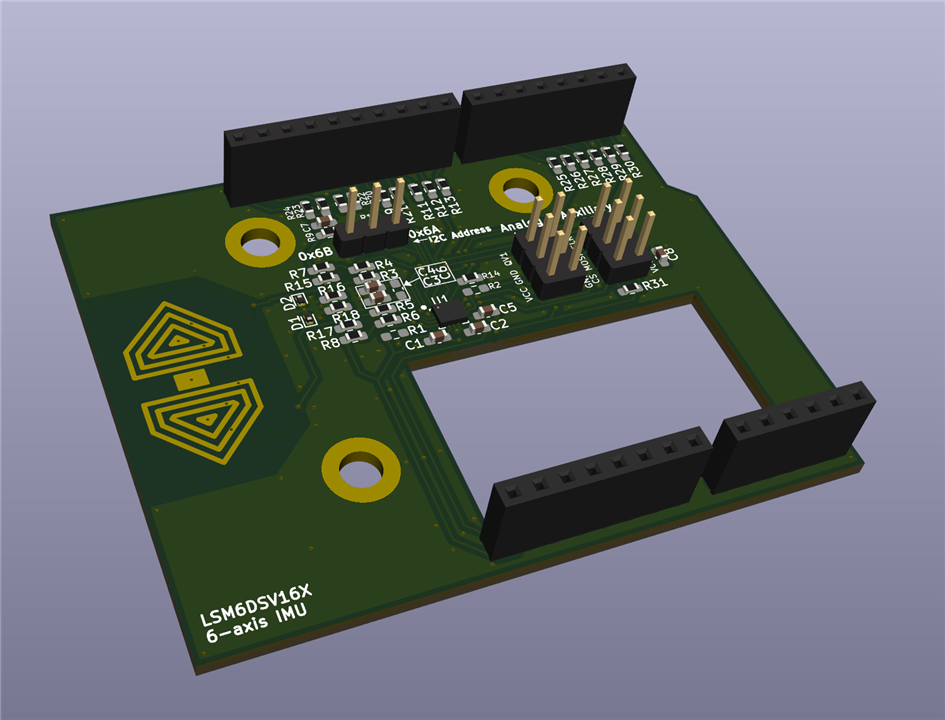
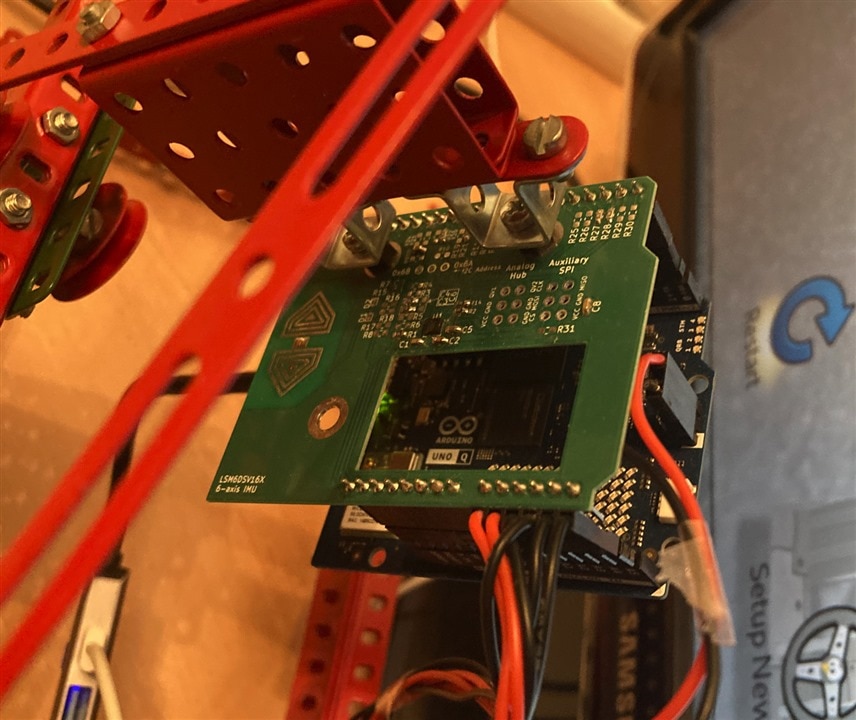
To get it to my Arduino Uno Q, I had to make my custom shied. I made shield utilizing nearly all it’s capabilities of the chip but not all are used in this application.
Designing custom shield allowed me to design it specially for Arduino Uno Q. I added holes perfectly fitting building set and add hole for making Uno Q matrix display visible.
Control Panel
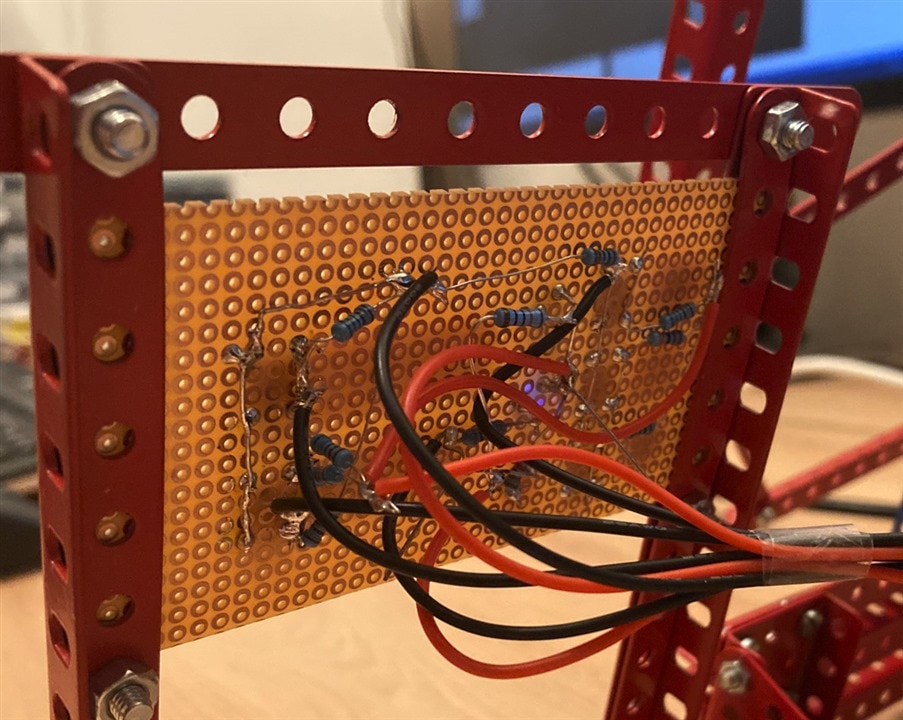
Except steering wheel I added simple control panel which allows selecting direction and activagin game functions Nitro and Gun.
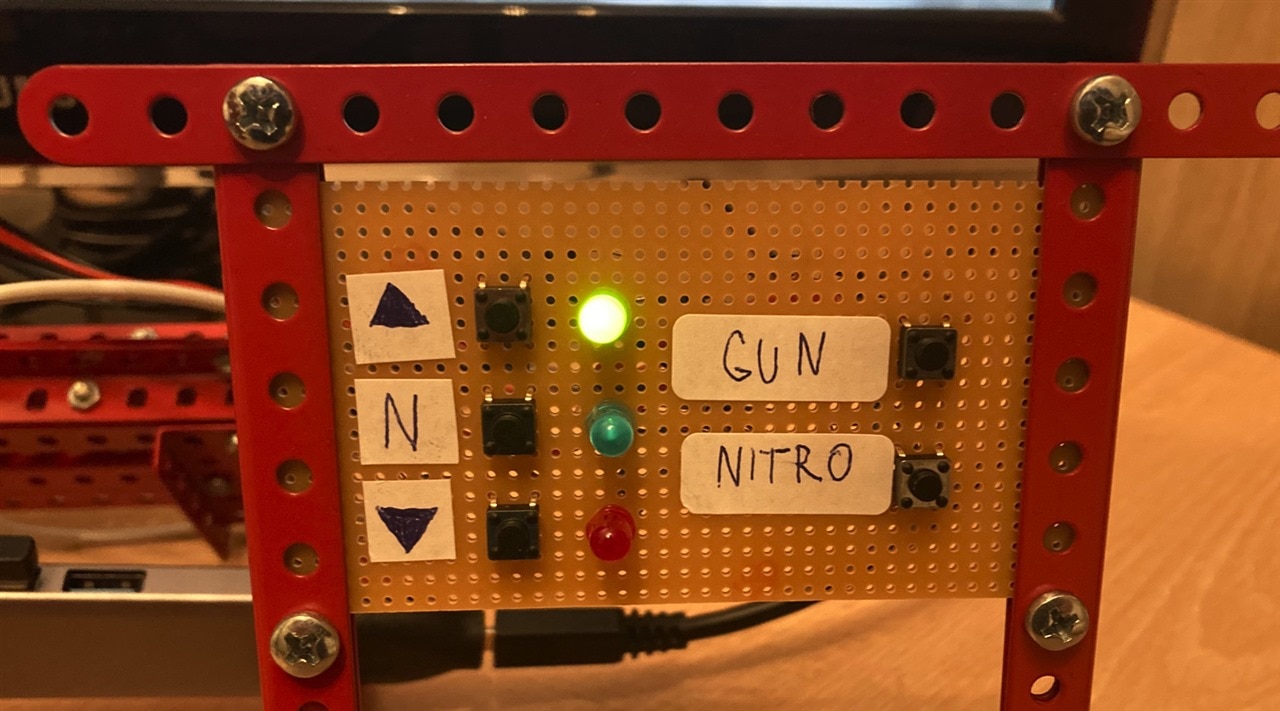
From back there are resistors forming resistor dividers allowing me connect multiple buttons to single pin on Arduino and detect pressed buttons using ADC.
Real Time MCU on Arduino
STM32 MCU on Arduino Uno Q run sketch that uses https://github.com/stm32duino/LSM6DSV16X library which is itself wrapper on library from ST. This library allows me to configure and enable ST’s low power sensor fusion.
Linux Driver
I considered modifying the game. It is open source. But later I found out that maybe it would be eaiser to implement Linux driver providing virtual joystick.
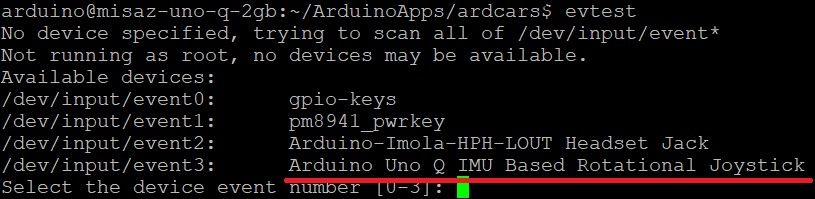
Driver is built via dkms. No full kernel build needed. You need to copy it to /usr/src/ardjoystick-1.0, then execute
sudo dkms build ardjoystick/1.0
sudo dkms install ardjoystick/1.0
sudo modprobe ardjoystick
While this is enough from kernel point of view. Game (and SDL library game is based on) require additional attribute from udev to detect is as a joystick. To make it working you need to copy 70-ard-imu-joystick.rules (it is in downloadable ZIP at the end of article) to /usr/lib/udev/rules.d.
Connections
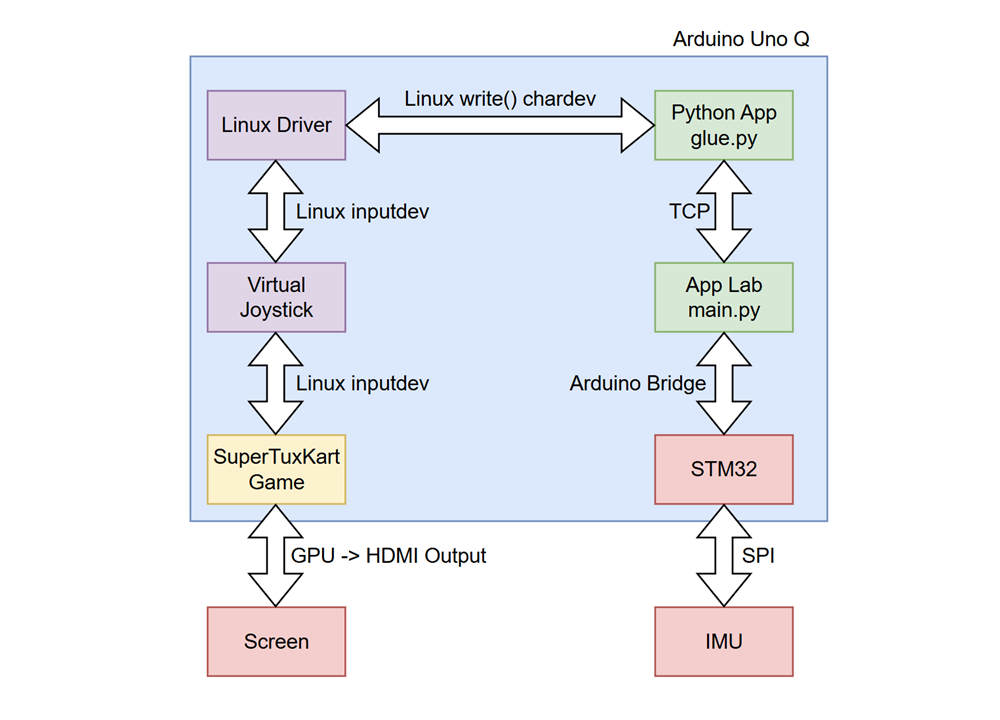
The hardest part was interconnecting all the layers.
- STM32 (Arduino Sketch) connects to sensor via SPI
- STM32 send data to python app in App Lab via Arduino Bridge connection
- Game can’t run in App Lab container, so it is needed to export data from App Lab container to outside word. This is done via TCP socket since this is only option container can communicate outside.
- Game do not understand this socket. Game gets data via virtual joystick device provided by Linux driver.
- Linux driver also can’t connect to socket because of security.
- There is additional python app (glue.py) which connects socket with driver by forwarding data between them.
- Linux driver communicates two directions. On input it handles character device which it uses for receiving data from HW. On other side it provides input devices which is virtual joystick.
Following diagram show all the connection and flow:
Conclusion
I enjoyed this project. I was surprised by 3D performance of Uno Q. As part of project I made custom shield, Arduino sketch and python app, Linux driver, played with building set and enjoy driving on the final console. It was cool time for me. If you want to built this or something similar yourself, feel free to download resources bellow. It contains all the codes needed.
Resources
Software (Sketch, Python apps, Linux Driver, udev rules) (ZIP)
Arduino Shield Kicad Project (ZIP)
Top Comments
-

misaz
-
Cancel
-
Vote Up
0
Vote Down
-
-
Sign in to reply
-
More
-
Cancel
Comment-

misaz
-
Cancel
-
Vote Up
0
Vote Down
-
-
Sign in to reply
-
More
-
Cancel
Children