


Video Demonstration:
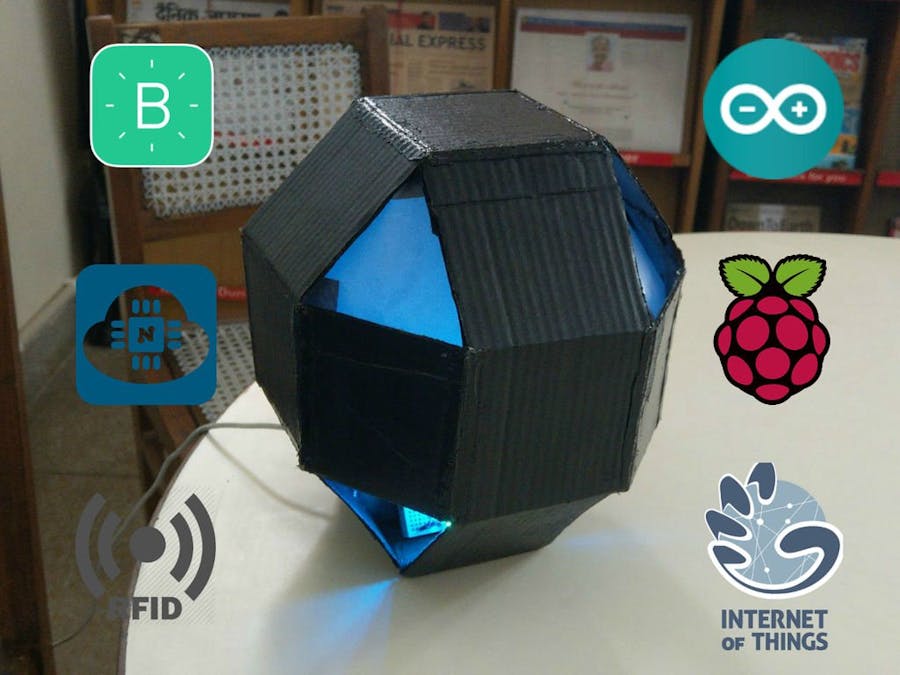
There are many IoT home automation projects out there, but trust me there is nothing like this! Octopod is made using NodeMCU (Arduino MKR 1010) , Arduino Uno, and Raspberry Pi 3. Octopod allows you to make your home smart. Octopod sends you a variety of data like temperature, humidity, and gas quality inside your home. Octopod sends you notification whenever it detects any sort of motion inside and tells you when you need to water your plants. You can also control your appliances through a Blynk application on your smartphone. Octopod even enables true mood lighting!
Octopod is equipped with a tiny little camera, which sends you live feed. This camera also uses artificial intelligence to detect humans in its sight and sends you their pictures. In addition, it features an RFID door locking system! Awesome, right?
How Everything Works?
The NodeMCU is connected to a bunch of sensors, a relay module and RGB LEDs. It is connected to Blynk app on a smartphone via WiFi, which sends all the data and allows you to control your home.
Raspberry Pi is also connected to WiFi, which lets you see the live feed via the Pi Camera. We have also installed OpenCV libraries on the Pi, and configured the Pi to detect any human beings in its sight and email you their images.
The smart door unit uses an RFID module. When the permitted RFID is brought within its range, it automatically opens the door.
STEP 1: Coding Main Octopod
I have added comments on almost every line, so you don't only copy but you understand. Here, I will tell you what actually happens when the code is executed in a nutshell!
- Including the Libraries:
In this segment we define the pins of our various sensors. You can change them as per your convince. We also define some Integers that we tend to use during the course of our code.
#define DHTPIN 2 // What digital pin temperature and humidity sensor is connected to#define soilPin 4 // What digital pin soil moisture sensor is connected to#define gasPin A0 // What analog pin gas sensor is connected to#define pirPin 12 // What digital pin soil moisture sensor is connected to int pirValue; // Place to store read PIR Valueint soilValue; // Place to store read Soil Moisture Valueint PIRpinValue; // Place to store the value sent by Blynk App Pin V0int SOILpinValue; // Place to store the value sent by Blynk App Pin V1 - BLYNK_WRITE() :
This code takes the data from DHT11 make it use able, and then sends it to Pin V5 and V6 respectively.
void sendSensor(){ int h = dht.readHumidity(); int t = dht.readTemperature(); // or dht.readTemperature(true) for Fahrenheit if (isnan(h) || isnan(t)) { Serial.println("Failed to read from DHT sensor!"); // to check if sensor is not sending any false values return; } // You can send any value at any time. // Please don't send more that 10 values per second. Blynk.virtualWrite(V5, h); // send humidity to pin V5 Blynk.virtualWrite(V6, t); // send temperature to pin V7} - void getPirValue() & void getSoilValue() :
In the setup we do a couple of things that are only meant to be done once. Like: Starting the serial communication at a fixed Baud Rate, Authorize this code to the Blynk application, beginning the Dht sensor readings, then tweeting to your twitter handle that your Smart Home Project is Online, then telling the node that Pir Pin and Soil Sensor Pin is meant to take Input only.
void setup(){ // Debug console Serial.begin(9600); Blynk.begin(auth, ssid, pass); // You can also specify server: //Blynk.begin(auth, ssid, pass, "blynk-cloud.com", 8442); //Blynk.begin(auth, ssid, pass, IPAddress(192,168,1,100), 8442); dht.begin(); // Begins DHT reading Blynk.tweet("OCTOPOD IS ONLINE! "); // Tweating on your Twitter Handle that you project is online pinMode(pirPin,INPUT); // Defining that Pir Pin is meant to take Input Only pinMode(soilPin,INPUT); // Defining that Soil Sensor Pin is meant to take Input Only // Setup a function to be called every second timer.setInterval(1000L, sendSensor);} - void loop() :
- Then download which ever code you like. Open the code and go to this line. Here in place of these X's add the UID of the card that you want to use to open the door. Now you are ready, just upload the code.
if (content.substring(1) == "XX XX XX XX") { }
1. Open up your Raspberry Pi Camera module. Be aware that the camera can be damaged by static electricity. Before removing the camera from its grey anti-static bag, make sure you have discharged yourself by touching an earthed object (e.g. a radiator or PC Chassis).
2. Install the Raspberry Pi Camera module by inserting the cable into the Raspberry Pi. The cable slots into the connector situated between the Ethernet and HDMI ports, with the silver connectors facing the HDMI port.
3. Boot up your Raspberry Pi.
4. From the prompt, run "sudo raspi-config". If the "camera" option is not listed, you will need to run a few commands to update your Raspberry Pi. Run "sudo apt-get update" and "sudo apt-get upgrade"
5. Run "sudo raspi-config" again - you should now see the "camera" option.
COMMAND-
$ sudo raspi-config 6. Navigate to the "camera" option, and enable it (lookout in interfacing option) . Select “Finish” and reboot your Raspberry Pi or just type the following :
$ sudo reboot Step 2 : OPEN CV INSTALLATION
You can verify that the camera works by running.
COMMAND-
$ raspistill -o image.jpg <br> which will save a image from the camera in your current directory.
After you checked the camera is working. Now download all the python files and models from below link :
LINK:
https://drive.google.com/file/d/0B98uoD6BbkpqZU9FT...
You can open up the file inspector and view the image.
Make sure you are using the virtual environment by typing the following commands:
COMMANDS-
$ source ~/.profile $ workon cv Next, navigate to the repository directory,
COMMANDS-
$ cd Smart-Security-Camera and install the dependencies for the project
COMMANDS-
<strong></strong>$ pip install -r requirements.txt To get emails when objects are detected, you'll need to make a couple modifications to the mail.py file. Open mail.py with vim vim mail.py , then press i to edit. Scroll down to the following section
# Email you want to send the update from (only works with gmail) fromEmail = 'myemail@gmail.com' fromEmailPassword = 'password1234' # Email you want to send the update to toEmail = 'anotheremail@gmail.com' and replace with your own email/credentials.
The mail.py file logs into a gmail SMTP server and sends an email with an image of the object detected by the security camera. Press esc then ZZ to save and exit.
You can also modify the main.py file to change some other properties.
email_update_interval = 600 # sends an email only once in this time intervalvideo_camera = VideoCamera(flip=True) # creates a camera object, flip verticallyobject_classifier = cv2.CascadeClassifier("models/fullbody_recognition_model.xml") # an opencv classifier facial_recognition_model.xml fullbody_recognition_model.xml upperbody_recognition_model.xml Run the program python main.py
You can view a live stream by visiting the ip address of your pi in a browser on the same network. You can find the ip address of your Raspberry Pi by typing ifconfig in the terminal and looking for the inet address. Visit :5000 in your browser to view the stream.
Note:
To view the live stream on a different network than your Raspberry Pi, you can use ngrok to expose a local tunnel. Once downloaded, run ngrok with ./ngrok http 5000 and visit one of the generated links in your browser. Note: The video stream will not start automatically on startup. To start the video stream automatically, you will need to run the program from your /etc/rc.local file see this video for more information about how to configure that. Receiving Emails When receiving an email for the first time, you might get the following notification from Google:
By default, Google blocks apps from using SMTP without permissions. We can solve this by clicking on the allow "less secure apps" link and toggle the feature on. The next object detected will send an email.
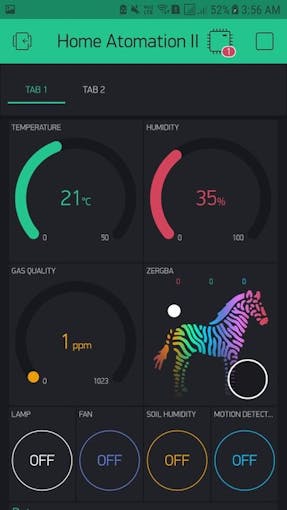
1 / 7 • Main Interface
STEP 4: Blynk App Interface Setup
This is one of the easiest and fun steps. So let's get started. Shall we?
- Downloading the Blynk App is the first obvious step. Download it from App Store or Google Play Store. Sign Up or Login in the app to get started.
- Click on New Project to create a new project. Name it whatever you like. In devices Choose NodeMCU. In connection type choose WiFi and click on Create.
- Now you will get a Auth key on your Email. Make sure to copy that and add that to your code.
- Now click on the + sign to add widgets. You may need to buy some energy!
- Now add three Gauge's. Click on of the Gauge's, name it Temperature. Choose a color of you choice for this gauge. In the pin choose Virtual Pin V6. Set the range from 0 to 50 °C ( not sure for °F), make the label °C/ °F and keep the reading rate to Push.
- Repeat this for other two Gauges using data as shown in the pictures.
- Now, add a zeRGBa and set R to digital Pin GP15, B to GP3 and B to GP1.
- Now add 4 Buttons, change there colors accordingly. Set them as shown in the pictures.
- Add a SuperChart, add 3 data streams Temperature, Humidity and gas, set there colors, there pins, Range and Suffix.
- Now, add tabs. Go to the second tab and add Twitter, Notifications, Email and Eventor. In Twitter add you twitter username and password. In Notifications, Switch on Notify when hardware goes off.In Email, set your Email address. In Eventor you can set many triggers, see the picture for the triggers that I have set up.
- You are done. now click on the play button to use the interface that you have created. You can change the interface as you like. It is really simple and fun process!
STEP 5: Making Octopod Structure
- Now make partial cuts (somewhat like paper creases) in between these rectangles and cut out this whole long piece. Repeat this process until you have 4 of these long pieces.
- Now, using a D draw a 135° and cut it out as shown in the images. Make 16 of these same angles.
- Using Glue gun glue these angles in between the small pieces. Repeat this for all the joints.
- Now using glue gun join 2 of these open structures to make a closed structure (somewhat octagon) .
- Now glue the other two open structure perpendicularly, making a 3-D shape.
- Now Cut 4 More pieces of of 9 x 9.5 cm and glue them in between all the empty spaces.
- Now you will be left with only 8 open triangles. Using Acrylic Butter paper cut 8 triangles, which will fit on these open areas, but don't glue them now.
Paint Job:For this you need to head out towards an open area! Wear your Mask and Gloves and just make one coat over the structure that you have created. You can go to Youtube, to learn proper ways to make a perfect coat. Now let this dry for 4- 5 Hours and then apply 1 more coat. I think 3 coats will be good for this.That's it! You have arrived with a unique piece of art.
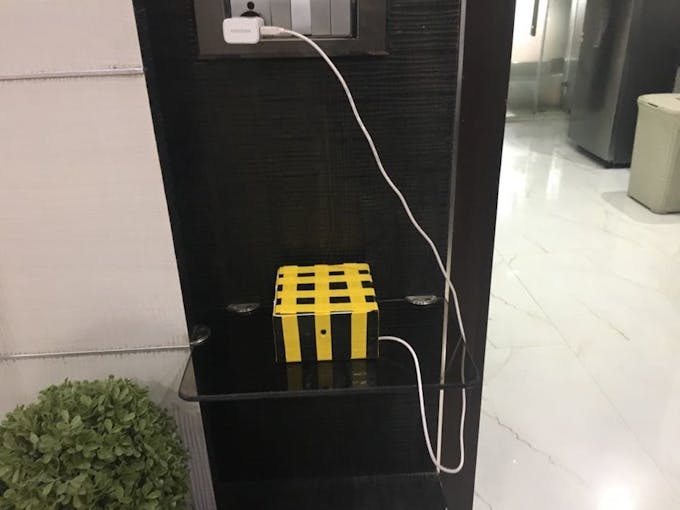
Really simple. Just take a Shoe Box and apply 2- 3 even coats of spray. And maybe for design make check pattern using duck tape like we did!
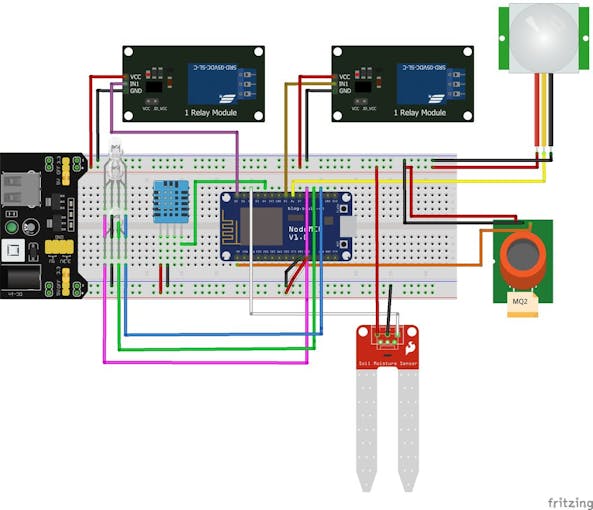
I have tried to make this step as simple as possible, by making the schematic diagram. Refer the picture or the file, and make connections accordingly. I will briefly explain all the connections!
- We have connected the nodeMCU to a large size Solderless Breadboard. We have also connected Breadboard power supply on the breadboard. NodeMCU, all the sensors, LED's and other components are powered by the power supply.
- Following are the sensor connections: DHT11 → D4/ GP2 MQ2 → A0/ adc00 Soil Moisture Sensor → D2/ GP4 PIR → D6/ GP1 RGB R → D8/ GP15, G → Rx/ GP3, B → Tx/ GP1 RelayLn1 → D0/ GP16, Ln2→ D5/ GP14 Make the following connections.
- For powering this you can use Power Bank or a Wall Adapter, which will be connected to the breadboard Power supply.
- Now, take your Raspberry Pi along with the Raspberry Pi Camera. Make a small hole in one of the walls of the cardboard and glue or tape your Raspberry Camera.
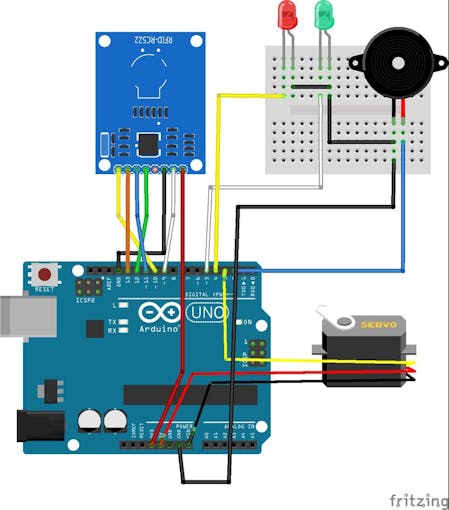
STEP 8: Assembling the Door Lock
After uploading the code on your Arduino just make the connections as shown in the picture or in fritzing file! It is quite simple. Then take the handy shoe box that we made make 2 holes in it for the LED's to pop out. and allow the servo to stand out. These days mechanical locks like servo's are also available in the market, though servo works just as fine. This is just an experiment, so please so please don't use this as you actual lock! Glue the Rfid to one wall of the box and also glue the small breadboard and Arduino. You can use a wall adapter or a Power bank to power this. Just power the Arduino and you will be good to go! Done!
CONCLUSION:
This was a really fun project to do!
I was really happy how it turned out. I think the lights look really well, and i think its well worth making even one of these as a side lamp. I really can't thank creators of Blynk and OpenCV libraries enough, they are both really excellent pieces of software and made this project possible! As always, if you have any questions on any part of the process please let me know and I will be happy to try help. Thanks a lot! And Please Vote for Us!
Sorry I forgot to add direct links to all the code. You can go to the given link and download all the stuff required including code for Face Detection Stuff.
Link to All code - https://github.com/saksham2001/Octopod_v1
-Saksham
Top Comments