The problem
When you have a garden, you don't want to dirt the porch with the shoes covered of mud. So what I typically do is to leave the shoes I walked in the garden with just before the first step that leads to the porch. But, when you go back to the garden, you need to go down the same step backwards in order to slip in the shoes
The solution
The solution I devised to solve this problem is an automated shoe shiner that performs the following tasks
- detects that a person has stepped over
- removes mud from the shoe bottoms
- places the shoes in the right orientation to make easy to slip in
Mechanical design
From the mechanical point of view, the shoe shiner is made of
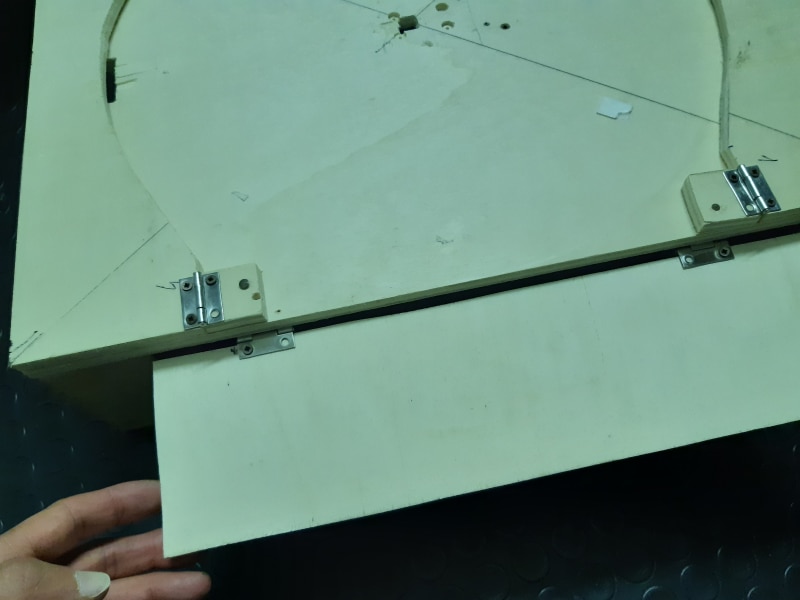
- 4 movable sides to keep shoes in place
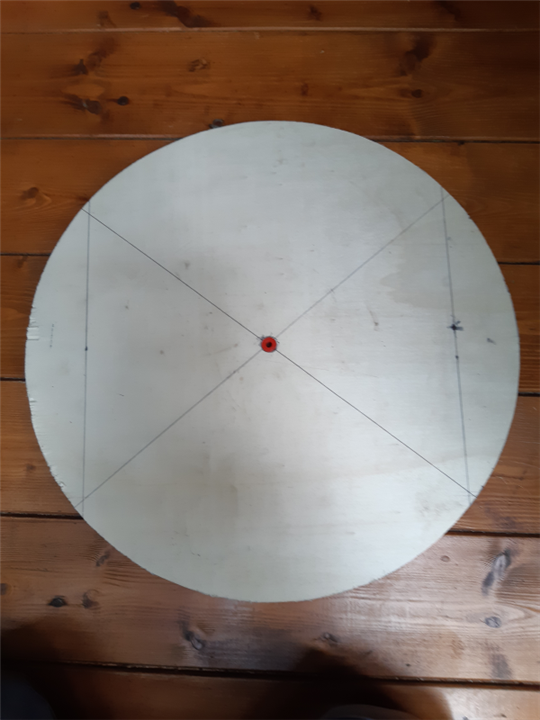
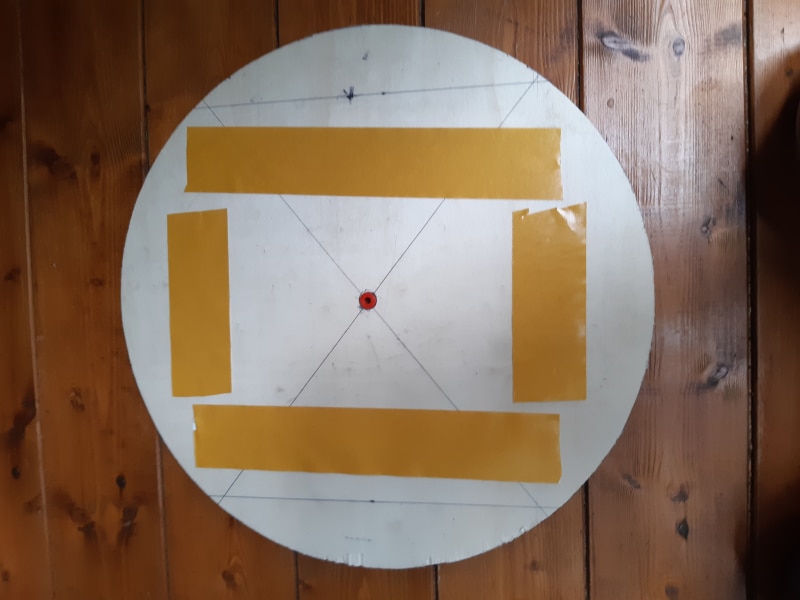
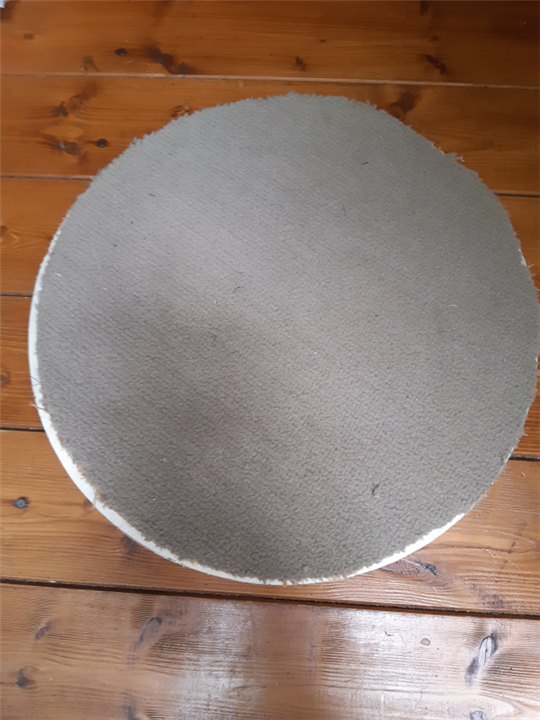
- a rotating platform covered with a doormat or similar material to remove mud from shoe bottoms and place the shoes in right position after being cleaned
All the parts are mounted on a 10 mm-thick plywood base. Five wood supports are screwed to the base. The central support also hosts the load cell that detects when a person steps over the shoe shiner.
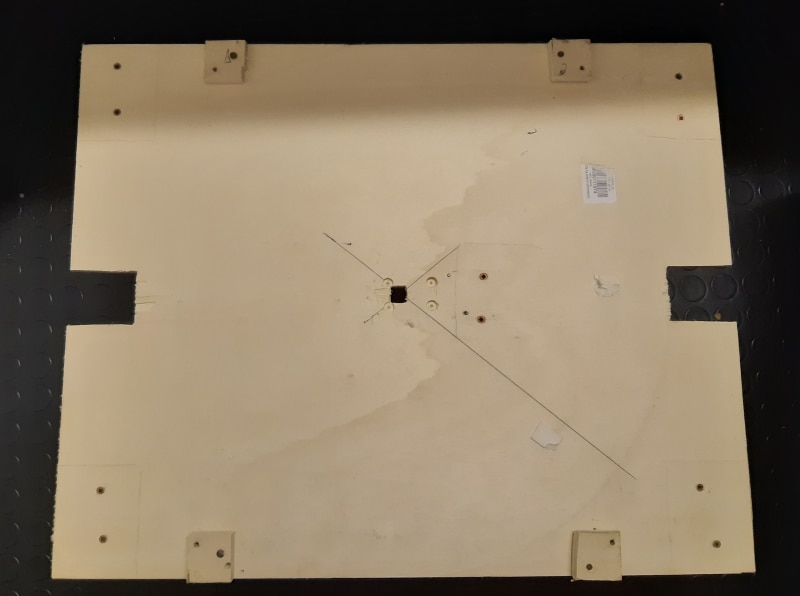
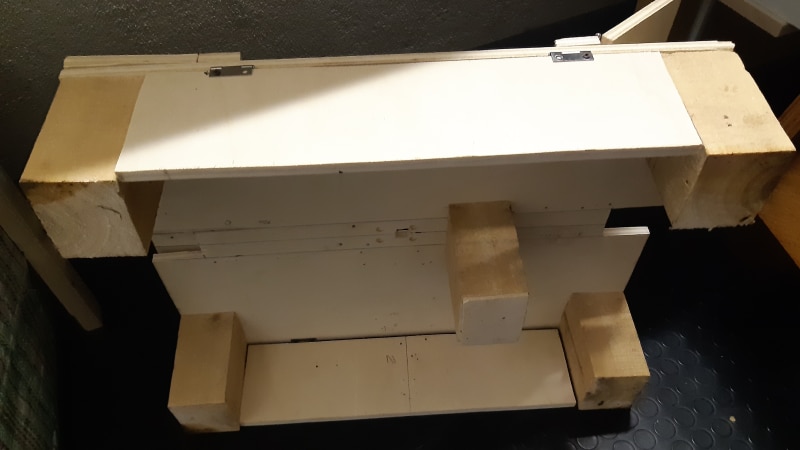
Here is the load cell installed on the central support
Here are the movable sides installed on the plywood base
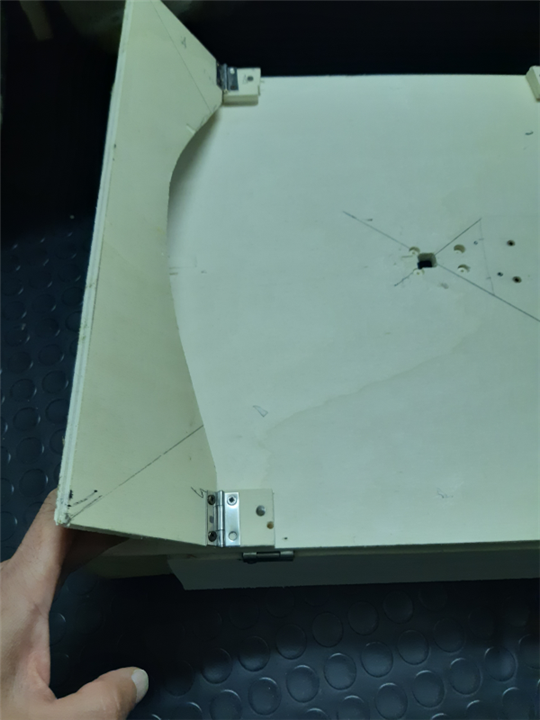
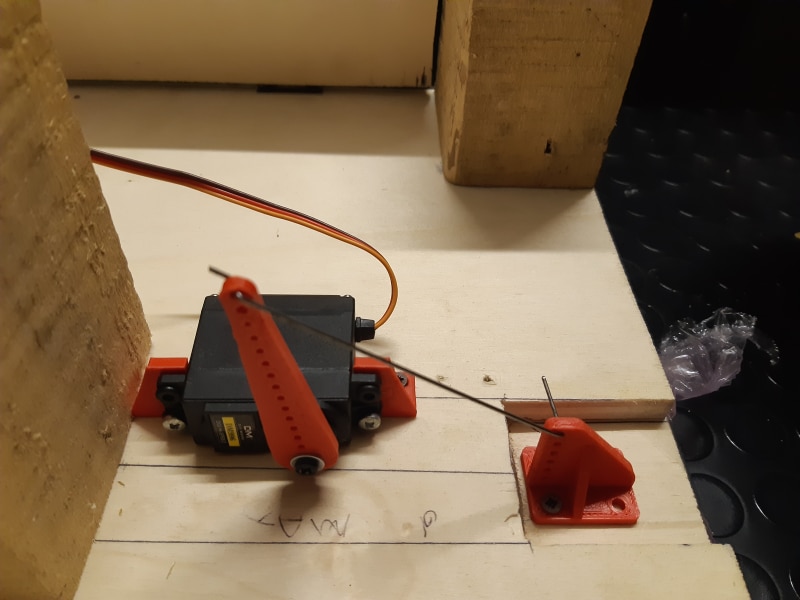
To automate the movable sides, I used four standard servos. I 3D-printed the levers on both and the movable part. The mounting brackets have been 3D-printed as well.
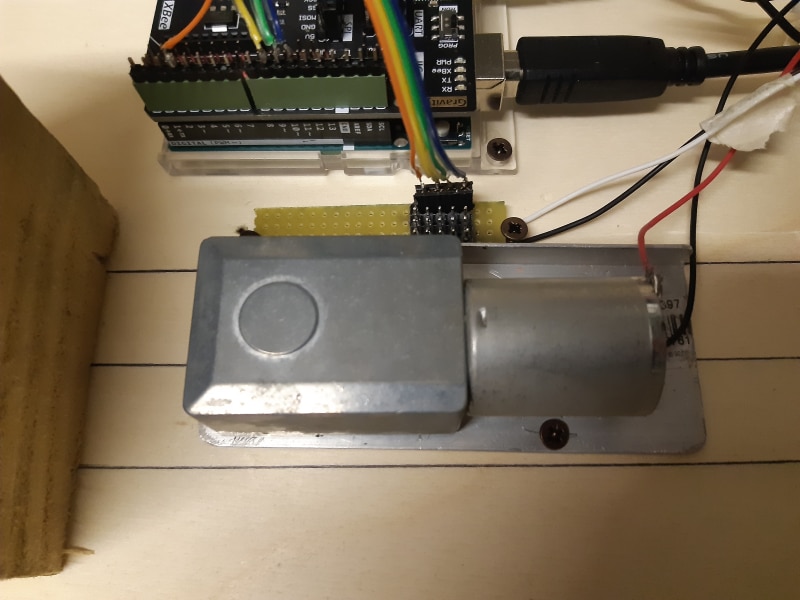
The DC motor is mounted on an L-shaped aluminum bar and screwed to the base.
A 3D-printer adaptor connects the motor shaft to the rotating platform.
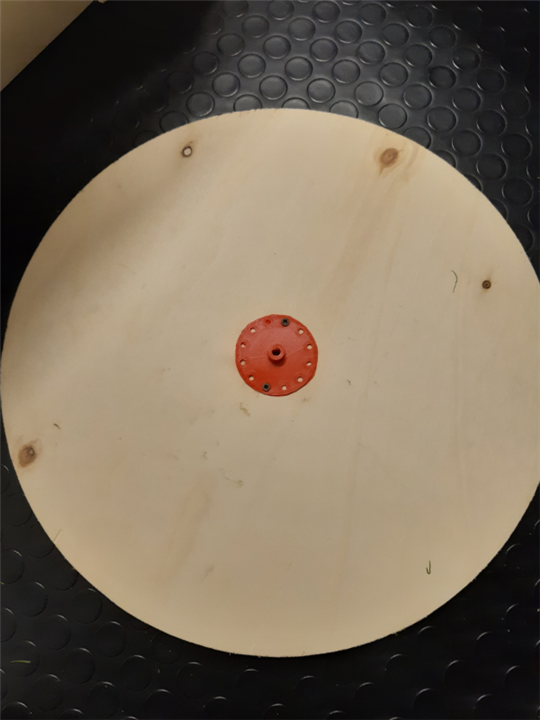
A doormat is applied on the top surface of the rotating platform and kept in place by means of double-sided tape
Electronic design
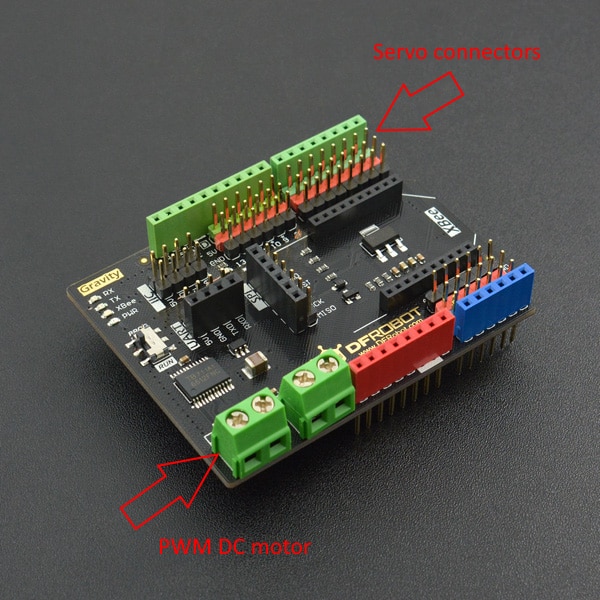
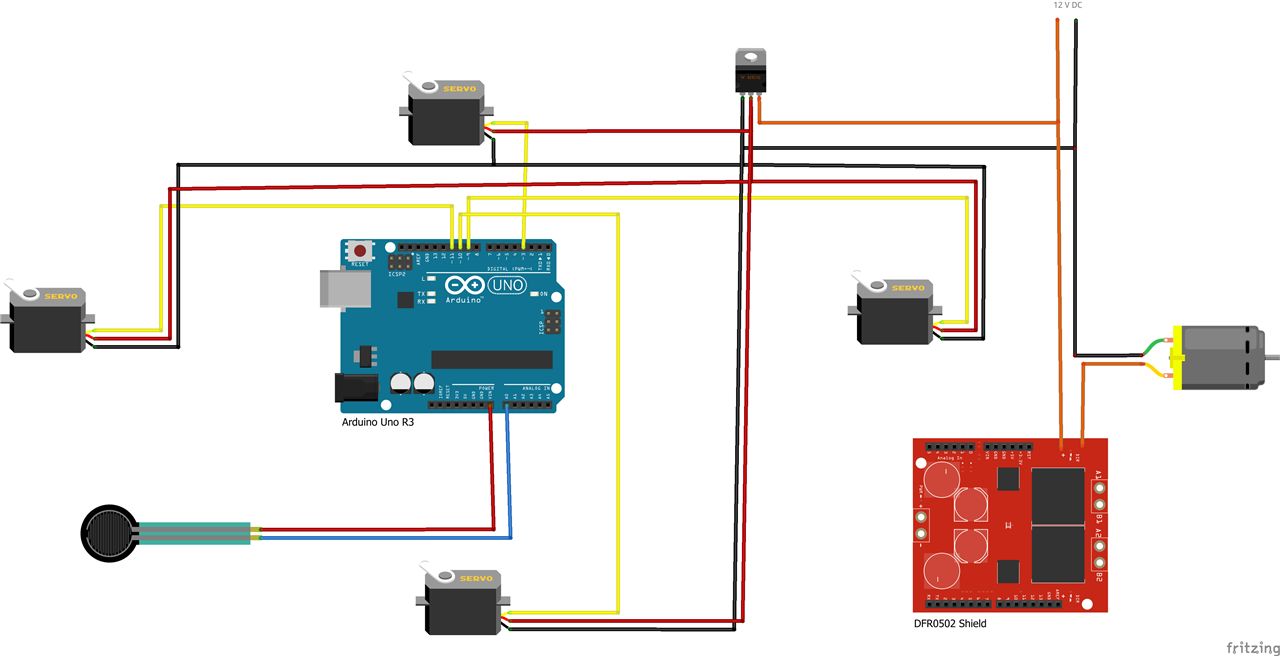
To automate the shoe shiner, I used an Arduino Uno R3 board with a DFRobot DFR0502 shield. This shield can drive 2 DC motors with PWM speed control and 1.2A of continuous current (and 3.2 A of peak current). Also, it has very convenient standard 3-pins servo connectors that greatly simplify the wiring
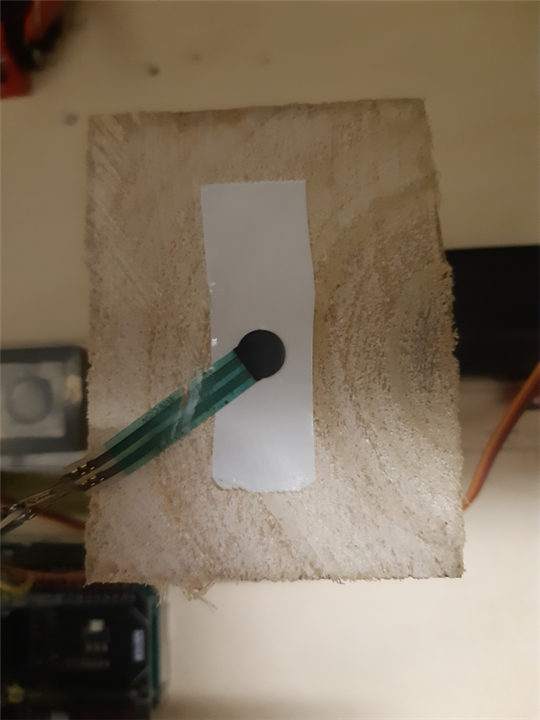
To detect when a person steps over the shoe shiner base, I added I load cell as shown in picture below. The load cell has been mounted on the bottom side a wood support that helps to support the weight of a person and protected by a thin and flexible piece of plywood. This "cover" is flexible enough to make the load cell "feel" the weight of the person but also protects the sensor the the rough terrain
The schematic of the solution is shown in picture below
Software
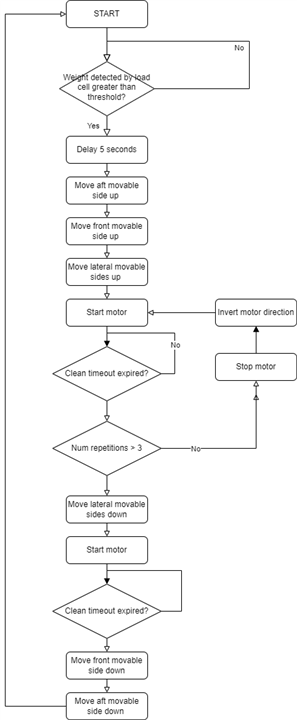
Implementation of the control software relies on a Finite State Machine pattern. The sequence of states is shown in diagram below
Each state is implemented by means of two functions, whose prototypes are
typedef AppStatusEnum (*statusInitFnc)(AppData* data);
typedef AppStatusEnum (*statusUpdateFnc)(AppData* data);
The statusInitFnc is called when a new state is entered. The state could use this function to initialize all the state variables it needs.
The statusUpdateFnc is repeatedly called to make the state logic progress. The function returns the new state the FSM has to switch to.
AppStatusEnum is an enumerative that includes all the possible states of the application
enum AppStatusEnum {
  AppStatus_Idle,
  AppStatus_Delay,
  AppStatus_AftUp,
  AppStatus_FrontUp,
  AppStatus_SidesUp,
  AppStatus_Cleaning,
  AppStatus_SidesDown,
  AppStatus_FrontDown,
  AppStatus_AftDown,
  AppStatus_Reverting,
};
AppData is an union where each state can save its own state variables
typedef struct {
  long startMs;
  int numSamples;
} IdleData;

typedef struct {
  long startMs;
} DelayData;

typedef struct {
  long startMs;
} RevertingData;

typedef struct {
  int clockwise;
  int numReps;
  long startMs;
} CleaningData;

typedef union
{
  IdleData idle;
  DelayData delay;
  CleaningData cleaning;
  RevertingData reverting;
} AppData;
To simplify the control of the movement of servos and DC motor I also implemented two classes, namely
SmoothServo
Moves servo lever from a given angle to another through a sequence of intermediate positions to make the movement as smooth and fluid and possible. Class SmoothServo has three main methods
- attach(int pin, int pos): attaches the SmoothServo object to a specific pin and moves the servo to the given initial position
- move(int from, int to, int steps): moves the servo from "from" angle to the "to" angle by passing through "steps" intermediate positions. Intermediate positions are applied every time the process method is called
- process(): makes the SmoothServo class go through intermediate steps to reach final position (se the move method). Returns true when the final position has been reached
SmoothPWM
Starts a DC motor by applying an increasing PWM value. Class SmoothPWM has three main methods
- attach(int pin, int pos): attaches the SmoothPWM object to a specific pin
- ramp(int from, int to, int steps): applies a ramp to "from" percent of PWM to "to" percent of PWM by passing through "steps" intermediate PWM values. Intermediate values are applied every time the process method is called
- process(): makes the SmoothPWM class go through intermediate PWM values to reach final PWM value (se the ramp method). Returns true when the final value has been reached
Bill of materials
| Qty | Item | Description | Link |
| 1 | Arduino Uno R3 | Controller board | |
| 1 | DFRobot 0502 | Gravity IO Expansion Shield with Motor Driver | |
| 1 | Load cell | ||
| 1 | 12V DC motor | ||
| 4 | Servo mounting brackets (left) | github | |
| 4 | Servo mounting brackets (right) | github | |
| 4 | Servo lever | github | |
| 4 | Servo bracket | github | |
| 1 | Motor shaft adaptor | github | |
| 1m x 1m | 10mm plywood | ||
| 8 | Hinges | ||
| Wood screws | |||
| Source code | github |
Final demo
I didn't manage to upload the video on the element14's site, so I have to share a Youtube link... sorry about that

-

Jan Cumps
-
Cancel
-
Vote Up
0
Vote Down
-
-
Sign in to reply
-
More
-
Cancel
-

amgalbu
in reply to Jan Cumps
-
Cancel
-
Vote Up
0
Vote Down
-
-
Sign in to reply
-
More
-
Cancel
Comment-

amgalbu
in reply to Jan Cumps
-
Cancel
-
Vote Up
0
Vote Down
-
-
Sign in to reply
-
More
-
Cancel
Children