


Introduction

A music box or musical box is an automatic musical instrument in a box that produces musical notes by using a set of pins placed on a revolving cylinder or disc to pluck the tuned teeth (or lamellae) of a steel comb. They were developed from musical snuff boxes of the 18th century and called carillons à musique (French for "chimes of music"). Some of the more complex boxes also contain a tiny drum and/or bells in addition to the metal comb. (Wikipedia)
This 18th-century toy survived until nowadays covering many different roles in the collective imagination: haunted musical boxes in the horror films, musical boxes as a symbol of childhood innocence, soundtrack in stories flashback and more. But it is also a nice gift for youngs and adults as well an undoubtful fascinating musical instrument. And at the same time, it is fascinating also for its robotic component, as as a matter of fact, it is a mechanical automa.
This is the reason I decided to make one. Or not one, at fake one.Or maybe a modernization. Or a nerdy musical box. I enjoyed so much thinking, designing and building it and laughed too, seeing the project coming real thinking to the surprise of the readers of seeing it. This is the reason I decided to share it in an easy way to reproduce and hack it as well.
The Project Design
There are some construction elements in the musical box that are a sort of symbolic components that immediately identify the kind of object: the kind of music played by the box, a button for start/stop the songs, the spring-charging mechanism. And the fact that it is a box.

The project design shown in the above image is divided into two parts: the music generation and al the control and the musical box simulator.
The music generator
For the music generation, I have used an Arduino UNO aiming to create a general-purpose mp3 with a reusable design in other projects. In this particular context the Arduino mp3 player should reproduce the classical musical-box sound; to build the circuit I have used using an Arduino Prototype Shield (many versions are available on Amazon). The circuit is not particularly complex and also an Arduino NANO will work fine.
The core of the mp3 music player is based on the DFPlayer Mini Mp3 produced by DF Robot; The player includes all the features we can find in a commercial mp3 player:
- six levels equalizer preset
- track selection
- volume control
- amplified speaker output
- earphones output
It also includes a microSD card reader to store up to 32 Gb of music in a maximum of 100 folders with up to 255 tracks per folder.

Above: The Arduino prototype shield with the DF Player mini mp3 player assembled over the circuit.
The DFPlayer Mini can be controlled in several ways, including buttons only: you can make your stand-alone mp3 player without any extra microcontroller but just some buttons and a battery. Very interesting instead is the RS232 control feature of the device, perfect to interface with the Arduino. The DF Player mini works at 5 Vcc and its low power consumptions make possible to power the player directly with the Arduino 5V. Every track of the playlist should be named following a numerical order, in the format 0001.mp3, 0002.mp3, etc. More details on how this device work can be found on the DF Robot documentation page: https://wiki.dfrobot.com/DFPlayer_Mini_SKU_DFR0299
The first issue has been finding original musical box tracks; the best site to find free, sampled music tracks based on users contribution is freesound.org from where I downloaded a discrete quantity of tracks and created a compilation for the player. Most of the tracks distributed by freesound.org are sourced in WAV file format while the player only supports the mp3 format but the file conversion is not so difficult: I suggest to use the Open-Source application VLC Media Player, supporting a lot of audio and video file formats that can be converted one to each other with the streaming feature of the application.
What I need in this case is controlling the player with the Arduino board in a semi-automatic way through the serial connection. The job is made easier as DFRobot provides the DF Player mini Arduino library on GitHub.
To tell the Arduino when the player should start and stop I have used the pin 2. The player control to do this task, to repeat the playlist and control the volume level as fading in and out is all done automatically the Arduino logic. DF Player should start the first next track of the playlist as the signal on pin 2 goes true and should stop playing when the signal goes false or when the current track has finished playing.
Player Software
The Arduino software is designed to control the player with a series of basic functions through the serial connection.
//! Initialization function
void setup() {
  Serial.begin(SERIAL_SPEED);

  pinMode(TRIGGER_PIN, INPUT_PULLUP);
  pinMode(NEXTSONG_PIN, INPUT_PULLUP);
  pinMode(VOLUMESONG_PIN, INPUT_PULLUP);
  pinMode(TRIGGER_LED, OUTPUT);

  libDFPlayer.begin(Serial);
  delay(1000);

  // Wait until the Arduino serial connect the player
  if (!libDFPlayer.begin(Serial)) {
    while(true);
  }

  initPlayer();
}
In the Setup() function the mp3 player is initialized through the library, included in the sketch; after the initialization, the serial connection becomes unavailable for programming the Arduino sketch via USB. For this reason when the Arduino should be programmed the shield should be removed.

Above: when the Arduino board should be programmed the mp3 player – that I assembled on the prototype Arduino shield – should be removed to keep the serial port free for connecting to the computer using the USB to serial cable.
/**
 * Main loop
 */
void loop()
{
  // Check the start/stop trigger
  isTrigger();

  // Check if the trigger is active
  if(playerControl.trigger == true) {
    // --------------------------------- Check if is already playing else start playing
    if(playerControl.isPlaying == false) {
      playerControl.isPlaying = true;
      // Start playing
      libDFPlayer.play(playerControl.currentSong);
      delay(500);
    } // Playing started
  } // Trigger is set for playing
  else {
    // Trigger is not active, check if is playing and fade out the song
    if(playerControl.isPlaying == true)
    // Put the player in pause
    libDFPlayer.pause();
    nextSong();
    playerControl.isPlaying = false;
  } // Playing stopped
}
The loop() function cyclically check the state of the input pin 2; when it is low (corresponding to the “on” state) the program starts playing the first queued track on the mp3 player.
It is needed to add a 1K resistor in series to the Rx signal on the player side (corresponding to the Tx signal of the Arduino board) to avoid interferences on the audio quality due to to the serial transmission connection.
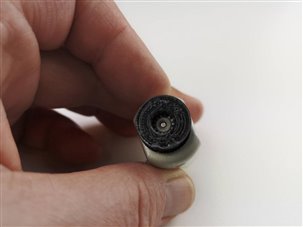
The audio output signal of the mp3 player is already amplified, supporting any speaker with 8 Ohm impedance and power not higher than 1W. I have used a square sized micro speaker (about 1,5x3x0,5 cm) mechanically amplified by a 3D printed large cone. This solution worked particularly well as the music box tracks have very few bass frequencies in their tracks.

Above: the 3D printed semispherical speaker cone providing a good and audible sound level
At this point, the Arduino controlled mp3 player is complete. In the next issue, we will complete the project controlling the Arduino player with the micro:bit that will manage all the tasks of this making.
The 3D printable files and the program sources are available on GitHub at the address https://github.com/alicemirror/musicalbox
Designing the Box and Making the Components
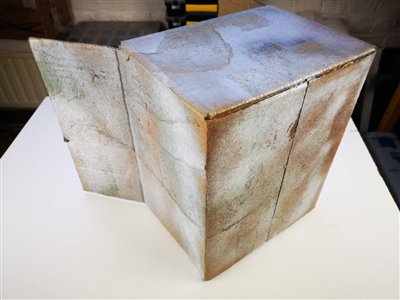
First of all, I got the right size cardboard box to convert it in the musical box container; it comes from one of the last Element14 shipments  I transformed in a rugged metal surface with a couple of spray-paint colors.
Below: the finished cardboard container box
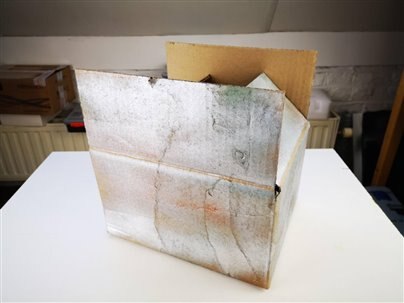
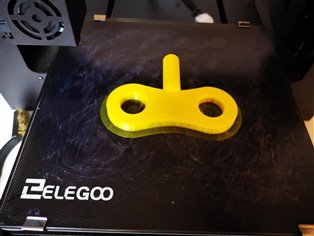
Then some external components had to be designed and 3D printed.
The Ratchet
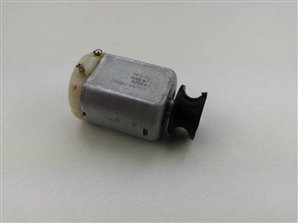
Designing and making the ratchet has been the most challenging part of the project design; The idea was to recreate an oversized ratchet, like those used in the spring-loaded real musical boxes (aka Carillon, from which the name of the project) but also recreating the real behavior. So, how to send to the micro:bit information on the status of the charge done manually with a spring-loaded manual charger emulator? Just using an electric generator! I have tested a series of DC motors until I found one that also when rotating the shaft at low speed was able to generate about 0.5 V.
Below: the five DC motors I used to test their ability to generate DC power; the best resulted to be number 1

To test the motor giving the better result I have recorded some samples of the voltage reached while rotating the shaft of every motor.
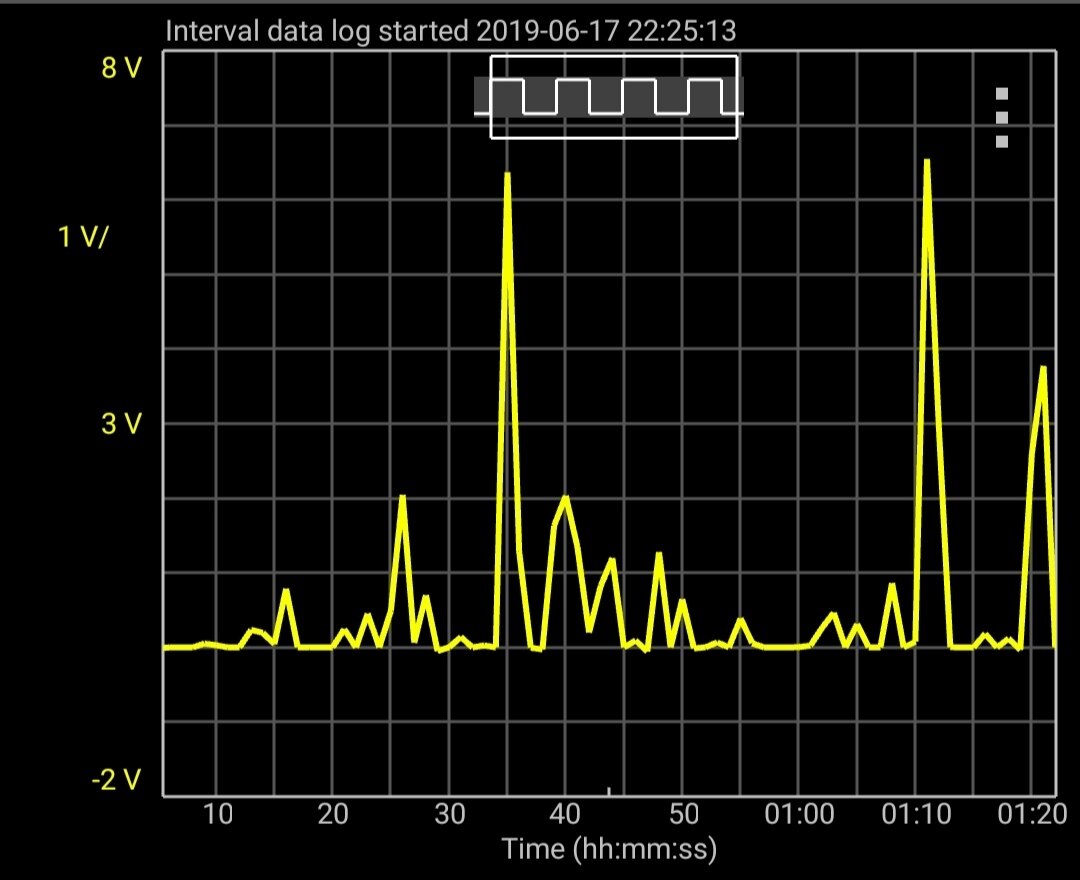
Above: the voltage detection graph of motor #1 selected for the project
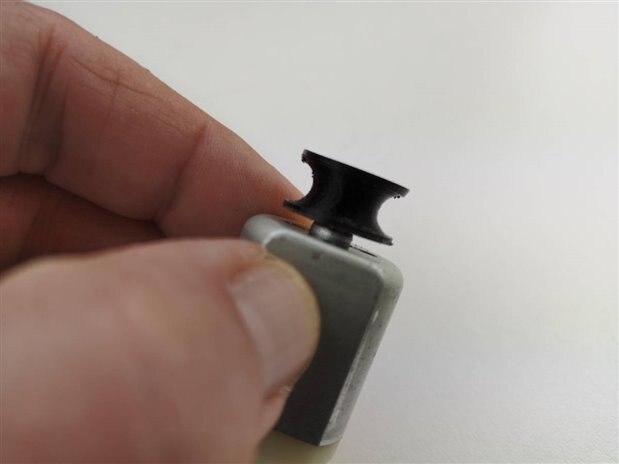
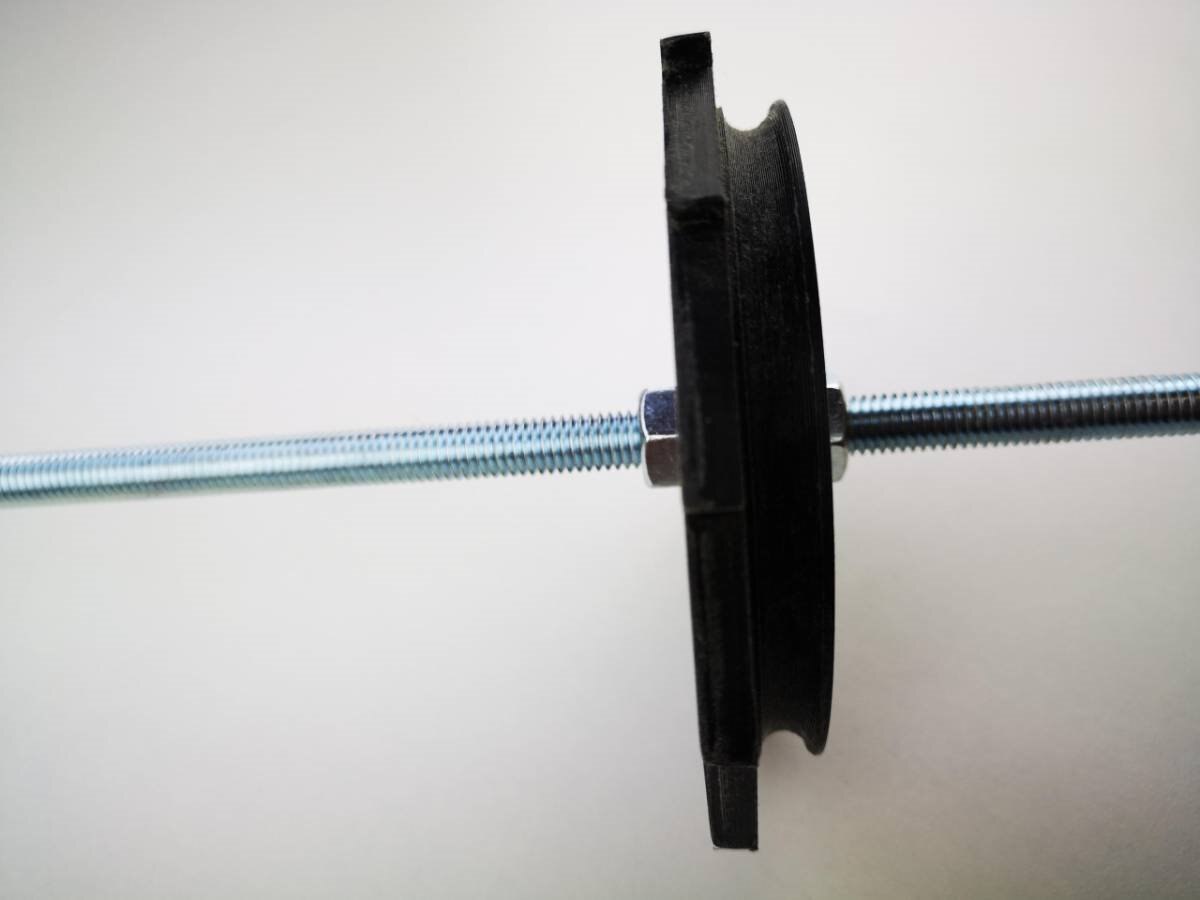
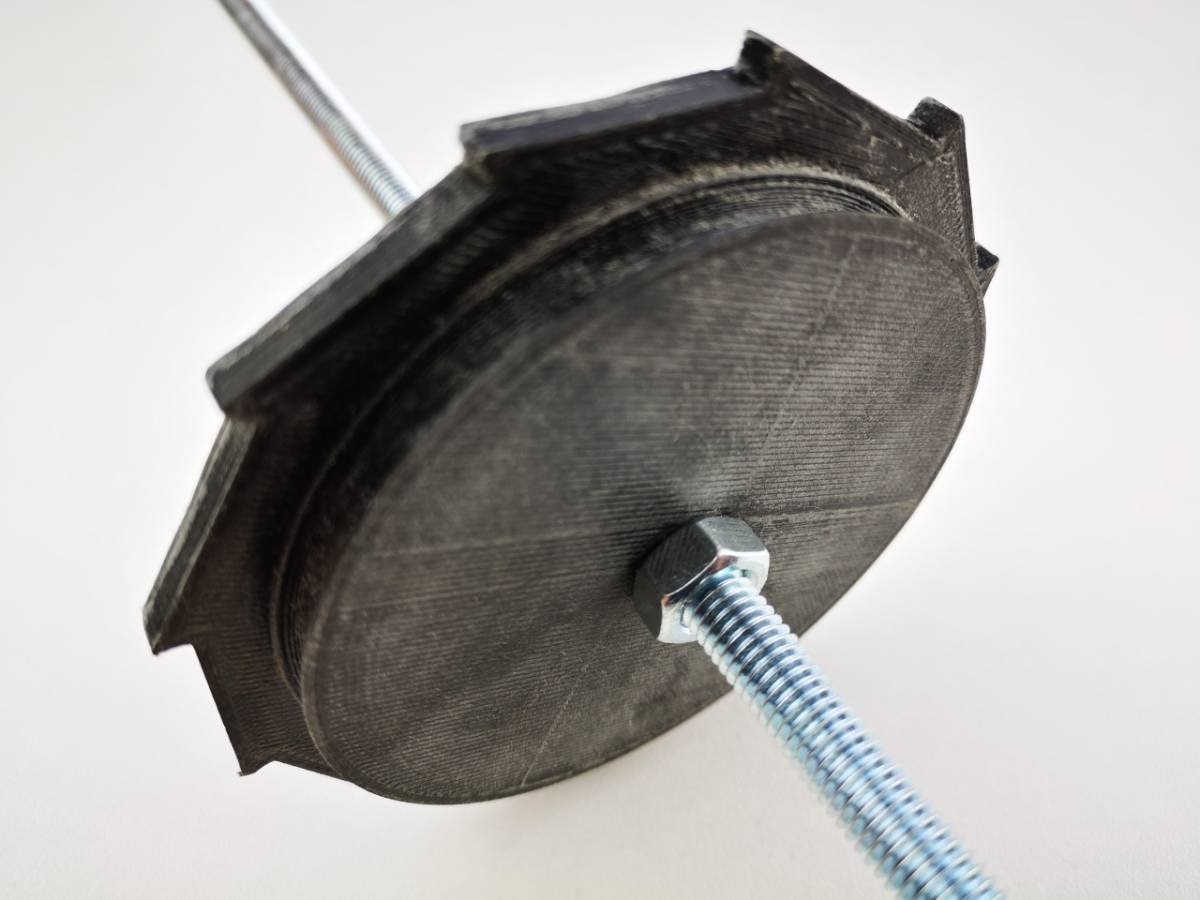
After selecting the right DC motor I designed and 3D printed a pulley, shown in the images below.
Around the motor shape, I designed and 3D printed the ratchet as in the schematic design shown below

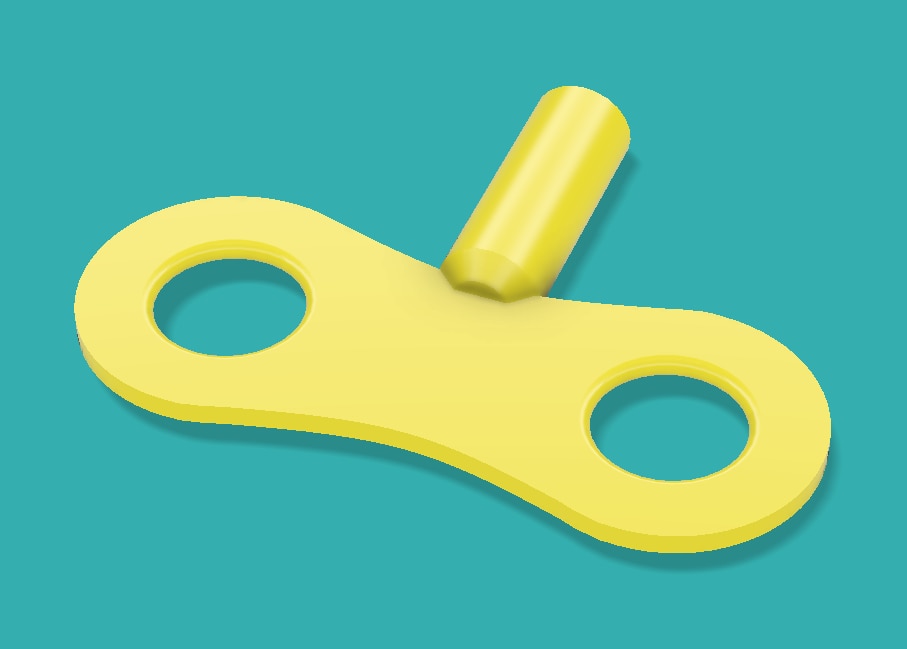
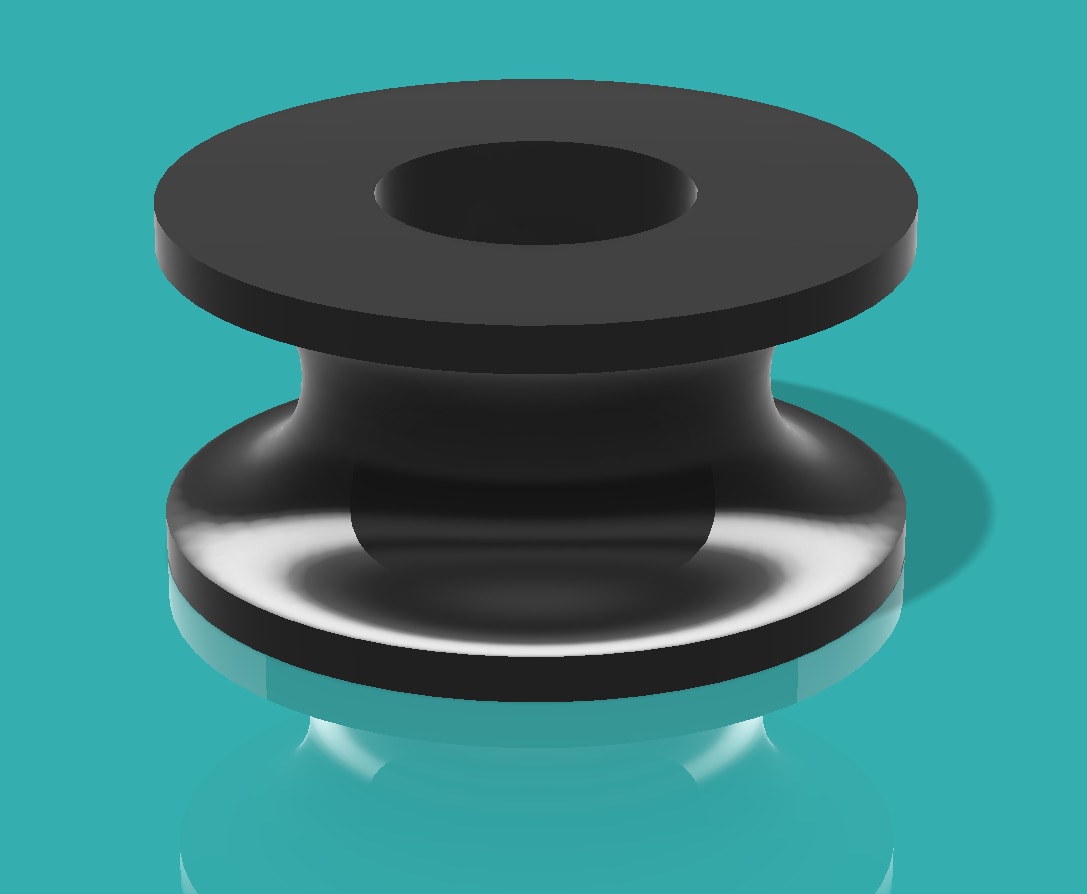
The image gallery below shows the rendering of all the parts, designed with Fusion360
| {gallery} Rendering of the Components for 3D Printing |
|---|
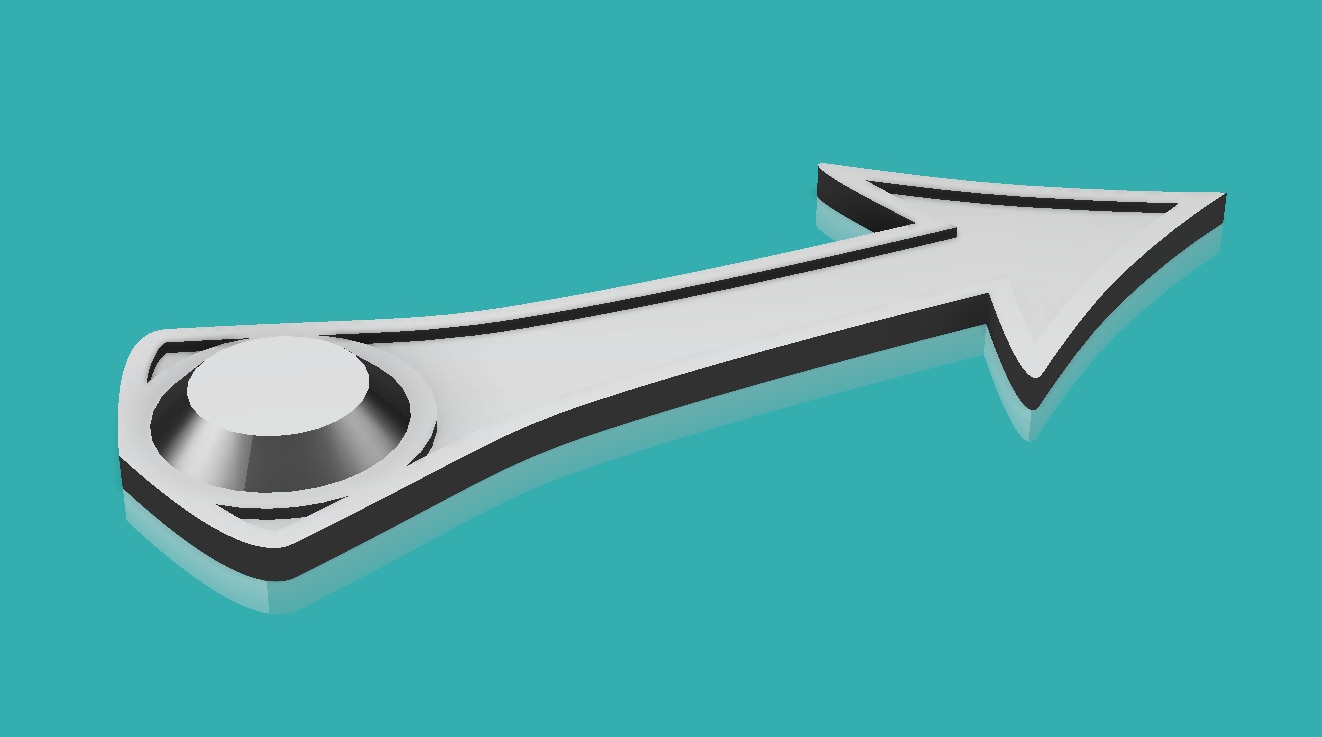
|
The charge level arrow |
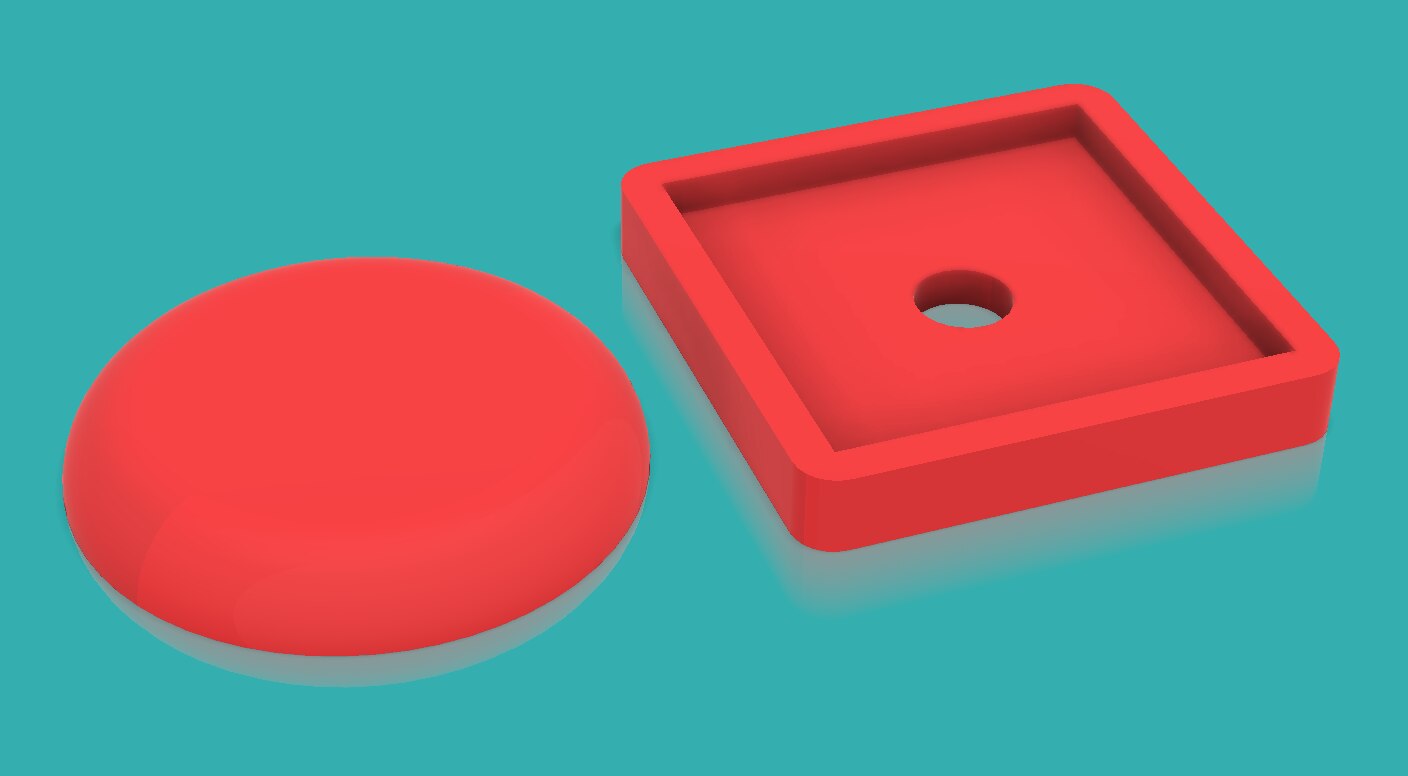
|
The two-parts button to be mounted over the temporary switch |
|
The speaker cone to further amplify the mp3 player output. The rectangle hole is for a square smartphone speaker |
|
The spring-charger key |
|
The generator (DC motor) transmission pulley |
|
The ratchet with the pulley shape on the bottom side and the notch to simulate the sound effect of the spring-charger |
|
The two sides of the ratchet |


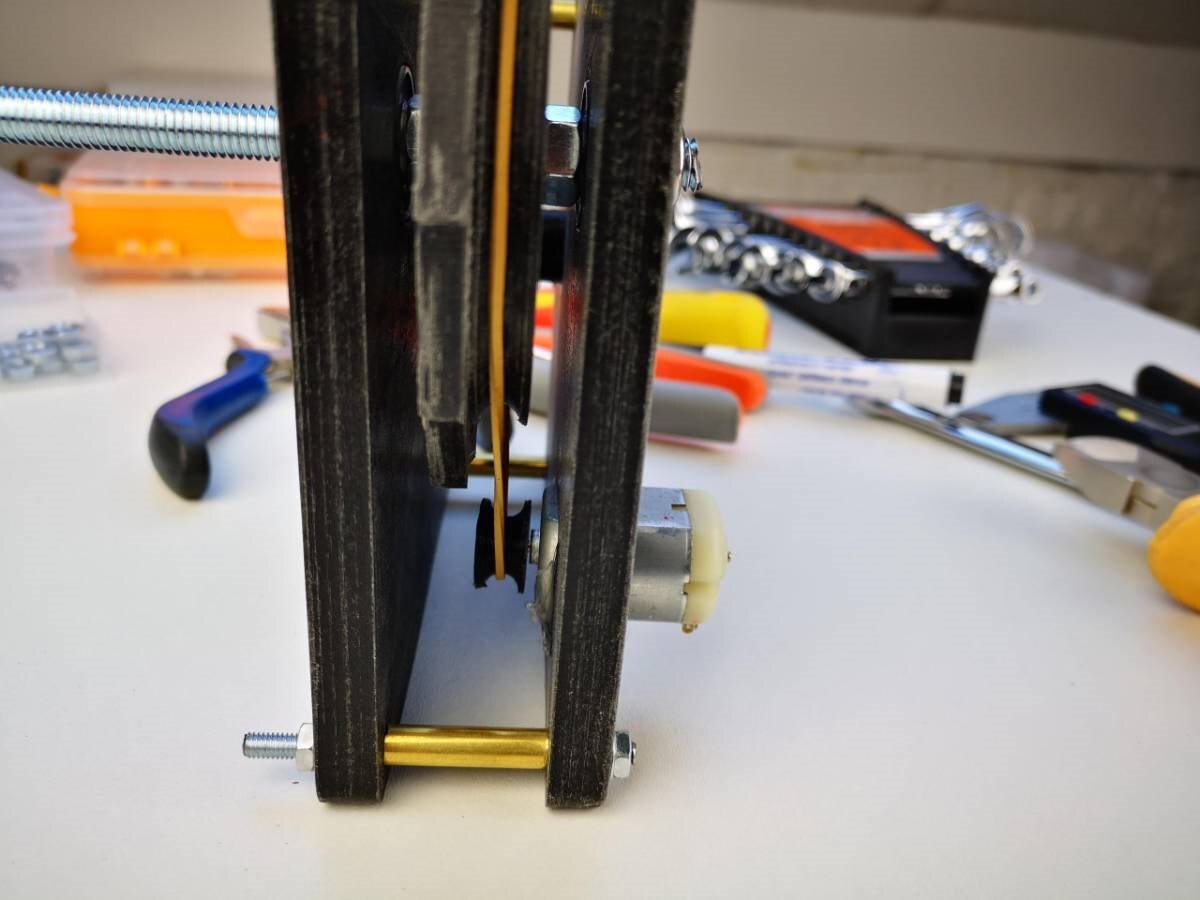
The image gallery below shows the finished parts and the assembly sequence, accordingly with the design above. This spring-load simulator and low-power generator is the most complex mechanical part of the entire project.
| {gallery} The Ratchet Parts and Assembling |
|---|
|
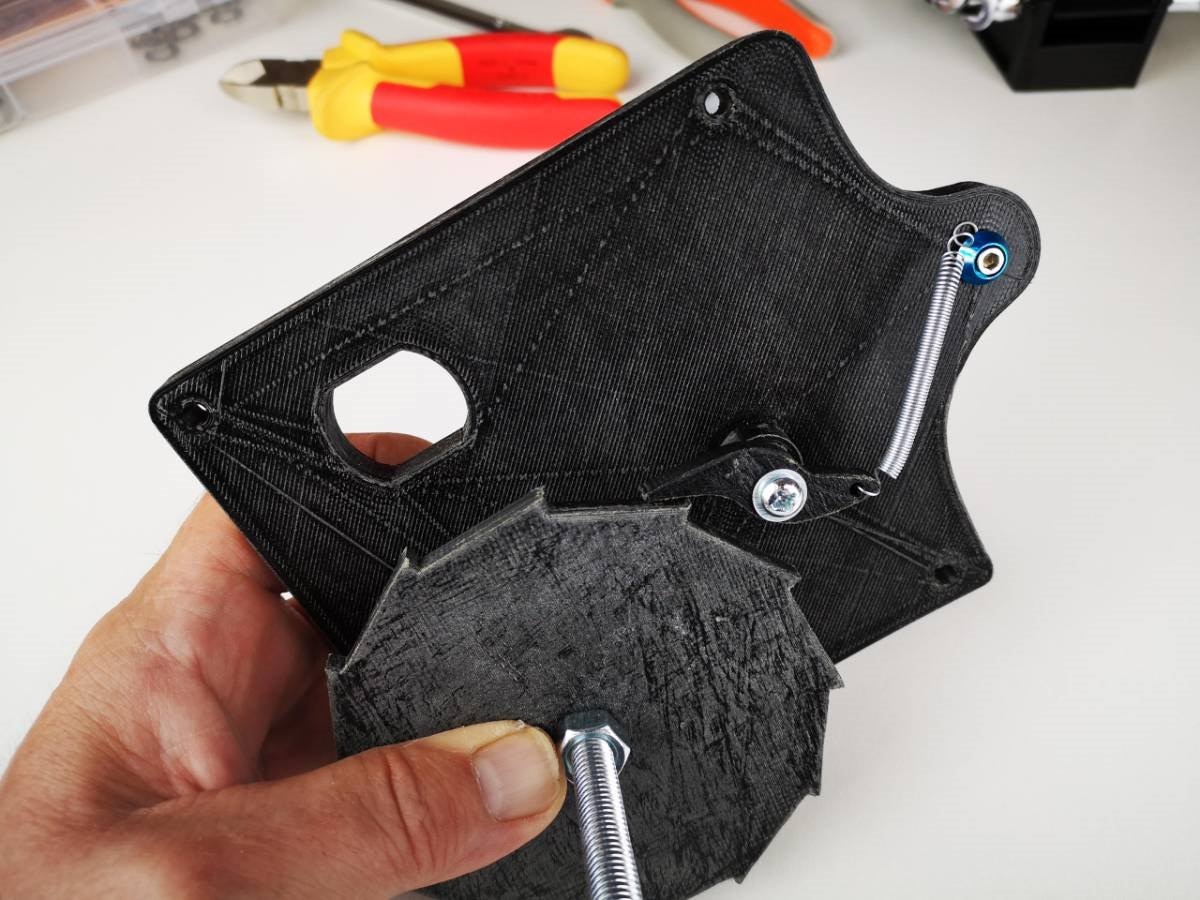
The ratchet 3D printed with the pulley side to rotate the DC power generator locked on the M4 threaded bar |
|
The ratchet 3D printed with the pulley side to rotate the DC power generator locked on the M4 threaded bar |
|
The ratchet 3D printed with the pulley side to rotate the DC power generator locked on the M4 threaded bar |
|
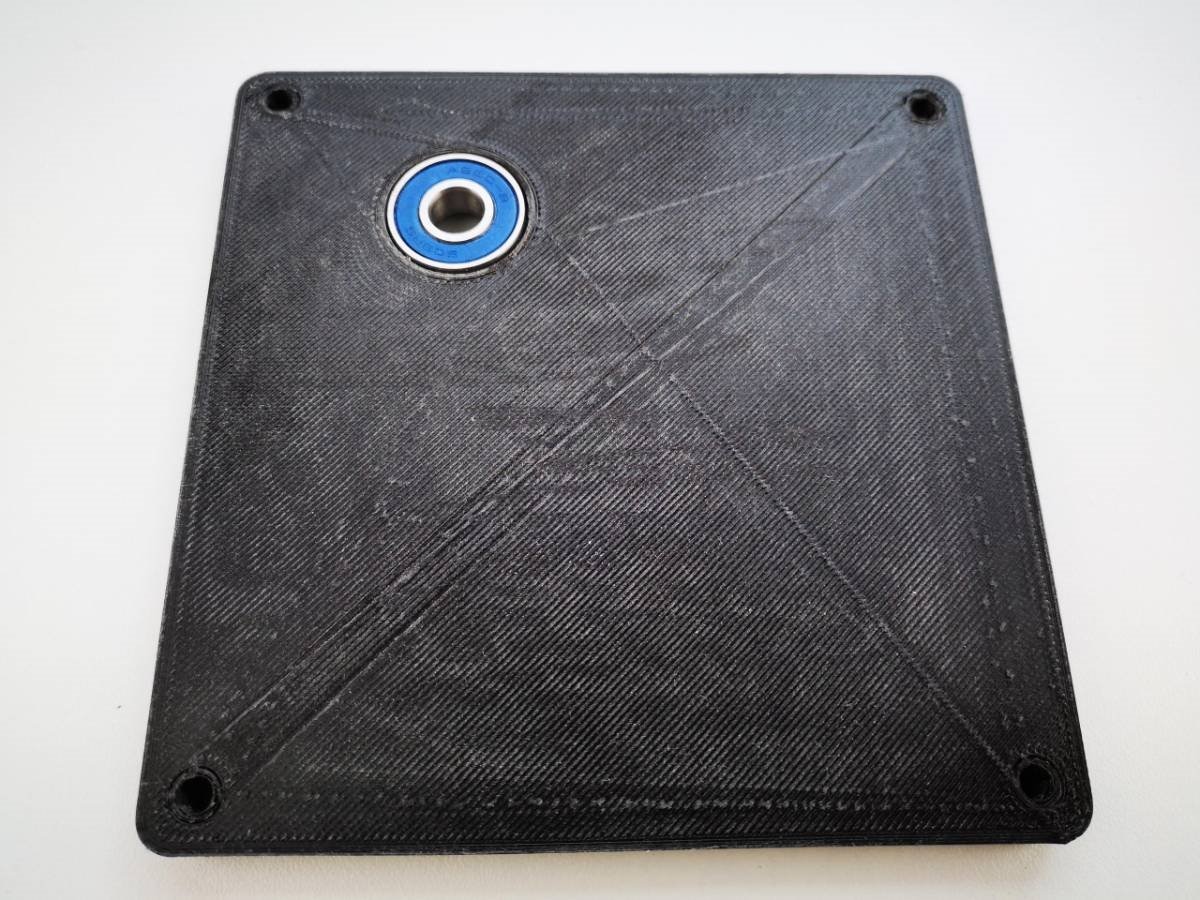
The motor wall, internal view |
|
The motor wall, external view |
|
The motor-side wall with the notch to test the right distances |
|
Notch leveling, detail |
|
The motor side-wall with the ratchet fixed to the bearing |
|
Testing the right positioning and leveling of the ratchet and notch |
|
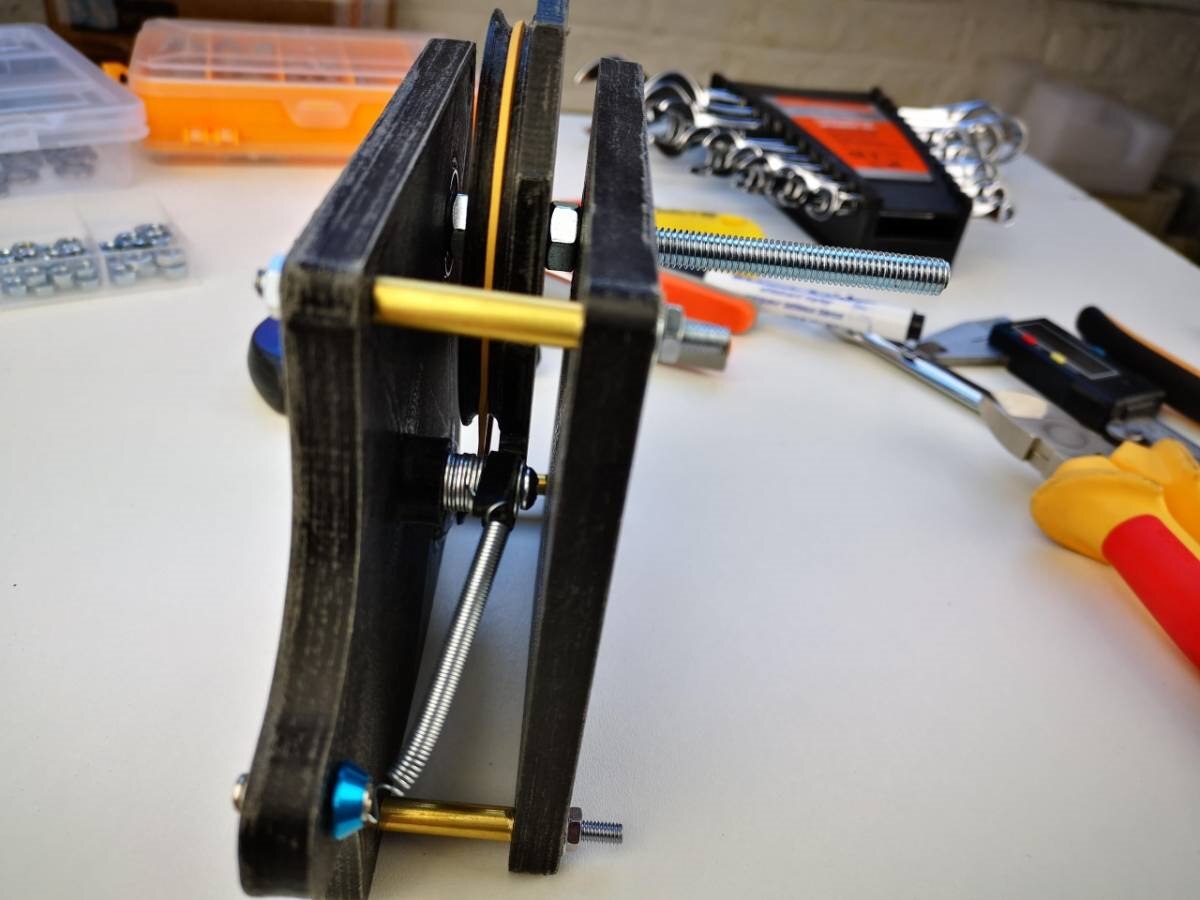
The notch and tension spring in place. The right eight respect the ratchet is obtained with a series of washers |
|
Testing the notch assembly with the tension spring |
|
The internal setting of the ratchet and notch with the tension spring. The role of this design is to recreate the physical effect and sound of the real spring-loaded chargers |
|
The right side of the ratchet shell. Note that to reduce the number of nuts both bearings are faced to the external side si that only one M4 nut by side will keep them in place and lock the rotating structure |
|
Per-assembled view of the ratchet to measure the right distance for the brass separator pipes |
|
The charging side of the ratched with one of the two lock-nuts to keep the bearing firmly in place |
|
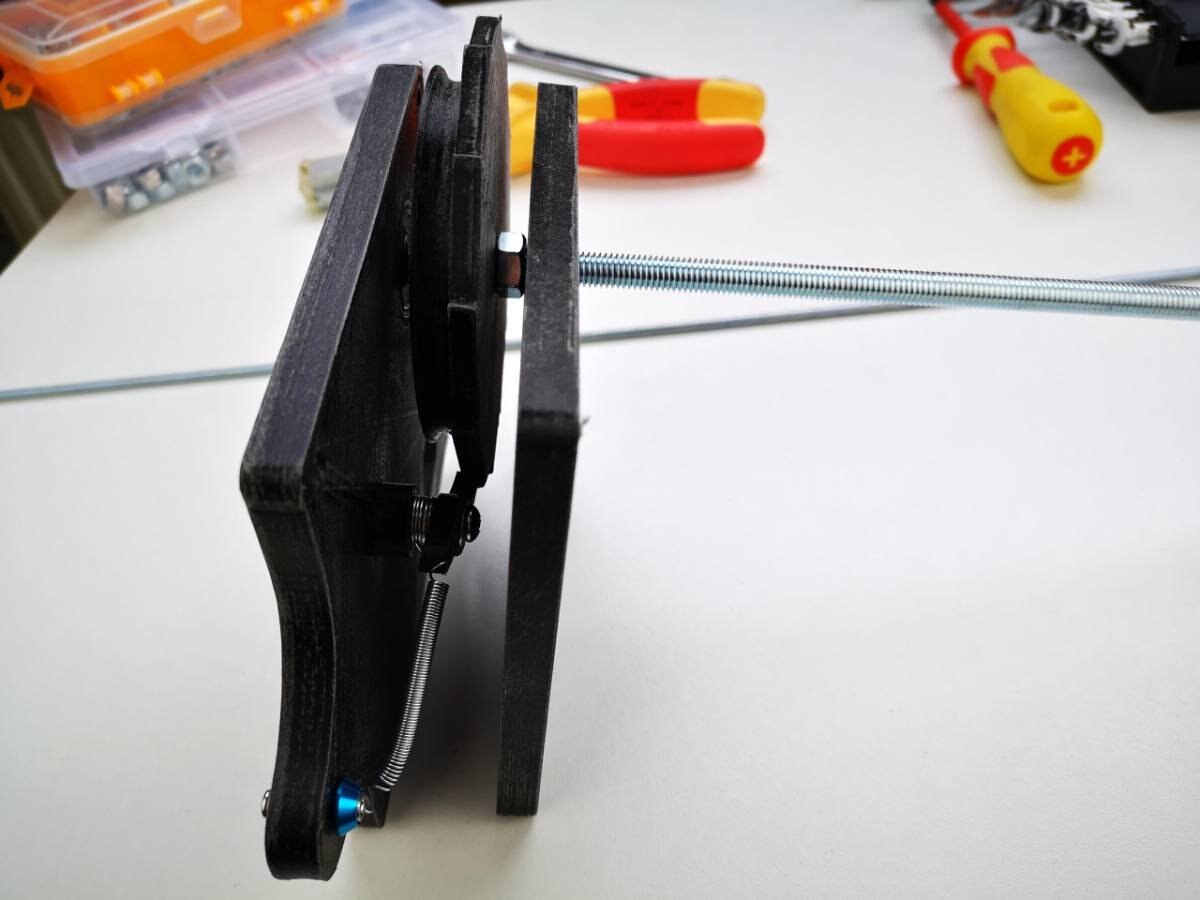
The two sides are kept together at the right distance with four M2 Allen screws and nuts with a brass pipe separator in the middle |
|
The finished part, motor/generator view |
|
The finished part, notch spring view |
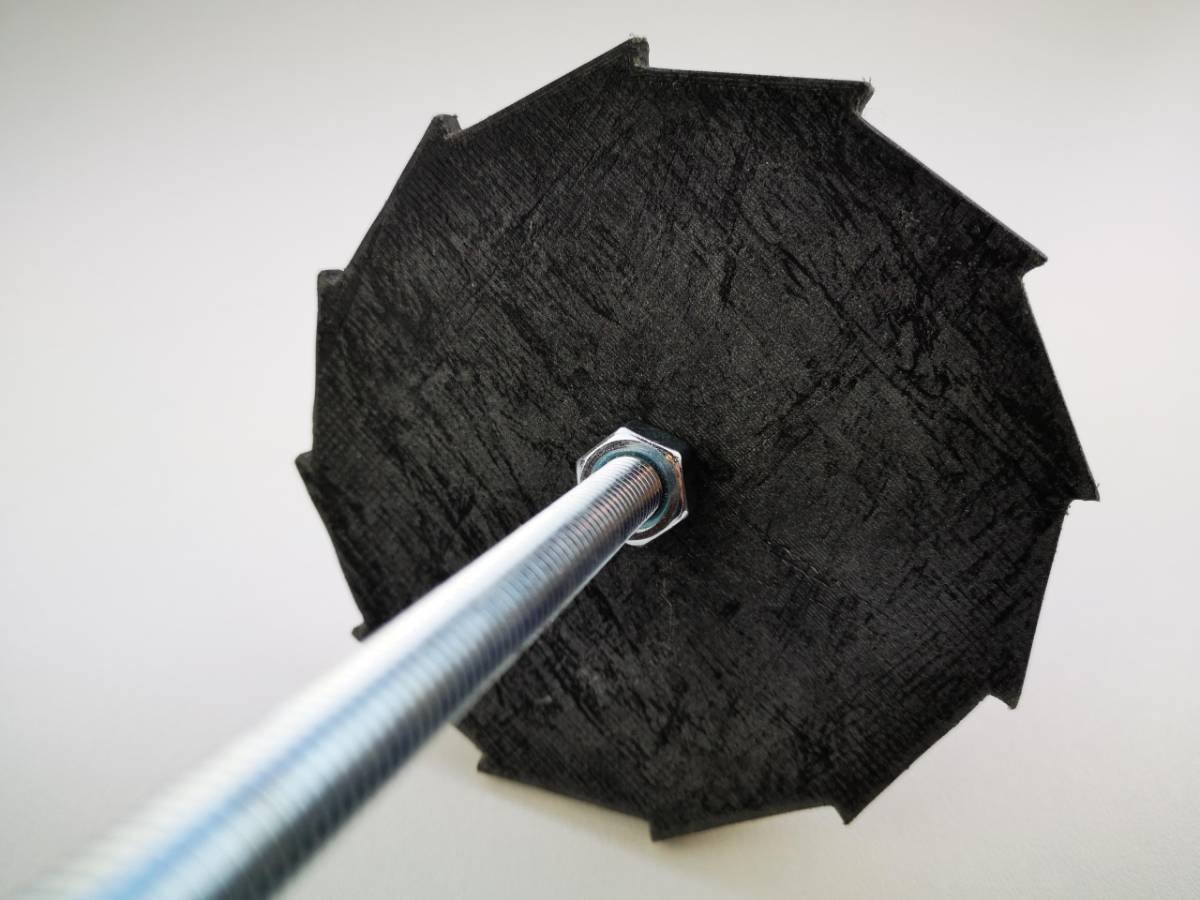

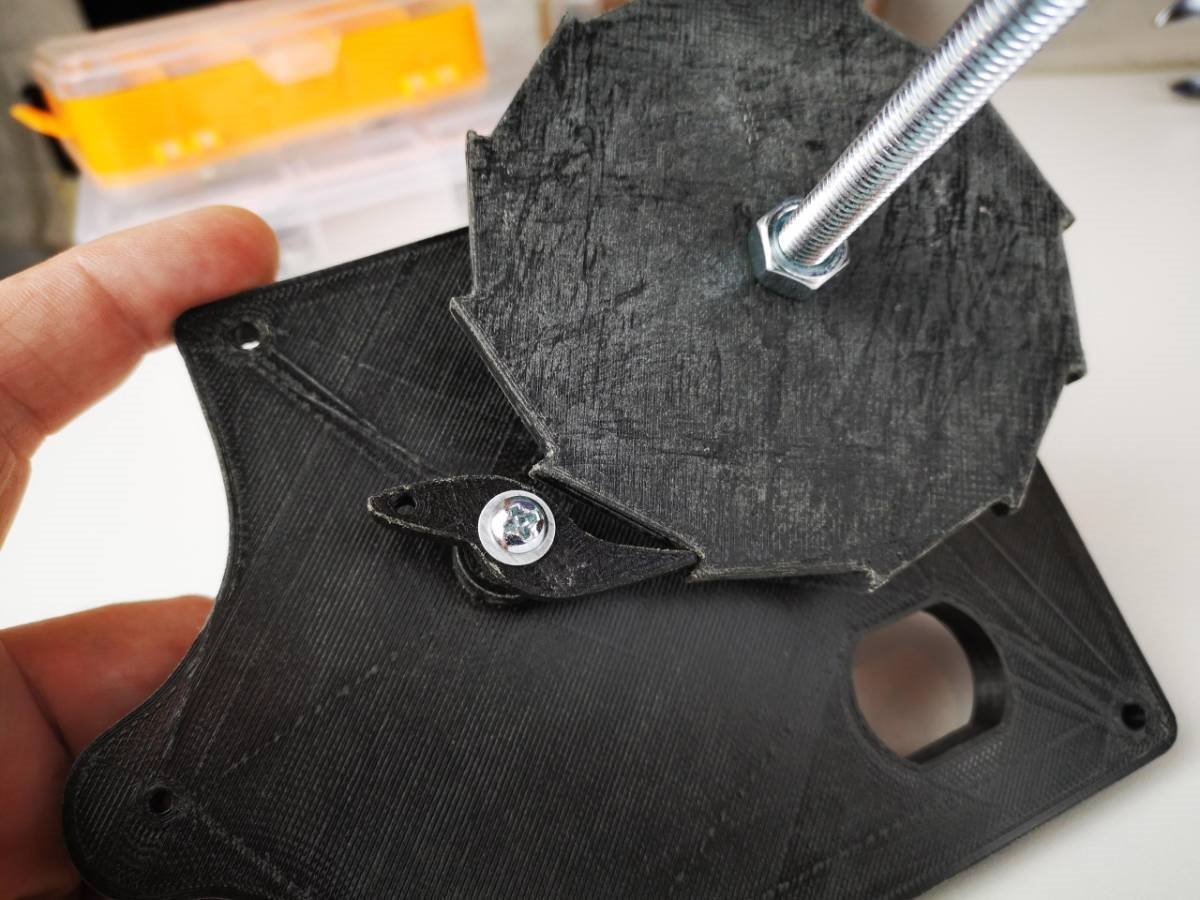
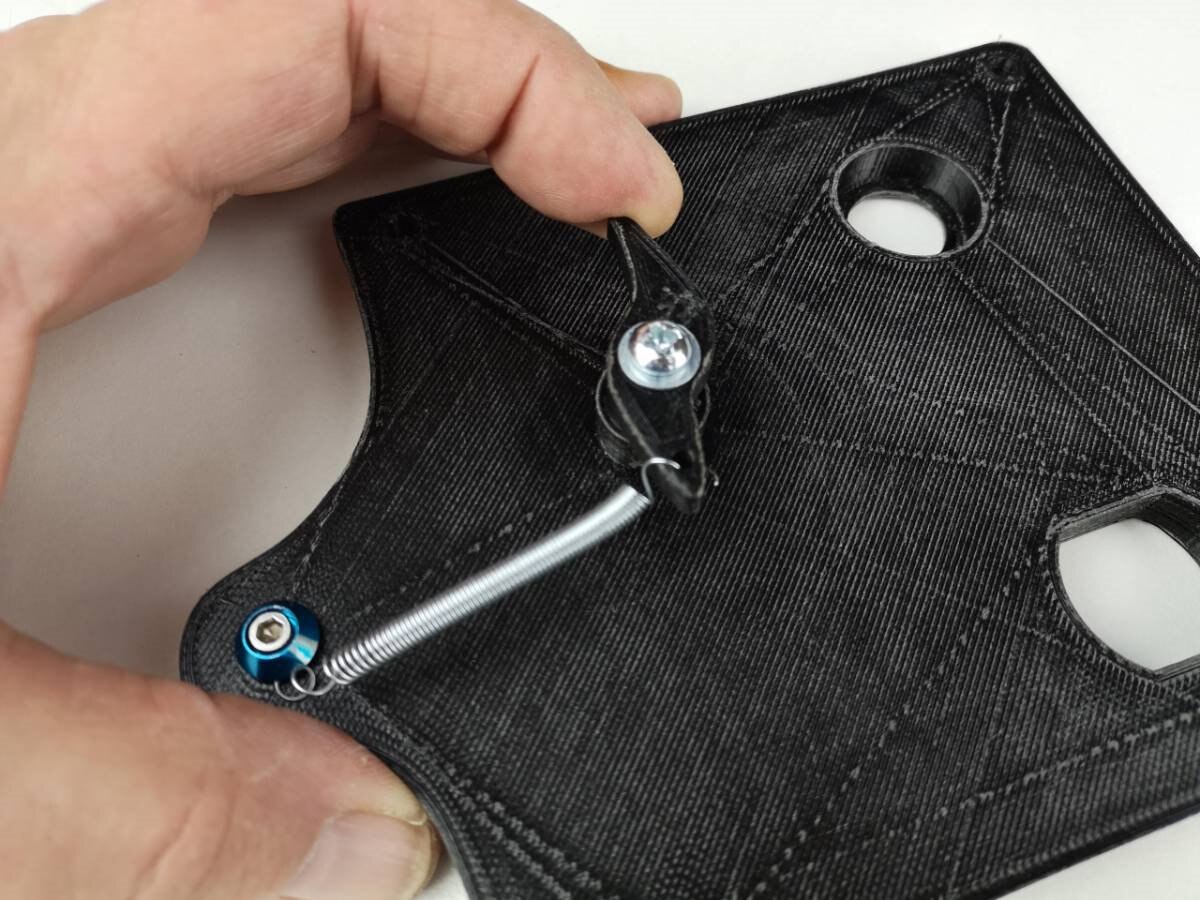

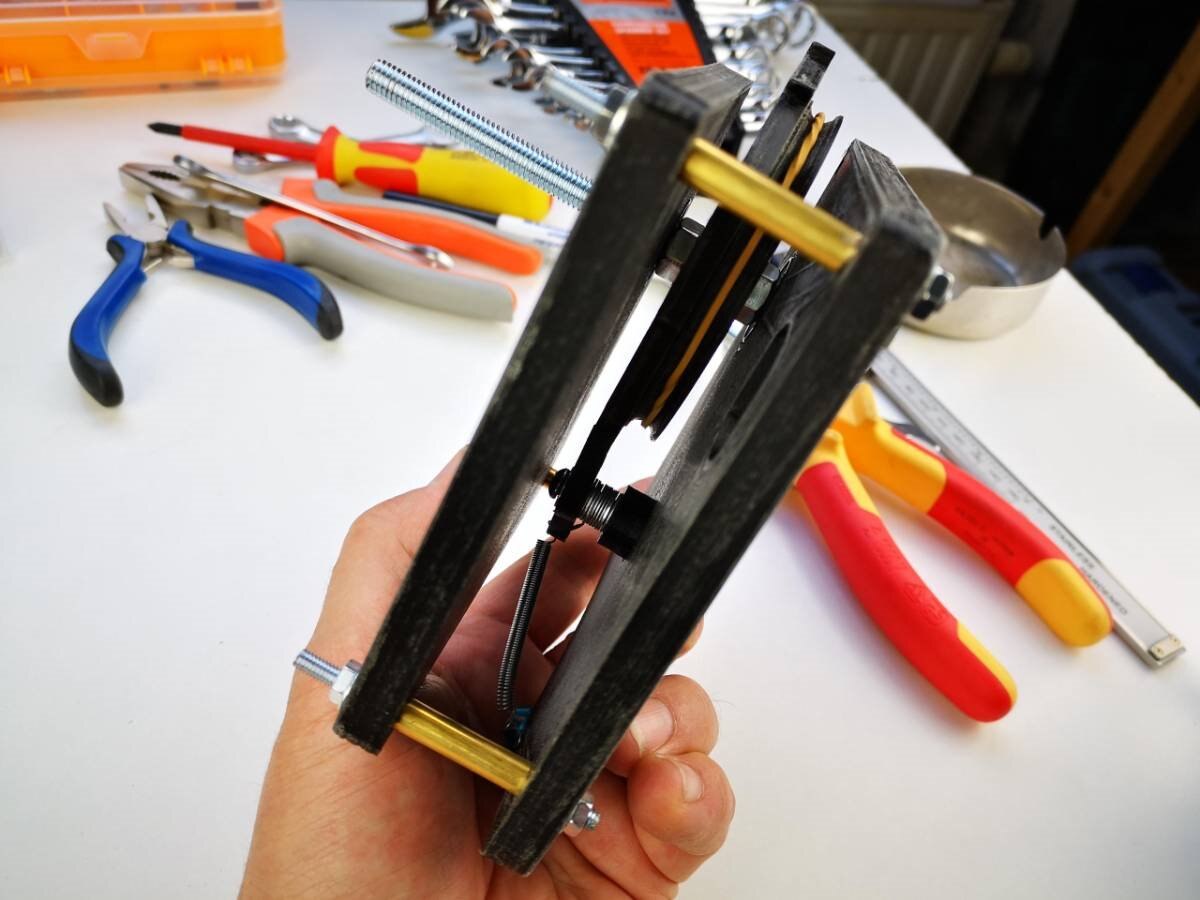
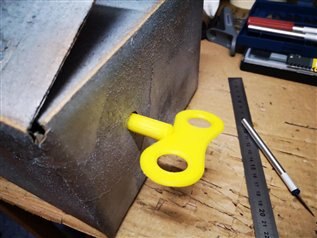
As shown in the image gallery above the ratchet is assembled with an M4 threaded shaft; the longer part is outside the musical box hosting the 3D printed big charging key screwed on it as shown in the images below.
After this part has been finished, I have made a short test program to read the generated power every half rotation of the key through one of the three analog ports of the BBC micro:bit mounted on a Kitronik Robotic Board to find the right reading value in order to avoid undesired effects if the key is not rotated correctly as should happen in the original mechanism. The images below show the counter detection of two of "key charging" events and the relative measured voltage.


The Charge Level Indicator
The charge level indicator should be a gauge showing when the musical box is full-charged and will decrease as a track is played. This feature can be easily reached with a few lines of code using the features of the Kitronik board that can easily control up to eight servos.
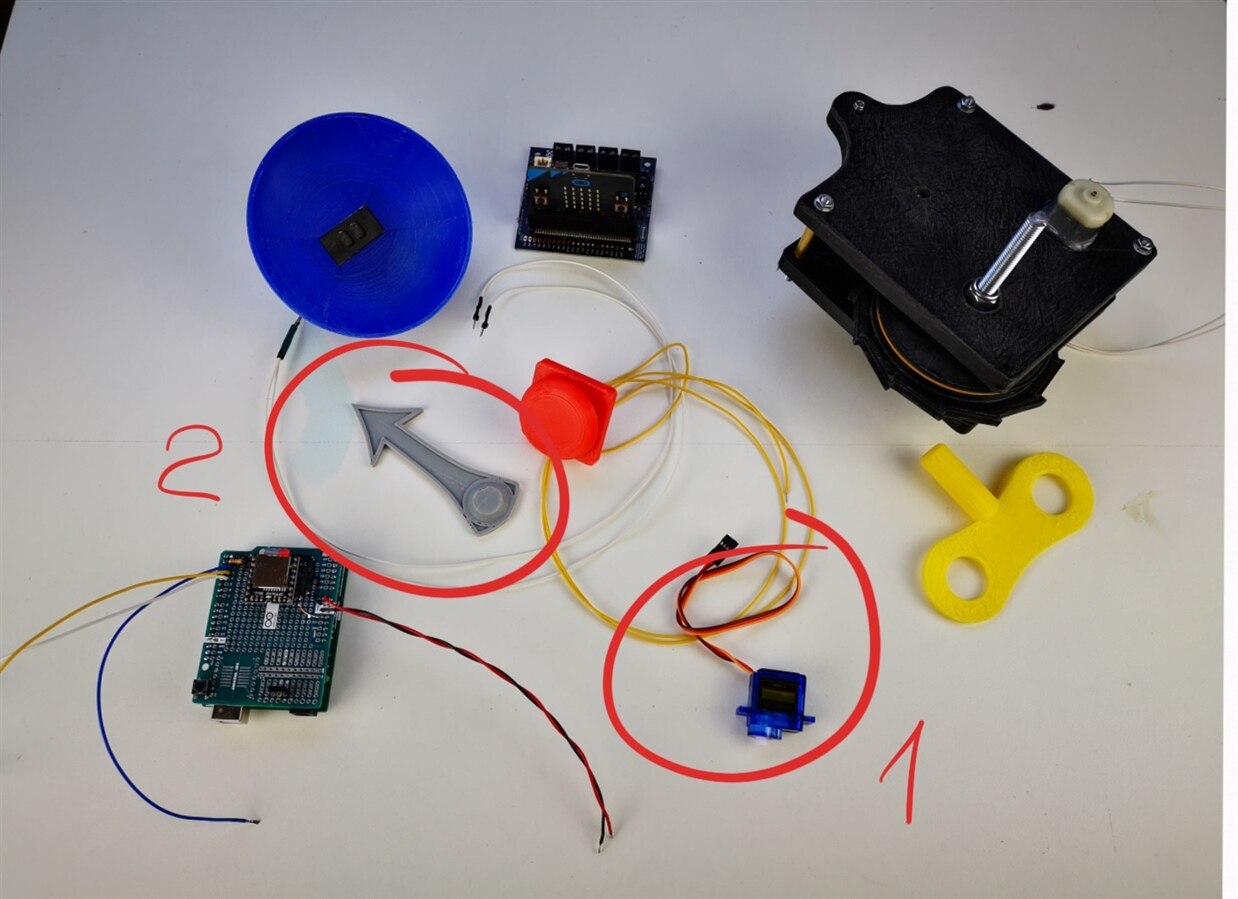
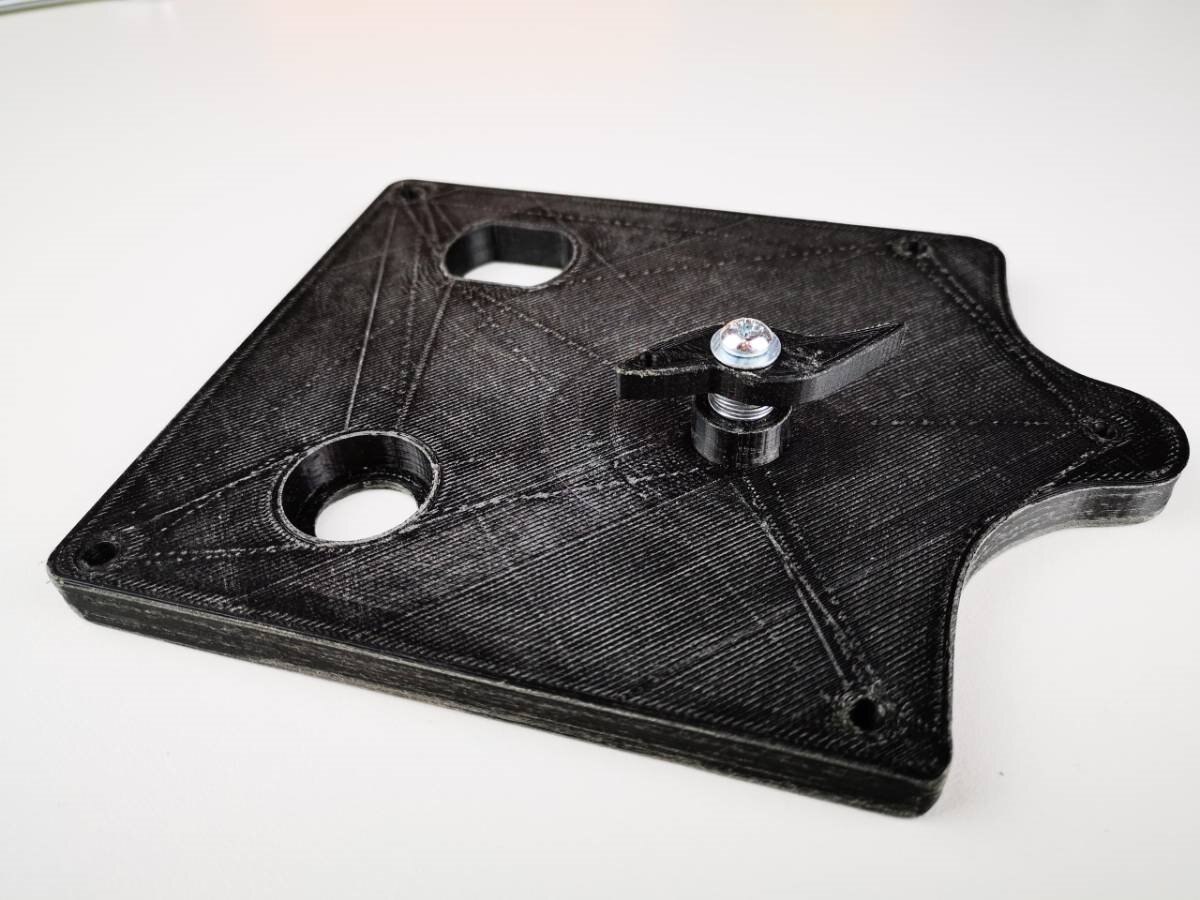
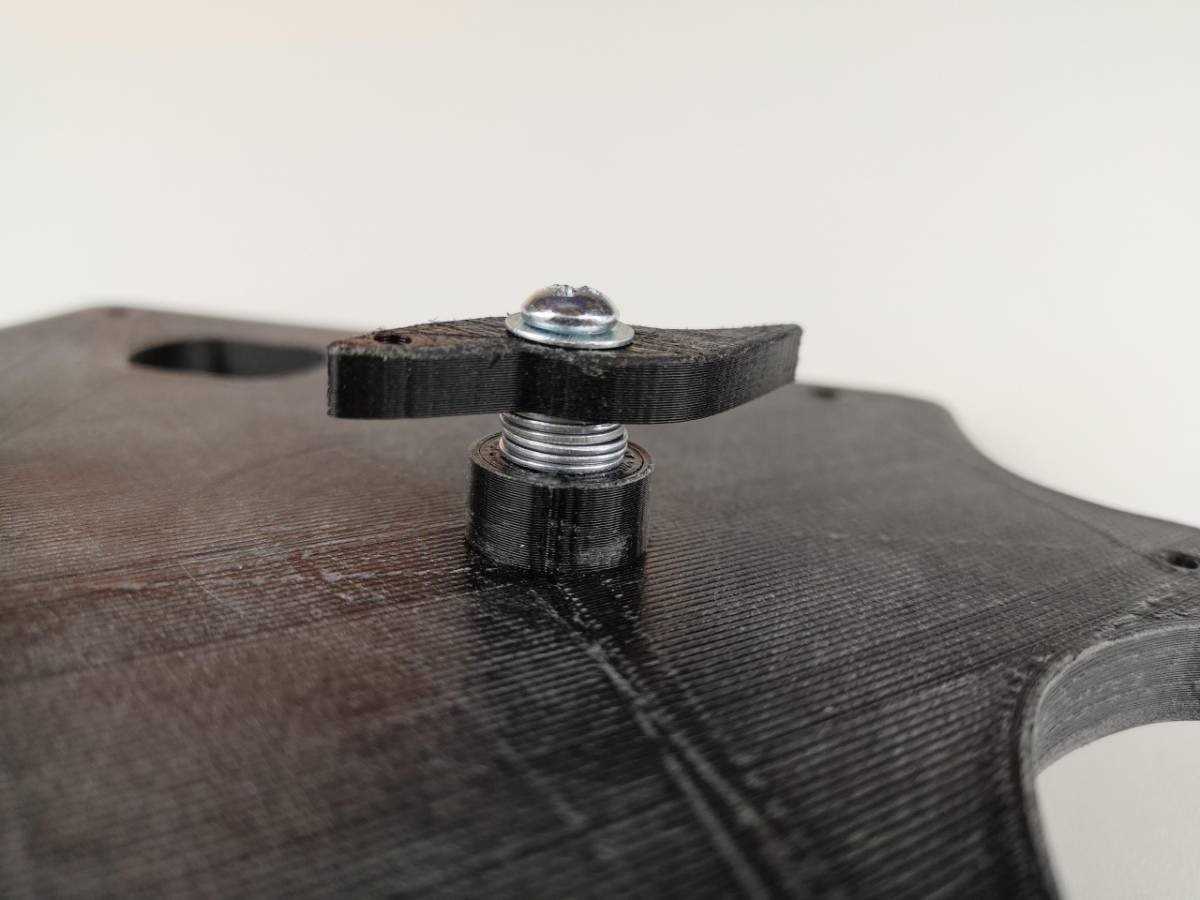
Above: the charge level servo [1] and the 3D printed and metal-painted gauge [2]
The Fire Lighting Effect
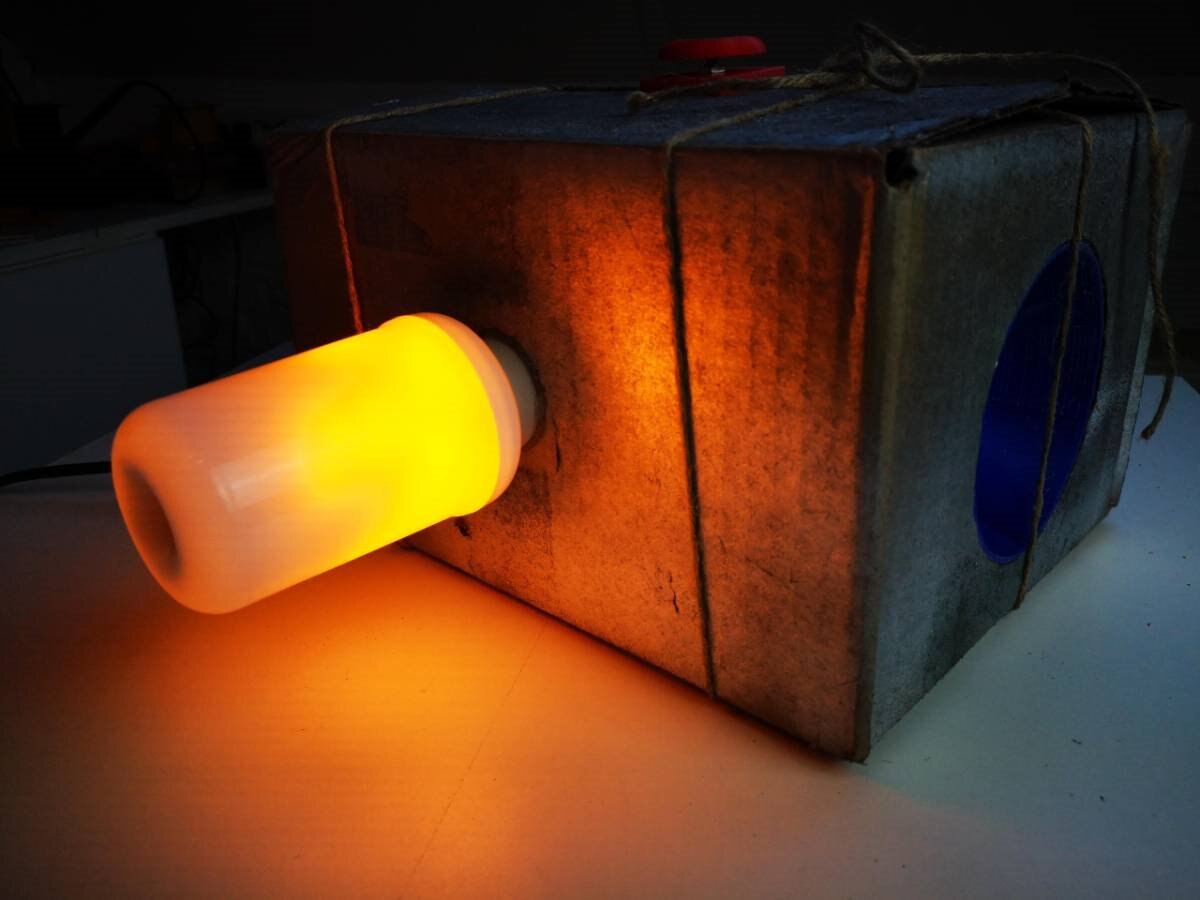
When I saw a banner somewhere on a site advertising this low-power LED light resembling a very realistic flame burning effect I loved it a lot and bought a couple of them, just in case. And this was the case to add a nice effect to the box. The problem is that these are common lamps working at 220V AC. Thanks to the Kitronik robotic board, I have used one of the motor output to control a 5V Finder relay to drive the lamp. All the features of the project have been controlled by software with the micro:bit.
Last Step
The last two parts added directly to the box has been the lamp holder and a top button, simulating the musical box button to release the spring and start the music.
The Lamp Holder and the Relais
Below: the lamp holder hot glued to one of the box sides
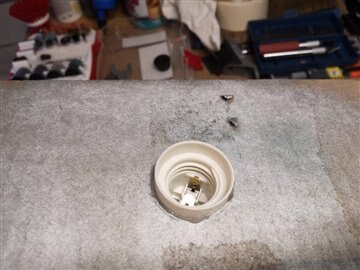
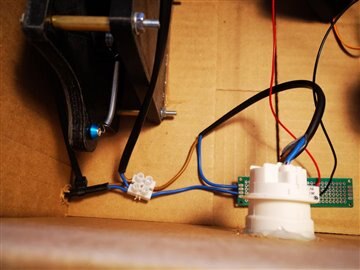
One of the 220V AC wires of the lamp holder (blue wire on the right image) is soldered on the small prototype PCB hosting the Finder relais. the right and black wires from the relais PCB control the relais through the Kitronk robotic board.
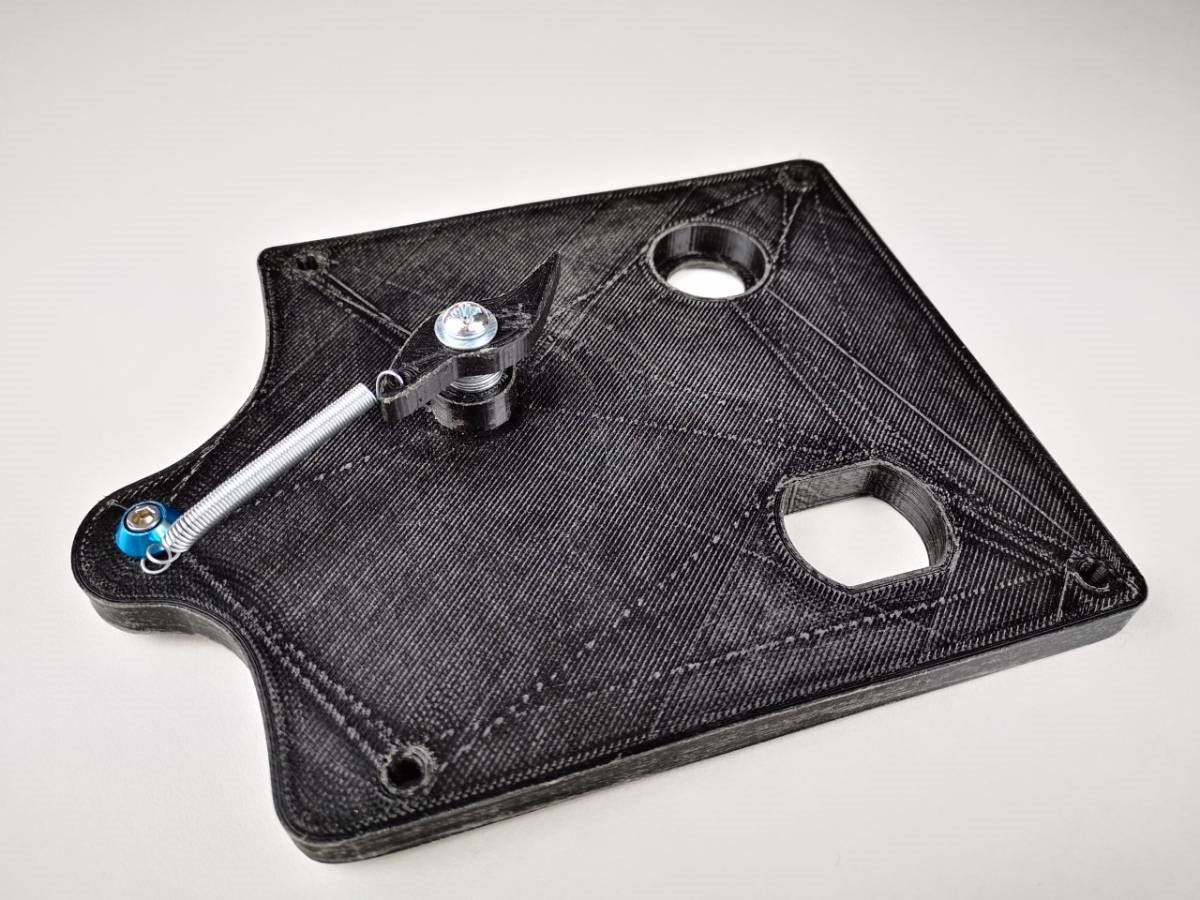
The Music-changer Button

The 3D printed red button in the above image is built in two parts. The square big socket is glued to one of the top-sides of the enclosure box while the round part press a temporary switch glued to the bottom; the button position is strategical for the aesthetical effect but I had to find this custom solution to be able to make the box opening when needed.
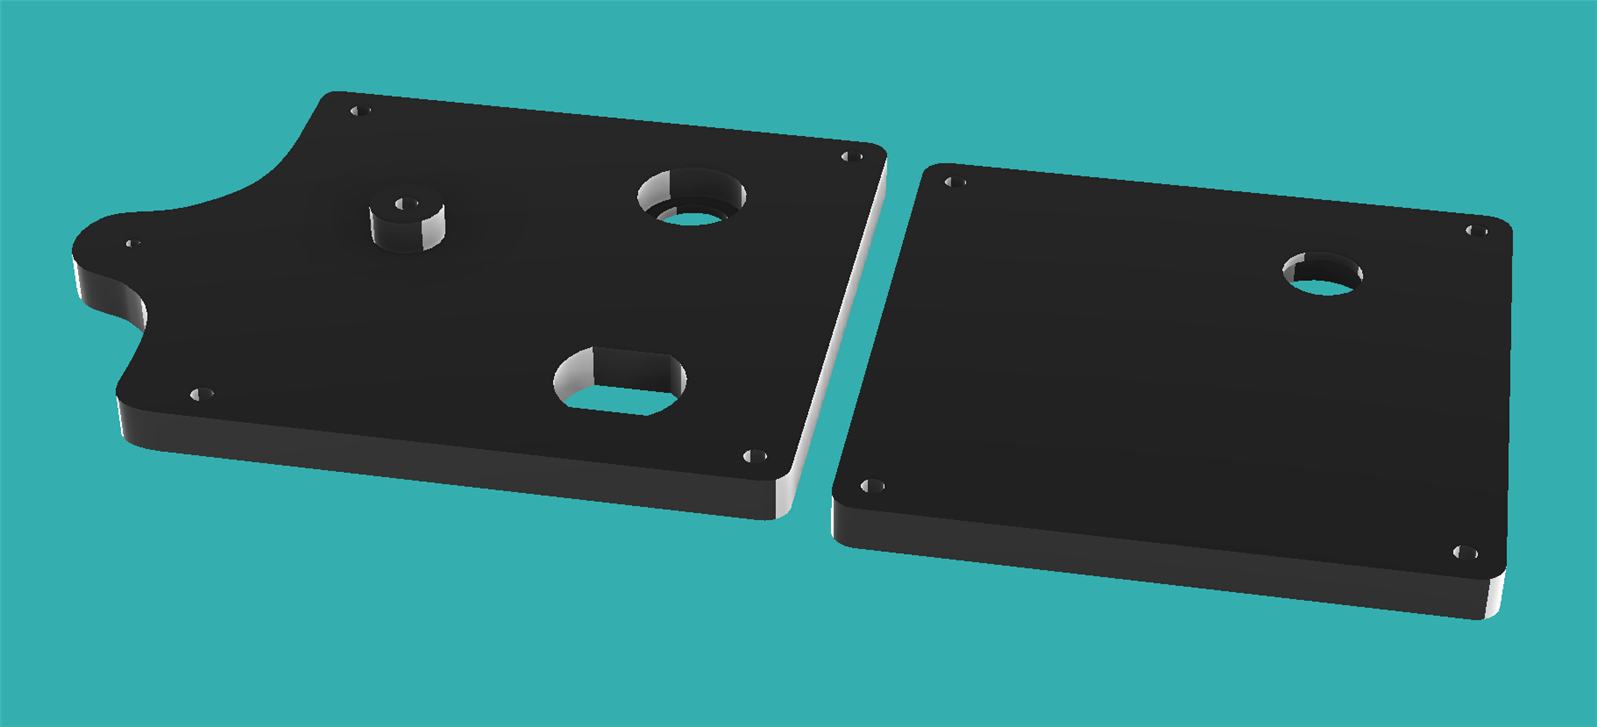
The Finished Assembly
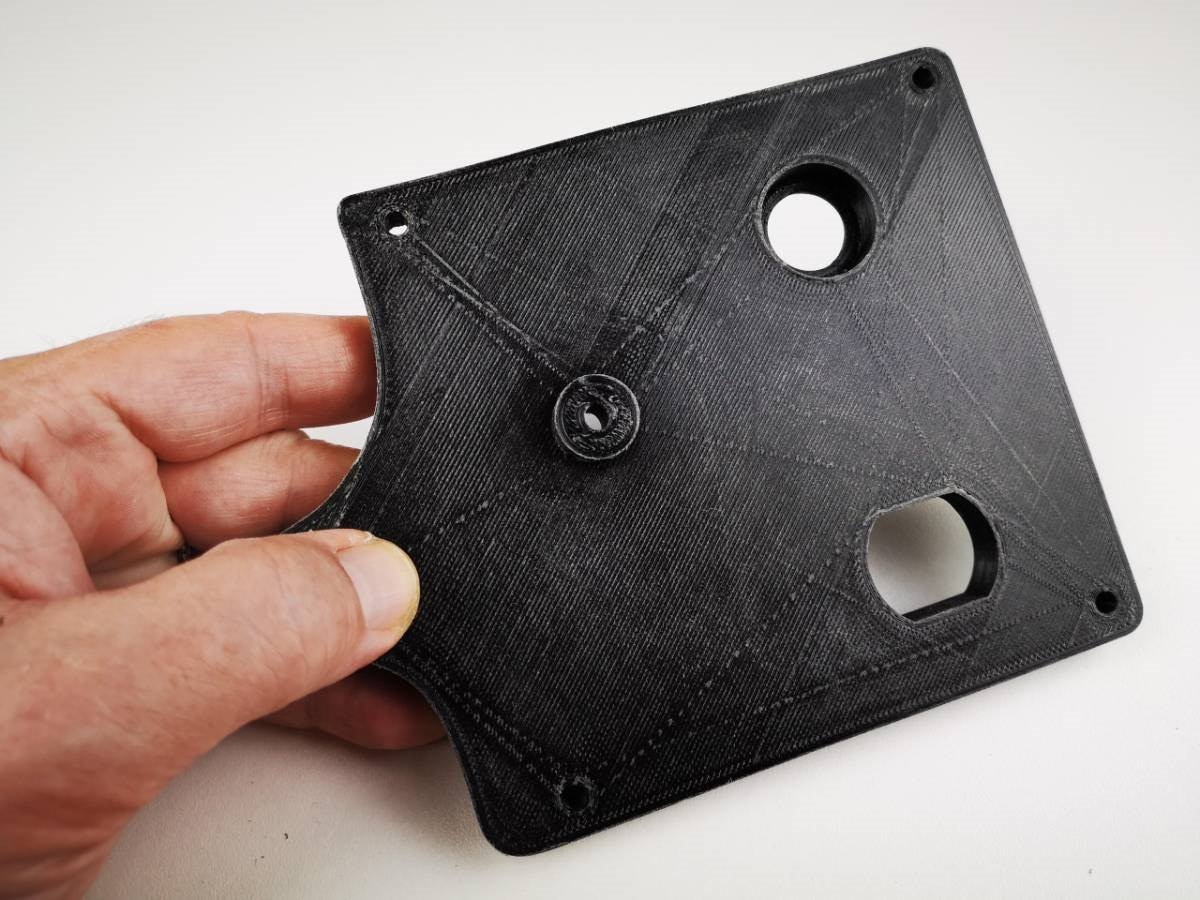
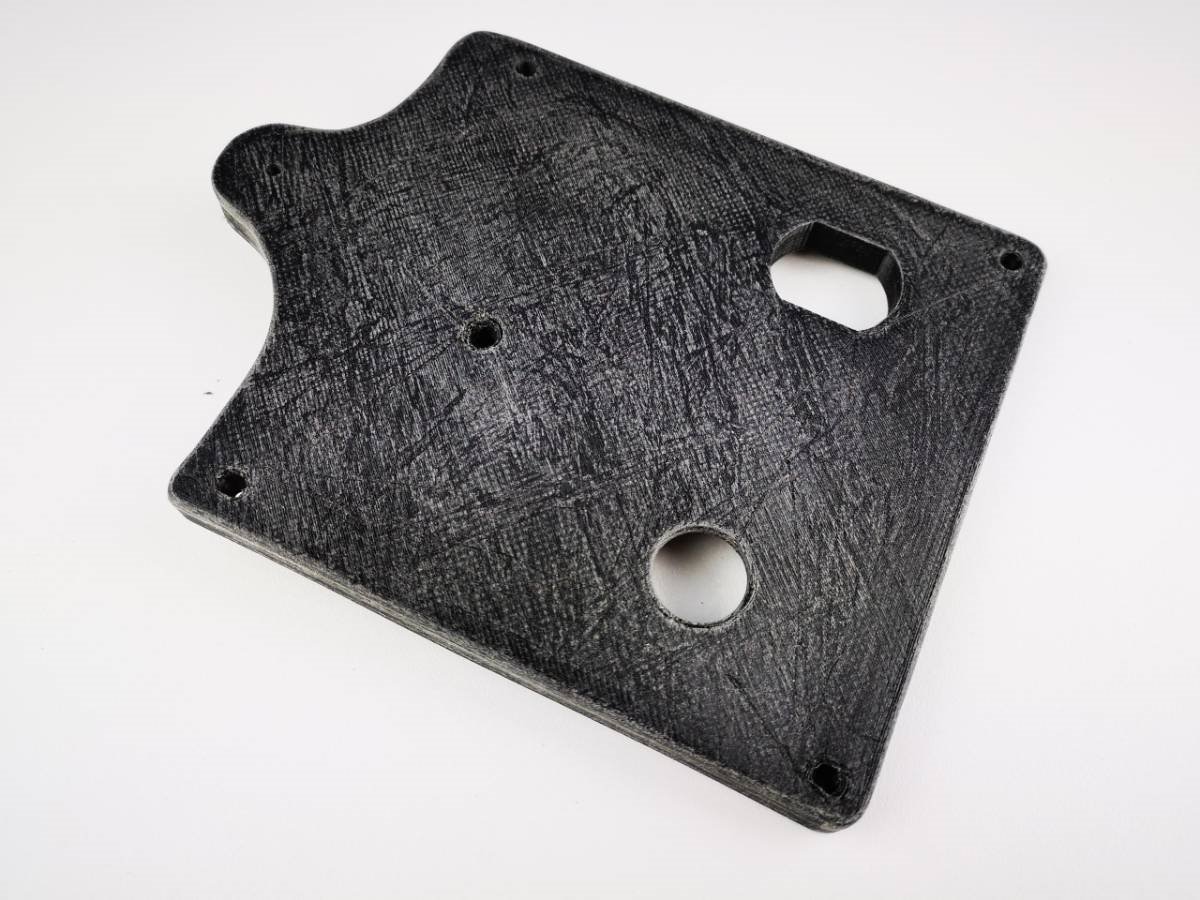
It was possible to include all the components as well as the power supply in the musical box container.
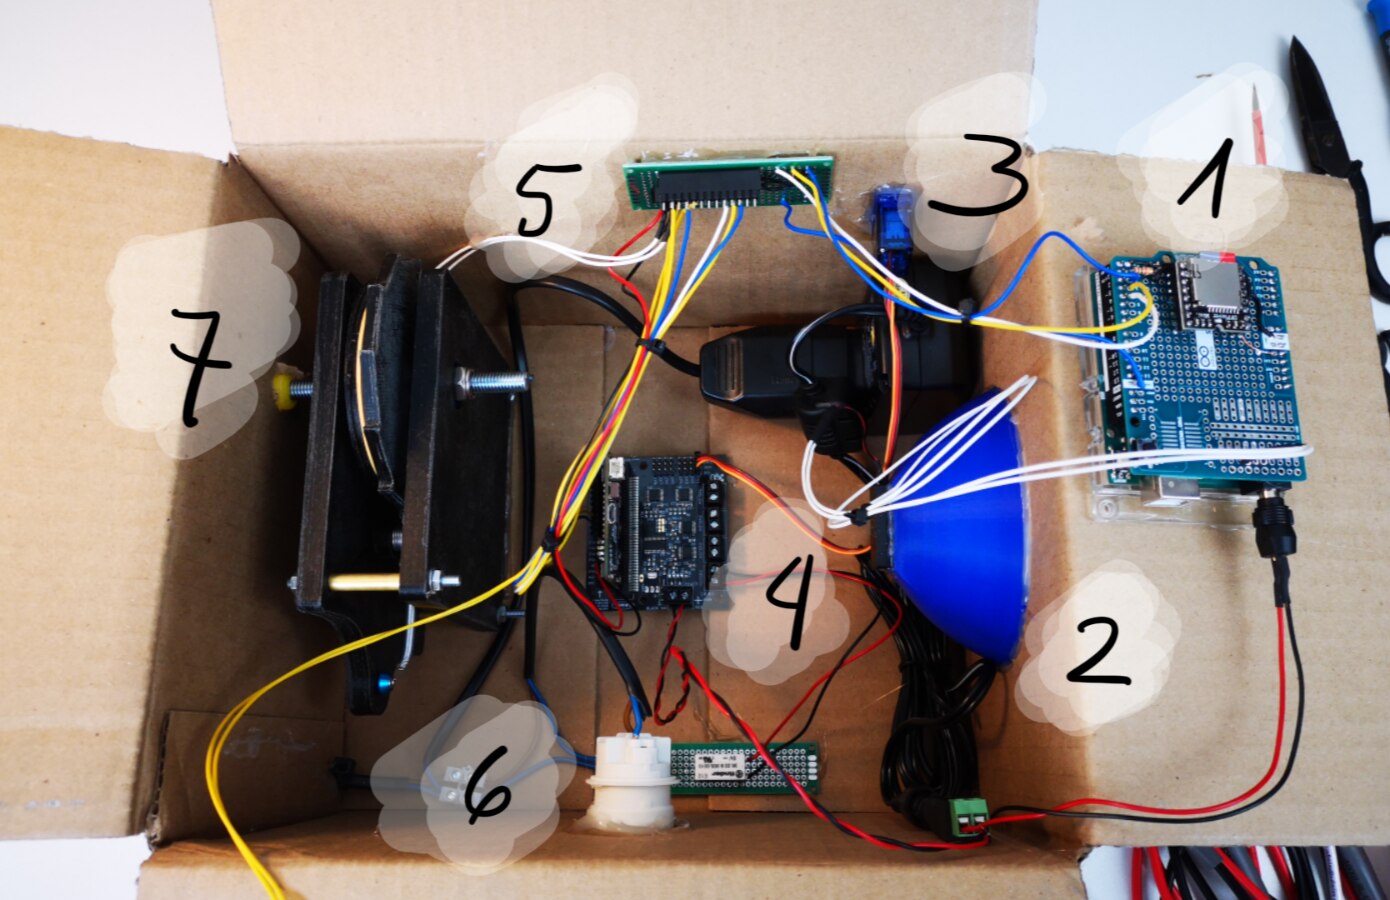
- The Arduino based mp3 player controlled by the BBC micro:bit
- The speaker 3D printed cone glued to the side of the box
- The servo controlling the charge level gauge
- The BBC micro:bit plugged on the Kitronik robotic board
- The signals collector board with the connectors
- The lamp holder and the relais board
- The ratchet component
Below: view of the assembled musical box ready for testing

The BBC micro:bit Software
Below the Javascript source code of the micro:bit
// Check the charing mechanism for a charge event
function readCharger () {
    // Counter for the readings to validate a charging
    // rotation
    isChargingCount = 0
    for (let i = 0; i < countCharger; i++) {
        analogIn = pins.analogReadPin(AnalogPin.P0)
        // Check if the analog input is valid
        if (analogIn > 90) {
            // Increment the readings counter
            isChargingCount += 1
        }
        basic.pause(10)
    }
    // Check if all the readings were accepted to validate
    // the counter
    if (isChargingCount == countCharger) {
        // Increment the charging levels
        chargeLevel += 1
    }
}
// Control che charge level and the player status
input.onButtonPressed(Button.A, function () {
    if (isPlaying == true) {
        // Current position in DEG of the servo controller
        // arrow.
        chargeLevel = chargeLevel - 1
        // Current position in DEG of the servo controller
        // arrow.
        arrowPosition = stepDeg * chargeLevel
        updateCharger()
    }
})
// Update the arrow servo status accoringly with the
// charge level
function updateControls () {
    // Current position in DEG of the servo controller
    // arrow.
    arrowPosition = stepDeg * chargeLevel
    Kitronik_Robotics_Board.servoWrite(Kitronik_Robotics_Board.Servos.Servo1, arrowPosition)
    // If the light is on, power on the realay, else power
    // if off
    if (lightStatus == true) {
        Kitronik_Robotics_Board.motorOn(Kitronik_Robotics_Board.Motors.Motor1, Kitronik_Robotics_Board.MotorDirection.Forward, 100)
        // As the carillon is full charged, set the playing
        // flag
        isPlaying = true
        // Set the Arduino player control pin to (off)
        pins.digitalWritePin(DigitalPin.P11, 0)
    } else {
        Kitronik_Robotics_Board.motorOn(Kitronik_Robotics_Board.Motors.Motor1, Kitronik_Robotics_Board.MotorDirection.Forward, 0)
        // As the carillon is full charged, set the playing
        // flag
        isPlaying = false
        // Set the Arduino player control pin to (off)
        pins.digitalWritePin(DigitalPin.P11, 1)
    }
}
// Send signal to the Ardino player for the next song.
// The song list is circular
function playNewSong () {
    // Set the Arduino player control pin to (off)
    pins.digitalWritePin(DigitalPin.P11, 1)
    basic.pause(500)
    // Set the Arduino player control pin to (off)
    pins.digitalWritePin(DigitalPin.P11, 0)
}
// Update the arrow servo status accoringly with the
// charge level and eventually disable the music
// playing if the charge level is 0
function updateCharger () {
    basic.showString("" + chargeLevel)
    Kitronik_Robotics_Board.servoWrite(Kitronik_Robotics_Board.Servos.Servo1, arrowPosition)
    // If the light is on, power on the realay, else power
    // if off
    if (chargeLevel == 0) {
        Kitronik_Robotics_Board.motorOn(Kitronik_Robotics_Board.Motors.Motor1, Kitronik_Robotics_Board.MotorDirection.Forward, 0)
        // As the carillon is full charged, set the playing
        // flag
        isPlaying = false
        // Set the Arduino player control pin to (off)
        pins.digitalWritePin(DigitalPin.P11, 1)
    } else {
        playNewSong()
    }
}
let analogIn = 0
let isChargingCount = 0
let isPlaying = false
let lightStatus = false
let stepDeg = 0
let chargeLevel = 0
let countCharger = 0
let arrowPosition = 0
// Disable all the output of the Kitronik Robotic
// Board
Kitronik_Robotics_Board.allOff()
Kitronik_Robotics_Board.servoWrite(Kitronik_Robotics_Board.Servos.Servo1, 0)
// Initialze the motor 1 (light relay control) as off
Kitronik_Robotics_Board.motorOn(Kitronik_Robotics_Board.Motors.Motor1, Kitronik_Robotics_Board.MotorDirection.Forward, 0)
// Arduino Player control pin off status
let playerOff = 1
// Arduino Player control pin on status
let playerOn = 0
// Current position in DEG of the servo controller
// arrow.
arrowPosition = 0
// Number of charger reads to have a valid charging
// count
countCharger = 5
// Current level of charge. Start from zero up to
// maxChargeLevel
chargeLevel = 0
// Max number of charge level. Every level of charge
// plays a song
let maxChargeLevel = 6
// The servo rotation steps in DEG every charge
// setting
stepDeg = 15
// The light status controlled by the relais on motor1
// powered when the music is playing
lightStatus = false
isPlaying = false
basic.forever(function () {
    // Only if it is not playing the chager can be used
    if (isPlaying == false) {
        readCharger()
        basic.showString("" + chargeLevel)
        // Check if the carillon is full charged and start
        // playing
        if (chargeLevel == maxChargeLevel) {
            // Change the lilght status controlled by the
            // background process
            lightStatus = true
        } else {
            // Change the lilght status controlled by the
            // background process
            lightStatus = false
        }
        updateControls()
    }
})
Music On!
Materials
All the sources, 3D printable files, and graphic are available on GitHub at https://github.com/alicemirror/musicalbox
Credits
This project has been created with the helpful support of Elegoo for the 3D printing printers and materials, and thanks to the precious boards provided by the Element14 Community. The musical box (aka the Carillon project) can be viewed at Robot Got Talent the Malem Street Art Project in Gent until the end of the month of September. Special thanks to the friend Jan Cumps that come visiting the exhibition a week ago, Cristina Ciocci by Ingegno Maker Space and Koen Vromman.
Top Comments
-

dubbie
-
Cancel
-
Vote Up
+4
Vote Down
-
-
Sign in to reply
-
More
-
Cancel
Comment-

dubbie
-
Cancel
-
Vote Up
+4
Vote Down
-
-
Sign in to reply
-
More
-
Cancel
Children