Previous blogs:
Solar Powered Tropical Beverage Cooling Mug -Blog #5 –*DRAMATIC* step fwd- building a Peltier module chill plate/fan cooled heatsink assembly.
Solar Powered Tropical Beverage Cooling Mug -Blog #4 – Learning to cool with Peltier modules
Solar Powered Tropical Beverage Cooling Mug -Blog #3 - the solar charging system
Solar Powered Tropical Beverage Cooling Mug - blog #2 - the solar panel characterization
Solar Powered Tropical Beverage Cooling Mug -Blog #1 - the concept
Project Video: https://youtu.be/2fnCpfT6f6A
This project idea turned out to be more challenging than expected and a lot was learned.
- The entire week before the project is due, it has been raining outside, no sun. Rely on previous testing to show the solar charging.
- Solar Power curves are done under ideal conditions. Test and engineer your solar projects for less than expected average power output.
- Diaper Rash Cream with zinc oxide worked OK as a thermal grease for Peltier modules. I would not use it if you are using IGBTs and driving your junction temperatures at the 180C range
- In my excitement, I forgot to include the current limit resistor in series with the Peltier module. The MOSFET controlling volts was chopping fully charged battery volts (~6.8v), which exceeded Peltier module rated 6 DC volts and 2 amps. It ran OK for a short while .........and failed open when I was videoing the final results.......maybe I’ll use a 12V one next time.
More hilarious project follies:
- The 12V 1.5W solar measured 50 mA charging current in full sun. The project may need more solar panels to recharge 2200mAhr worth of batteries………dead batteries could take 4 sunny days to recharge. (❁´◡`❁)
- In a perfect world with perfect heat transfer, and no thermal losses to the ambient, chilling 1 liter of water 1 degree C takes 23 minutes. AA battery bank life from full charge with the 6V 2A Peltier module consuming 3W would last a bit over about 4.5 hours.
The beverage better be already cool when putting it in the Solar Powered Tropical Beverage Cooling Mug. How I got that number:
- The Peltier module was experimentally observed to do best chilling at ~ 3V 1A which is 3W.
- The specific heat capacity of water is 4,200 joules per kilogram per degree Celsius (J/kg°C). This means that it takes 4,200 J to change the temperature of 1 kg of water by 1°C. ……
- A kg of water is 1 liter.
- 1 Joule = 1 watt*sec
The Arduino control code didn’t yet include modifying Peltier PWM based on chill plate temperature.
So here are the schematics, code, and some more photos, which can also be seen in the previous blogs.
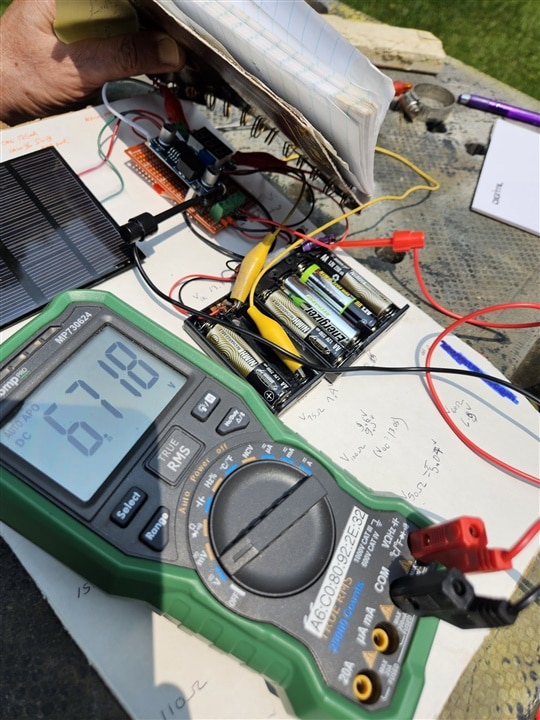
Data taking while watching the solar panel charge the battery pack.

The solar panel power curve plotted from excel data
The system schematic:
int BatteryVoltsCnts;
int ChillPlateTempCnts;
int HeatsinkTempCnts;

int BatteryBankVoltsOK=LOW;
int ThermistorOK=HIGH;

int TurnOnFanPerm=true;
int TurnOnFan=false;
int fanDuty=255;

float THMST1_R_M=0.001; // THMST1_R value div 1000
float THMST2_R_M=0.001; //THMST2_Rvalue div 1000
float THMST1_R=0.001;
float THMST2_R=0.0001;
float scratch1=0.1;
float scratch1A;
float scratch1B;
float scratch1C;
float scratch2=0.0;
float scratch2A;
float scratch2B;
float scratch2C;

float ChillPlateTemp=0.0;
float  HeatsinkTemp=0.0;


float One_Over_Tzero = (1/298.15);
float One_OverBvalue = (1/3500.00);
float DeltaAirTemp =0.0;


void setup() {

// SETUP FAN CONTROL IO ///////
pinMode(A1, INPUT);    // battery volts divided by 2   1023=5V  full charge battery = 6.8/2
pinMode(A2, INPUT);    // chill plate temperature
pinMode(A3, INPUT);    // heatsink hotspot temperature

pinMode(5, OUTPUT);    // Peltier Module MOSFET gate PWM
pinMode(3, OUTPUT);    // cooling fan MOSFET gate PWM
pinMode(13, OUTPUT);    // sets the digital pin 13 as output

Serial.begin(9600);

}


void loop() {

BatteryVoltsCnts=analogRead(A1);
// battery volts are divided by 2 in HW ,
// full charge battery = 6.8V  therefore 6.8V/2=3.4V, (3.4V/5V)*1023=695 cnts full charge,
// 574 cnts = dead battery
Serial.print("BatteryVoltCnts=");
Serial.println(BatteryVoltsCnts);

if ((BatteryVoltsCnts>570)&& (ThermistorOK==HIGH))
  {
    // Run fan full out
    BatteryBankVoltsOK = HIGH;
    analogWrite (3, fanDuty);  // run heatsink fan at top speed
    digitalWrite (13, HIGH); // lit D13 LED
    analogWrite(5,160); // run Peltier Module at 3V ( PWM 60% duty)
  }
  else
   {
    BatteryBankVoltsOK = LOW;
    analogWrite (3, 0);  // stop heatsink fan
    digitalWrite (13, LOW); // stop D13 LED
    analogWrite(5,0); // run Peltier Module at 0V
   }

// Read chill and heatsink temperatures
// also reference https://learn.adafruit.com/thermistor/using-a-thermistor

ChillPlateTempCnts=analogRead(A2);//volts across a 6k resistor
HeatsinkTempCnts=analogRead(A3); //volts across a 6K resistor

////thermistor resistance calcs
    THMST1_R_M= (1.00001*((1023.0)/(ChillPlateTempCnts)));  // inv ratio of volts across the 6K resistor to full scale counts
    THMST2_R_M= (1.00001*((1023.0)/(HeatsinkTempCnts)));  // volts across a 6K resistor
    THMST1_R =((THMST1_R_M*6000.0)-6000.0);  //Chill plate thermistor resistance
    THMST2_R =((THMST2_R_M *6000.0)-6000.0); // heatsink thermistor resistance

//// thermnistor temperature calculated by thermistor resistance,
    scratch1= log(THMST1_R/2000);  /// In Arduinoese ln is written as log
    scratch1A =One_OverBvalue*scratch1;
    scratch1B = (One_Over_Tzero)+(scratch1A);
    scratch1C= (1/scratch1B);
    ChillPlateTemp=(scratch1C-273.15);

    scratch2= log(THMST2_R/2000);  /// In Arduinoese ln is written as log
    scratch2A =One_OverBvalue*scratch2;
    scratch2B = (One_Over_Tzero)+(scratch2A);
    scratch2C= (1/scratch2B);
    HeatsinkTemp=(scratch2C-273.15);

 //   scratch2= ((1/298.15)+(1/3500)*log(THMST2_R/2000));  /// In Arduinoese ln is written as log


/////////// debugging data print
//       Serial.print("ChillPlateTempCnts=");
//       Serial.println(ChillPlateTempCnts);
 //      Serial.print("THMST1_R_M=");
 //      Serial.println(THMST1_R_M);
    //   Serial.println(THMST1_R_M,4);

  //    Serial.print("chillplate ohms=");
  //     Serial.println(THMST1_R,4);
       Serial.print("ChillPlateTemp=");
       Serial.println(ChillPlateTemp);
       delay(100);
 //      Serial.print("HeatsinkTempCnts=");
 //      Serial.println(HeatsinkTempCnts);
 //     Serial.print("heatsink ohms=");
 //     Serial.println(THMST2_R,4);
      Serial.print("HeatsinkTemp=");
       Serial.println(HeatsinkTemp);
          delay(1000);
      Serial.print(" ThermistorOK ==");
      Serial.print(ThermistorOK);
       Serial.println(" .");

 if ((ChillPlateTemp<0)||(ChillPlateTemp>130)||(HeatsinkTemp<0)||(HeatsinkTemp>130))
  { ThermistorOK=LOW; }
  else
    { ThermistorOK=HIGH; }


}
I hope you enjoyed the folly as much as I did making it. Relax, you're off the grid.

Top Comments