


Thanks to Tariq for sending me a Raspberry Pi HQ camera kit! With the kit, I have made a completely new version of the first camera I made.
Notable upgrades:
- Image preview window
- much more readable and logical code
- improved camera @ 12.3MP
- integrated power supply
Before we begin, I would like to disclose that the power supply is a battery bank. Now that is out of the way, let's go see how the thing works.
This version is powered with a Pi 0W. (I do not believe I have time to do CV on a Pi 4, unfortunately, but that will certainly be done in the future.)
It is connected to an Adafruit PiTFT 2.8" Resistive touchscreen, which has 4 buttons on the outside connected to GPIO pins 17, 22, 23, and 27. Via the MIPI CSI interface, a Raspberry Pi High Quality camera is connected.
The lion's share of the project is done in software. The software is quite long and is in a GitHub Repository(as I do not want to play around with the e14 site markdown)
BOM and Software:
Raspberry Pi HQ Camera, with C/CS lens(and adapter if necessary)
CSI cable: standard FPC 15 pins, 1.0mm pitch contacts opposite
CSI cable: 22 pin FPC 0.5mm Pitch to 15 pin 1.0 pitch adapter
Optional: Raspberry Pi 4, 2GB or higher, for software development
Optional: Host computer, with Microsoft VSCode(must be configured on raspberry pi, but VSCode does that automatically. Install PyLance for the Raspberry Pi), Remote extension, VNC Viewer(VNC must be enabled, configured on Raspberry Pi as well)
PiTFT 2.8" Resistive for B+
Optional: single cell 18650 power bank
MicroSD Card, 16GB or higher, Class 10 or better, with Raspbian w/Desktop(preferably full version)
First, we will need to set up the development environment for the Raspberry Pi. While the Pi comes with Thonny, Thonny is vastly inferior to Visual Studio Code, which has a powerful PyLance extension.
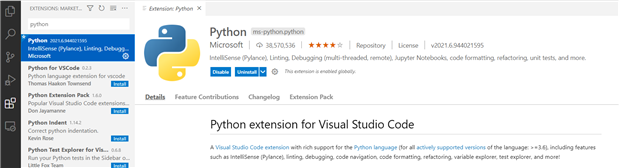
You will need to go to VScode>Marketplace, search Python, and install the extension from Microsoft.
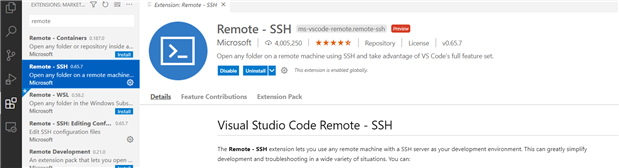
You will also need Remote - SSH, also from Microsoft.
Once this is done, connect to your Raspberry Pi! Make sure it's connected to your network + has SSH enabled(adafruit has a great guide on this Overview | Raspberry Pi Zero Headless Quick Start | Adafruit Learning System)
After connecting, enter your Pi's password(default username is pi, password raspberry).
Open a folder, in the location you would like. I have used /home/pi/Documents/ as the location for my python files.
Here's the GH: Hugoyhu/Raspberry-Pi-Point-and-Shoot-Camera: Python scripts for the Point and Shoot Camera, v2 (github.com)
Please copy all 4 files into VScode(sorry!)
Make sure to use pip to install PyQt5, a library for GUI development, that I used:
run this in the terminal
pip3 install PyQt5
Once that is done, run Main, and give it a try! Keep in mind: the app uses X11 forwarding, so you must either run directly on the pi, or VNC. You cannot forward X11(at least I haven't figured out how), over SSH(which is what ssh and VScode remote use)
Button 17 is to turn the preview on/off, 22 is to take an image, 23 is to take a .h264 video(press once to record, press it again to stop recording)
By default video is 480p and stills are 4056x3040(gotta take advantage of that extra resolution, ya know)
Like with the previous version, you'll need to increase graphics video RAM to at least 256MB. Go to sudo raspi-config -> performance options -> Video memory
I don't want to bore anyone with the specific details of how the code works, so I'll just give a quick overview of the structure. There are 4 python files: a main file, a file for the Camera controls, one for the window management(for image preview) and another one for the constants used in the files(such as file paths)
The camera control file has 3 buttons(gpiozero.Button) which creates a thread for each button with a callback assigned. The CameraController.py file has a class, CameraController that has several functions for taking images. There is an __init__ function which is an interface for the construction of a CameraController instance, and a few others such as for taking stills, videos, and turning preview on/off.
The CameraController is then imported into the ViewWidgets module. As CameraController is multithreaded, other than initial setup, the main thread doesn't do anything, and will require a resource exhaustive loop with sleep in order to prevent the main thread from exiting. However, the ViewWidgets module has a ViewWidgets class, which incorporates the PyQt5 library, one that is used for GUI creation. In order for the GUI to remain running, there must be a blocking function, (instance of QApplication).exec_(). However, this is troublesome as it pauses the thread that is being used. Thus, it is not feasible to have CameraController import ViewWidgets, rather, ViewWidgets importing CameraController.
After this is done, there is a callback from ViewWidgets that allows CameraController to "notify" ViewWidgets that a new image has been taken(so the image can be added to the list for previews)
The code is fully functional with my testing. However, I haven't been able to have it run from start, either with cron or rc.local. I'm not sure why, frankly.
Using a cardboard box, I made a larger, but more durable case. It also has room for batteries. Instead of using a Pi 0, I decided to use the Pi 4 Tariq sent me- it is just much faster. My touchscreen on the PiTFT was not working, and I do not want to transfer files/ reset configs to a new SD, so I am using VNC viewer in the video attached. Here is a demo of me using the Preview, image taking, and image gallery.
I am powering externally since my internal battery is 1A, ~4000mah, and my external is 25000mah @ 2.1A. I will be trying out openvino soon!
Top Comments