element14 Community
element14 Community
    Register Log In
  • Site
  • Search
  • Log In Register
  • Community Hub
    Community Hub
    • What's New on element14
    • Feedback and Support
    • Benefits of Membership
    • Personal Blogs
    • Members Area
    • Achievement Levels
  • Learn
    Learn
    • Ask an Expert
    • eBooks
    • element14 presents
    • Learning Center
    • Tech Spotlight
    • STEM Academy
    • Webinars, Training and Events
    • Learning Groups
  • Technologies
    Technologies
    • 3D Printing
    • FPGA
    • Industrial Automation
    • Internet of Things
    • Power & Energy
    • Sensors
    • Technology Groups
  • Challenges & Projects
    Challenges & Projects
    • Design Challenges
    • element14 presents Projects
    • Project14
    • Arduino Projects
    • Raspberry Pi Projects
    • Project Groups
  • Products
    Products
    • Arduino
    • Avnet Boards Community
    • Dev Tools
    • Manufacturers
    • Multicomp Pro
    • Product Groups
    • Raspberry Pi
    • RoadTests & Reviews
  • Store
    Store
    • Visit Your Store
    • Choose another store...
      • Europe
      •  Austria (German)
      •  Belgium (Dutch, French)
      •  Bulgaria (Bulgarian)
      •  Czech Republic (Czech)
      •  Denmark (Danish)
      •  Estonia (Estonian)
      •  Finland (Finnish)
      •  France (French)
      •  Germany (German)
      •  Hungary (Hungarian)
      •  Ireland
      •  Israel
      •  Italy (Italian)
      •  Latvia (Latvian)
      •  
      •  Lithuania (Lithuanian)
      •  Netherlands (Dutch)
      •  Norway (Norwegian)
      •  Poland (Polish)
      •  Portugal (Portuguese)
      •  Romania (Romanian)
      •  Russia (Russian)
      •  Slovakia (Slovak)
      •  Slovenia (Slovenian)
      •  Spain (Spanish)
      •  Sweden (Swedish)
      •  Switzerland(German, French)
      •  Turkey (Turkish)
      •  United Kingdom
      • Asia Pacific
      •  Australia
      •  China
      •  Hong Kong
      •  India
      •  Korea (Korean)
      •  Malaysia
      •  New Zealand
      •  Philippines
      •  Singapore
      •  Taiwan
      •  Thailand (Thai)
      • Americas
      •  Brazil (Portuguese)
      •  Canada
      •  Mexico (Spanish)
      •  United States
      Can't find the country/region you're looking for? Visit our export site or find a local distributor.
  • Translate
  • Profile
  • Settings
Recycle & Retrofit
  • Challenges & Projects
  • Project14
  • Recycle & Retrofit
  • More
  • Cancel
Recycle & Retrofit
Blog RaspberryPI VU-EDITOR
  • Blog
  • Forum
  • Documents
  • Events
  • Polls
  • Files
  • Members
  • Mentions
  • Sub-Groups
  • Tags
  • More
  • Cancel
  • New
Join Recycle & Retrofit to participate - click to join for free!
  • Share
  • More
  • Cancel
Group Actions
  • Group RSS
  • More
  • Cancel
Engagement
  • Author Author: sebathorus
  • Date Created: 12 Dec 2020 10:42 PM Date Created
  • Views 1486 views
  • Likes 6 likes
  • Comments 2 comments
  • recycle & retrofit
  • recycleretrofitch
Related
Recommended

RaspberryPI VU-EDITOR

sebathorus
sebathorus
12 Dec 2020

Hello,


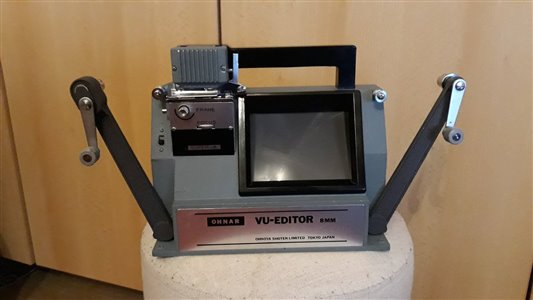
For Recycle&Retrofit monthly project, I tried to bring a new life to an old OHNAR VU-EDITOR. I bought this device few years ago at a flea market and since I saw it I knew I'll fit some kind of electronics and display on it.

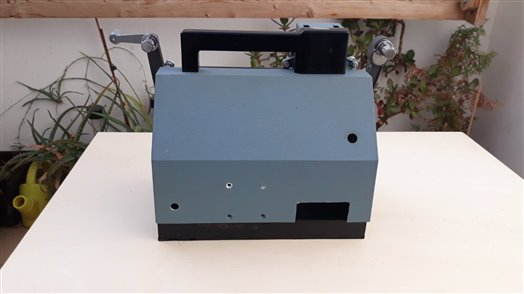
Although have no manufacturing date on it, I found this type was built around 60s-70s and was used to edit 8mm film reels. It was in a non-working condition so it was a perfect candidate for a retrofit job.


I kept its original look as much as I could, only few cuts and holes here and there.

To bring this guy in 2020 (not the best year but...) I decided to make it a Linux computer with the help of an Raspberry Pi and few accessories. My aim was to use for this project other stuff I had around the house and buy new stuff as little as possible.

In this image are electronic components used, except display and power supply.

image

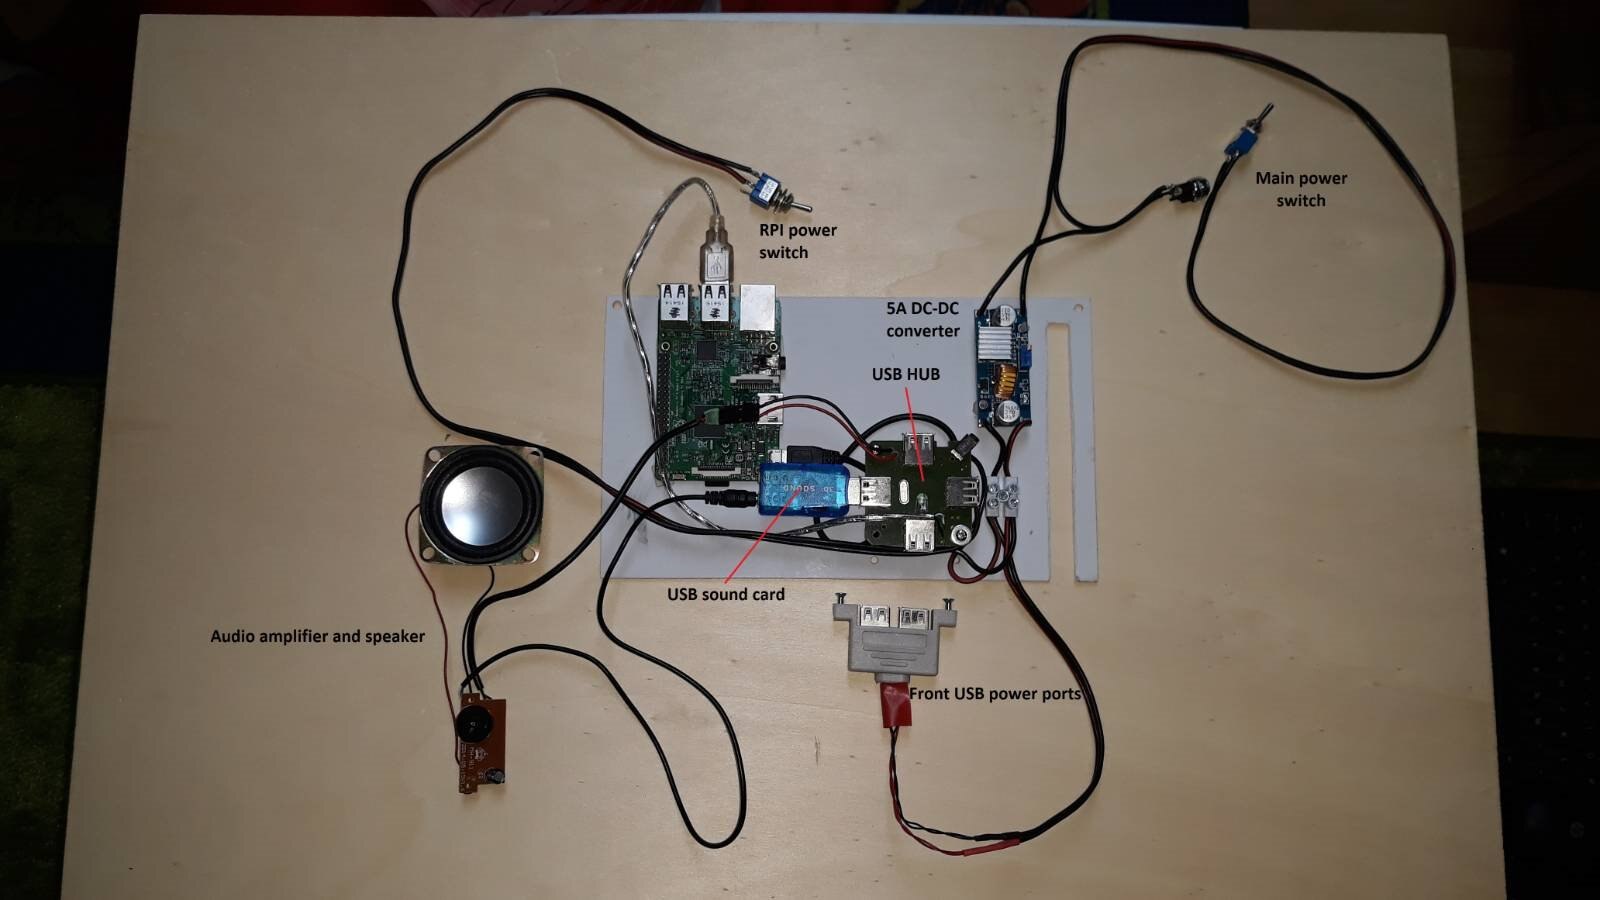
- power is supplied by a laptop power adapter (18V/4.58A) and a DC-DC converter (5A). I choose this converter because accept input voltage up to 37V and I thought I might make this thing portable by using a 3S Li-Po pack instead of wall adapter.

- I used a hacked USB hub to provide power and connectivity to RPi and peripherals (audio/keyboard/etc)

- recycled USB front connector from old PC - for front 5V only

- audio - USB sound card + small amplifier and speaker (probably from some USB powered speakers, it works well on 5V)

- initial keyboard recovered from an old/non-working tablet cover+keyboard combo (looked like this) worked for few weeks then one day stopped... I replaced it with a mini wireless keyboard, as a plus, this one have a touch pad and Linux was able to recognize/use also media buttons without any extra configuration

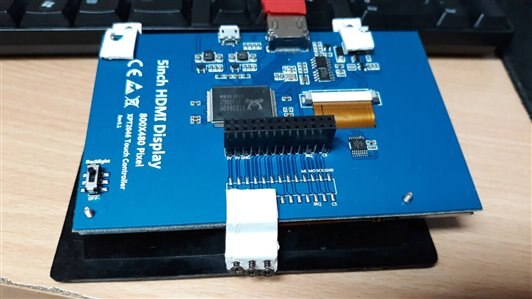
- 5 inch display - configured to use only original frame area

- Pico HAT HACKER to bring RPI pins to front panel for easy access to them

- Raspberry Pi 3B with Buster


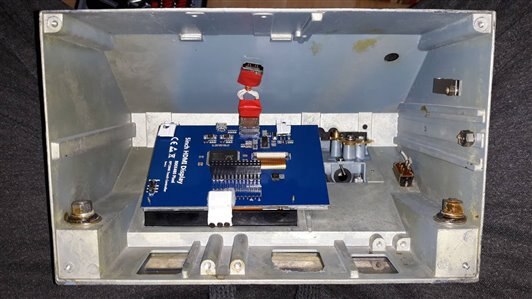
Last picture before start

image

Display mounted on frame - unfortunately I could't find a display to fit exactly on the original screen frame size so I cheated a bit, I took a bigger display (5 inch) and scaled image from Raspbian config

image

Display is connected to RPi on HDMI and here was a bit of struggle to make it happen. I used a short and flat HDMI cable for connection but despite the VU_EDITOR looked quite spacious it wasn't enough room for HDMI cable to bend safely. So I had to took a HDMI adapter with variable angle, remove its housing and use it to connect the parts.

image

First boot with display mounted

image

Enclosure is made from cast aluminum, some drilling and cutting was needed to make RPi ports accessible on the back, few holes for speaker and enlarge existing openings behind the front panel to accommodate a Pico HAT Hacker, USB header and a mini breadboard

imageimageimage


imageimage


imageimage


In the end, a short demo of how it looks/works. After boot, wireless keyboard takes a little to initialize and audio output jumps sometimes from USB sound card to analog output, otherwise its fine.

You don't have permission to edit metadata of this video.
Edit media
x
image
Upload Preview
image

  • Sign in to reply

Top Comments

  • ralphjy
    ralphjy over 4 years ago +2
    It would have been phenomenal if you had been able to set it up to capture frames from the Super-8 film . Nice build. Maybe you can use it to play home movies.
  • sebathorus
    sebathorus over 4 years ago in reply to ralphjy

    Thank you!

    To have possibility to grab frames from film would be great, but I didn't had any film to experiment with.

    I kept untouched all the mechanics and most of the optics, I removed only a 220V->12V transformer and a couple of mirrors which were used to project image on original screen, so it's still possible to do this if I manage to got a reel of 8mm film.

    For now I use it to play music while I have the possibility to use RPi and it's pins to connect stuff and experiment.

    • Cancel
    • Vote Up 0 Vote Down
    • Sign in to reply
    • More
    • Cancel
  • ralphjy
    ralphjy over 4 years ago

    It would have been phenomenal if you had been able to set it up to capture frames from the Super-8 film image.


    Nice build.  Maybe you can use it to play home movies.

    • Cancel
    • Vote Up +2 Vote Down
    • Sign in to reply
    • More
    • Cancel
element14 Community

element14 is the first online community specifically for engineers. Connect with your peers and get expert answers to your questions.

  • Members
  • Learn
  • Technologies
  • Challenges & Projects
  • Products
  • Store
  • About Us
  • Feedback & Support
  • FAQs
  • Terms of Use
  • Privacy Policy
  • Legal and Copyright Notices
  • Sitemap
  • Cookies

An Avnet Company © 2025 Premier Farnell Limited. All Rights Reserved.

Premier Farnell Ltd, registered in England and Wales (no 00876412), registered office: Farnell House, Forge Lane, Leeds LS12 2NE.

ICP 备案号 10220084.

Follow element14

  • X
  • Facebook
  • linkedin
  • YouTube