Introduction
Metaphorically speaking the title refers to an idea. It relates to an idea that helped solve my total ineptness at looking after plants.
It all started about 5 years ago when a colleague brought in a large plant to the office and assured me that this plant was rather robust and did not require much looking after but could I look after it anyway. Needless to say, after a good while of total neglect in the corner it did look rather sad and this prompted immediate ideation to try and resolve this problem.
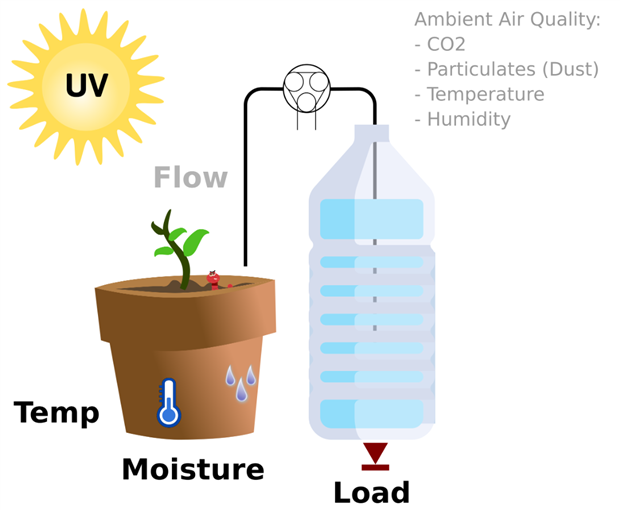
What this required was an automated means to monitor the vital signs, such as soil moisture and amount of sunlight as well as other secondary signals, which may cause the plant to require more or less water, such as temperature. Other aspects related to plant health such as soil nutrients were deemed too difficult to measure with sensors and so were ignored. Then I needed a means to water the plant automatically if the vital signs dropped below optimum levels. As all this was rather new to me, and nothing was found online that defined exactly what the optimum levels were, I adopted a more stochastic approach by applying fuzzy logic to determine when to water and by how much.
And so the fuzzy plant watering system was born.
Proof of Concept design
Watching plants grow is a bit like watching paint dry. Capturing data over a good number of days and weeks, rather than just over a few minutes or hours, is essential as part of the horticultural learning exercise to first evaluate the quality of data captured to then determine how much the soil moisture levels change over time when the plants were watered and then left for a good number of days etc. Then, as I often forgot to water the plants when in the office I also had to figure out a way to water the plants remotely and to save time, I also wanted the captured data to be accessible directly via a computer and as I often worked remotely, I also wanted to have this data accessible from anywhere and so a cloud platform solution was also considered necessary.
Hence, this turned into an IoT-based remote monitoring and control project.
How so much has changed since 2014. There was no "edge computing" back then, or at least, I was not aware of it back then. The remote brain for this project was an Arduino Mega as this provided the oomph to handle whatever I through at it with my fuzzy fuzzy-logic rules and data sets.
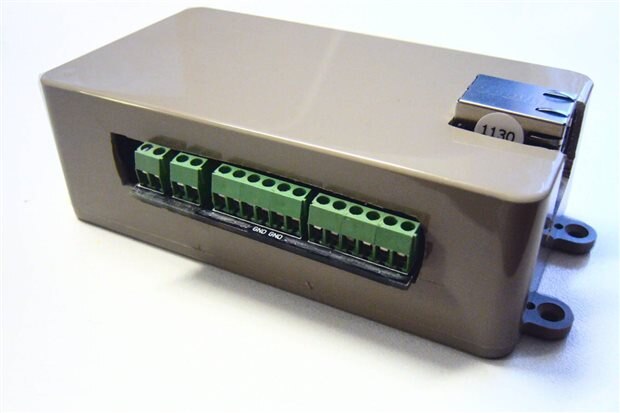
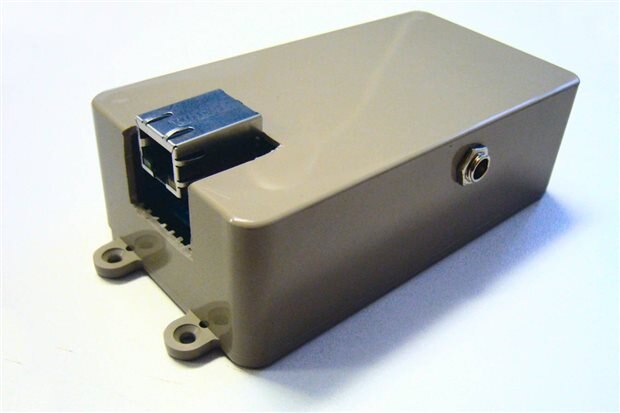
Now, if you recall, back in early 2014, the infamous and seriously cheap ESP8266 had not been released and my experiences with my first Arduino compatible WiFi module (the RN-XV WiFly) had not gone smoothly, and was quite pricey, so I elected to use an Ethernet module instead for my proof of concept project.
Also back in 2014 I had just purchased my first Raspberry Pi, so to learn the ropes I decided to incorporate this into the mix to act as my local server for data capture and local access (not quite Edge Computing, but close). It was also possible to then connect the RPI to the Internet with the help of a much cheaper WIFI USB dongle, which you would typically use with your laptop, for example (as shown in picture on the right - source TP-LInk).
I then was able to also send data to the cloud for remote storage. At the time I used the Carriots IoT Platform – which is now called the Altair Smartcore platform (https://www.altair.com/newsdetail/?news_id=11375), as it was free to use back then.
The network topology looked as follows:
Let me let now walk through each of the main component blocks.
The Remote Unit (Fuzzy Plant Monitor)
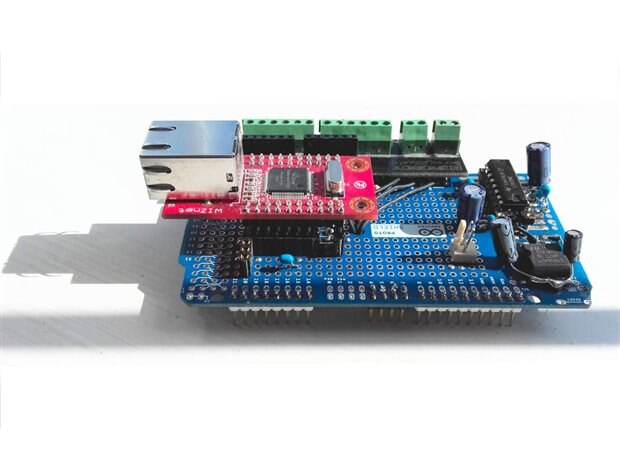
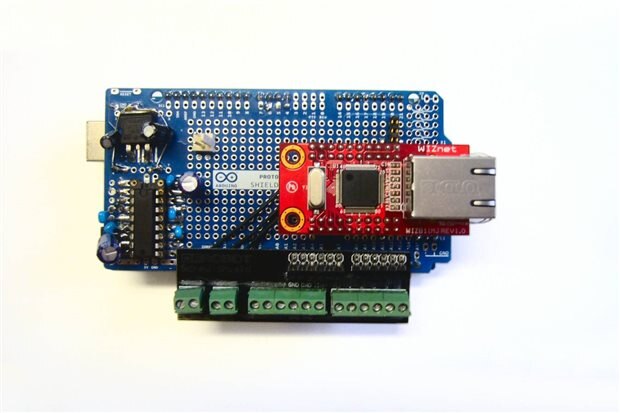
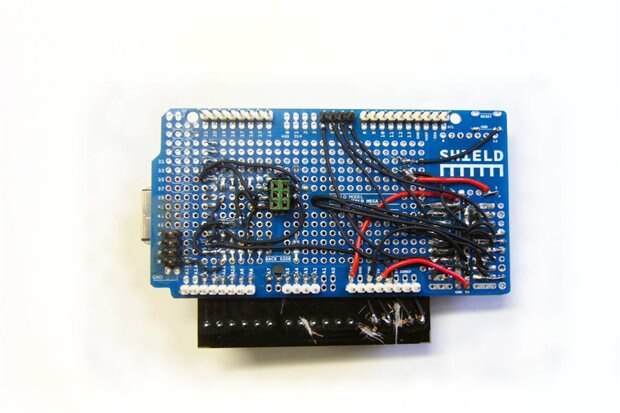
| {gallery:autoplay=false} Fuzzy Plant Monitor |
|---|
Then as the Arduino Mega provided plenty of capacity the design also allowed for two pot plants to be monitored and controlled from the same remote unit.
Let me now delve a bit deeper into some of the different modules and sensors used.
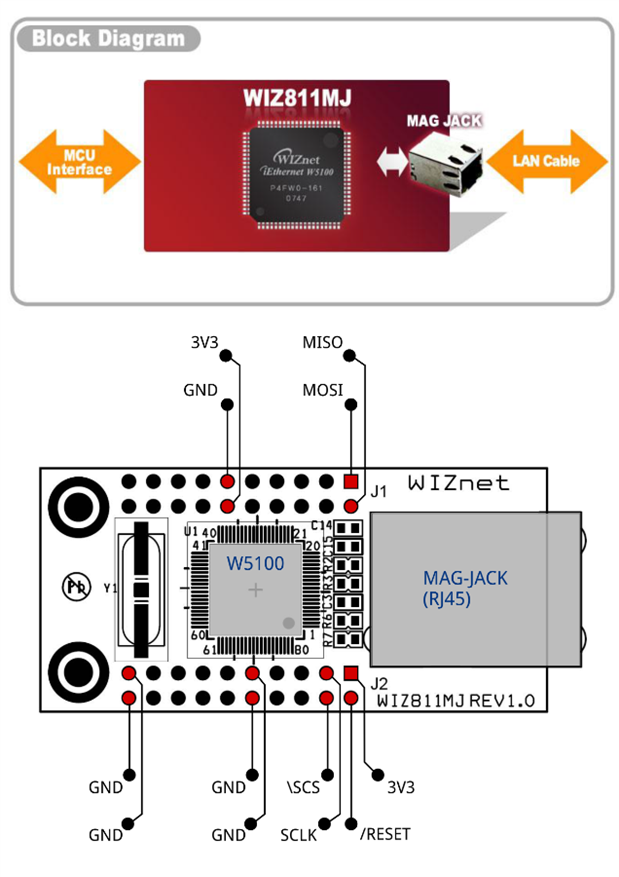
The Wiznet (WIZ811MJ) Ethernet Module
The WIZ8MJ is an Ethernet-based network module consisting of a W5100 (TCP/IP hardwired chip , include PHY ) and MAG JACK JACK (RJ45 with X’FMR) with MCU interface logic (MCU bus Interface and/or SPI Interface). The nice thing about this module is that it is powered with 3.3V but the pins are 5V tolerant.
The L293D DC Motor driver
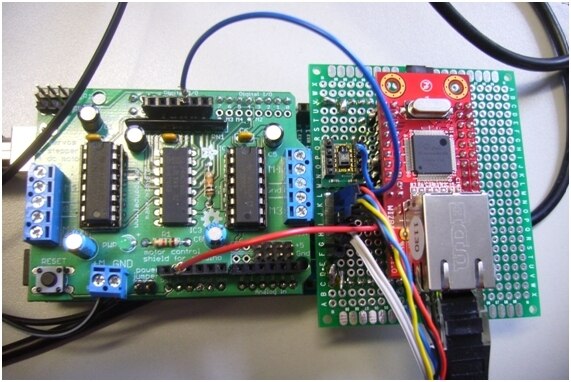
If I remember the TI L293D was used, simply because it was on an Arduino Motor shield from Adafruit, which was used to initially test the peristaltic liquid pumps. It also happens to be a great chip to drive two DC motors offering up to 600mA per channel (1.2A peak).
The DC Motor circuit that was used on the Arduino Mega shield was a copy from the motor shield as follows:
The Sensors
The sensors used included:
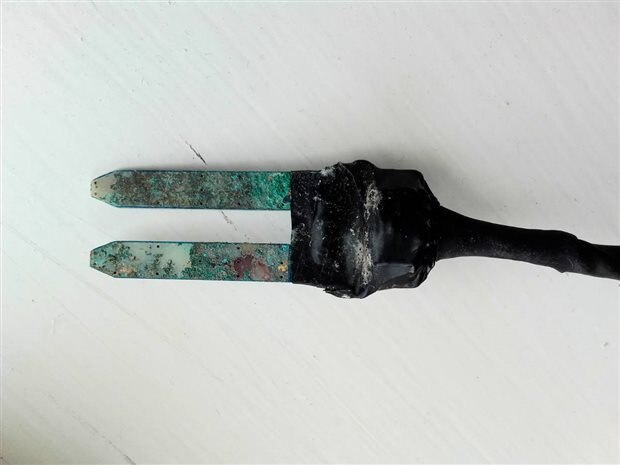
- Grove Moisture sensor from SeeedStudio - this sensor consists of two probes, which allows current to pass through the soil and a resistance value can be measured that then correlates with soil moisture content. Unfortunately these sensors a prone to corrosion.
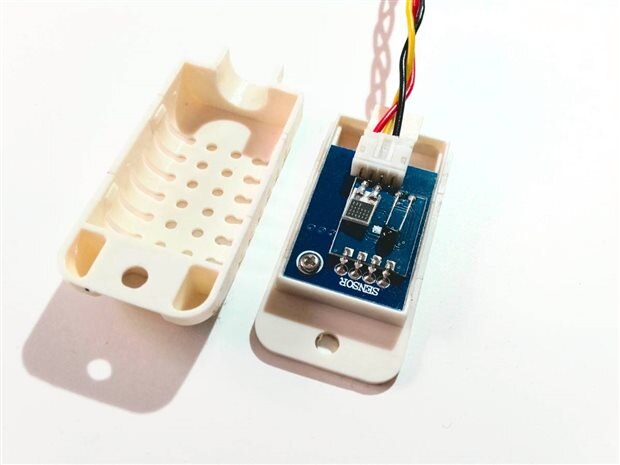
- AM2302 (wired DHT22) temperature-humidity sensor from Adafruit - this sensor uses a capacitive humidity sensor and a thermistor to measure ambient conditions, and then spits out a digital signal on the data pin.
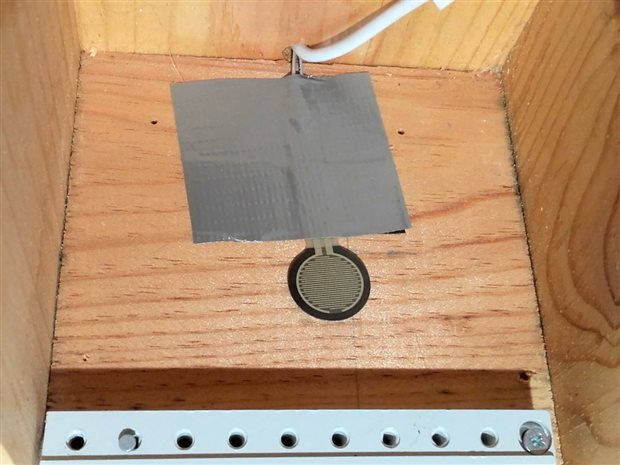
- Round Force-Sensitive Resistor (FSR) - Interlink 402 from Adafruit - this sensor is basically a resistor that changes its resistive value depending on how hard its pressed.
| {gallery:autoplay=false} Sensors used in Fuzzy Plant Monitor |
|---|
|
image source: https://www.seeedstudio.com/ |
|
image source: https://www.adafruit.com/ |
|
image source: https://www.adafruit.com/ |
The Water Pump
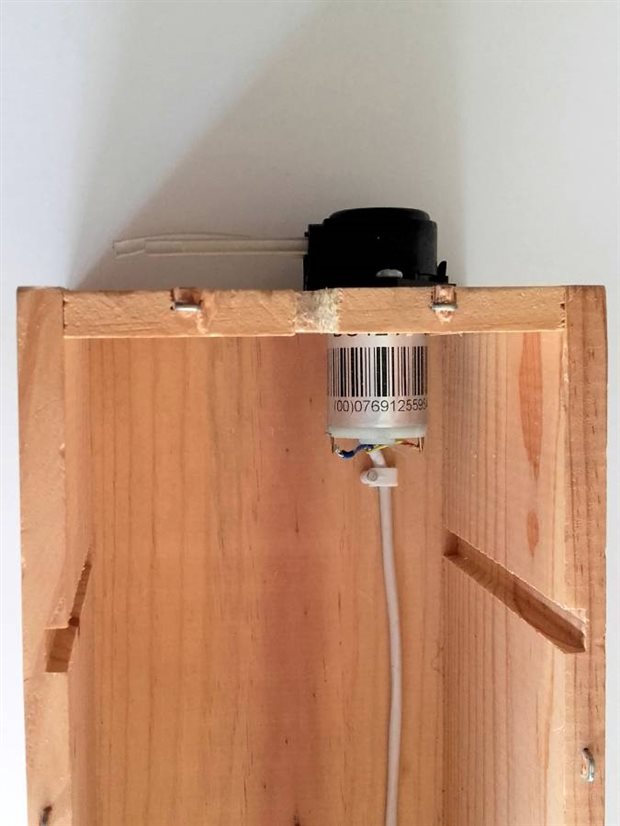
To water the plants a 12VDC Peristaltic Liquid Pump, from Adafruit.com, was used. This type of DC motor was chosen as it could drip feed a pot plant (according to spec, the flow rate is up to 100 mL/min) and thus unlikely to cause a flood in the office if something went wrong. The pump also came with silicon tubing which was needed for this project.
At the time (as in back in 2014) only a 12V DC version was available. I see that you can now purchase a 5V to 6V version which would make powering the system a little easier.
For the initial prototype, I mounted the motor in a separate enclosure:
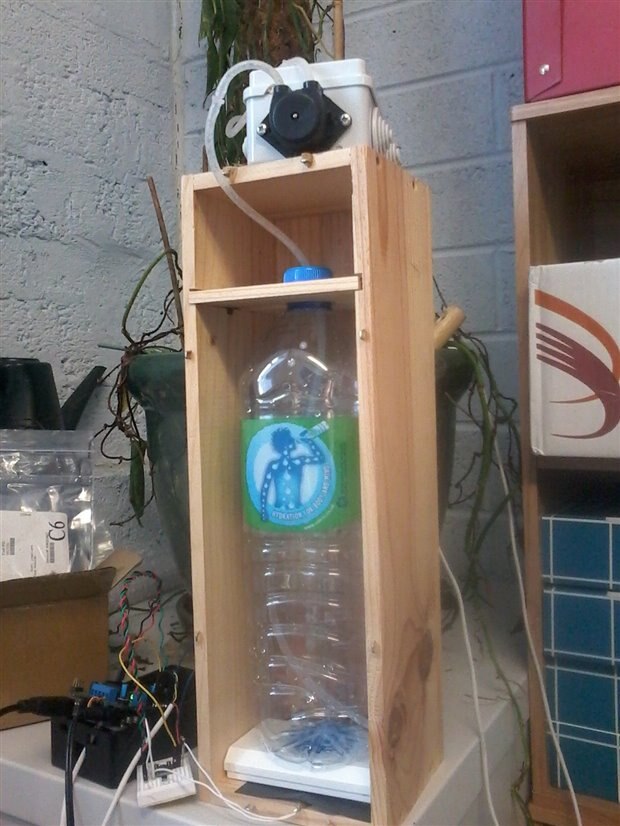
But, this enclosure seemed superfluous to requirements and so the motor was mounted directly on the wooden box.
The Code
As I'm now discovering, dusting off old alpha quality code is like pulling out an old notebook from your bookshelf. Almost invariably there are pages missing and you find highlighted or underlined or scratched out text and you've no idea why. So if you find gaps or errors in the code presented, I'm afraid you'll have to wait for the next blog where the revised fuzzy watering prototype system is revealed.
For handling the peristaltic liquid pump, or geared-down DC motor, Adafruit's Motor Shield library was used (now archived as read-only) and another Adafruit library was used for the DHT Temperature and Humidity sensor.
For the moisture sensor, we applied the values given to us by SeeedStudio to get us started as the fuzzy logic then applied its own rules as the real data became available, namely:
- DRY Soil: 0 - 300 as analog reading
- WET Soil: 300 - 700 as analog reading
- IN WATER: 700-950 as analog reading
As the Force Sensing (load) Resistance sensor was used to determine if the water bottle was empty we simply applied an analog threshold value. So basically the harder the force, or a full bottle of water, the lower the resistance and therefore the lower the analog input value and when no pressure is being applied to the FSR its resistance will be larger than 1MΩ. This FSR used can sense applied force anywhere in the range of 100g-10kg making it suitable for a 1.5 litre bottle of water, which happens to fit neatly inside the wooden box.
The fuzzy library used came from https://github.com/zerokol. The good news is that it appears (based on last github update) that this fuzzy logic library is still being maintained.
Zerokol has also published a very handy blog that explains what fuzzy logic is all about and how you apply the theory with library. Here is the English version (a Portuguese version is also available): https://blog.zerokol.com/2012/09/arduinofuzzy-fuzzy-library-for-arduino.html
More information about the fuzzy logic rules used will be revealed in the next blog but for this prototype, the following code was created:
//MOISTURE
FuzzySet* DRY=new FuzzySet(0,0,200,300);
FuzzySet* WET= new FuzzySet(200,400,500,600);
FuzzySet* WATER= new FuzzySet(400,600,900,900);
//TEMPERATURE
FuzzySet* freze=new FuzzySet(-100,-100,-10,0);
FuzzySet* cold=new FuzzySet(-5,0,10,15);
FuzzySet* warm= new FuzzySet(10,20,25,35);
FuzzySet* hot= new FuzzySet(30,40,70,70);
//HUMIDITY
FuzzySet* low=new FuzzySet(0,0,20,50);
FuzzySet* medium= new FuzzySet(25,50,50,70);
FuzzySet* high= new FuzzySet(60,100,100,100);


//WATER ON/OFF
FuzzySet* ON = new FuzzySet(255,255,255,255);
FuzzySet* OFF = new FuzzySet(0,0,0,0);


//WATERING TIME
FuzzySet* zero = new FuzzySet(0,0,0,1);
FuzzySet* short_ = new FuzzySet(1,30,30,90);
FuzzySet* normal = new FuzzySet(60,120,120,210);
FuzzySet* long_ = new FuzzySet(180,300,300,360);
Then for the setup routine:
  //creating FuzzyInput
FuzzyInput* moisture = new FuzzyInput(1);//with its ID in param
//creating the FuzzySet to compond FuzzyInput moisture
moisture->addFuzzySet(DRY);//Add FuzzySet DRY to moisture
moisture -> addFuzzySet(WET);
moisture -> addFuzzySet(WATER);
fuzzy->addFuzzyInput(moisture);//Add FuzzyInput to Fuzzy object


  //creating FuzzyInput
FuzzyInput* temperature = new FuzzyInput(2);//with its ID in param
//creating the FuzzySet to compond FuzzyInput temperature
temperature->addFuzzySet(freze);
temperature->addFuzzySet(cold);
temperature -> addFuzzySet(warm);
temperature -> addFuzzySet(hot);
fuzzy->addFuzzyInput(temperature);//Add FuzzyInput to Fuzzy object


  //creating FuzzyInput
FuzzyInput* humidity = new FuzzyInput(3);//with its ID in param
//creating the FuzzySet to compond FuzzyInput moisture
humidity->addFuzzySet(low);//Add FuzzySet DRY to moisture
humidity -> addFuzzySet(medium);
humidity -> addFuzzySet(high);
fuzzy->addFuzzyInput(humidity);//Add FuzzyInput to Fuzzy object


//creating fuzzy output water
FuzzyOutput* water = new FuzzyOutput(1);
//creating FuzzySet to compond FuzzyOutput water
water->addFuzzySet(ON);
water->addFuzzySet(OFF);
fuzzy->addFuzzyOutput(water);


//creating fuzzy output watering time
FuzzyOutput* time = new FuzzyOutput(2);
//creating FuzzySet to compond FuzzyOutput water
time->addFuzzySet(zero);
time->addFuzzySet(short_);
time->addFuzzySet(normal);
time->addFuzzySet(long_);


fuzzy->addFuzzyOutput(time);


//FUZZY RULES
//if moisture=WET and temperature=warm THEN time=short_
//if moisture=WET and temperature=cold THEN time=zero
//if moisture=WET and temperature=freze THEN time=zero
//if moisture=WET and temperature=HOT THEN time=normal
//if moisture=WET and humidity=high THEN time=zero
//if moisture=WET and humidity=medium THEN time=short_
//if moisture=WET and humidity=low THEN time=normal
//FuzzyRule "IF moisture=water THEN time=zero"
//FuzzyRule "IF moisture=DRY THEN time=long_


//FUZZY RULES CONSEQUENCES///////////////////////////////////
FuzzyRuleConsequent* thenTimeZero = new FuzzyRuleConsequent();
thenTimeZero->addOutput(zero);


FuzzyRuleConsequent* thenTimeShort = new FuzzyRuleConsequent();
thenTimeShort->addOutput(short_);


FuzzyRuleConsequent* thenTimeNormal = new FuzzyRuleConsequent();
thenTimeNormal->addOutput(normal);


FuzzyRuleConsequent* thenTimeLong = new FuzzyRuleConsequent();
thenTimeLong->addOutput(long_);
///////////////////////////////////////////////////////////////


//Assembly the Fuzzy rules
//if moisture=WET and temperature=warm THEN time=short_
FuzzyRuleAntecedent* ifmoistureWETandTempWarm = new FuzzyRuleAntecedent();
ifmoistureWETandTempWarm->joinWithAND(WET,warm);
//Istatiating a FuzzyRule object
FuzzyRule* fuzzyRule09= new FuzzyRule(9,ifmoistureWETandTempWarm,thenTimeZero);
fuzzy->addFuzzyRule(fuzzyRule09);//Adding FuzzyRule to Fuzzy object


//if moisture=WET and temperature=cold THEN time=zero
FuzzyRuleAntecedent* ifmoistureWETandTempCold = new FuzzyRuleAntecedent();
ifmoistureWETandTempCold->joinWithAND(WET,cold);
//Istatiating a FuzzyRule object
FuzzyRule* fuzzyRule08= new FuzzyRule(8,ifmoistureWETandTempCold,thenTimeZero);
fuzzy->addFuzzyRule(fuzzyRule08);//Adding FuzzyRule to Fuzzy object


//if moisture=WET and temperature=freze THEN time=zero
FuzzyRuleAntecedent* ifmoistureWETandTempFreze = new FuzzyRuleAntecedent();
ifmoistureWETandTempFreze->joinWithAND(WET,freze);
//Istatiating a FuzzyRule object
FuzzyRule* fuzzyRule07= new FuzzyRule(7,ifmoistureWETandTempFreze,thenTimeZero);
fuzzy->addFuzzyRule(fuzzyRule07);//Adding FuzzyRule to Fuzzy object


//if moisture=WET and humidity=high THEN time=zero
FuzzyRuleAntecedent* ifmoistureWETandHumHigh = new FuzzyRuleAntecedent();
ifmoistureWETandHumHigh->joinWithAND(WET,high);
//Istatiating a FuzzyRule object
FuzzyRule* fuzzyRule06= new FuzzyRule(6,ifmoistureWETandHumHigh,thenTimeZero);
fuzzy->addFuzzyRule(fuzzyRule06);//Adding FuzzyRule to Fuzzy object


//if moisture=WET and humidity=medium THEN time=short_
FuzzyRuleAntecedent* ifmoistureWETandHumMedium = new FuzzyRuleAntecedent();
ifmoistureWETandHumMedium->joinWithAND(WET,medium);
//Istatiating a FuzzyRule object
FuzzyRule* fuzzyRule05= new FuzzyRule(5,ifmoistureWETandHumMedium,thenTimeShort);
fuzzy->addFuzzyRule(fuzzyRule05);//Adding FuzzyRule to Fuzzy object


//if moisture=WET and humidity=low THEN time=normal
FuzzyRuleAntecedent* ifmoistureWETandHumLow = new FuzzyRuleAntecedent();
ifmoistureWETandHumLow->joinWithAND(WET,low);


//Istatiating a FuzzyRule object
FuzzyRule* fuzzyRule03= new FuzzyRule(3,ifmoistureWETandHumLow,thenTimeNormal);
fuzzy->addFuzzyRule(fuzzyRule03);//Adding FuzzyRule to Fuzzy object


//if moisture=WET and temperature=HOT THEN time=normal
FuzzyRuleAntecedent* ifmoistureWETandTempHot = new FuzzyRuleAntecedent();
ifmoistureWETandTempHot->joinWithAND(WET,hot);
//Istatiating a FuzzyRule object
FuzzyRule* fuzzyRule04= new FuzzyRule(4,ifmoistureWETandTempHot,thenTimeNormal);
fuzzy->addFuzzyRule(fuzzyRule04);//Adding FuzzyRule to Fuzzy object


//FuzzyRule "IF moisture=DRY THEN time=long_
FuzzyRuleAntecedent* ifmoistureDRY = new FuzzyRuleAntecedent();
ifmoistureDRY->joinSingle(DRY);
//Istatiating a FuzzyRule object
FuzzyRule* fuzzyRule01= new FuzzyRule(1,ifmoistureDRY,thenTimeLong);
fuzzy->addFuzzyRule(fuzzyRule01);//Adding FuzzyRule to Fuzzy object


//FuzzyRule "IF moisture=water THEN time=zero"
FuzzyRuleAntecedent* ifmoistureWATER = new FuzzyRuleAntecedent();
ifmoistureWATER->joinSingle(WATER);
//FuzzyRuleConsequent* thenTimeZero = new FuzzyRuleConsequent();
thenTimeZero->addOutput(zero);
//Instatiating a FUzzyRule objet
FuzzyRule* fuzzyRule02= new FuzzyRule(2,ifmoistureWATER,thenTimeZero);


fuzzy->addFuzzyRule(fuzzyRule02);//Adding FuzzyRule to Fuzzy object
We then sampled the sensor values periodically to get updated values and compare these values against the fuzzy rules.
//Report inputs value, passing its ID and value
fuzzy->setInput(1,moistAvg);
fuzzy->setInput(2,tempAvg);
fuzzy->setInput(3,humAvg);
//Exe the fuzzification
fuzzy->fuzzify();
  Serial.print(F("Temp: "));
  Serial.print(cold->getPertinence());
  Serial.print(F(", "));
  Serial.print(warm->getPertinence());
  Serial.print(F(", "));
  Serial.println(hot->getPertinence());
    Serial.print(F("Hum: "));
  Serial.print(low->getPertinence());
  Serial.print(F(", "));
  Serial.print(medium->getPertinence());
  Serial.print(F(", "));
  Serial.println(high->getPertinence());
    Serial.print(F("Moist: "));
  Serial.print(DRY->getPertinence());
  Serial.print(F(", "));
  Serial.print(WET->getPertinence());
  Serial.print(F(", "));
  Serial.println(WATER->getPertinence());

//exe the desfuzzyfication for each output,passing its ID
long output= fuzzy->defuzzify(2);
Serial.print(F("output: "));
Serial.println(output);
Then the remote unit was put to sleep when not active and an external interrupt was used if an external control instruction was received.
The Local Server (Raspberry Pi) and Cloud (Platform as a Service)
As it was back in 2014, a LAMP stack (Linux Apache MySQL PHP) was installed on the Raspberry Pi (RPI) as that was what I was familiar with, having created my own website etc. There were and still are plenty of online instructions on how to do this. Here's one I found on the raspberrypi.org website.
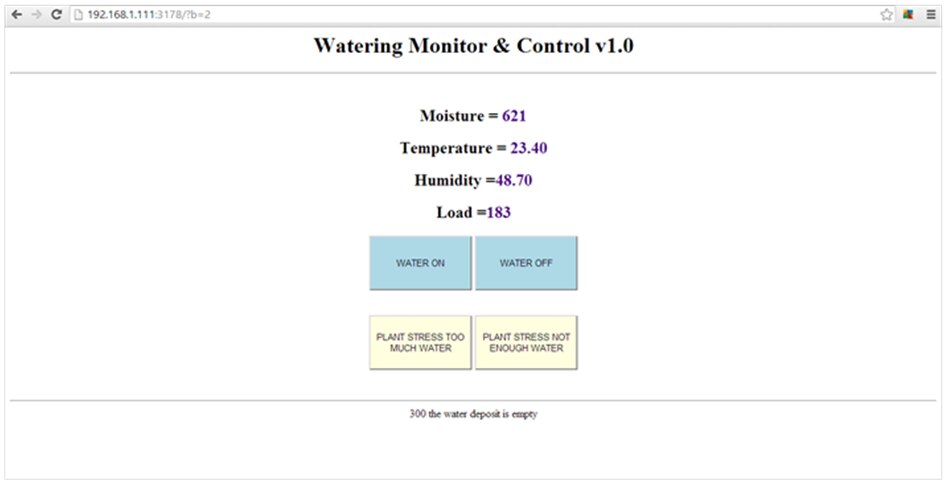
To access the local server you just typed on your web browser: 192.168.1.200:3178. As this was an office prototype on the office LAN no sign-in was required (wouldn't do that now). Then once you had the webpage open you could water your plant by clicking water on and then clicking water off. The webpage also provided the current moisture level of the soil, the current temperature and humidity, and the level of load of the water bottle that supplies water to the system. There were two additional buttons for adjusting values. If you clicked the "plant stress too much water", the fuzzy parameters changed to water the plant less often by making the moisture threshold levels for the plant lower. If the "plant stress not enough water" was clicked then the fuzzy parameters changed to water the plant longer to match a higher moisture level.
To be honest, if I wanted to use a RPI again as a local server (my next version does away with a local server - reasons explained in next blog) and would probably use Node-Red instead.
As mentioned earlier, a cloud Platform as a Service (PaaS) was also used to allow remote storage of data. Basically, the RPI acted as a bridge and sent the data it received to the cloud service using a JSON structured payload. From the Carriots dashboard you were then able to extract the data and you could view whether the RPI was online (connected) or not.
Following on...
Anyway, the irony behind the outcome of the project, was that the plant died due to too much watering. This happened shortly after all the testing was carried out to get the parameters right and to make sure that control buttons worked.
So, now that I've overcome my grief for that poor plant (well ok, if I'm being truthful, I may not have grieved much... ok, ok... I did not grieve at all), it is time to remake this project taking into account the lessons learnt.
Finally, there is one more point to stress, as I close off this blog, and that is, when you apply lessons learnt you are effectively starting the development process from scratch. Hence it is back to breadboarding etc. for the redesign. So there's no fancy custom PCB's just yet with this one.









Top Comments