


Good Day,
Side note: This was originally created for the TekScope YAHOO group, http://tech.groups.yahoo.com/group/TekScopes/ back in January 2014.
Tektronix D10/5103N CRT Oscilloscope - Repair notes and pictures
This is a write-up of my repair of a "classic" Tektronix oscilloscope from the 1970s. See here for Christian Weagle's website for an excellent introduction to the 5000 series oscilloscopes from Tektronix: http://www.i9t.net/5000_scopes.html
References: Tektronix 5103N/D10 Instruction and Service Manual
Serial number display unit: 700080, mainframe 700092, made by Tektronix, Herveeren, The Netherlands.
This basic D10/5103N Single Beam unit has been used or stored in an environment with polluted air / cigarette smoke, but was in a good mechanical condition.
The repair started with dismounting of the three cabinet panels and a good clean of the panels with a mild soap, brush and rinsing with water. Some treatment with an old dental brush and ArmorAll plastic cleaner/ care brought the original blue Vinyl coating back. Vacuuming the housing removed most of the dust.
As always, I have checked the mains cable, all fuses, the protection earth conductor connection etc. prior to any following tests.
Warning for other 5103-owners: The wires in the mains plug were pre-tinned and mounted with screws. This is not recommended, but might have been industry standard back in the 70s. The soldered wire is too soft, and the tinned conductors creep under mechanical pressure. I have found all three terminations were loose. I have cut the old wires, and then crimped some cable-end sleeves onto the wires before reassembly.
Somebody has added some fuse holders to the LV-power supply board to accommodate European style fuses (5mm x 20mm size), which looked ok. Some basic tests of the power supply's electrolytic capacitors confirmed they are in a good state. Checking all connectors and wiring/harness was mandatory.
After the three included plug-ins have been removed (two 5A15N single amplifier and a 5B12N dual time base), the unit was powered up using an isolating VARIAC.
Quickly after power has been applied, something began to smell "electrical", so the unit was powered down quickly. 
After the aluminium cover on the HV/Deflection board has been removed, a damaged resistor was revealed.
Here is a summary of the following repair:
- A damaged resistor R252 / 100 Ohm was found.

Picture 1: Dead short silver mica capacitor
- Primary failure was a shorted silver mica capacitor in the HV section, C252, 4.7nF. Dead short, see photo above. Again, this is the first silver mica cap failure I have ever seen.

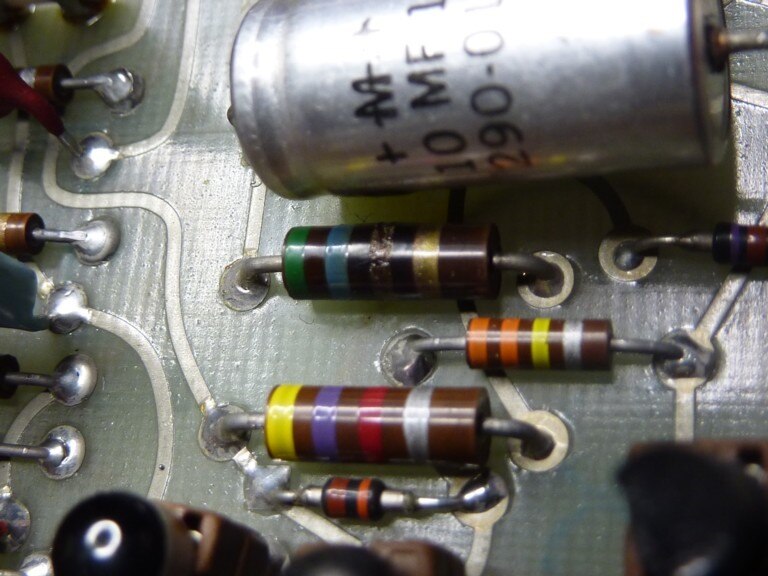
Pictures 2, 3: Damaged resistors on HV board (CRT Circuit, board 2 in the schematics)
Picture 4: Side view from opposite, CRT removed already.
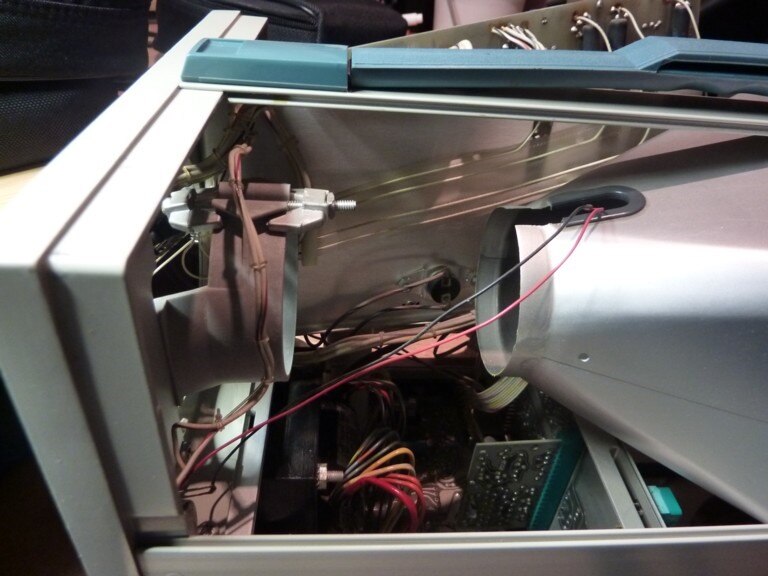
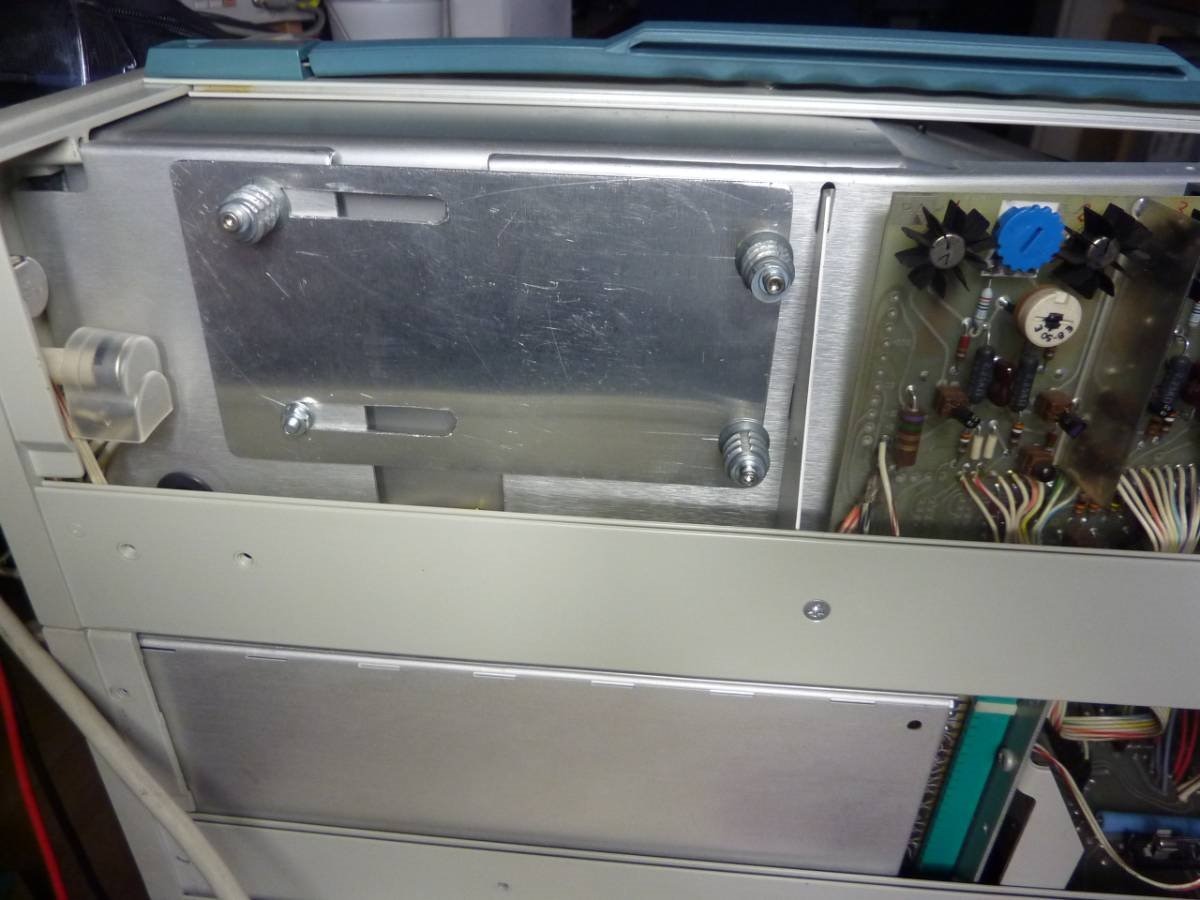
- In order to remove the HV board for repair, I had to remove the side panel, pull the CRT neck connector, remove all connectors to the main power supply board, unmount all front panel controls, unsolder the calibrator connection, remove the overtemp. protection, remove the CRT and move the CRT shield aside. If you ever need to remove a CRT, please obey the safety instructions as provided in the service manual.
After all this work, I could finally remove the aluminium bracket which holds the HV board, and take the HV board off the bracket. Yay... 
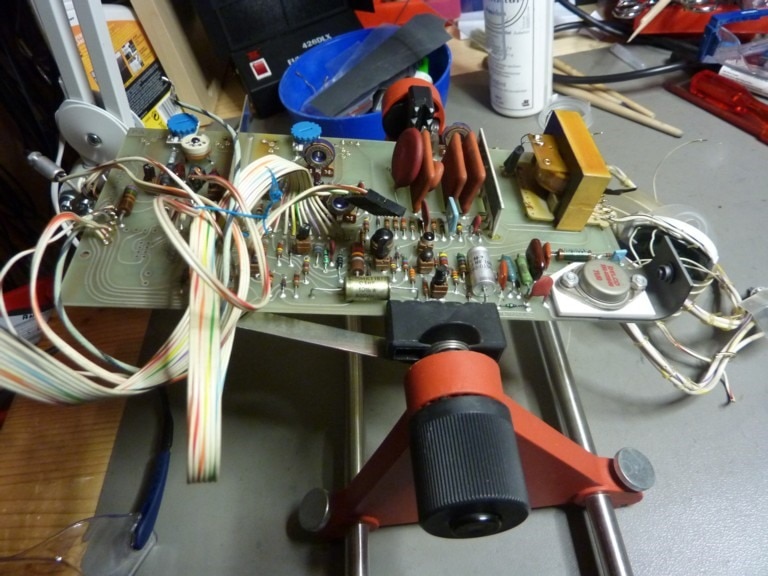
Picture 5: Finally, the HV board is ready for repair
Picture 6: A view into the CRT shield.
Mind the small nut which fixes the shield to the upper frame. The black plastic frame is the DC coil for beam/trace rotation.
Side note: The HV board features an interesting switched mode power supply, which generates several supply voltages, incl. the -3,450V cathode voltage.
- Tested switching transistor Q252 on my 5CT1N curve tracer (being aware of the CT's limits). Looked functional per se, but had low beta. Tektronix listed the SJ2304 as a replacement part, which is insanely expensive and rare. See below for chosen replacement.
- The following components have been replaced:
R252 100 Ohm, Q252 with a BUX48A , C252 with WIMA MKP 4.7nF, CR253 with UF4007 (the diode looked and measured ok, but these diodes can cause issues at high temp, which I experienced in my 7704A), R251 looked cooked, so it was replaced with two 10 Ohm resistors in parallel (measured 5.4 Ohm), C251 el. cap 10µF 100V replaced as a precaution.
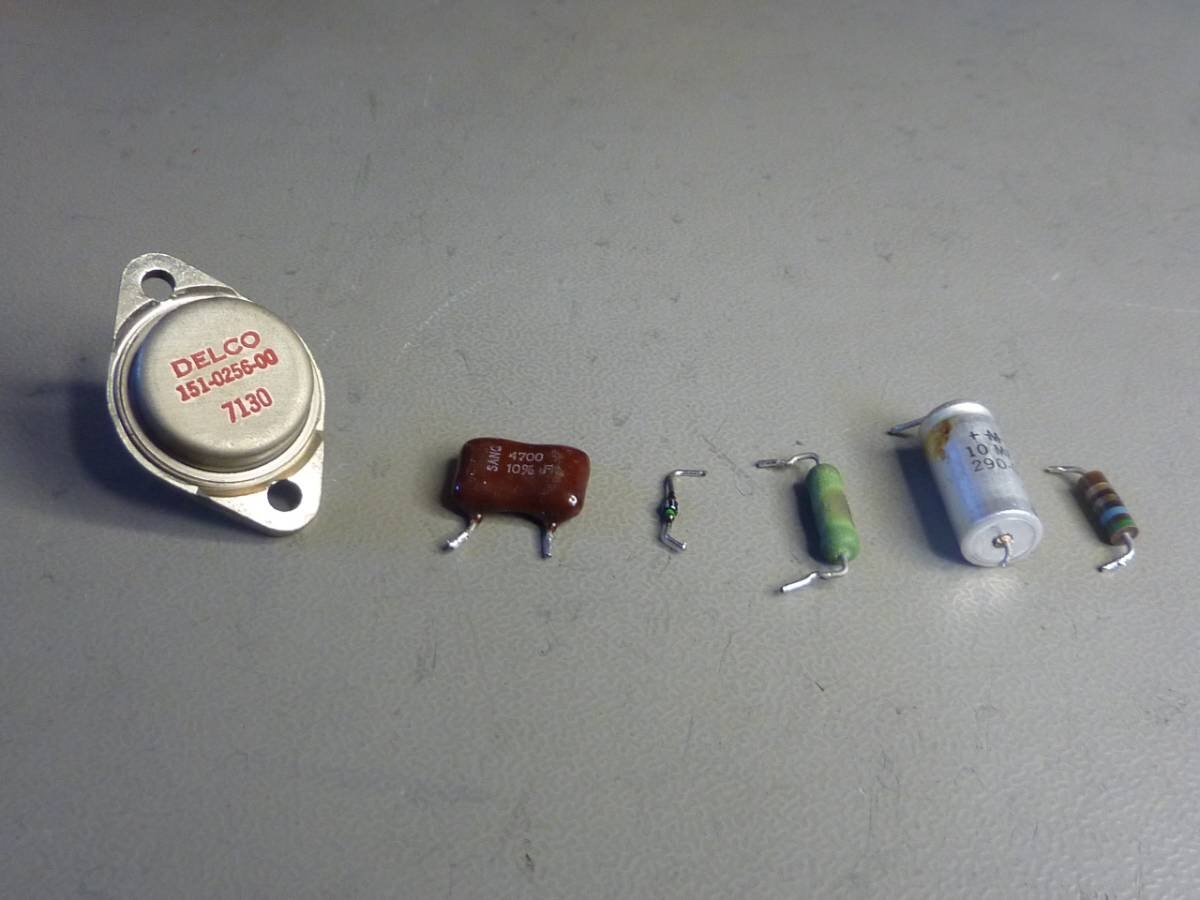
Picture 7: Replaced components
- To make the next repair easier, I decided to split the aluminium bracket. The same bracket type is used in the storage display variants of the 5000 scope series (such as the 5113/D13); so it has some extra space at the front. I have made a simple panel with two slot holes out of a left-over aluminium sheet, and used some standoffs, nuts and bolts. This allows taking out the aluminium bracket very easily next time.
Picture 8: New panel
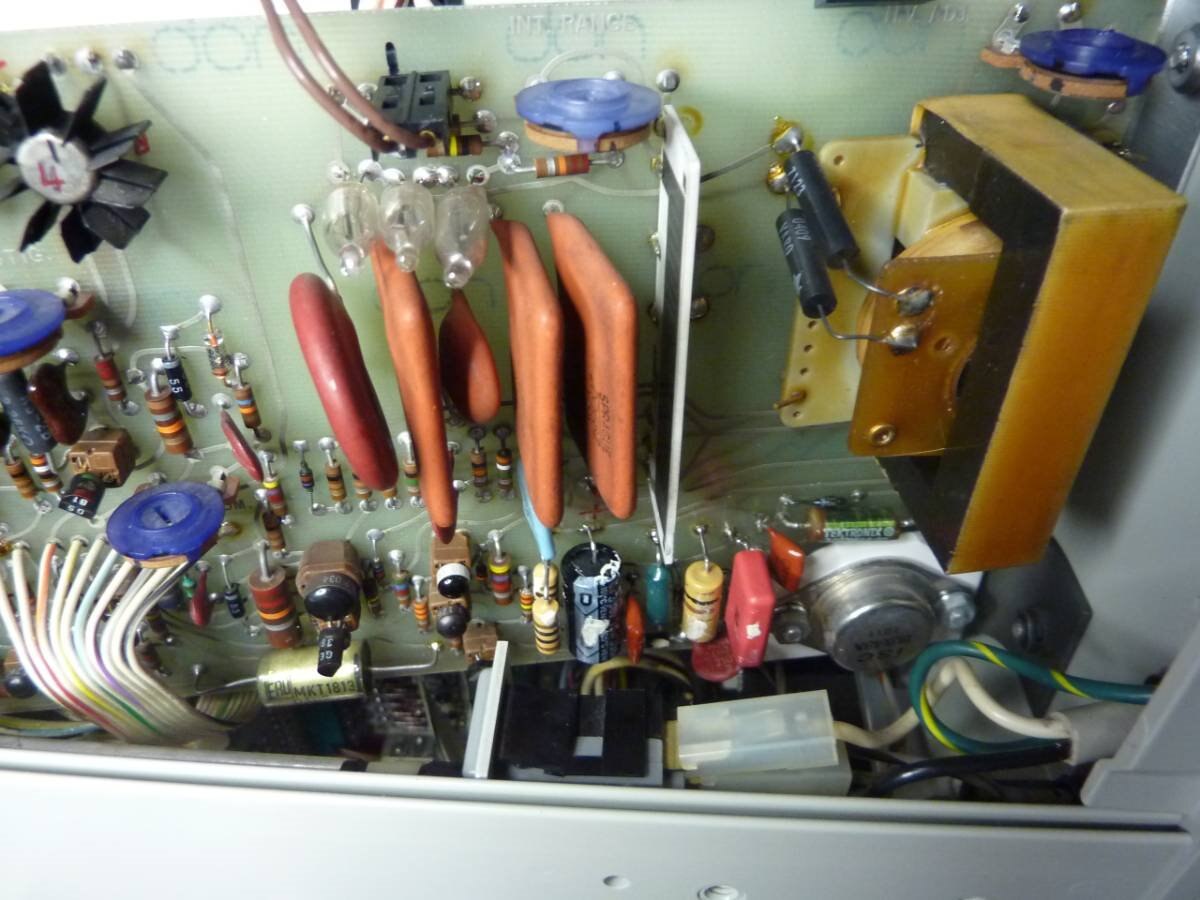
Picture 9: Repaired HV Board
I always mark exchanged components with a white dot...
- Side note: While I was at it, I have briefly checked if the power transistors in the deflection amplifiers (Q104, Q114, Q124, and Q134) could be replaced by other, more common transistors. Tektronix has changed these over the years, from the 2N5058 over the 2N3440 to the BF859A. I have tested some BF459 with good initial results, see the photo below; but this is subject to further evaluation.

Picture 8: Initial testing of new BF459 NPN Power Transistors in the vertical deflection amplifier
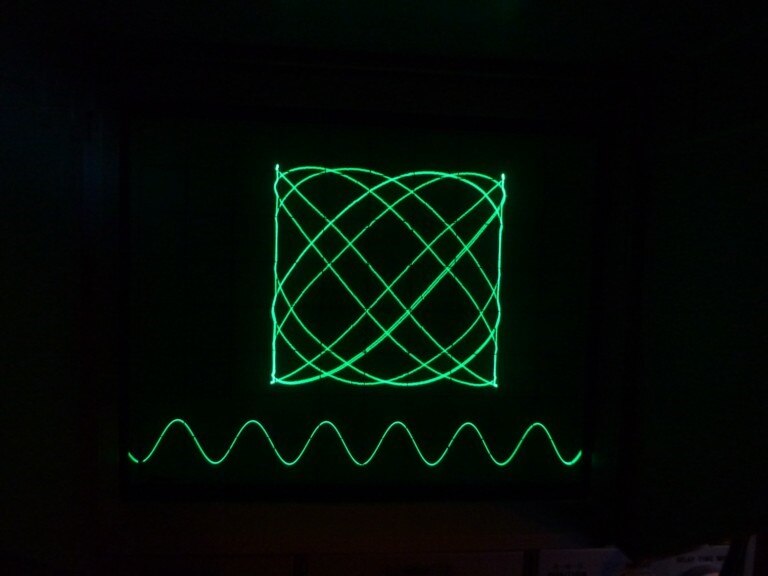
- After all components were re-assembled, I was glad to find the HV board and the oscilloscope functional again. A quick check of the supply voltages and continuous operation over 1.5 hours (under supervision) confirmed the successful repair. A full calibration followed and closed the repair.

Picture 9: Another classic Tektronix oscilloscope is back to operation…
- As almost expected, the two 5A15N single amplifiers and the 5B12N dual time base will not need much adjustment, as it appears. These are very reliable components; however, these will be calibrated also.
Picture 10: More fun with another revived Tektronix 5000-series oscilloscopes…
Cheers,
Magnus
Please note: No liability is accepted, and no warranty is given. Warning: Any repair may expose you to potentially lethal voltages. Use common sense and follow electrical safety rules and general guidelines. Remember that you are working at your own risk!
-

colporteur
-
Cancel
-
Vote Up
0
Vote Down
-
-
Sign in to reply
-
More
-
Cancel
Comment-

colporteur
-
Cancel
-
Vote Up
0
Vote Down
-
-
Sign in to reply
-
More
-
Cancel
Children