


Introduction
All we know that the BBC micro: bit is a board strongly oriented to the education, as well as the programming methodology based on Blocks, something similar to the Scratch language is particularly adaptable to teach programming, microcontrollers, and robotics to children, teaching STEM in schools etc. But the potential of this board is far beyond a small game. Recently I had the opportunity to develop some micro:bit based projects preparing a series of workshop that - hopefully - will start by the end of this month.
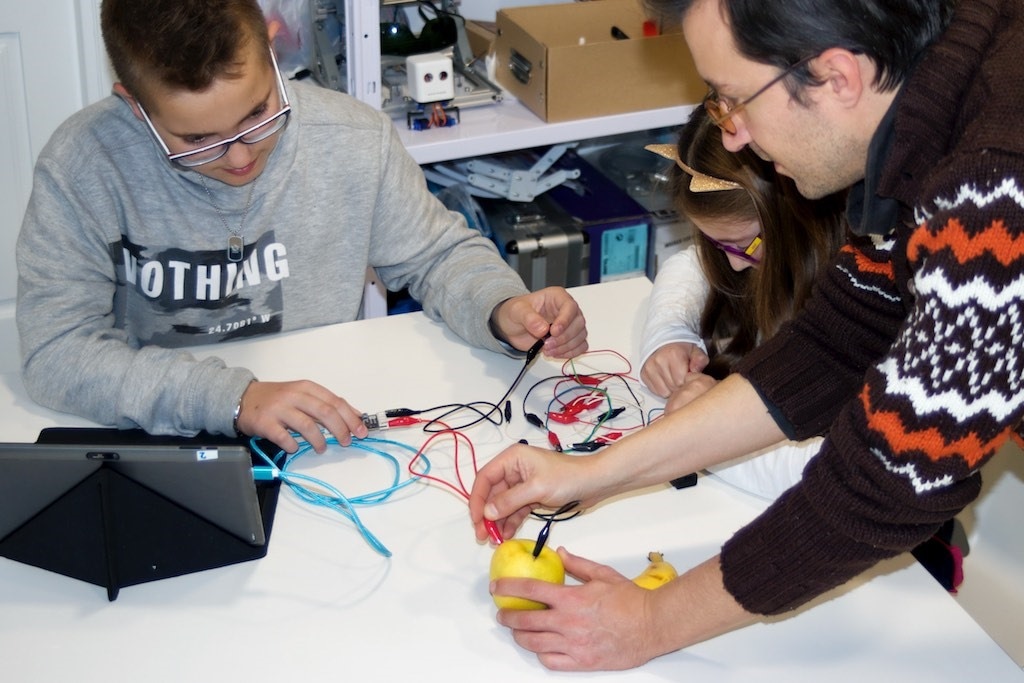
So, I started exploring more in depth the possibilities of the micro:bit. As a matter of fact we should consider that there is a minimum age that has sense t learn programming but there is not a maximum  The children start with simple programs, connecting apples and bananas; then they are involved and start thinking about something more complex, the exploration of the world of electronic and programming goes so far...
This project is the first one that - compared to what we are used to seeing based on the micro:bit - can be considered a bit more advanced. By the way, I have also thought how much it was difficult, the same project, if developed with an Arduino board, just to mention the most popular: BBC micro:bit demonstrated its incredible power and completeness. In my opinion, this is the fir micro controller board of a new generation, based on a totally different concept than the previous generation of microcontrollers for maker.
Last but not least, I should say that I have enjoyed a lot making this project, developing the software and playing with it
The material choice: a must

The idea beside the Cardboard robot with wheels lays over two concepts:
- Using as much as possible recycling material where cardboard is king
- Create projects that - under an adult supervision - are easy to make seeing in-depth how things work
One of the reasons I love the approach offered by products like the Inventor's Kit by Kitronik against the "assemble in five minutes" projects is that the first ones leave full space to the creativity.
Non-electronic Components
- Cardboard from a recycled package box
- Some paper clips
- Cable ties
- Rubber bands
Tools
- A soldering iron
- A hot glue gun
- Scissors
- Cutter
- Ruler
- Ballpoint pen
- Adhesive tape
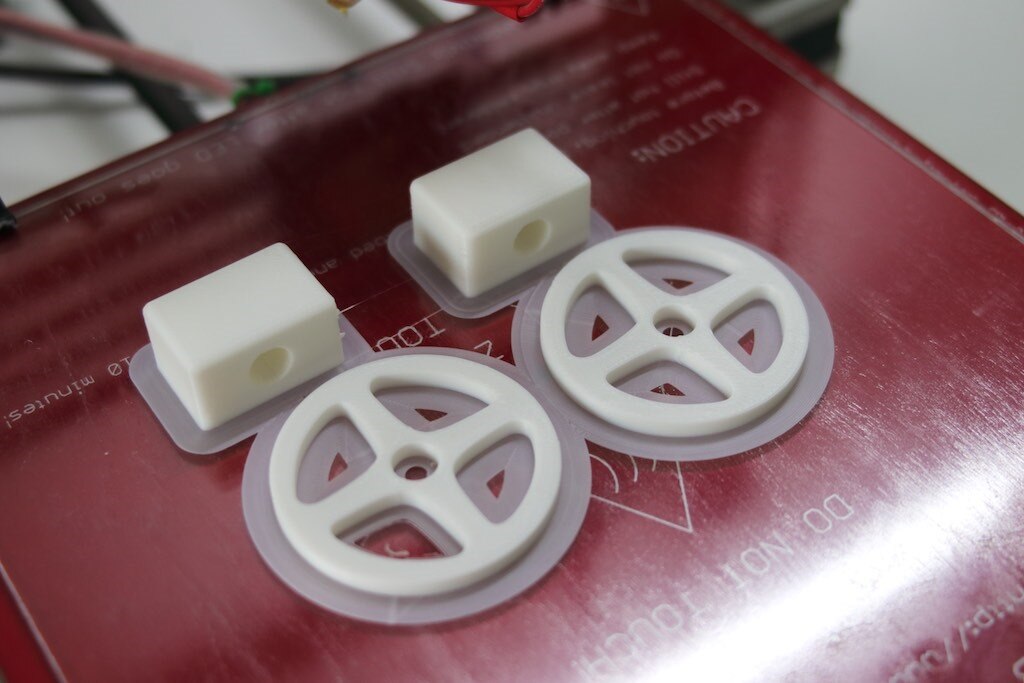
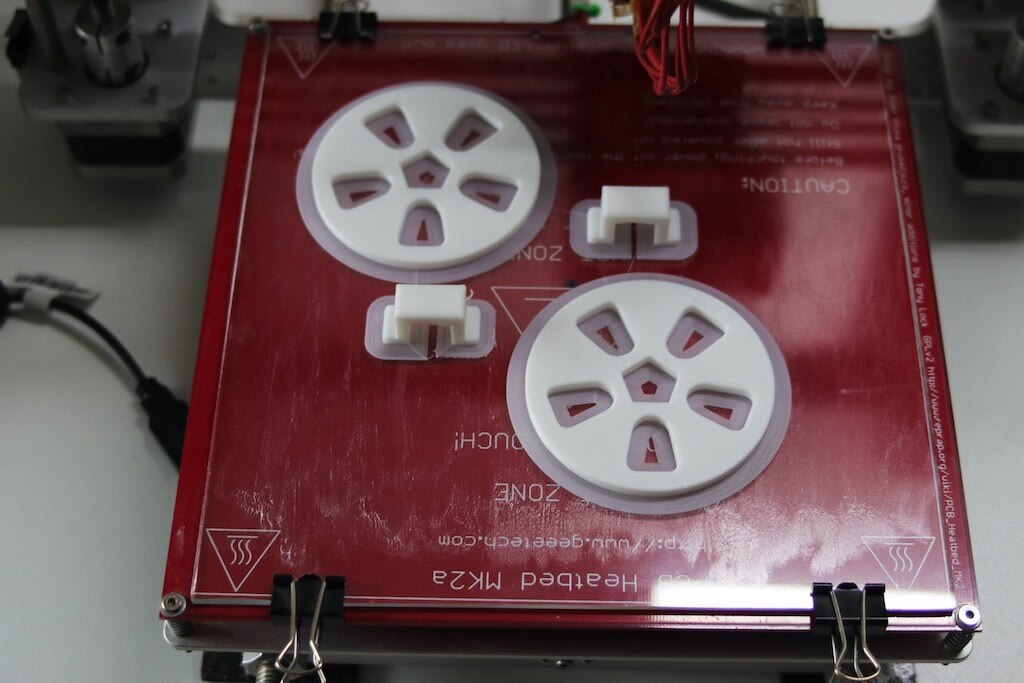
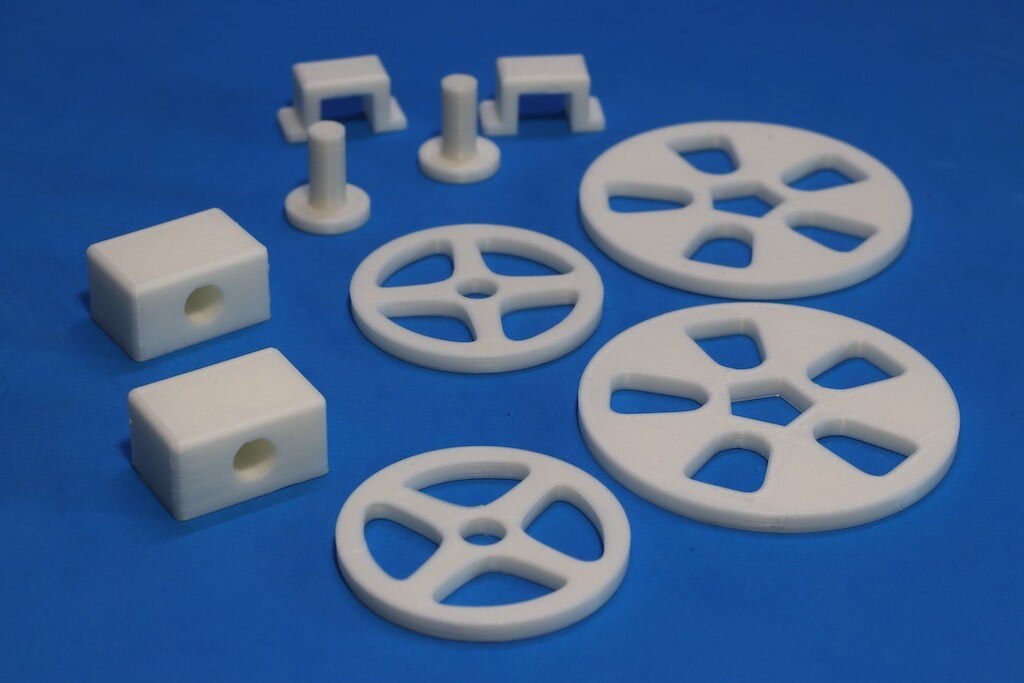
3D Printed components

It is possible to reach almost the same result without using a 3D printer, but the rotating parts and some small mechanics it was worth to make them better.
The images below shows the components used for this project:
| {gallery} 3d Printed Components |
|---|
|
Front free wheels |
|
3D printing the driving wheels |
|
3D printed driving wheels and motors support |
|
The robot on wheels 3D printed components |
The electronic parts
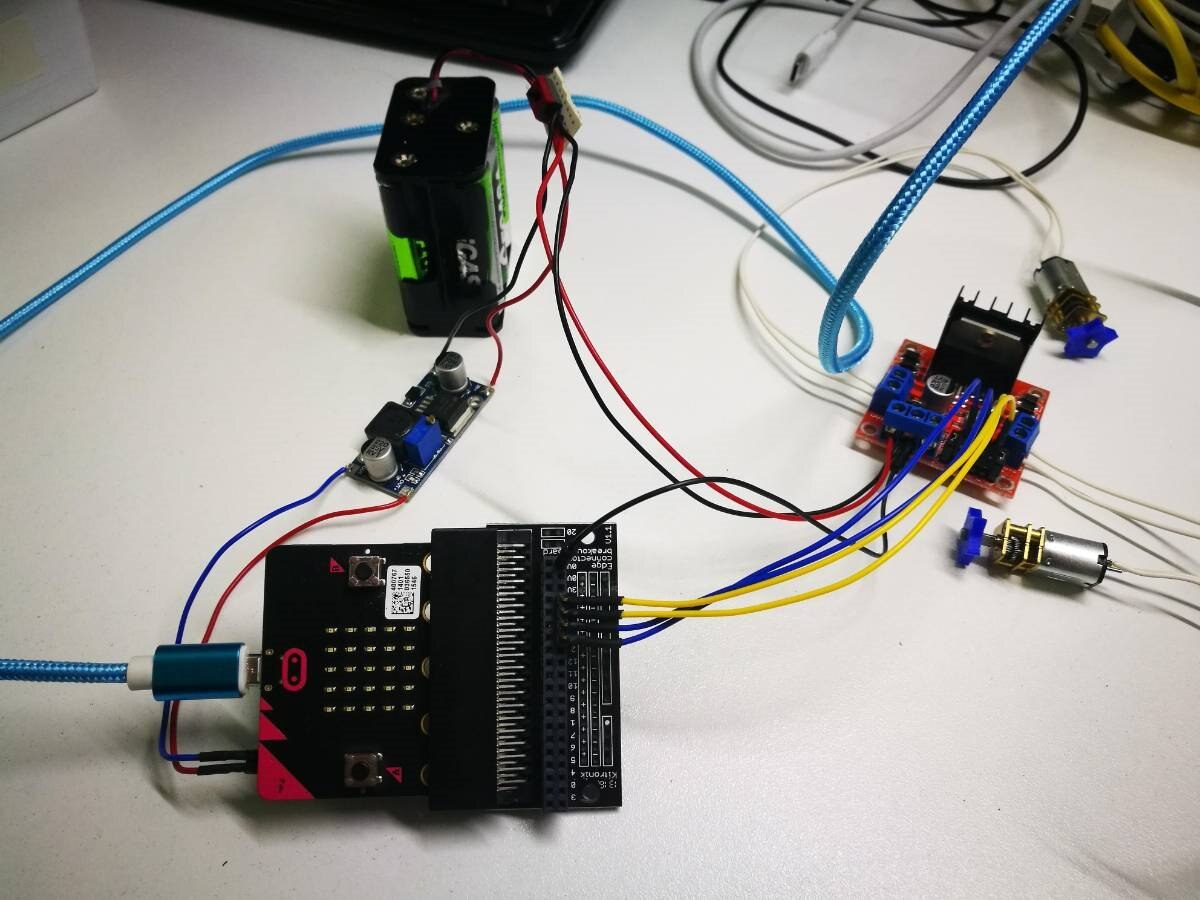
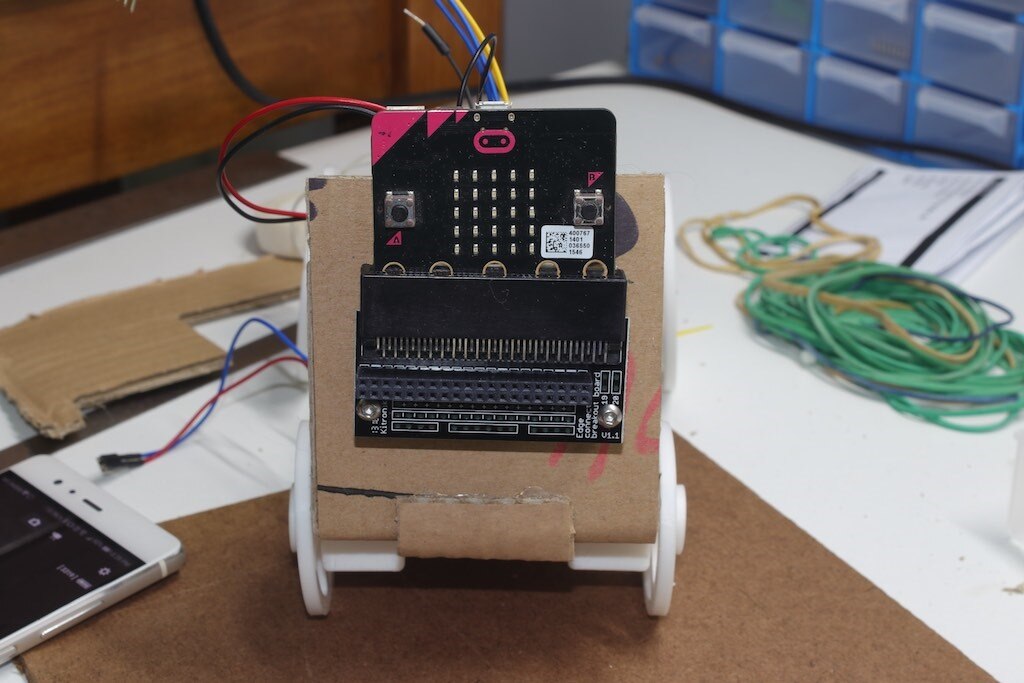
The micro:bit has been inserted into the card edge micro:bit support (from Kitronik) as many pins should be used to drive the motor controller
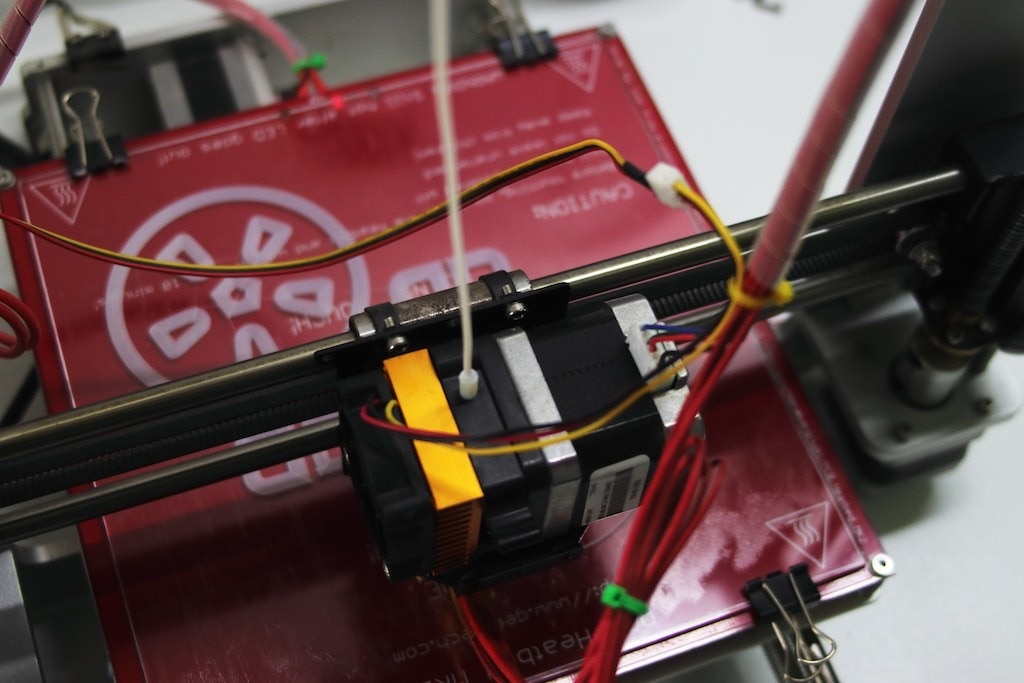
Motors
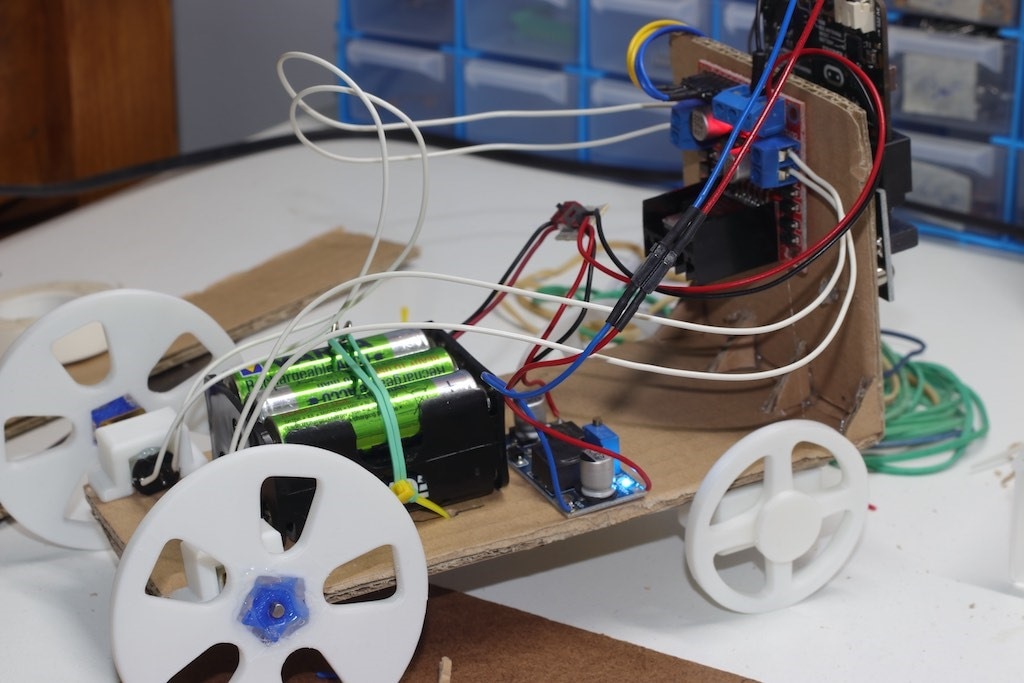
Motion is provided by two micro geared DC motors by Kitronic. As the motors need 5-6 V to run it was necessary to build a 9V battery pack and two separate power lines for the motors and the micro:bit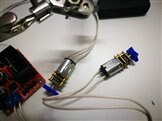
Motor Controller
I have used a cheap motor controller from GearBest working well at low voltage (min 5V). This controller is very easy to connect and no soldering is needed. This driver can control a single stepper motor or two independent DC motors.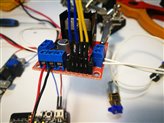
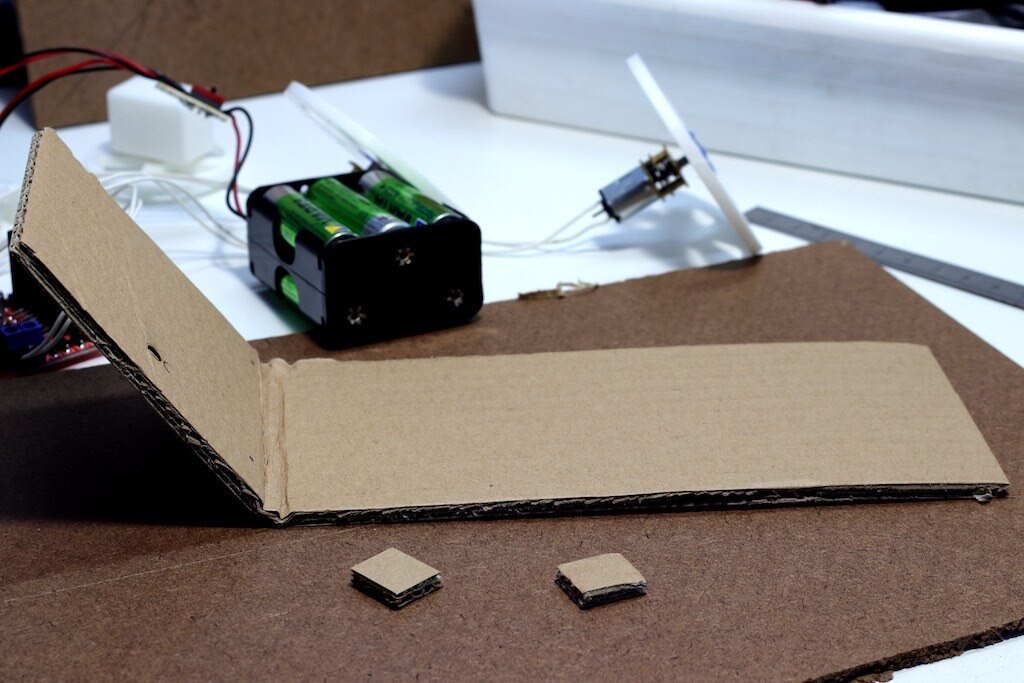
Battery Pack
The super-cheap solution iI found has been a 0,50 Euro battery holder (bought at a local store) with 6xAA 1,5 V 1000 mA rechargeable batteries. I have also soldered the wires with a power switch. Note that from the power switch the power line has been doubled: a couple of wires go to the motor controller to power the motors and the controller itself and the second couple power a DC/DC step-down to power the micro:bit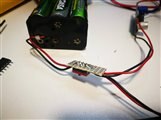
DC/DC Converter
As shown in the side image, the DC/DC converter has been regulated to 3.0V power-out and soldered to the micro:bit power connector. This converter based on LM2596 can be bought on Amazon for about 7 Euro (4 pieces)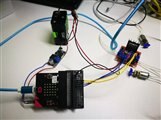
1-2-3 ... Building the Cardboard Robot on Wheels
The building process does not require more than one hour or less.
Step 1. Prepare the Wheels
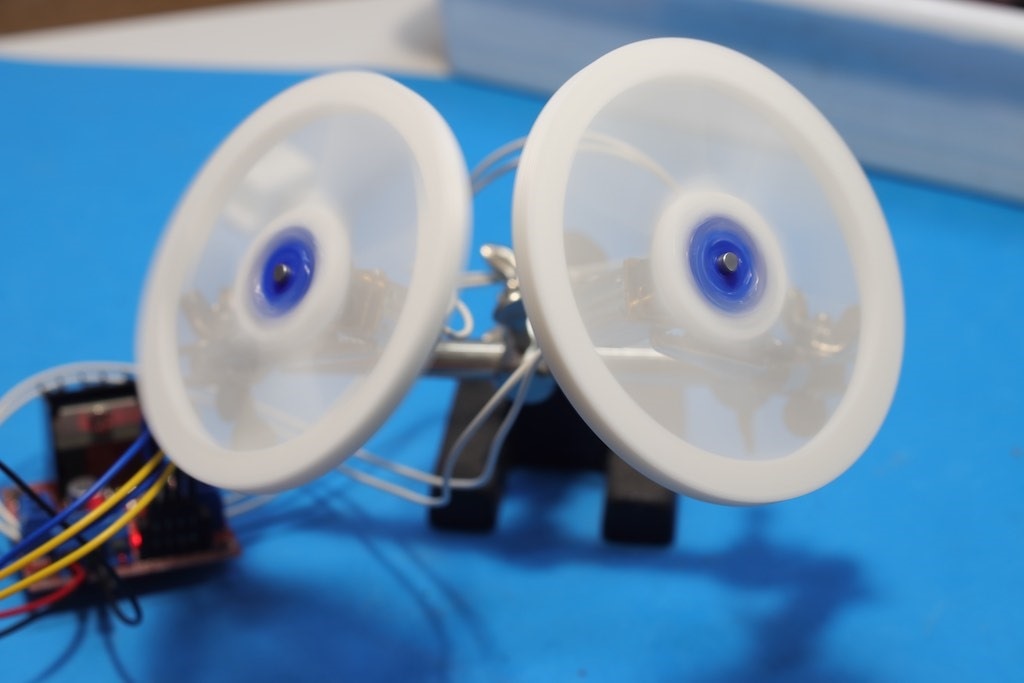
The two freewheels (left in the first rendering below), I have decided to make them a bit smaller than the driving wheels and put them in front where there is less weight are built with three 3D printer pieces.
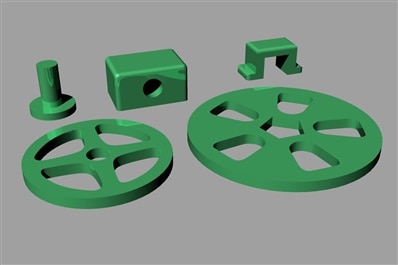

The right rendered above image shows how to assemble the front freewheel. The support block will be hot glued to the base of the chassis and the axis should be hot glued inside the block, leaving the wheel free to rotate.


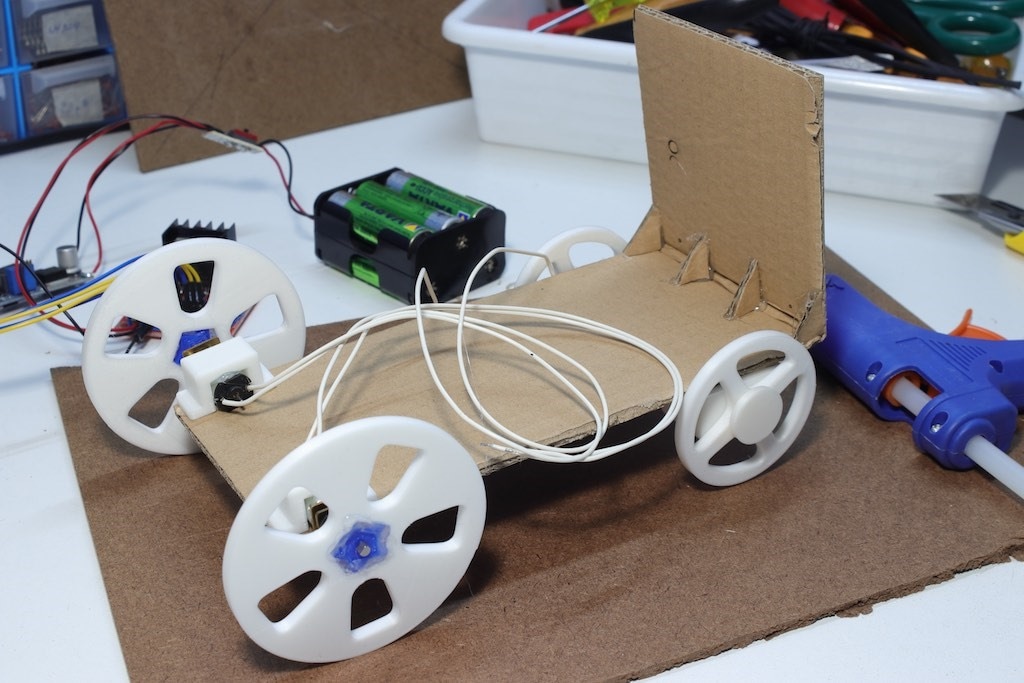
The motors are glued on the "U" support and the wheels are glued to the motor axis. As the micromotors are geared, the direct traction is sufficient to move the entire system. The image below shows the motor wheels assembled.
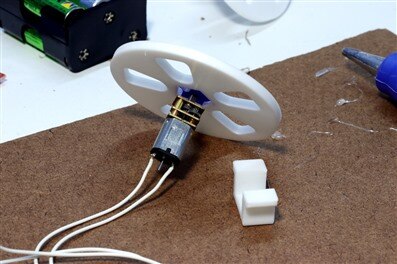

Then motors are tested (and the wheels well centred to the axis(
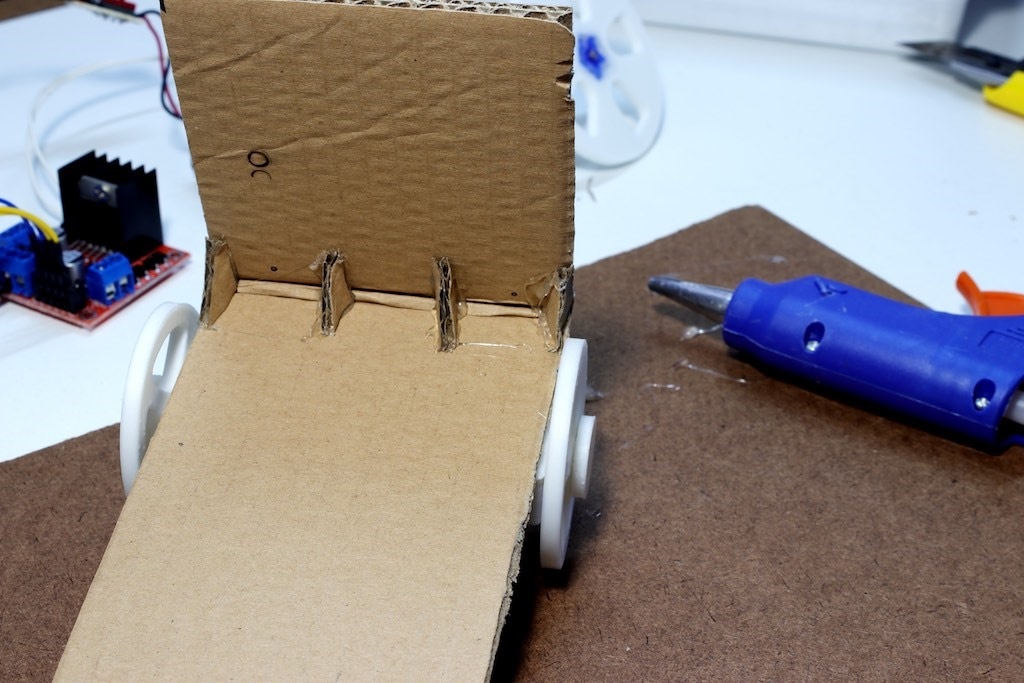
Step 2. Make the Chassis and assemble the wheels
The images below illustrate the sequence of making the cardboard chassis with the four wheels blocks hot glued (again!) to the bottom
| {gallery} Assembling the Chassis and the wheels |
|---|
|
The cardboard base of the chassis |
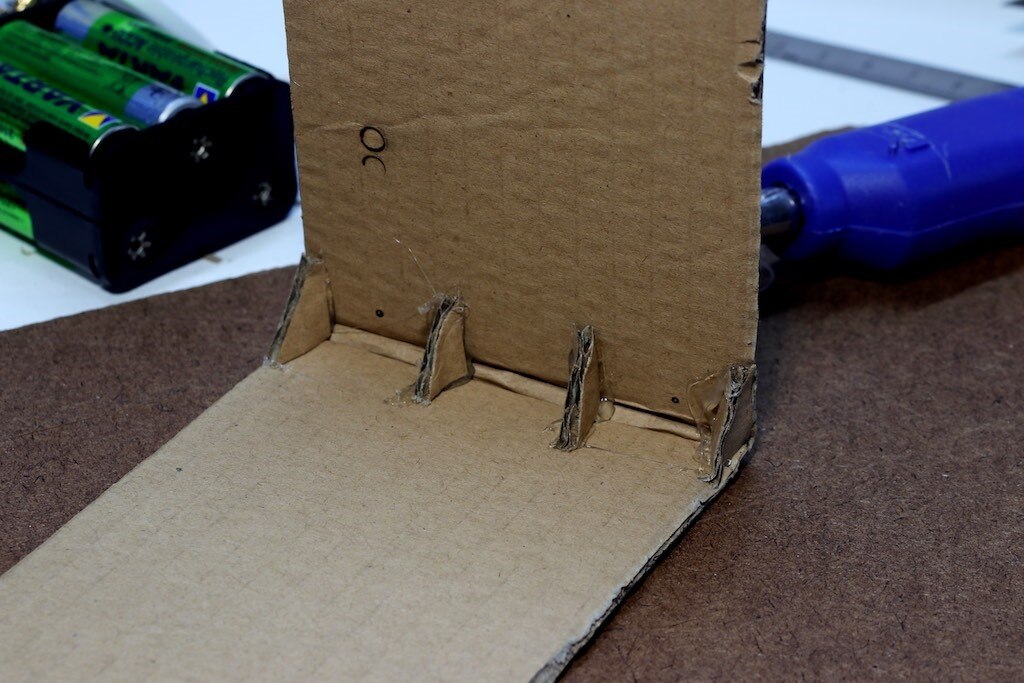
|
The finished chassis. Note the triangular supports to keep in place the vertical part. |
|
Detail of the glued supports |
|
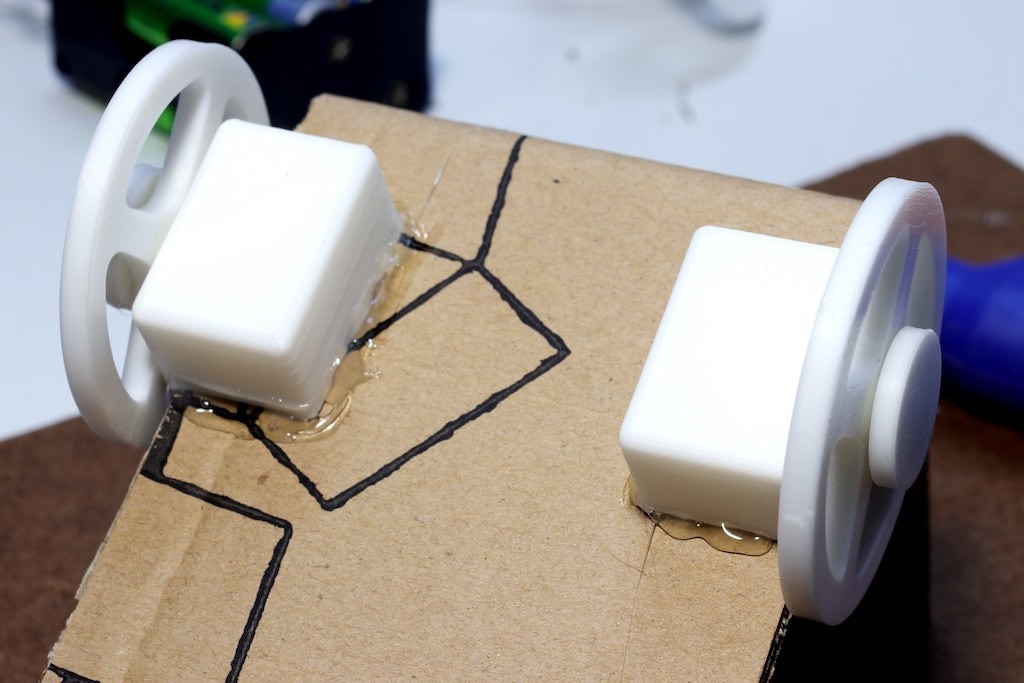
The freewheels glued to the front bottom of the chassis. Be careful to align both blocks, the wheels should be parallel! |
|
The front wheels from the top |
|
The motor wheels glued to the back of the chassis. Due to the smaller diameter of the freewheels, motors have been fixed on the top side. This solution also avoid damage to the motors while the vehicle is moving |
|
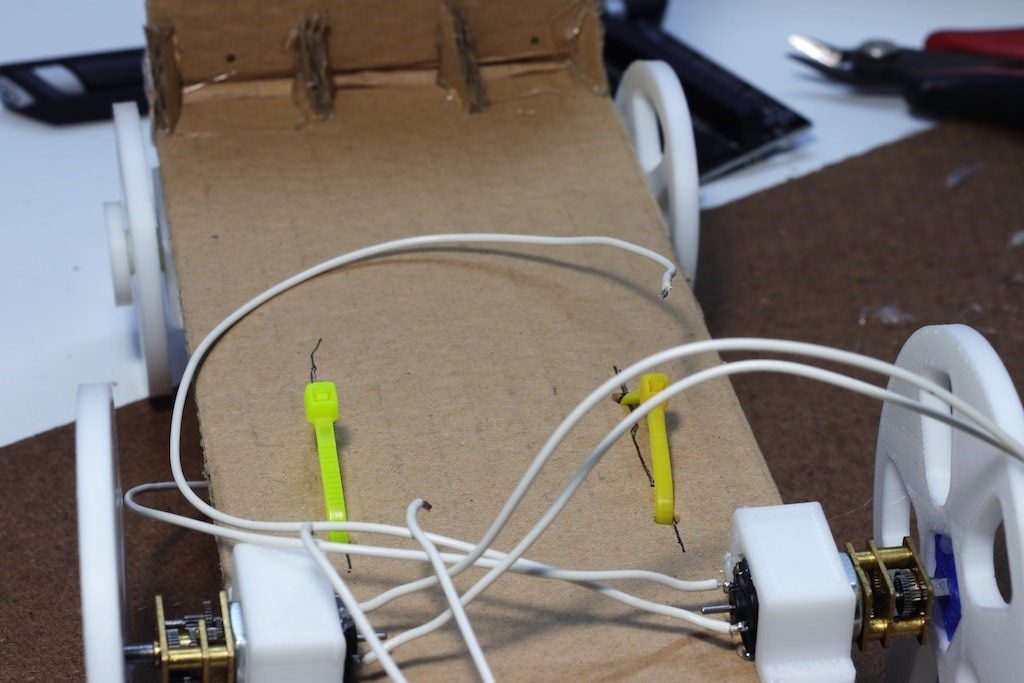
Two cable ties will keep in place the battery pack. As this is the heavies components it is fixed the nearest possible to the moving wheels. |

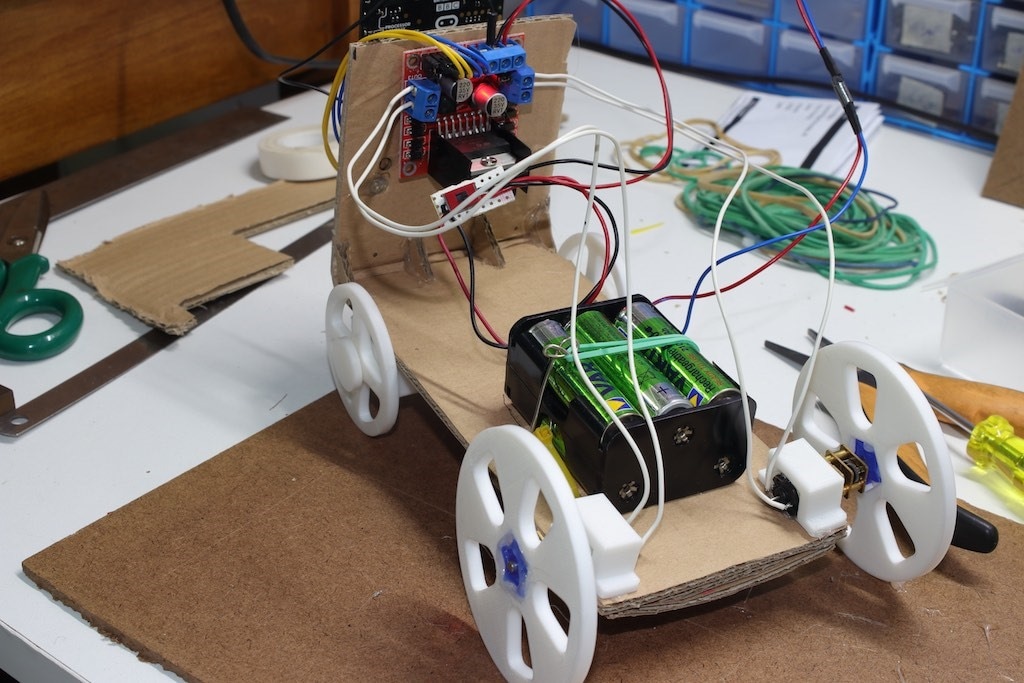
Step 3. Adding the Electronics
The last step is gluing, gluing and gluing the electronic parts we have wired together before.
|
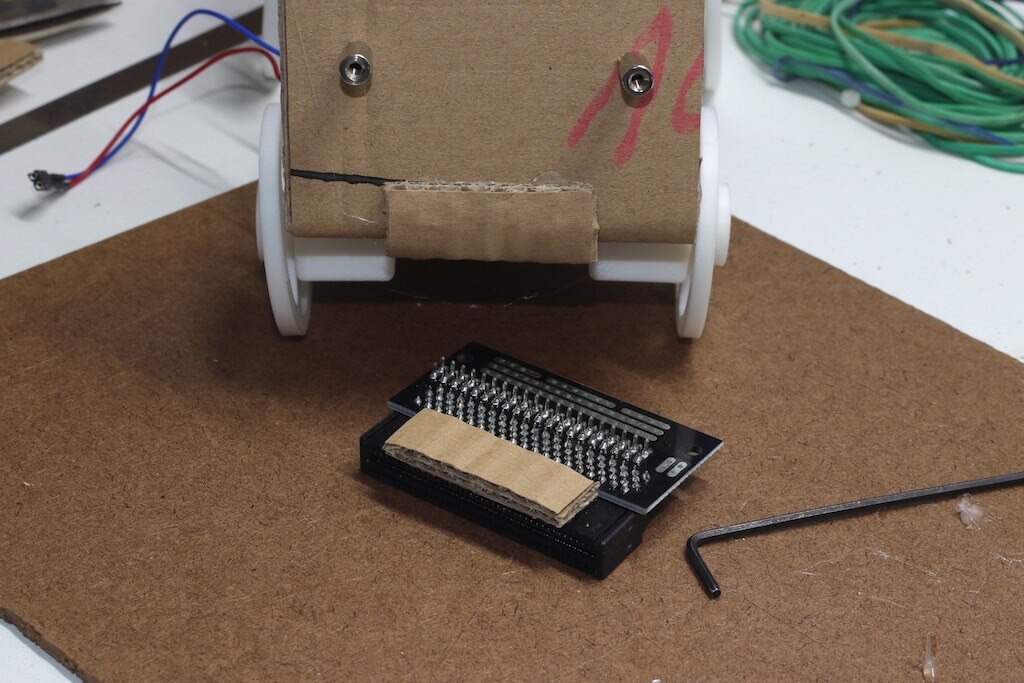
Glue a cardboard support to the back of the micro:bit connector |
|
Then glue all to the front side of the vehicle. The support leaves space to the back of the board and make easy to disassemble the connector edge if needed. |
|
Then, glue to the back of the front side the motor controller and the DC/DC converter to the bottom of the chassis |
|
The battery pack kept in place with a paper-clip and a rubber band |
The Software
The software has been developed with Blocks and the full project is published freely available on the micro:bit Let's Code website.
Alternatively, this is the Java version of the source:
control.onEvent(EventBusSource.MES_DPAD_CONTROLLER_ID, EventBusValue.MICROBIT_EVT_ANY, () => {if (control.eventValue() == EventBusValue.MES_DPAD_BUTTON_A_DOWN) {
images.iconImage(IconNames.SmallSquare).showImage(0)
  } else if (control.eventValue() == EventBusValue.MES_DPAD_BUTTON_A_UP) {
images.iconImage(IconNames.Square).showImage(0)
pins.digitalWritePin(DigitalPin.P13, 0)
pins.digitalWritePin(DigitalPin.P14, 0)
pins.digitalWritePin(DigitalPin.P15, 0)
pins.digitalWritePin(DigitalPin.P16, 0)
  } else if (control.eventValue() == EventBusValue.MES_DPAD_BUTTON_B_DOWN) {
images.iconImage(IconNames.SmallSquare).showImage(0)
pins.digitalWritePin(DigitalPin.P13, 0)
pins.digitalWritePin(DigitalPin.P14, 1)
pins.digitalWritePin(DigitalPin.P15, 0)
pins.digitalWritePin(DigitalPin.P16, 1)
  } else if (control.eventValue() == EventBusValue.MES_DPAD_BUTTON_B_UP) {
images.iconImage(IconNames.Square).showImage(0)
pins.digitalWritePin(DigitalPin.P13, 0)
pins.digitalWritePin(DigitalPin.P14, 0)
pins.digitalWritePin(DigitalPin.P15, 0)
pins.digitalWritePin(DigitalPin.P16, 0)
  } else if (control.eventValue() == EventBusValue.MES_DPAD_BUTTON_C_DOWN) {
images.iconImage(IconNames.Triangle).showImage(0)
pins.digitalWritePin(DigitalPin.P13, 0)
pins.digitalWritePin(DigitalPin.P14, 1)
pins.digitalWritePin(DigitalPin.P15, 1)
pins.digitalWritePin(DigitalPin.P16, 0)
  } else if (control.eventValue() == EventBusValue.MES_DPAD_BUTTON_C_UP) {
images.iconImage(IconNames.Square).showImage(0)
pins.digitalWritePin(DigitalPin.P13, 0)
pins.digitalWritePin(DigitalPin.P14, 0)
pins.digitalWritePin(DigitalPin.P15, 0)
pins.digitalWritePin(DigitalPin.P16, 0)
  } else if (control.eventValue() == EventBusValue.MES_DPAD_BUTTON_D_DOWN) {
images.iconImage(IconNames.Triangle).showImage(0)
pins.digitalWritePin(DigitalPin.P13, 1)
pins.digitalWritePin(DigitalPin.P14, 0)
pins.digitalWritePin(DigitalPin.P15, 0)
pins.digitalWritePin(DigitalPin.P16, 1)
  } else if (control.eventValue() == EventBusValue.MES_DPAD_BUTTON_D_UP) {
images.iconImage(IconNames.Square).showImage(0)
pins.digitalWritePin(DigitalPin.P13, 0)
pins.digitalWritePin(DigitalPin.P14, 0)
pins.digitalWritePin(DigitalPin.P15, 0)
pins.digitalWritePin(DigitalPin.P16, 0)
  }
})
bluetooth.onBluetoothConnected(() => {
basic.showLeds(`
  # # . # #
  # # . # #
  . . # . .
  # . . . #
  . # # # .
  `)
})
bluetooth.onBluetoothDisconnected(() => {
basic.showLeds(`
  # # . # #
  # # . # #
  . . # . .
  . # # # .
  # . . . #
  `)
})
images.iconImage(IconNames.Target).showImage(0)
basic.pause(1000)
Notable aspects
The entire application - Blocks allows this easily! - is event-driven. Adding the Kitronik library as explained in their site https://www.kitronik.co.uk/blog/adding-bluetooth-remote-control-move-mini/
The library associated a series of Bluetooth events to any kind of instruction you want to add. This made possible to control via Bluetooth the vehicle with the open source application for Android. The events behavior are explained in the Kitronik library, full source and documentation available on GitHub: https://github.com/KitronikLtd/pxt-kitronik-servo-lite
The controller - whose ready-to-use version is available on the Android market for free - is well documented on the Bitty Software site.
Running the Robot
After flashing the micro:bit hex file created from the source described above we are finally ready to see the Cardboard Robot With Wheels running for a real RoadTest 
Enjoy this project!
Top Comments