


Although as a kid, for some reason, I thought R2D2 hovered like a land speeder. He actually had wheels which can be seen in a lot of shots in the movies - even the prequels and sequels.
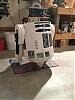
For the Project 14 Robots on Wheels project, I'll take a trip down memory lane at the making of our R2D2 - a screen ready, semi-autonomous version of what we call - The Happy Machine. We call him this, because he can roll into any environment and you will see nothing but smiles on the faces in the room.
The Inspiration
When my son was around six, I told him that when I was his age, I always wanted to build an R2D2. I would look at tree stumps and imagine how I could cut it up into his shape. So, he and I did a Google search to see if anyone else ever had that crazy idea.
To my surprise, I found a forum on Yahoo Groups just for building R2. A guy in Australia was leading the charge since 1999. He had grown a community of 5000 around the world by 2010. From there, we stumbled upon this video:
https://www.youtube.com/watch?v=azE7bifgzUg
This video showed me how he was a Happy Machine. It sealed the deal - we were going to build him. The Yahoo Group led me to a relatively new extension to the club: astromech.net which now is the primary hub for the group. I met some really smart people who were so very helpful - similar to element14.
The Learning Curve
As I researched, I immediately became attracted to the coding of the mechelectronics of the build. It was also the period I found the Ben Heck Show. I had programmed for leisure since I was 10, so now applying programming to control hardware was super fun. For over a year, I did nothing but learn about the Arduino, Netduino, proximity switches, servos, and motor controllers. Autodesk Fusion didn't exist, but I found Blender. It was, and still is, the hardest software I ever learned - but it is an amazingly powerful, free tool to substitute for 3D CAD once you learn it. I'm glad I did as it led to good visualizations of projects at work and dabbling in game development.
The Grunt Work
I'd talk to folks at work about the project and they would say, "I'd like to see it." I realized that after a year all I had to show were wires and microcontrollers. So, I forced myself to get to the grunt work - physically making the droid. This required woodworking skills, resin casting, metal work, and model building.
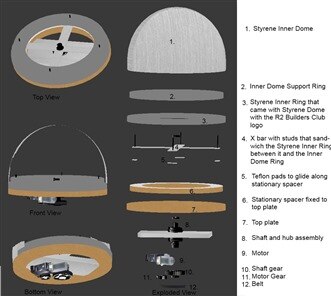
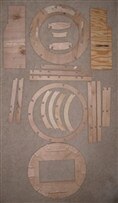
I was able to get ahold of drawings that gave a template to make his body frame out of wood. So, I broke out my table saw and router and got to cutting:


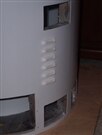
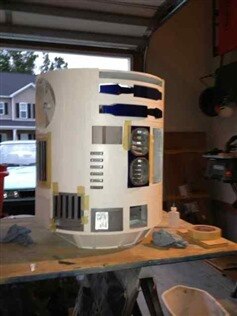
After I had a sturdy frame, I learned about the material High Impact Polystyrene. It is a sheet plastic material used by prop designers and model builders. You can obtain it in various thicknesses. Using solvents, it can be chemically welded instantly to allow you to make parts. I used this sheet material to shape all non structure parts such as his foot shells. I also used it to laminate over all wooden parts to give it the illusion of him being built from metal once painted.
For the small parts, I learned how to make molded resin parts from Smooth-On. I would use clay to make one part, then resin cast it to duplicate it as with R2's coin slots:


3D printers weren't yet affordable. So, this old school approach served me well.
It took about 3 years to find the time to research, 2D print & puzzle templates together, cut out the plastic, cast the resin, route wood, and assemble and paint.
The whole family was involved on applying the two layer of body skins:
The legs were a big challenged in that part of the journey. I had to keep in mind I had to get electricity to the feet when designing my approach without the wires showing. So, I routed a hidden channel in the legs and ran the wires before gluing and screwing it all together. Here is a video showing the extensive process:
They turned out pretty good:
The Wheels
A popular builder on astromech.net had posted his personal design for the foot drives. I liked everything about it, but decided to upgrade his sleeve bearings with roller blade bearings. I worked in a fab shop for automated sowing machines when I was 18 and my sole job was to cut lengths of metal. The experience finally paid off. With a reciprocating saw and a metal cutting blade, I carved out the frame. Since then, I have acquired a "portaband" which would have made it much, much easier. You can see my first test drive of the assembled 4 wheel drive in this video:
The mechanical parts (chain, sprockets, shafts) came from SurplusCenter.com. They are a great source for mechanical supplies.
The Controls
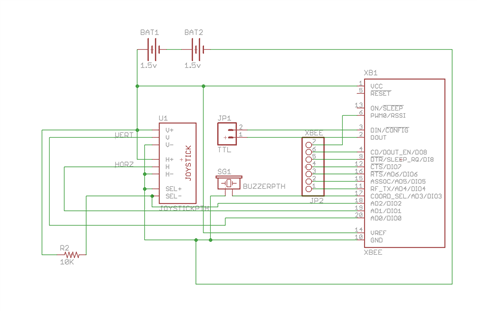
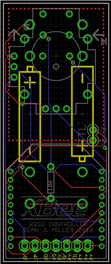
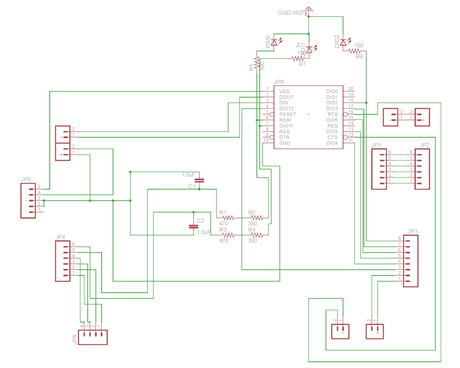
After 3 years, I had a great movie prop. Not every body detail was finished, but we had enough to apply my programming and microcontroller skills I learned at year one. Ben Heck taught me how to make my own PCB. So, using Eagle, we designed the PCB shields to control R2's motor drivers using XBee radios. This allowed for his control to fit in my pocket. This makes him truly magical because people don't know how he is moving around. When asked, I just say "The Force!" It makes most men mad, though. They just want to know how, but a good magician never tells his secrets.
The dome lights are controlled by an Arduino Mini. You can see it in this video where we troubleshot his lights:
My first true circuit was in 2013 when I made a voltage regulator circuit. Looking back, its fun to remember how rookie I was.
We first got the microcontroller to work with an RC controller:
We quickly evolved, though, and we soon had an OshPark.com PCB. My son learned along side of me:
I used the Netduino for the foot control microcontroller, which has an Arduino form factor, but out of the box could be programmed with C#. I love the language due to its ability to have Threads.
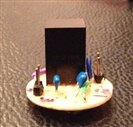
Joystick Design:
Receiver Design:

With C#, I had threads reading a proximity switch, reading the thumbstick from the Xbee, and randomly driving the dome. I could click the thumbstick and he'd go into an autonomous mode where he would use a front proximity sensor to move around without hitting things:
I would never turn my head from this mode since he only had one proximity sensor to prevent collision. However, he also could do "idle animations". This further allowed the illusion of full autonomy in that I could have both my hands in full view of the crowd while he moved safely on his own. His proximity sensor served as an interlock to prevent running over someone.
The Finishing Touches
Now that he is fully Movie Ready, fully controllable, and has been a big hit at school functions, work functions, and Halloween, the hobby continues. Every few months, I'll add a new servo to open another panel. With each one, he comes more and more to life.
Closing Thoughts to this Robot on Wheels
Building R2 was a journey that took my son from 6 to 10. He and I both learned so much. Although I am an engineer, the journey taught me more than my college degree did.
If anything, we both learned - if you can dream it, you can build it. It just takes commitment. That level of commitment translates to something amazingly impactful. When people see him, they don't imagine him being made, but rather, that they are in the presence of the real R2 - the Happy Machine.
I do thank the Ben Heck show for inspiration along the way. I wish I had joined this community sooner. However, the guys and girls at astromech.net were absolutely fantastic, too. Just like here, it is so great to be among a community without trolls - a group that is eager to help one another.
I hope this serves as inspiration for future builders as well. As my boy says - Let's get to it!
Top Comments
-

mcb1
-
Cancel
-
Vote Up
+3
Vote Down
-
-
Sign in to reply
-
More
-
Cancel
Comment-

mcb1
-
Cancel
-
Vote Up
+3
Vote Down
-
-
Sign in to reply
-
More
-
Cancel
Children