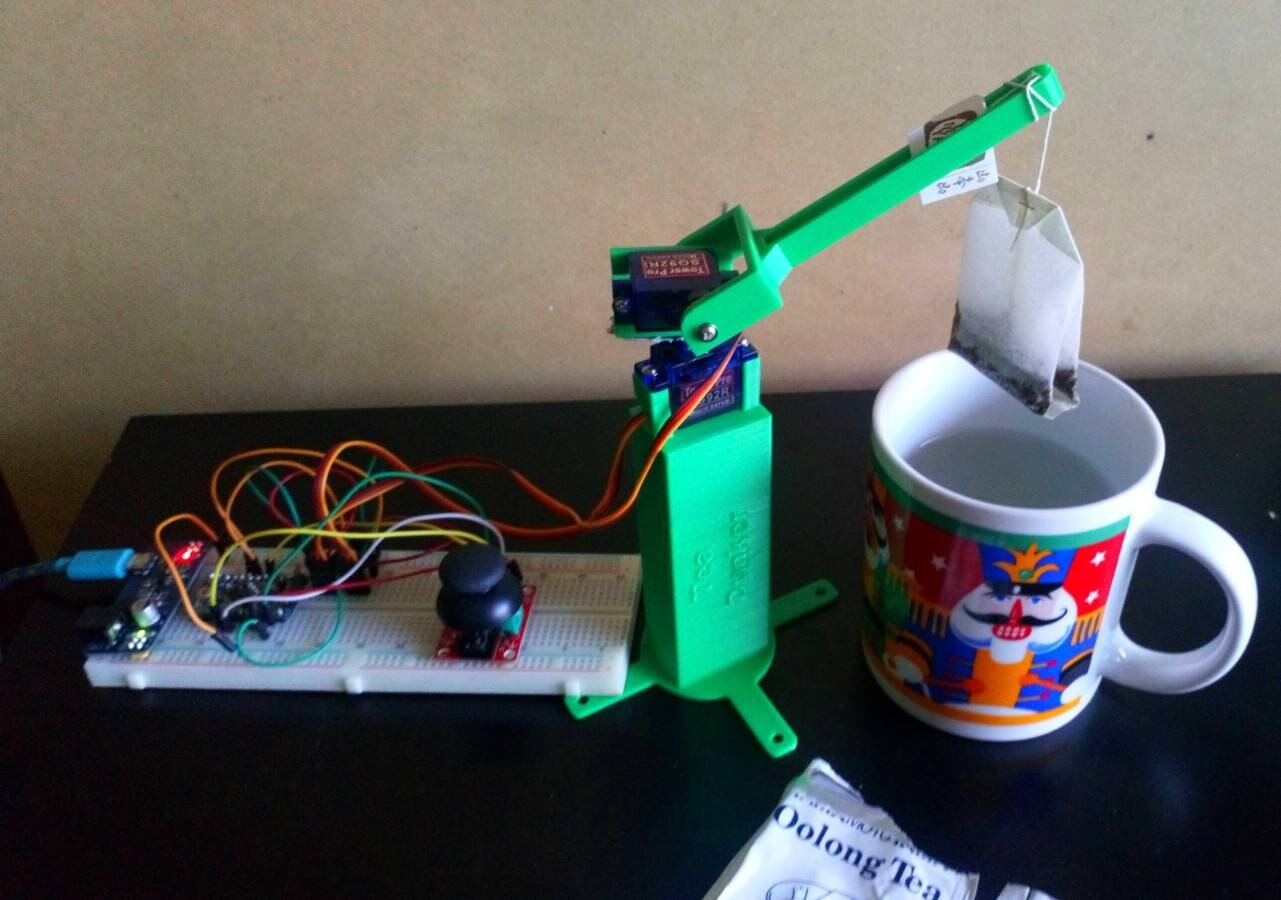
This is my entry to this month Project14 theme - Wacky Automation Devices. For a lack of a better name, I am calling this an Automated Tea Dunker. But if you can come up with something more fun, please leave it in the comment below. Here is the video of the prototype using an Arduino pro mini, two hobby 9G micro servos and thumb joystick. But I plan to automate this further, if time permits in the coming weeks, and probably add Wifi capability.
Now if you watched the video and the first thing that crossed your mind was, "hmm, wouldn't it be easier and faster to just dip the tea bag using your hand"  . If yes, then I think I have achieved my goal and build something wacky !!
Here are the steps to follow, to make something similar
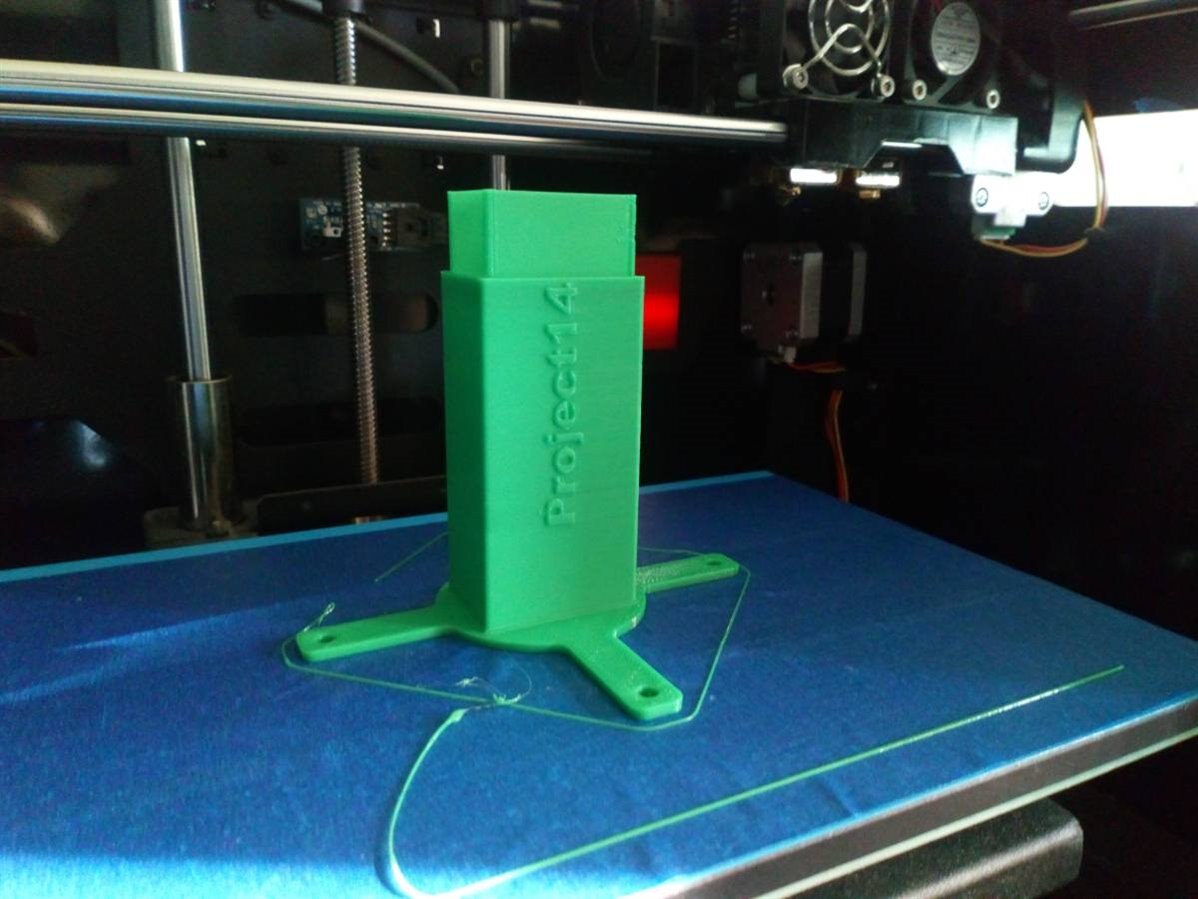
Download and 3D print the STL files attached
There are 4 STL files in total attached in the zip file below, which are going to be used as part of the servo mechanism. You can print this using PLA or ABS filament on your 3D printer.
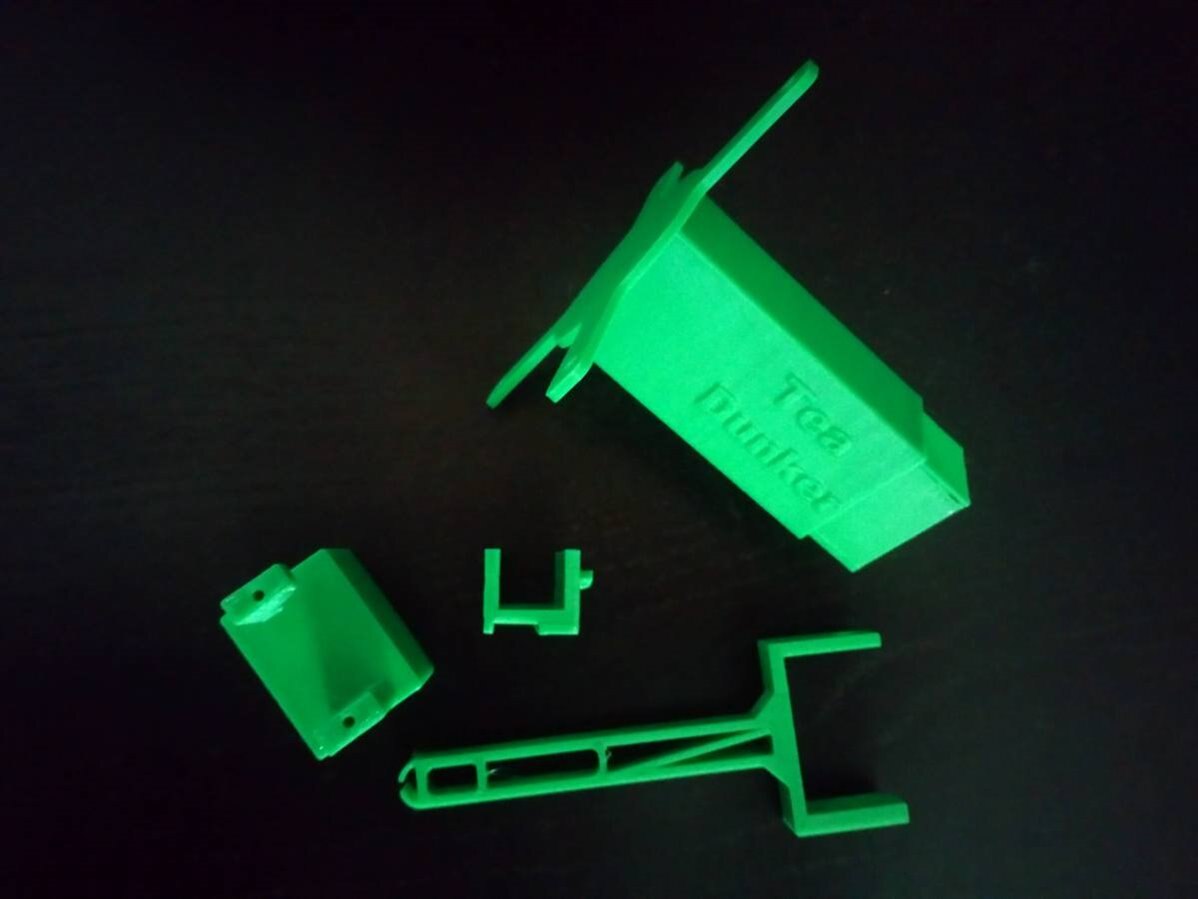
Here are all the 3D printed parts. In my case, I used Hatchbox 1.75mm green PLA to print the files on my Flashforge creator pro.
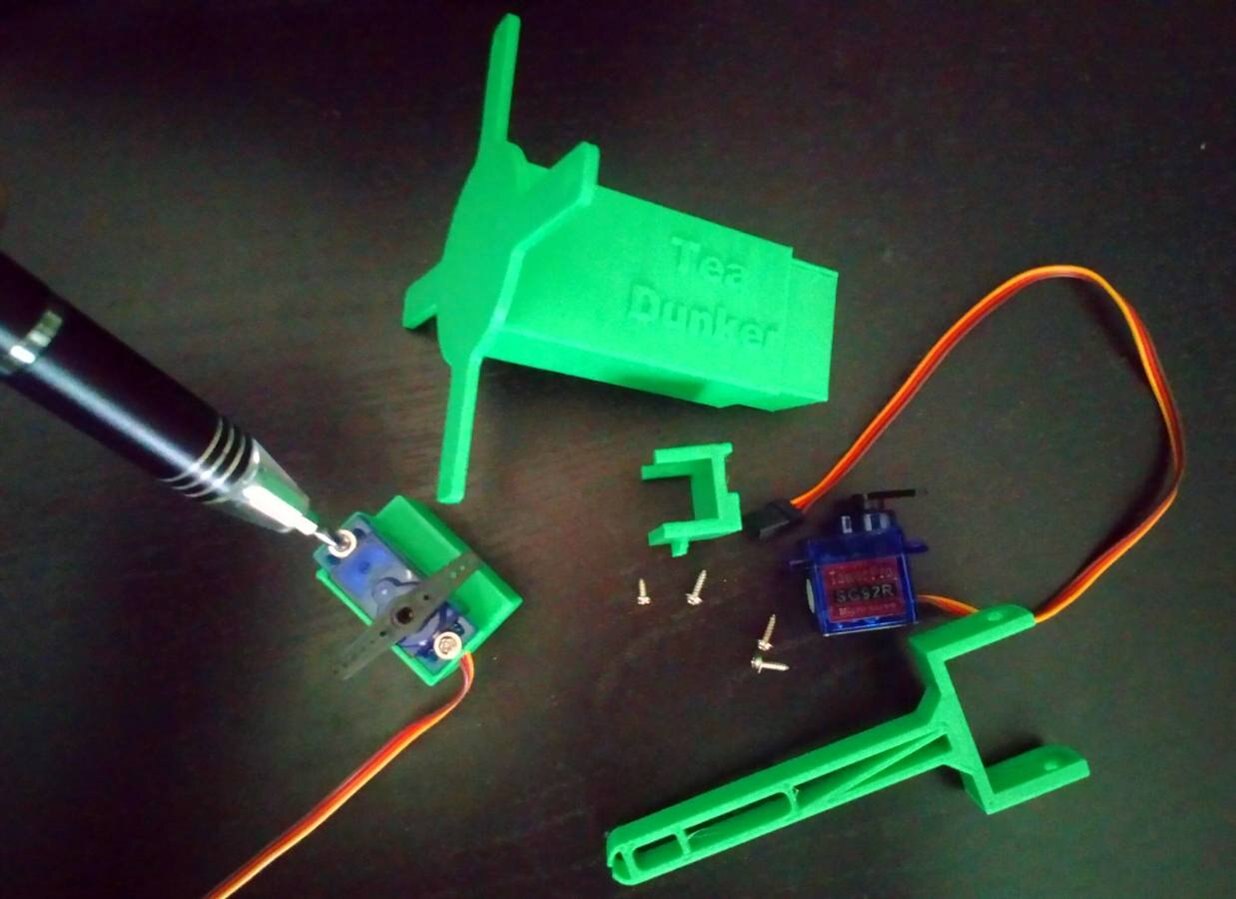
Adding the servos to the 3D printed parts
For the servos, I am using two Tower Pro - SG92R servos. The screws used to mount the servo's onto the 3D printed parts should come with the servos.For the base servo, use the two sided servo horn as you see in the picture below. And for the servo that controls the tea bag arm you will have to use a single side horn, here don't completely tighten the screw on the servo horn as you may have to readjust this after uploading the arduino code below, if you are not happy with dunking movement of the tea bag.
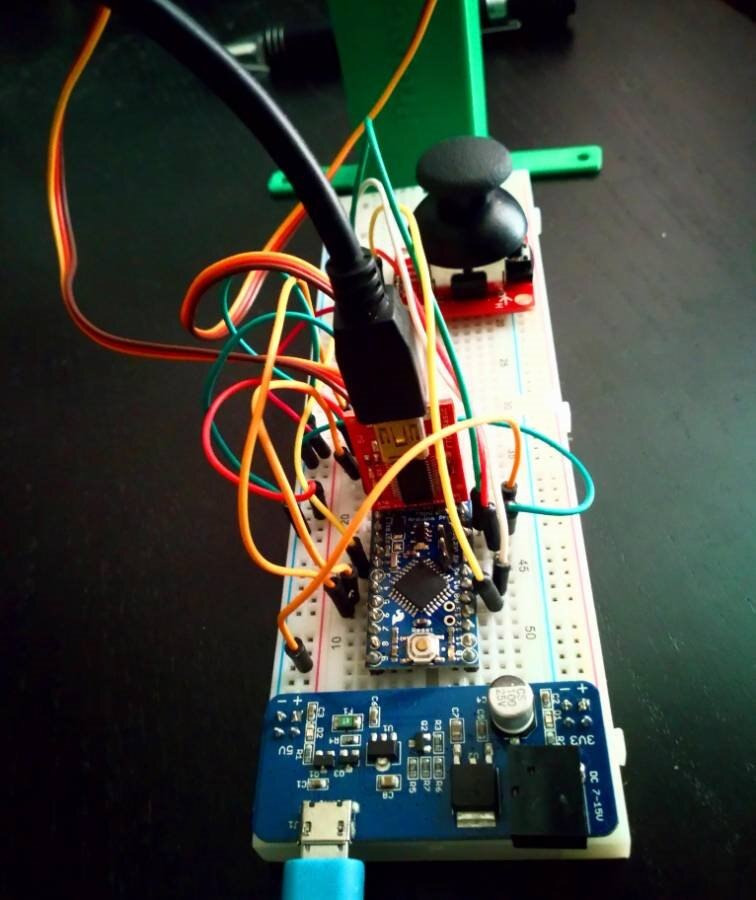
Put the circuit together
As part for the circuit, here are the connections, I am using the Arduino pro mini, but you can use any version of the Arduino..
- Servo connected to the base 3D printed part is connected to pin#4 on the Arduino Pro mini
- Servo connected to the tea bag arm is connected pin#5
- As part of the Joystick the Vertical pot is connected to pin# A0
- and the Horizontal pot is connected to pin# A1
Upload the code below to the Arduino
In my case, since i am using an Arduino Pro mini, I had to use an FTDI breakout to upload code using the Arduino IDE.
//Carmelito 10/18/2017 - Created for the Project14 - Wacky Automation device project
//called the Automated Tea Dunker.
#include
int servoVal;
//The joystick bits of the code are based on Mike Grusin, example on SparkFun Electronics 3/11
const int VERT = 0; // pin A0
const int HORIZ = 1; // pin A1
const int SEL = 2; // pin #2
const int servoBasePin = 4;   //Servo connected to the top base of the 3D printed part
const int servoTeaArmPin = 5; //Servo connected to the Tea bag holder arm of the 3D printed part
Servo servoBase;  // create servo object to control a servo
Servo servoTeaArm;  // create servo object to control a servo


void setup()
{
  // make the SEL pin of the joystick an input
  pinMode(SEL,INPUT);
  digitalWrite(SEL,HIGH);
  servoBase.attach(servoBasePin);  // attaches the servo
  servoTeaArm.attach(servoTeaArmPin);  // attaches the servo
  Serial.begin(9600);
}


void loop()
{
  int vertical, horizontal, select;
  // read all values from the joystick
  vertical = analogRead(VERT); // will be 0-1023
  horizontal = analogRead(HORIZ); // will be 0-1023
  select = digitalRead(SEL); // will be HIGH (1) if not pressed, and LOW (0) if pressed

  // print out the values
  Serial.print("vertical: ");
  Serial.print(vertical,DEC);
  Serial.print(" horizontal: ");
  Serial.print(horizontal,DEC);
  Serial.println("Move servos");

  //Mapping the postions to the servos
  servoVal = map(vertical, 0, 1023, 0, 180);
  servoBase.write(servoVal);
  servoVal = map(horizontal, 0, 1023, 0, 180);
  servoTeaArm.write(servoVal);
  delay(10); //Change this to check what works for you
}
yo
And once you done upload the code, put in the hours of practice !!  and finally once you confident, dip the tea bag in a cup of hot water and enjoy !!

Top Comments
-

e14phil
-
Cancel
-
Vote Up
+2
Vote Down
-
-
Sign in to reply
-
More
-
Cancel
Comment-

e14phil
-
Cancel
-
Vote Up
+2
Vote Down
-
-
Sign in to reply
-
More
-
Cancel
Children