I have to be honest, when I first read about the micro:bit when it was announced, I wasn't overly impressed. With the large number of single board computers out there it felt a bit under powered. The display was 5x5 LEDs. It didn't support WiFi (it did Bluetooth but what use is that). It didn't run an operating system. I didn't look much more into it.
A while later when I had started teaching a Code Club with 9-10 year olds. I now had hands-on experience with Scratch, Python and Raspberry Pi and I thought again about the micro:bit. It neatly solved many of the issues I'd encountered with the tools we'd been using. So I bought one and was more convinced, then I was a winner in the Great micro:bit Education Giveaway. Now I had enough to use with my students. It was interesting that when showing it to one of the other Code Club volunteers they were a bit underwhelmed too. But then we used them together with our children and they started to see it too. Now with two sessions with my Code Club done I can really see just how perfectly this little product fits for education. This is why:
The price is low.
A low price means you can afford a whole classroom of them. Or expect the students to buy one for themselves. And if one stops working, it's not going to break the bank to replace it. It's about half the price of a Raspberry Pi, but the Pi requires a power supply, SD card, keyboard, mouse, monitor to get working with. We had a few Raspberry Pi in our class but they were too expensive to get a whole set.
It's small but strong.
Kids and equipment = things getting damaged. The micro:bit looks pretty rugged to me, and I'm not concerned about them getting broken. And being small means they're very easy to setup and put away. The kids help themselves from a box at the start of the class and they get returned at the end.
It comes with inputs and outputs.
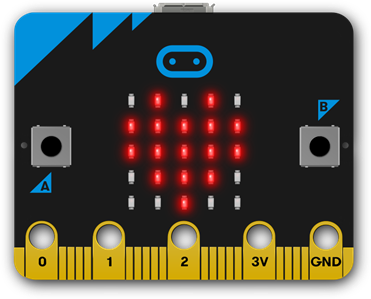
If you have a Raspberry Pi or Arduino you're probably going to want some sort of daughter board for I/O. We used the SenseHAT and the Rainbow HAT and these worked pretty well. But it was another thing to buy and more complexity to the setup. It turns out you can do a lot of fun things with a 5x5 LED array and the two buttons on the micro:bit. And when you've got the hang of those there's also built-in motion, light and temperature sensors plus anything you want to wire up to it.
You can program it from practically anything.
You can program a micro:bit from anything that has a web browser and can write to a USB drive. Which means pretty much any computer you can find. You don't have to install any software. Initially I thought programming on the web was going to be a compromise but the tools like MakeCode are really good. Dropping files onto a USB drive is very easy to learn and understand method of flashing a device.
It's simple.
Being simple makes the micro:bit a more effective learning tool. I see the students less distracted by other things they can do (e.g. play Minecraft on the Pi, spend a lot of time doing very detailed layouts in Scratch instead of coding). By being less distracted I see them think more about how the code works and how they can modify it.
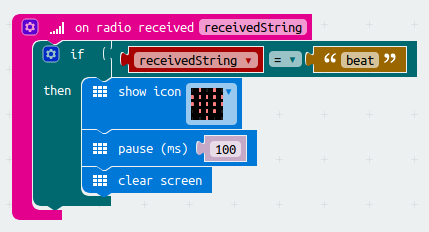
It supports Bluetooth.
I had been looking to introduce some networking projects in our Code Club, but just couldn't work out something both simple enough and meaningful to do. The Bluetooth networking on the micro:bit is amazingly easy to use. Join a group and broadcast messages to that group in a few blocks.