

.jpg)

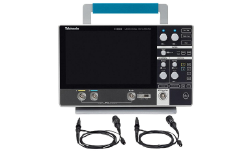
 Remote control of oscilloscopes allows users to operate and monitor the functions of an oscilloscope from a distance using a computer or mobile device. This technology is especially beneficial in the new remote work culture and educational institutions. Students now expect to access their coursework from anywhere, making remote connectivity essential in education, enhancing the learning experience, and maximizing the equipment's utility. The ability to control the oscilloscope remotely allows for efficient data acquisition and analysis, streamlining project workflows and maximizing the instrument's utilization. This feature allows students or engineers educators to use the oscilloscope's advanced functions without professors or equipment manufacturers being physically present, increasing efficiency and accessibility. This article explores the remote-control capabilities of the Tektronix 2 Series Mixed Signal Oscilloscope (MSO), set up procedures and a video that demonstrates the set up of a Raspberry Pi controlling a 2 Series MSO.
What are the Benefits of Remote Connectivity?
The key features that make remote connectivity useful include:
- Sharing data with teammates worldwide
- Capturing and analyzing data remotely
- Quickly accessing the oscilloscope through the internet
- Collaborating flexibly with others, no matter where they are
These remote-control capabilities are crucial for a geographically distributed workforce. Users can control the oscilloscope, share its screen, exchange data, troubleshoot, and analyze it on a computer without needing physical access. This significantly improves data gathering and analysis, helping teams work more effectively and make the most of their equipment.
What is a Programmatic Interface?
A programmatic interface is like a bridge, letting you control the oscilloscope through your software. It uses a common set of commands that both the oscilloscope and user software can understand, allowing you to automate tasks like adjusting settings or collecting data, or controlling triggers.
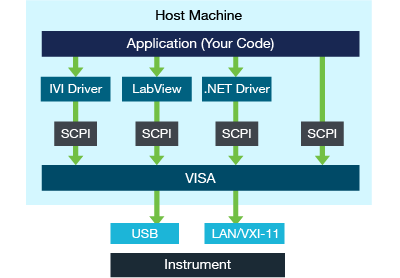
Figure 1: Programmatic interface stack. Image Source: tek.com
Tektronix oscilloscopes use SCPI type of commands, which work with any programming language, making it very flexible (Figure 1). For example, programmers often use Python (with PyVISA), MATLAB, LabVIEW, or C-family languages to control these devices. Connections can be made simply through USB without needing a network, using SCPI commands along with a graphical interface on top.
VISA (Virtual Instrument Software Architecture) is an I/O API that is a commonly used industry standard. Some additional standard protocol specifications that manage I/O on top of VISA are USB-TMC for USB control and VXI-11 for TCP/IP control. Some users choose to use Raw Sockets instead of VXI-11 based control over Ethernet.
How To Interface a Raspberry Pi with 2 Series MSO
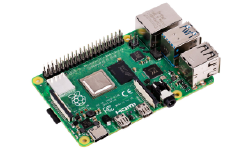
The Raspberry Pi has become popular for a variety of projects beyond education. Its small size, low price, flexible use, and support for Python programming make it perfect for automating test setups in labs or manufacturing. It can control devices, gather data, capture waveform data and help manage information or remote access, especially for repeated or complex tasks, and with pre-written example programs, it provides a quick solution.
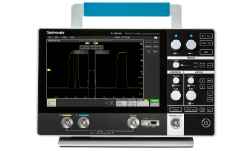
The Tektronix 2 Series MSO is an adaptable tool designed to keep up with the increasing demand for remote learning and hybrid work settings in both schools and workplaces. The MSO comes with built-in features that make remote work easier and help distant teams collaborate. It can take on the roles of several different instruments, which helps streamline processes, save space, and boost efficiency. For instance, using a Raspberry Pi to automate operations with a Tektronix 2 Series MSO can enhance remote learning and working. The MSO is designed to be versatile, supporting diverse ways to work and collaborate from afar. It can perform the functions of multiple devices, simplifying setups and improving efficiency.
Demonstrating How to Use a Raspbery Pi to Control an Oscilloscope
The following video shows the best way to use a Raspberry Pi to control a Tektronix 2 Series MSO, including an introduction and setup tips.
Setting Up the Raspberry Pi and 2 Series MSO for Remote Control
The following section guides you through the setup procedure for using a Raspberry Pi to automate a Tektronix 2 Series MSO and configure the instrument for remote control.
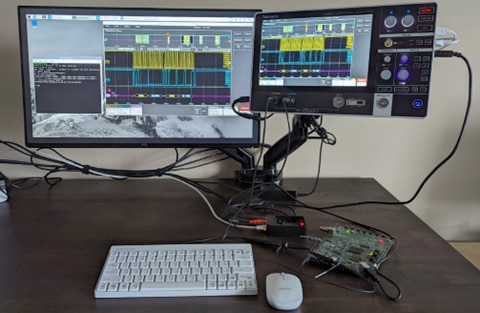
Figure 2: Programmatic interface stack. Image Source: tek.com
As discussed earlier, VISA (Virtual Instrument Software Architecture) is an industry-standard API used for configuring, programming, and troubleshooting instrumentation systems comprising GPIB, VXI, PXI, Serial, Ethernet, and/or USB interfaces. The communication support between the oscilloscope and the Raspberry Pi is based on pyVISA, it is a Python package that enables you to control all kinds of measurement devices independently of the interface. It manages connection and communication with devices.
PyVISA is a Python wrapper for VISA shared libraries but can also serve as a front-end for other VISA implementation such as PyVISA-Py. PyUSB provides for easy access to the host machine's Universal Serial Bus (USB) system for Python 3.
Note: these setup producedures were based on Tektronix documentation provided in the References section at the end of this article.
To install these packages on the Raspberry Pi, execute the following commands in the terminal window:
$ sudo python3 -m pip install pyvisa
$ sudo python3 -m pip install pyvisa-py
$ sudo python3 -m pip install PyUSB
Modify the rule to allow all users to access the USB devices.
$ echo 'SUBSYSTEM=="usb", MODE="0666", GROUP="usbusers"' >> /etc/udev/rules.d/99-com.rules • exit
After installing the dependencies, restart the Raspberry Pi to apply the changes. Next, we will set up the connection with a Tektronix 2 Series MSO. Connect the USB device port on the right side of the oscilloscope to the Raspberry Pi.
To check if the oscilloscope is detected, use the ‘lsusb’ command. Verify that PyVISA is correctly installed by starting Python and creating a ResourceManager:
>>> rm = pyvisa.ResourceManager()
>>> print(rm.list_resources())
The output will display the oscilloscope's VISA descriptor, such as:
Once you see the correct VISA descriptor, connect to the oscilloscope with:
This will connect the Raspberry Pi to the oscilloscope.
To confirm the communication, enter an *IDN? query. If the return string lists the correct model number and serial number, then the Raspberry Pi is able to communicate with the oscilloscope.
Once the connection between the Raspberry Pi and oscilloscope is established, you can refer to example projects from Tektronix repository github.
Shop our wide variety of Oscilloscopes from Tektronix Shop now
About the Sponsor

FROM INSPIRATION TO REALIZATION: Tektronix designs and manufactures test and measurement solutions to break through the walls of complexity and accelerate global innovation. Together we empower engineers to create and realize technological advances with ever greater ease, speed, and accuracy. For more information go here


