Introduction
Earlier in the holiday contest project Activity Tracker, I have mentioned that I will explain the steps involved in creating the ML model using the MPU6050 sensor data. In this blog we will see how to send the sensor data to cloud and deploy the model on edge. You can find the entire project along with data here.
Hardware details
Microcontroller
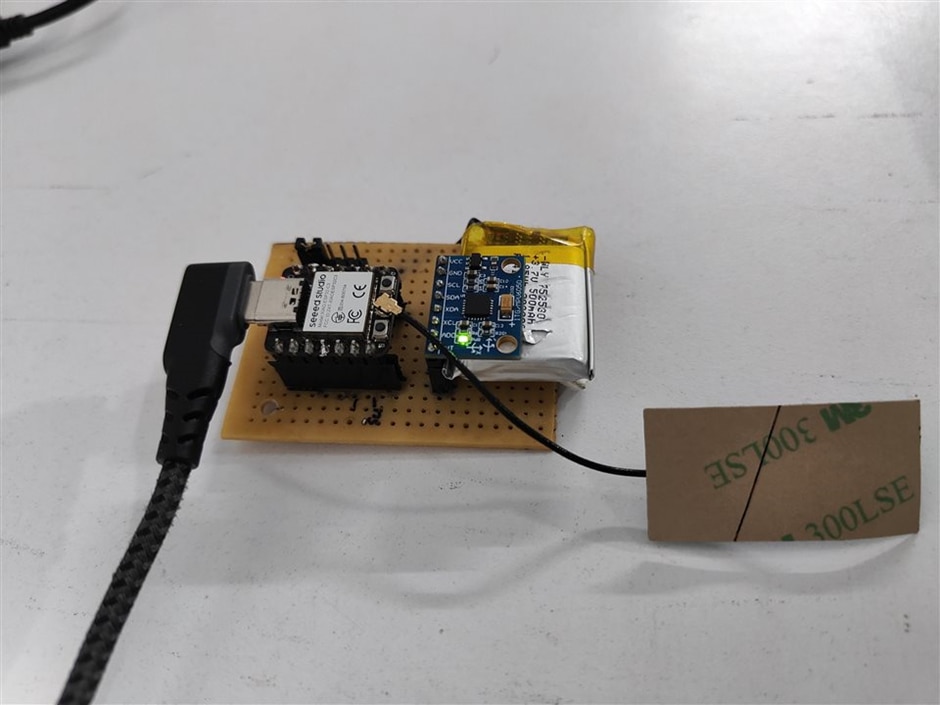
- As I planned to create a wristwatch style device, I decided to use a microcontroller with small form factor and wireless support. So, I decided to use XIAO ESP32C3 – a RISC based 32-bit microcontroller that supports WIFI as well as BLE. The size really small (20x17.5mm) making it suitable for my purpose.
Sensor
- Next to capture the movement, I have decided to use MPU6050 which is a Six-Axis (Gyro + Accelerometer) MEMS Motion Tracking sensor that uses I2C protocol to send data.
Power source
- While during data collection period, the board can be powered by using USB cable, it is inconvenient when you want to move around and test the working of the sensor kit. So, I have decided to add a rechargeable battery which will power up the ESP32C3 board.
- My final hardware setup looks as below. That is all for the hardware stuff.
Software setup
- The below instructions are for setting up the required tools in Windows platform, which was a little annoying as I have to install a new language support packages and installer tools.
Build tools
- First, we need to install Python and then NodeJS and make sure you accept additional tools installation, which will install Chocolatey as well.
Edge Impulse Cli
- Now that we have bloated our system, it is time to install the actual tool – Edge Impulse Cli. There is a chance your installation will stop halfway. Just close the window and continue to next step. Enter the below command in a CMD prompt. npm install -g edge-impulse-cli --force
- Create an account in Edge Impulse, developer account is enough for now as we have a really small amount data to be processed. Once the data is collected, entire workflow can be completed within 15mins.
Arduino IDE
- Now, install Arduino IDE and add the ESP32 Json URL in preference. Make sure you use ESP32 version 2.0.14 or less, the latest alpha versions have updated Wi-Fi functions that are not backward compatible (ESP NOW).
- From the list of attachments below, download the I2Cdev library and add to Arduino. Download and flash the sensor data file to the ESP32. ESP32 will read the sensor data and print them in CSV format.
Data preparation
Connecting data to cloud
Open a command prompt and enter the following command. If you have followed the previous steps correctly, you will be prompted to enter your email ID and password of your Edge Impulse account.
edge-impulse-data-forwarder.cmd
Linking device to project
- Make sure your USB port is not open in any other terminals or windows. Cli will automatically scan and select your device.
- If you don’t have any projects, you can create one through, if you have only one project, it will be automatically selected and if you have multiple projects, you will have to select the correct one to continue.
Assigning names to data and device
- Then it will continue to monitor the serial data and try to find the frequency and format. If the incoming data has a valid format, it will prompt you to enter the label for your data. In our case, we will name the data as ax,ay,az,gx,gy,gz and the device name as esp32c3.

- Now, lets go back to Edge Impulse and check whether our device is added to our project. Goto Devices tab in Edge Impulse, check whether the device is added or not.

Data sampling
If you have followed the instructions up to this point, you will see similar options like the below image on Edge Impulse project.
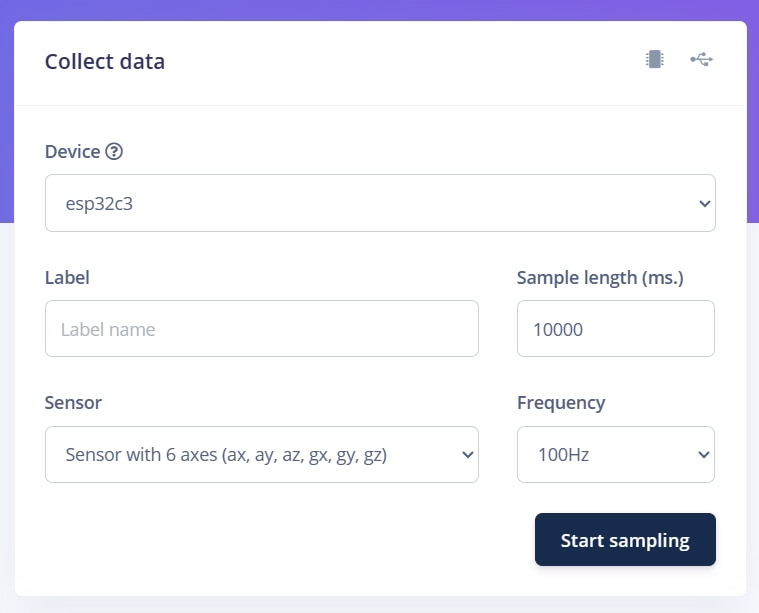
Now, we will try to collect data for 3 different types of labels.
- Idle
- Twist
- Bicep curl
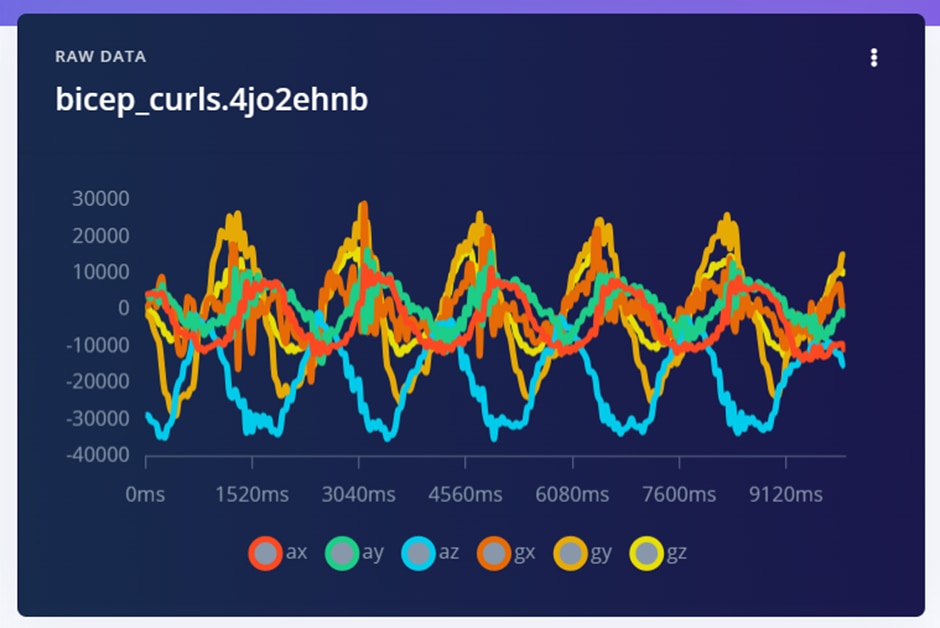
Taking the idle data is actually simple, click start sampling and place the device randomly. For twist to on data, twist your wrist such that you are facing your inner palm and let that hand rest in normal position. For bicep curl, you can either make your arm go from 180 degree to 90 degree or 180 degrees to nearly touching your shoulder joint. For a sample of 10s, you can do either action any number of times. This is how a 10s of bicep curls data looks like for me.
We need to maintain a minimum of 3:1 ratio of data between training set and test set. We will collect 16 set of data for training and 4 set of data for test for each of the labels so that we can maintain a 4:1 ratio.

Now that we have collected 10mins worth of data, it is time to create an Impulse.
Impulse Design
Creating impulse
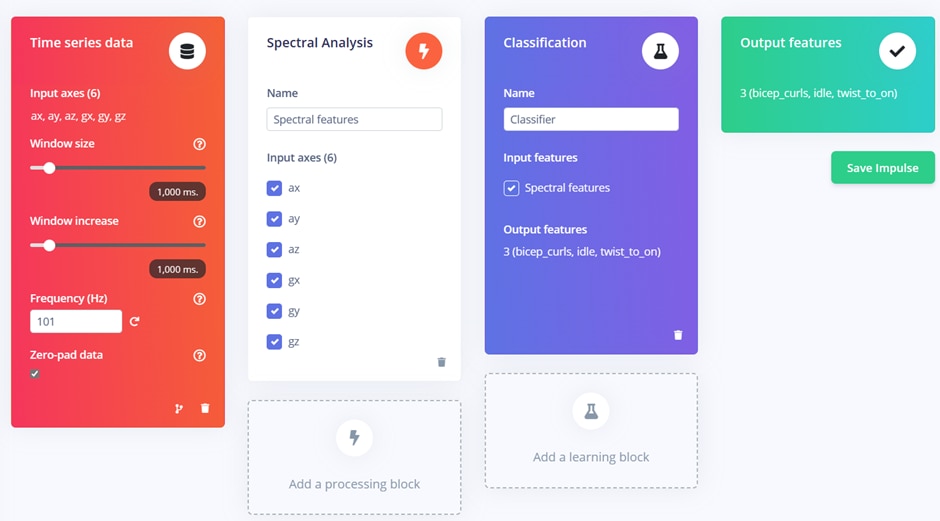
- On the left most window, we will see data is marked as “Time Series Data”. If you keep the number of bicep curl and twisting motions per sample at a constant rate, you can set the window size based on that value. Example, if you make 5 curls per sample, you can set the window size to (10/5) 2 seconds.
- Next option is selecting a processing block. Based on the data we have we will be presented with various processing blocks pre tuned for images, audio and sensor readings. For our usage select Spectral analysis and ensure all axes are selected.
- Select Classification as learning block and select spectral features as input. Click “Save Impulse”.
Spectral features
In this section, we will apply filters to our data. Now, before we move on to next step, we need copy the corresponding raw feature data below the graph, make sure it covers the peak or slope points of your data. Paste it in a notepad, we will need the raw data later.

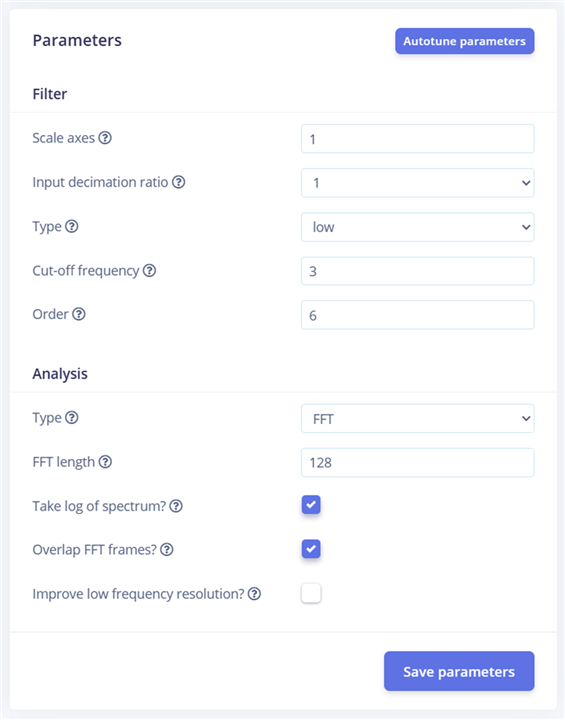
While auto tuning option is present, it is available for paid customers and for now we will try to tune manually. Select the filter type as low and set cut off frequency as 3 and Order as 6. Click save parameters and Click Generate features.
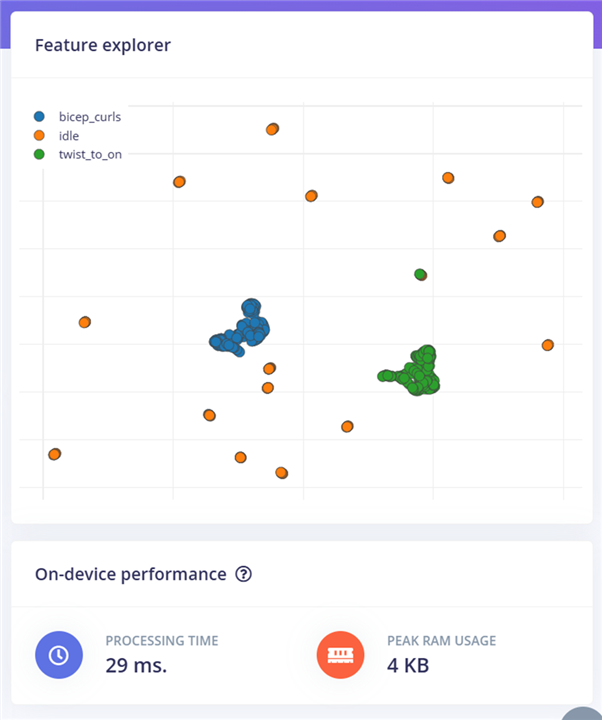
Once the features are generated you will be presented with a graph representing your data that showcases how your data is clustered. You can easily find out anomaly and outliers here.
Classifier
On the top right section, select “ESP-EYE” as target. Do not worry, we can flash the result in any of the ESP32 variant.

Classifier section hardly needs any correction, click “Start training” and wait for the process to end. For a smaller amount of data, it will take few minutes only. Now, the result will show how accurate of validation set.
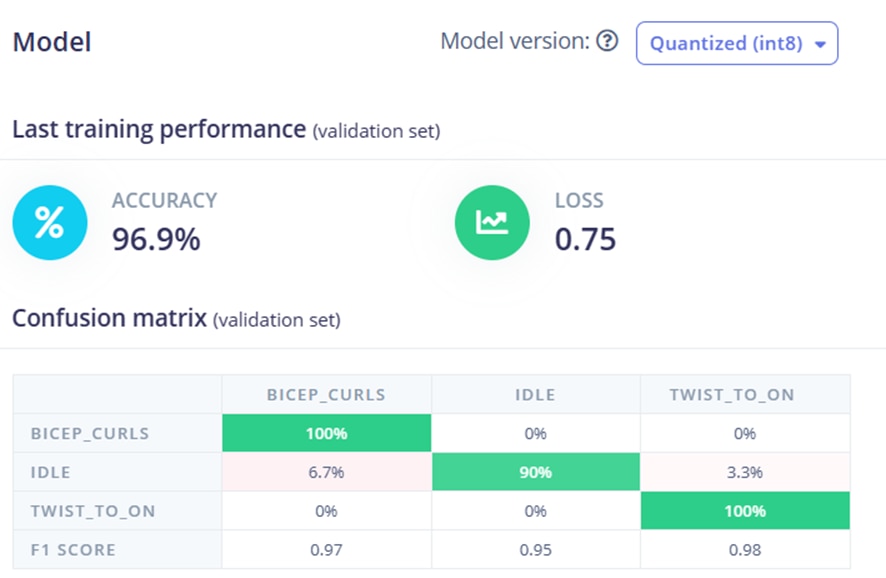
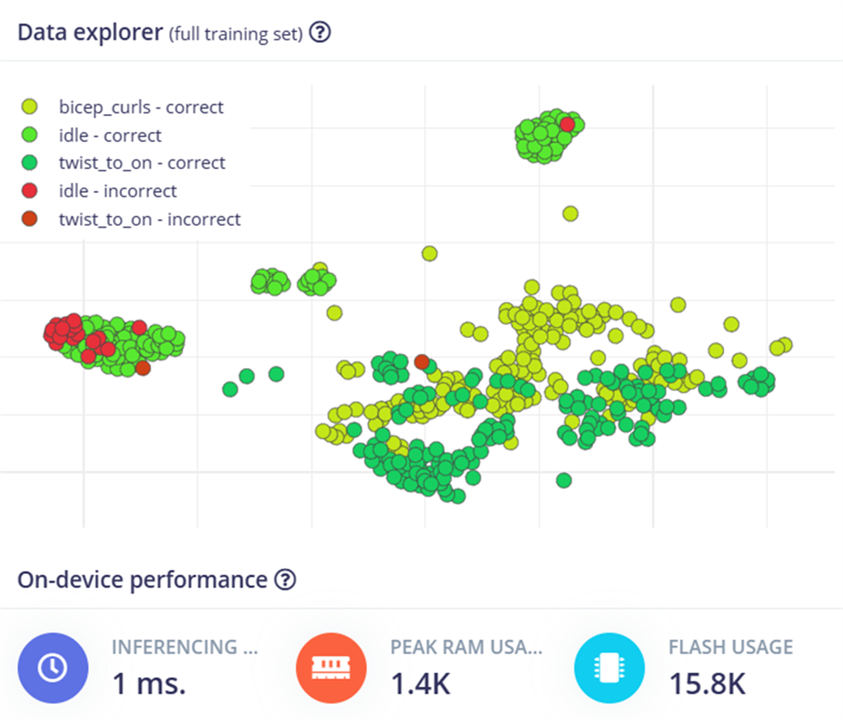
Let's skip EON tuner for now and move on to retrain model.
Retrain model.
Retraining might improve your model’s accuracy by setting the unknown parameters earlier as known parameter and starting the training again.
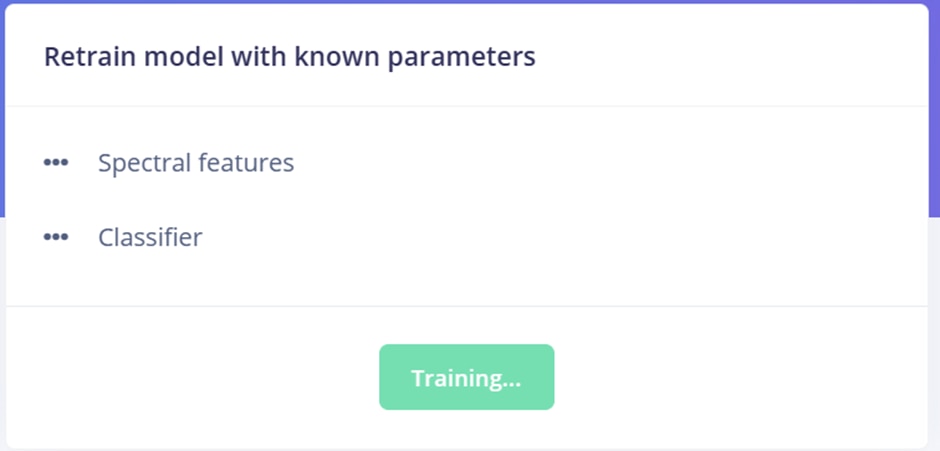
You can load a previously poor accurate test data and retry classifying it and check the new performance.
Live Classification
Make sure your sensor kit is connected to Edge Impulse and is visible on the project. Click “Start sampling” and let the cli collect data of your movement. Once the data is collected, it will process and print the inferred result per second.
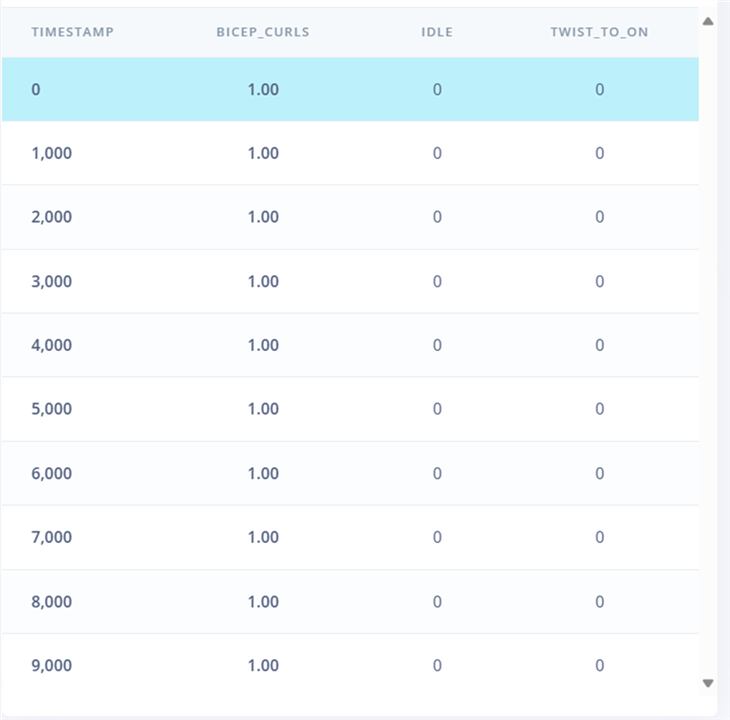
As we can see, the model has correctly identified the action as bicep curl. On the right side, you will see the spectral feature of the data.
Deployment
Downloading the inference model and tools
Select deployment and from the list of options available, select “Arduino Library”. Now, make sure EON compiler is enabled and set to Quantised. Click “build”, it will take some time and once the build is completed, the Arduino library will be automatically downloaded.
Deploying in the ESP32
From the Arduino IDE, select Sketch -> Include library -> Add .zip library and select the newly downloaded zip file.
If properly installed, you will a list of examples created for various boards including Nicla Sense, pico and Sony Spresense. Select the "static_buffer" example.
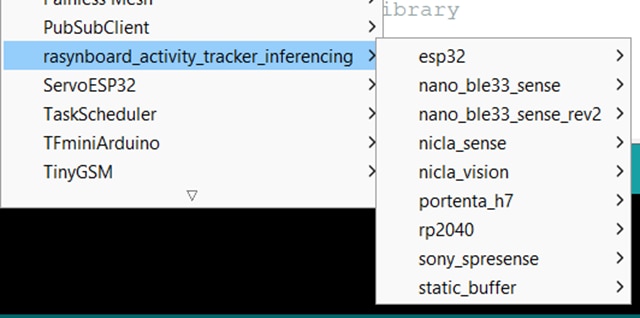
Remember the raw features we copied earlier in the Spectral features section, paste the values under features variable.
Now comes the hard part. It took nearly 10mins to compiler and upload the file for me, based on your settings, it might take shorter or longer time.

Once the example is uploaded, open the serial monitor. You will see the output similar to the one you have seen on the live classifier.

That’s it, you have successfully run a ML inference model on your edge device.
Real time integration
So far, we have seen how to send data to cloud, create an impulse, download and run a inference model with sample data on edge. To see how the inference model works in real time, you can see the code explanation section of Activity tracker project.
Performance
To be honest, I was surprised by the size of the build. Considering the number of files that are compiled, I expected the binary file to be large in size. The final output is around only 306KB, for comparison, size of binary file without any logic is 230KB. The inference time takes around 34ms, which is blocking other functions, so if you are using a single core ESP32 series such as C3 or C6, performance might suffer a bit.


Conclusion
While I originally wanted to explore the Edge Impulse with Rasynboard, due to circumstance I had to use ESP32 to complete the project. While it is disappointing, I am glad it turns out I can provide details on how to run ML models on edge using a ESP32 board which is easily affordable for everyone and can be replicated. Hopefully, the blog was educating as it was for me.
