


This is an update of the Raspberry Pi Internet Radio project I’m doing with my brother. My brother is making the cabinet. I am doing the electronics. Since the last blog we’ve elected to limit the physical portion of the User Interface to an encoder with switch that controls on / off and volume. With these simplifications it isn't necessary to write Python scripts and configuration can be done within MoOde. Full control can still be done with a smart phone, tablet, or computer.

Architecture
The MoOde architecture is shown in the diagram below. Audio sources are in light blue across the top. Local files, radio streams and UPnP have inputs to MPD in purple (more on that in a minute) as well as the ALSA (Advanced Linux Sound Architecture) DSP functions shown in light yellow. Spotify and Airplay also have access to the DSP functions. Bluetooth, LMS, and Roon Bridge are played directly from the configured audio device without DSP options.
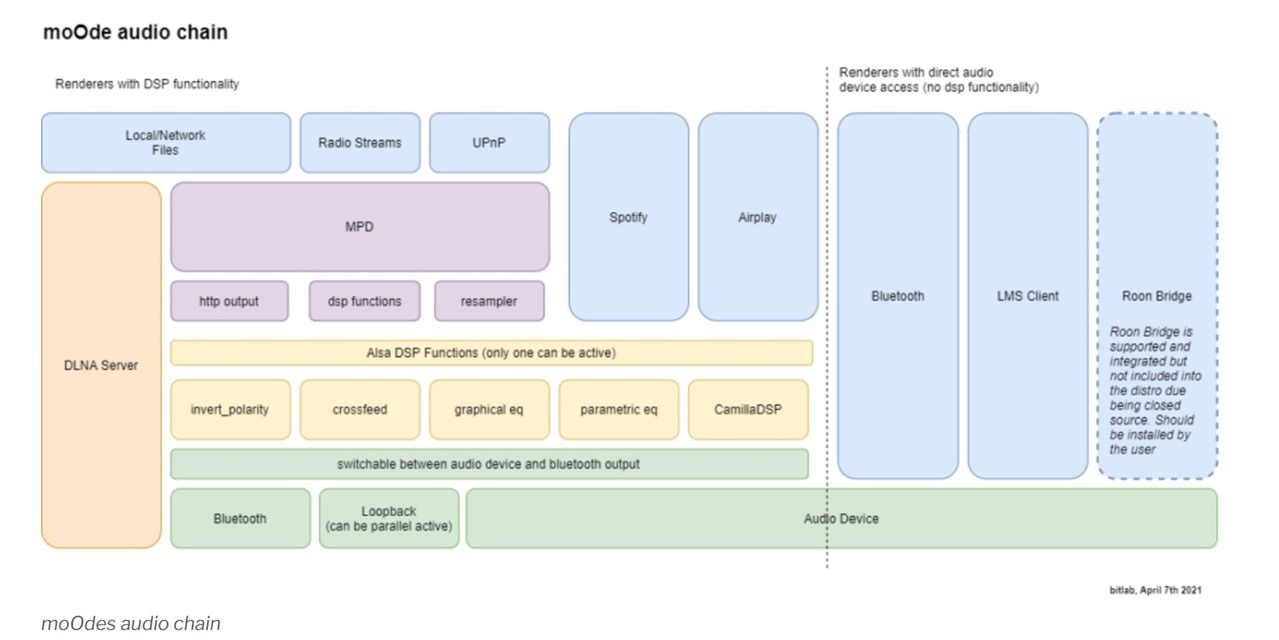
Credit: BITLAB’S BYTES https://www.bitlab.nl/page_id=872
As can be seen in the architecture diagram, the primary control of local files and internet radio streams is done through MPD (Music Player Daemon) which is included in the MoOde download. MPD is a server side application for playing music controlled by its network protocol. Control of MPD is done with mpc and available commands are given here: https://helpmanual.io/help/mpc/. They include methods for controlling volume, selecting files, etc. but not all commands seem to be available through MoOde.
A couple of methods were examined for incorporating volume control and on / off physical controls into our project before finally selecting an encoder.
USB HID Interface
USB HID (Human Interface Devices) codes are often built into keyboard devices. There are a limited number accessible in MoOde. One of my keyboards has mute, up volume, and down volume keys as shown in the image below.
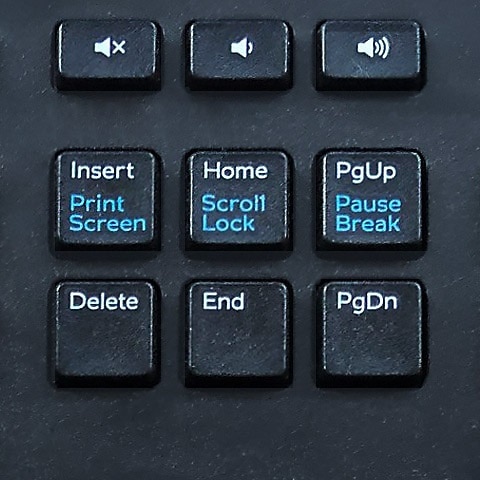
These keys can be mapped into MoOde and a keyboard or microcontroller with HID capability used for control. The MoOde forum has instructions for incorporating “consumer control” HID codes using CircuitPython here: https://moodeaudio.org/forum/showthread.php?tid=4888&highlight=circuitpython. A microcontroller or a momentary button switch can be used to turn the Raspberry Pi on and off using GPIO pins as described here: https://forums.raspberrypi.com/viewtopic.php?t=217442.
I tried it with my keyboard and it worked well but the functions available are limited.
MoOde SSH User Interface
The mpc commands can be issued through the MoOde user interface, web API, SSH command line, or from a script running on the Raspberry Pi. Below is an example that increases the volume one increment using the web API:
http://moode/command?cmd=vol.sh up 1
This is the same command using SSH located at m-> Configuration Settings -> Audio -> System -> Local Services -> SSH term server:

The second call without specifying the volume direction and amount returns the current setting. Using a Python script running on the Raspberry Pi and GPIO it would be possible to control volume and other functions.
This works well and gives access to mpc but since the most used functions are readily available from the MoOde user interface it isn’t something most users will access often.
MoOde Momentary Button Switch User Interface
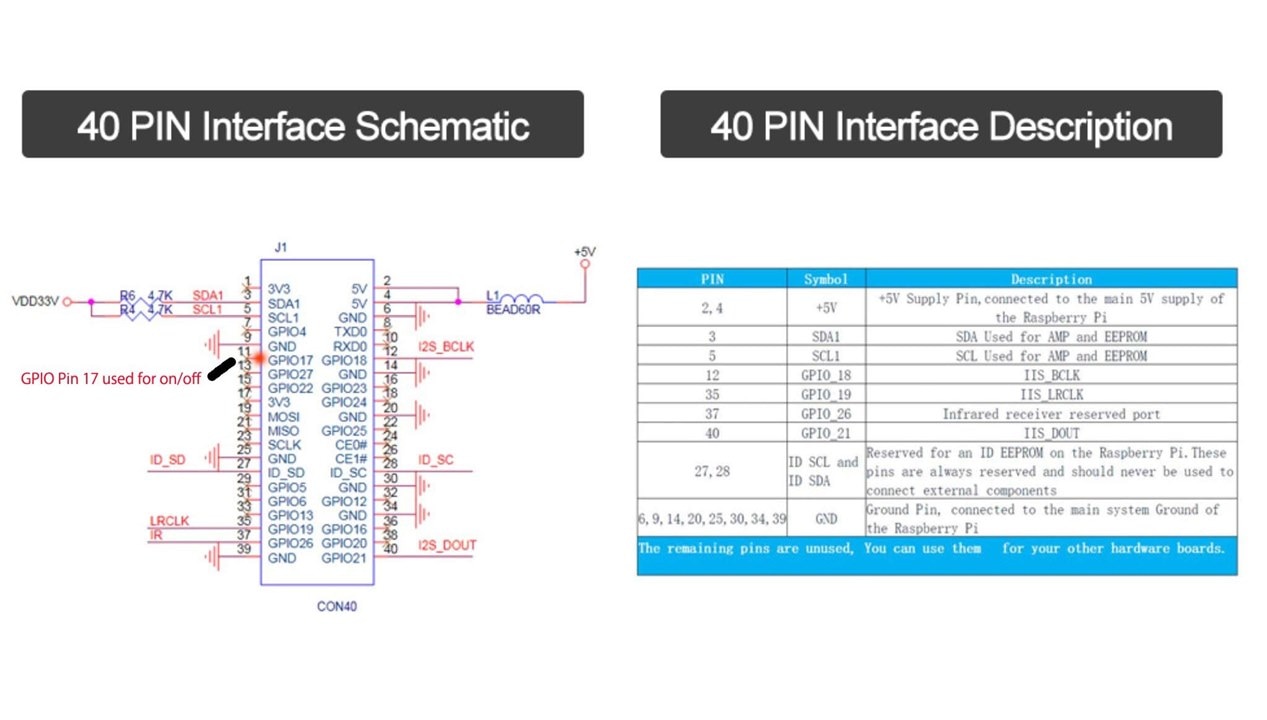
The diagram below shows the pins that are already in use by the amplifier hat I'm using as well as the pin set aside for an on / off switch.
The mpc commands can be setup in the user interface to work with momentary button switches as found at m-> Configuration Settings -> Audio -> System -> Local Services -> GPIO button handler. The pins use the BCM nomenclature and are pulled up. Pins 27 and 22 were arbitrarily selected to control volume up and volume down respectively.
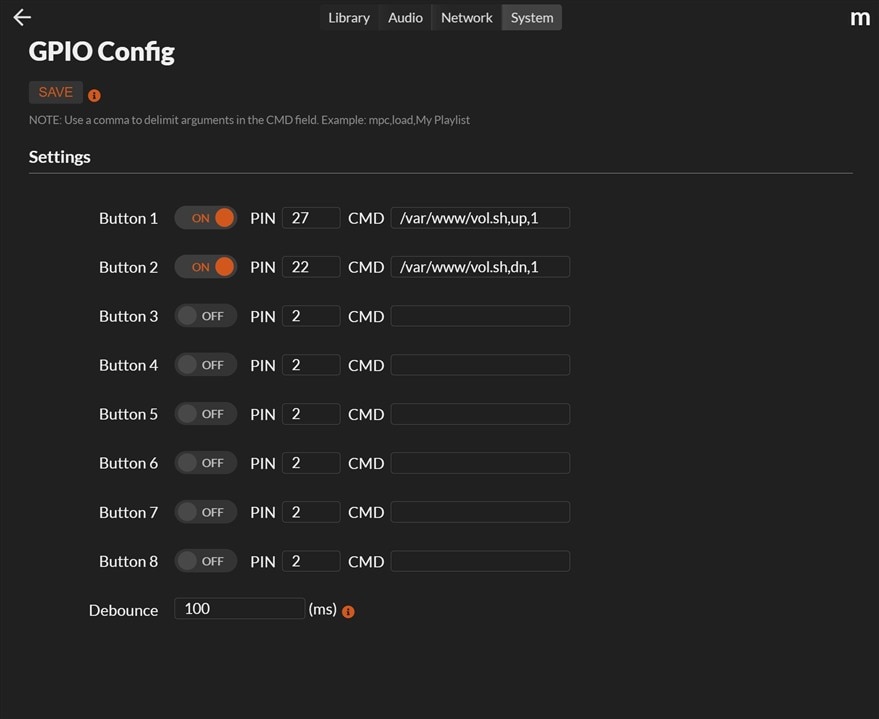
This worked as expected when tested by hooking up a dupont jumper to the desired pin and grounding it. However, it seems out of place for a radio from the period we are using for inspiration as most used a rotary potentiometer.

Encoder
This is the option we elected to use. Settings for rotary encoders to control volume are located at m-> Configuration Settings -> Audio -> Volume options -> Rotary encoder in MoOde:

I’ve left the default pin numbers at 23 and 24 for the moment and haven’t experimented with other settings.
The on / off switch in the encoder is wired to the Raspberry Pi and modifications made as described here.
Icing on the Cake
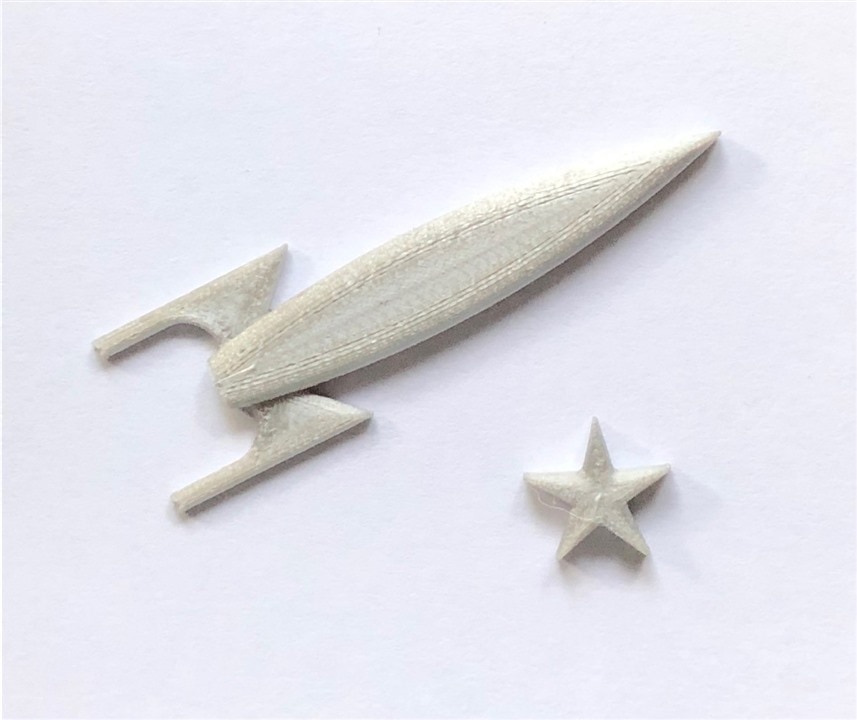
I made a first draft 3D print of the rocket and star that will be used for ornamentation on the front of the radio. I expect we’ll have to fill, sand, and paint them with metallic paint to get the desired effect.
Notes on Use
The instructions for adding a new radio station in the MoOde Forum are out of date. The new method is to go to the Browse by “Radio Stations” landing page and click on the “+” button upper left. Because of things like this I will put together a short user instruction sheet.
Next Steps
I plan to make a simple PCB for connecting the user controls to the Pi and then solder everything up before sending it to my brother.
Useful Links
MoOde Landing Page: https://moodeaudio.org/
Good Introduction to MoOde: http://techzle.com/stream-music-with-raspberry-pi-and-moode-audio
MoOdeForum, adding radio stations: https://moodeaudio.org/forum/showthread.php?tid=116
Mpc commands: https://helpmanual.io/help/mpc/
MoOde Forum, connect hardware buttons: https://moodeaudio.org/forum/showthread.php?tid=198&highlight=%40Cyanoazimin
MoOde Forum, control Moode with Python: https://moodeaudio.org/forum/showthread.php?tid=1164&page=2&highlight=Web+api
MoOde Forum, control volume from command line: https://moodeaudio.org/forum/showthread.php?tid=1059&pid=7698#pid7698
MoOde Forum, change volume with pot / encoder: https://moodeaudio.org/forum/showthread.php?tid=4610&highlight=Volume+control
Raspberry Pi Forum, power on / off button for Pi: https://forums.raspberrypi.com/viewtopic.php?t=217442
MoOde Forum, USB Consumer Controller with CircuitPython: https://moodeaudio.org/forum/showthread.php?tid=4888&highlight=circuitpython
Moode Architecture: https://www.bitlab.nl/page_id=872
MPD User’s Manual: https://mpd.readthedocs.io/en/stable/user.html
Top Comments
-

tomhank
-
Cancel
-
Vote Up
0
Vote Down
-
-
Sign in to reply
-
More
-
Cancel
Comment-

tomhank
-
Cancel
-
Vote Up
0
Vote Down
-
-
Sign in to reply
-
More
-
Cancel
Children