Table of contents
Abstract
Modify battery operated Christmas train engine so my 4 year old grandson can make it go and stop - all by himself.
Project
For many of us, there is a magical bond between Christmas and toy trains. One of the few déjà vu moments in my life was about a train set that I received for Christmas one year. My Dad got a Christmas train quite late in life – and was never able to part with it, even when he stopped decorating for Christmas. Looking back, it was probably something that he had wanted as a child - but he grew up dirt poor. And then he was too grown up for a kids toy. I'm glad that he finally got his train before he passed.
I wanted my grandkids to experience the magic of a Christmas train – so I bought one – before Dad passed – because he wasn't going to part with his. I asked – and got the Grumpy Cat look as my reply. Hey! Okay! I crossed the line. My train isn't as cool, but mine has a movie theme.
You know... the only problem with most of these trains is they are either ON or OFF. Sure there are model railroad sets, but you don't hand one of those over to a four year old. Or a six year old.
So the kids either just get to watch – BOO! No fun there. OR... you use the kind pictured above and you're trying to put an engine on the tracks while it's running – and then attach some cars. It's painful to watch – or participate in.
What? Put it on the track and then flip the switch?
GREAT PLAN! Have you ever tried that in real life with a small child? Even the older kids struggle.
Herein is the basis for my project. Add a Start/Stop switch to the affordable battery powered Christmas train that a small child can operate – with the train already on the tracks. And it needs to be minimally invasive so the Christmas train still looks like a train and not scrap wire on wheels. And it needs to run on 3VDC – since the train is powered by two D-cell batteries.
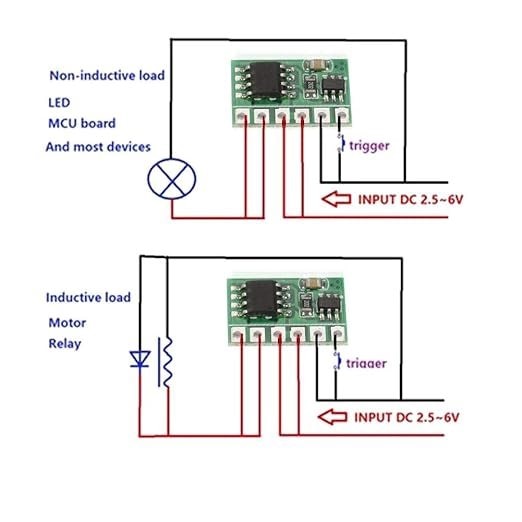
My initial circuit plan was to use a capacitive touch switch. Space is very limited within the train so I was trying not to go the “microcontroller and relay” route. While looking for a way to integrate the capacitive switch, I stumbled on a latching switch module based on the MEM2313 P-channel MOSFET. The capacitive modules that I have go high when touched and this module is momentary active low. PERFECT! Plan B!
If you watched the video, you already know that I went with magnetic reed switches - but to a small child... THEY are in control. How it is achieved is immaterial - to them.
BEFORE
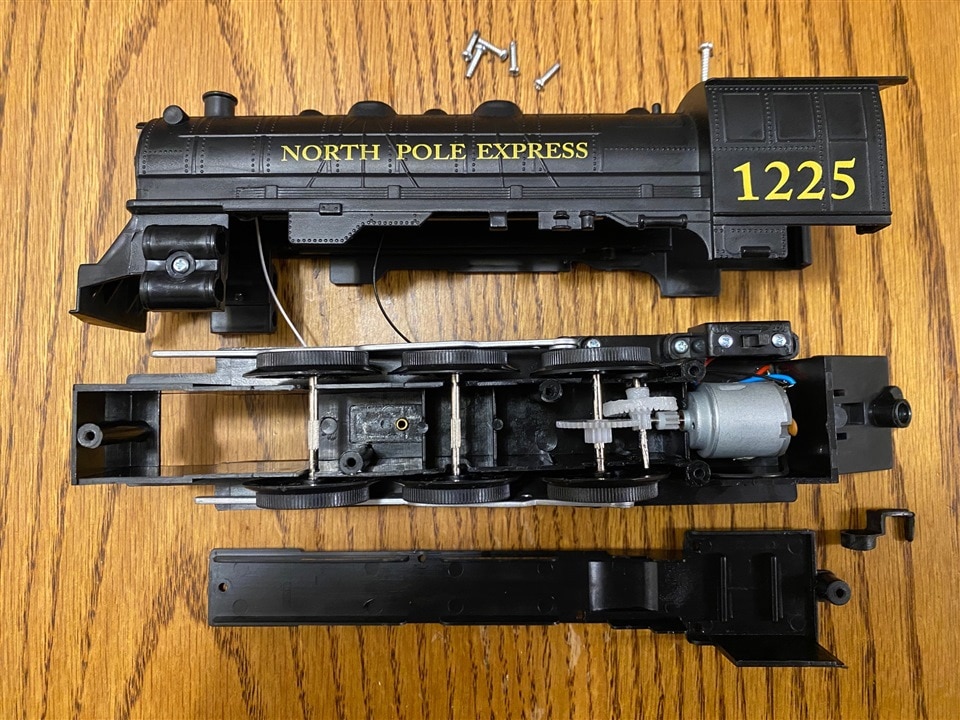
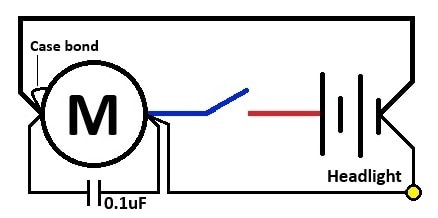
Pretty simple. Flip the switch and it runs.
DURING
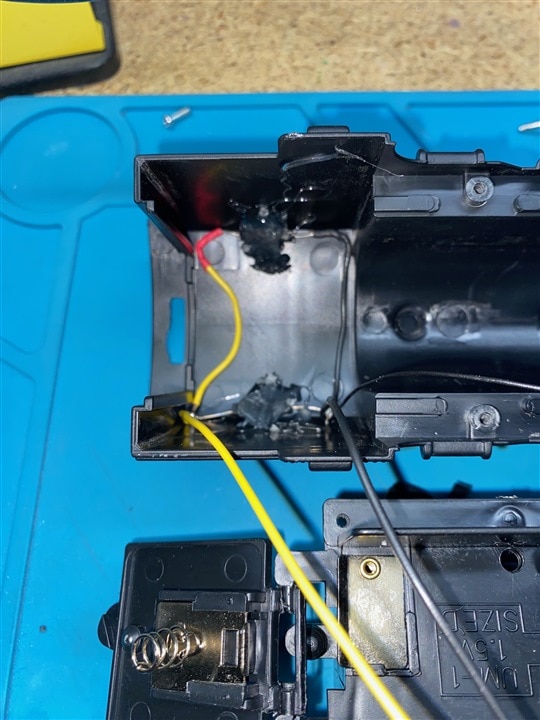
Parallel magnetic reed switches hot glued into the corners of the cab.
The control module. Dime added for scale. And its wiring diagram below.
FINISH PROJECT
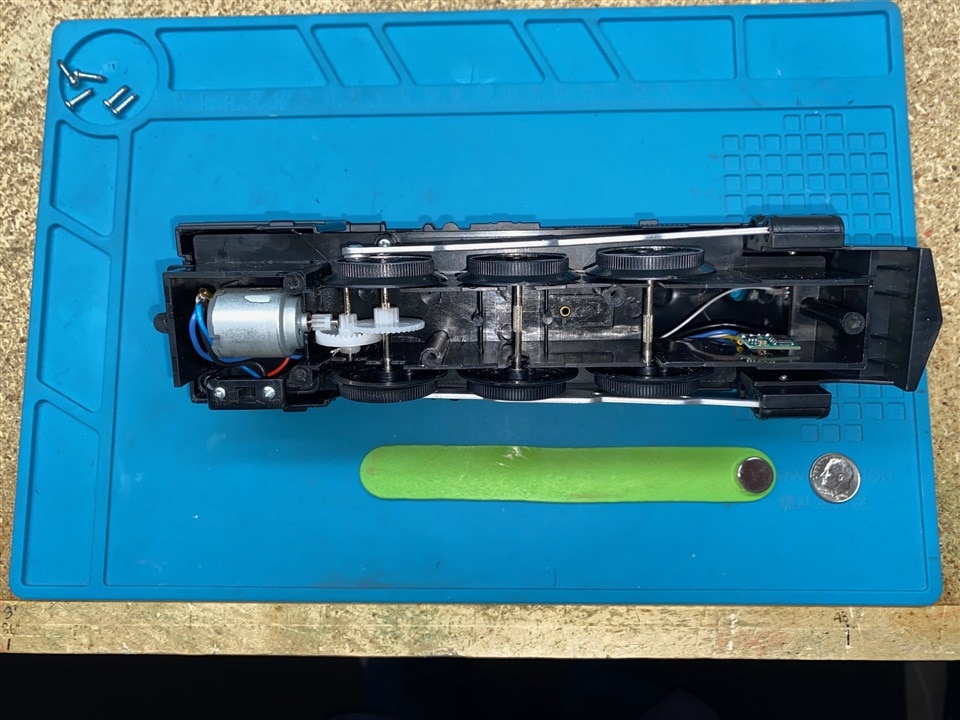
A few extra wires but still clean.
NEW SCHEMATIC
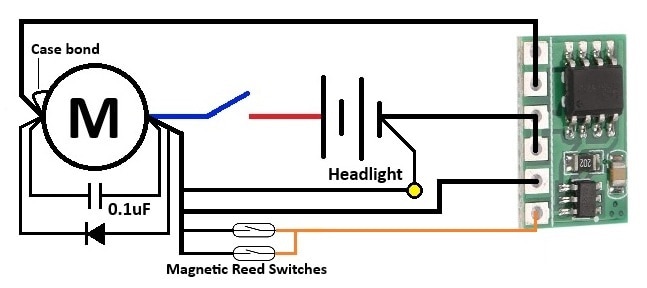
I added the diode for circuit protection. When the grandson pushes the engine across the floor, it doesn't matter that the switch is OFF. The light still lights - because the motor is also a permanent magnet generator.
And sometimes... everything with wheels is a Matchbox car.
CONCLUSION
I'm happy with the outcome but even more so with the shift to the magnetic switches. Whether it's a wand or a whacking stick, every kid gets a giggle out of smacking a moving toy. It's even more magical if it starts or stops doing something because of it. Think of it as entry level training for percussive adjustment repair techniques. For most of this train's life, it has been running into Hot Wheels, Matchbox cars, it's own cars... I don't think whacking it with a magnet on a popsicle stick is going to faze it.
Merry Christmas. Happy holidays. Happy New Year!
Attachments
References
Switch Module: https://www.amazon.com/dp/B07NYQRWSZ?ref=ppx_yo2ov_dt_b_fed_asin_title


Top Comments