


A few weeks back I was given the RIoTboard to play with. This is another single board computer with some fun stuff on it - Ethernet, USB, Camera interface, GPIO expansion including I2C, 2 onboard LEDs...yadayadayada.
The operating system initially on the device from the factory is Android: this causes some concerns with how accessible the GPIO is from Java since it's not commonplace for Java to be low level as well as high level, but as there are few completed tutorials for how to write an app which gets to that low level, I decided to stick with this operating system rather than shifting to Linux.
Before following these steps to get going, you're going to want to set up your IDE (I used a mix of Eclipse and Android Studio: Android studio has less tutorials and is currently Beta, but Eclipse crashes...a lot) for which Sagar has written a tutorial, and root your operating system.
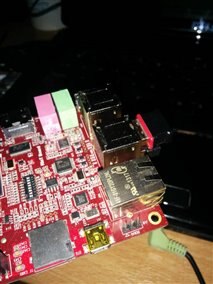
In order to test all this is working and light one of the onboard LEDs without making an app, we can enter this command into either the terminal emulator on the system, or from Putty or similar serial terminal using the serial debug - the debug interface is right up by the ethernet port:
the command:
su echo 1 > /sys/class/leds/user_led/brightness
Which should turn on the LED next to the power socket. To turn it off:
su echo 0 > /sys/class/leds/user_led/brightness
Now we'll go back to our app. Open up either eclipse or Android studio, create a new project & blank activity, then inside the OnCreate method add this line:
Process process = Runtime.getRuntime().exec("su -C echo 1 > /sys/class/leds/user_led/brightness");
Now when we come to run this on the RIoTboard, 2 things should happen:
- A pop up window will ask whether you want to grant root permissions
- After granting them, the LED closest to the power input should turn on.
The next phase of this project will be integrating Gmail with the app, so that we can create a notification light when a new unread email comes in.