


Introducing the Sequans Monarch Go Module
Recently, Avnet announced a new distribution agreement with Sequans for their Monarch Go modules and I wanted to see if I could get this working with some of the Avnet boards that I have around my office.
https://news.avnet.com/press-release/sequans-and-avnet-execute-global-distribution-deal
The module is larger than the modules you would purchase if you were integrating the LTE-M baseband module onto your own PCB but definitely smaller than some of the cabinet mounted modems that I have come across in the past.
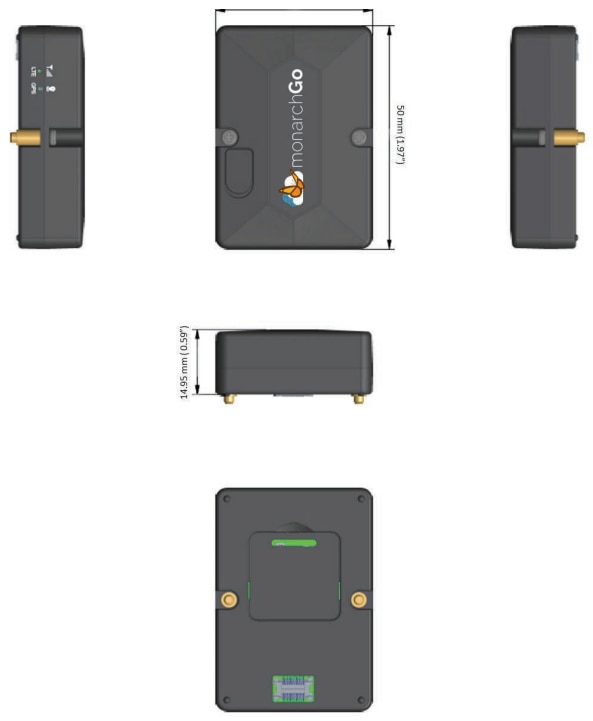
The reasoning behind the larger module is that it self-contains an antenna, the Sequans GM01Q module, and the enclosure for these is already certified for use on the Verizon network. This can be very helpful for community folks who are looking to avoid the costly lab testing fees and eliminate a large chuck of time-to-market by reducing effort and complexity of a board design. This approach removes the need to design and tune a cellular antenna as it embeds an optimized LTE antenna within the module.
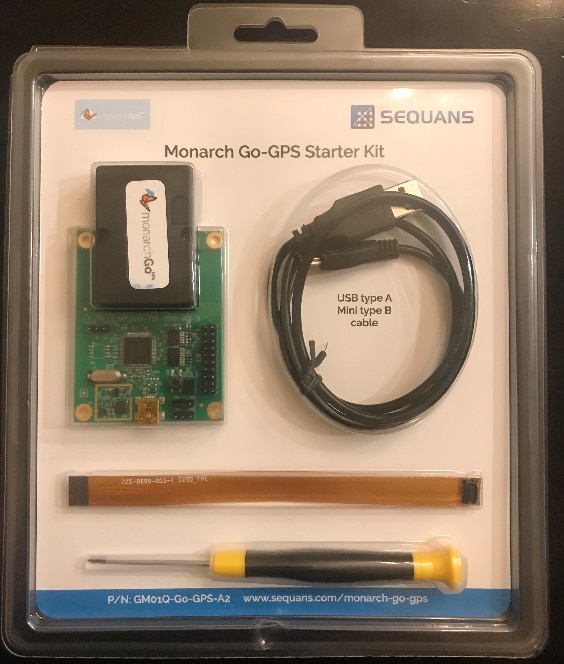
Thanks to the folks at Sequans, I was able to get my hands on a few of the Monarch Go Starter Kits (MONARCH-GO-STK) for testing in the lab. Here is what this starter kit looks like in its factory packaging:
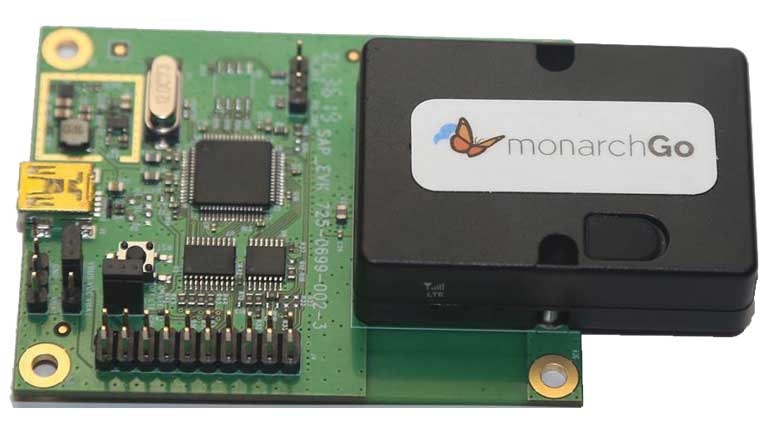
And here is a closeup of the evaluation board with the Monarch Go module already mounted where the USB-UART and supporting power supply circuitry is visible:
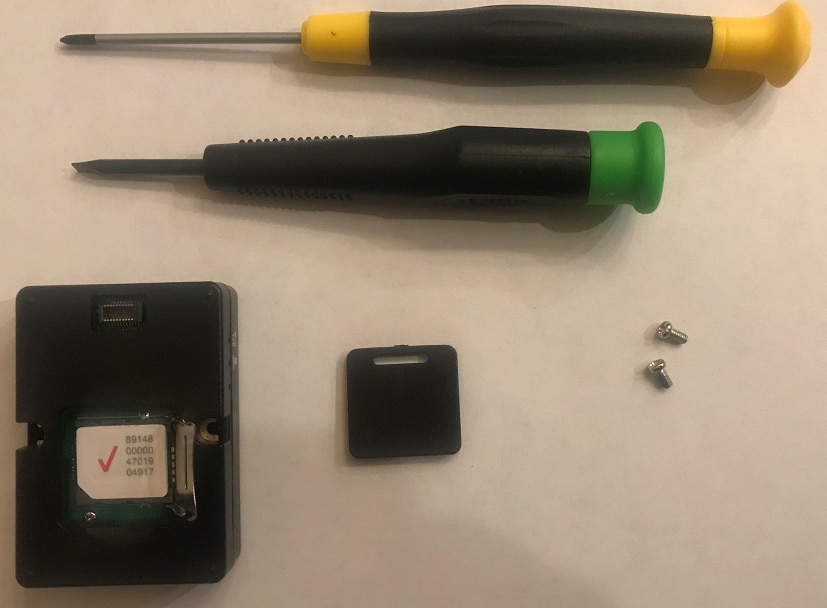
Using the included PH000 screw driver, I removed the 2 Phillips-head screws which mount the module to the green PCB so that I could gain access to the SIM card bay of the Monarch Go. This isn't a necessary step, but I was curious to see if there really was a Verizon SIM card installed in this kit. I used a 3/32 flat-head screwdriver to pop the plastic cover from the back of the Monarch Go module to reveal the SIM card cage:
Thanks to some notes that james.flynn passed along to me, I was able to get this device activated with Verizon ThingSpace and running with my Ubuntu 16.04 LTS laptop. I figured this is a good reference point to demonstrate that the LTE-M module is working, that it is properly activated/registered with Verizon, and successfully connected to the local LTE-M network before I begin experimenting with connecting up to other boards. I wanted to share some of my notes in case this might help others save some time if they are looking to go down the same path.
First Signs of Life
The instructions on the back of the Monarch Go Starter Kit directed me to sign up for a Verizon ThingSpace Account and activate the SIM card (some very reasonable activation and monthly service fees will apply) that comes pre-installed in the Monarch Go:
https://thingspace.verizon.com/service/connectivity-for-developers/
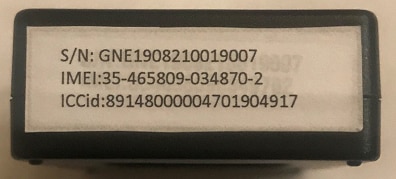
After signing up, I registered my device using the IMEI and ICCID numbers from the sticker on the side of the module.
I quickly got an email from Verizon indicating that my new Monarch Go device was registered with ThingSpace.
I used the included USB-Mini cable to connect the green Starter Kit PCB to my Ubuntu 16.04 laptop. I already had minicom installed but if you don't already have it (or another terminal application) you can install minicom under Ubuntu using the following command:
sudo apt-get install minicom
I could see from dmesg that a new device was being enumerated as /dev/ttyUSB0 so I connected to it with the command:
minicom --device /dev/ttyUSB0
After a few seconds, here is what I saw from the terminal:
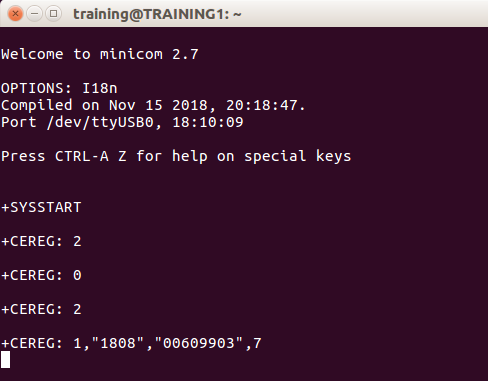
Looking the +CEREG command up in the AT Commands Reference Manual for the Monarch Go, this looks like a good sign since the last message shows that the device is registered on its home network.
If you see only the +CEREG: 0 or +CEREG: 2 messages, then the device is not yet properly activated on the Verizon network.
Adding PPP Infrastructure to Ubuntu
The first steps are to install Point-to-Point Protocol support under Ubuntu by installing the ppp related packages. I did this with the following commands:
sudo apt-get update
sudo apt-get install ppp
Next, I created a new file named ppp0 file in the /etc/network/interfaces.d/ folder with the following contents:
auto ppp0
iface ppp0 inet ppp
provider sequans
This new ppp0 file creates an automatic ppp network interface connection by utilizing the Seqans provider information that gets setup in a later step.
Next, I created a new file named sequans in the /etc/ppp/peers/ folder with the following contents:
# /etc/ppp/options
#
# Sequans Monarch Module PPP options file
#
# To quickly see what options are active in this file, use this command:
#   egrep -v '#|^ *$' /etc/ppp/options

# tyname - Use this serial port to communicate with the Monarch. The string "/dev/" is prepended to ttyname to form the name of
# the device to open.
/dev/ttyUSB0

# speed - a decimal number is taken as the desired baud rate for the serial device.
115200

# Use hardware flow control (i.e. RTS/CTS) to control the flow of data
# on the serial port.
crtscts

# Don't agree to authenticate using CHAP.
-chap

# Increase debugging level (same as -d).  If this option is given, pppd
# will log the contents of all control packets sent or received in a
# readable form.  The packets are logged through syslog with facility
# daemon and level debug. This information can be directed to a file by
# setting up /etc/syslog.conf appropriately (see syslog.conf(5)).  (If
# pppd is compiled with extra debugging enabled, it will log messages
# using facility local2 instead of daemon).
debug

# Disable the defaultroute option.
defaultroute

# With the dump option, pppd will print out all the option values which
# have been set. This option is like the dryrun option except that pppd
# proceeds as normal rather than exiting.
dump

# Don't use the modem control lines, pppd will ignore the state of the CD (Carrier Detect) signal and will not change the state of the DTR
local

# pppd should create a UUCP-style lock file for the serial device to ensure exclusive access to the device.
lock

# Do not require the peer to authenticate itself. This option is privileged.
noauth

# Don't detach from the controlling terminal. Without this option
nodetach

# the peer will supply the local IP address during IPCP negotiation (unless it specified explicitly on the command line or in an options file)
noipdefault

# Ask the peer for up to 2 DNS server addresses. The addresses supplied by the peer (if any) are passed to the /etc/ppp/ip-up script in the environment
# variables DNS1 and DNS2, and the environment variable USEPEERDNS will be set to 1. In addition, pppd will create an /etc/ppp/resolv.conf file containing
# one or two nameserver lines with the address(es) supplied by the peer.
usepeerdns

# specify command for pppd to execute by using chat before starting
# PPP negotiation. chat provides a way to send arbitrary strings to the
# modem and respond to received characters.
connect "/usr/sbin/chat -t6 -f /etc/chatscripts/connect"

# after pppd has terminated the link, issue command to the modem to cause
# it to hang up.
disconnect "/usr/sbin/chat -t6 -f /etc/chatscripts/disconnect"

# ---<End of File>---
This new sequans file specifies all of the options that will be pushed into the new PPP session once it is intitiated.
Next, I created a new file named connect in the /etc/chatscripts/ folder with the following contents:
# This is the chat script used to dial out to the Sequans Module
#
#ABORT "NO CARRIER"
TIMEOUT 30
ABORT ERROR
"" AT
OK AT+CGDATA="PPP",3
CONNECT ""
This specifies the AT commands that are used to establish the network PPP connection.
Next, I created a new file named disconnect in the /etc/chatscripts/ folder with the following contents:
# This is the chat script used to hang up the Sequans Module
#
"" "\d\d\d+++\c"
This specifies the string sent to the modem in order to disconnect the PPP connection.
Finally, I edited the /etc/network/interfaces file to add the following lines:
# Include files from /etc/network/interfaces.d:
source-directory /etc/network/interfaces.d
auto ppp0
Now that the Ubuntu infrastructure is setup, I will show how to use these new settings to initiate the PPP connection and get the new interface up and running in the next section.
Connecting to the Internet
The PPP protocol session can be initiated by bringing up the ppp0 interface using the following command:
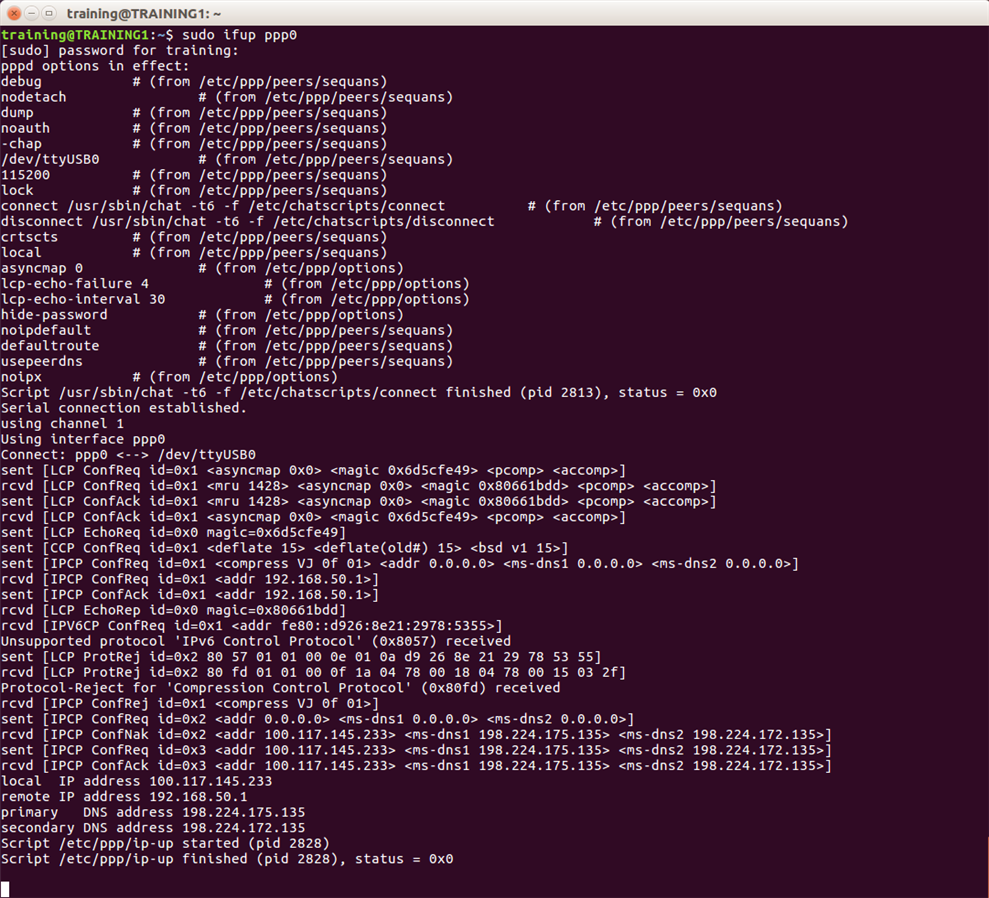
sudo ifup ppp0
With a bit of luck, the connection session will be negotiated successfully, an IP address assigned, and DNS servers identified:
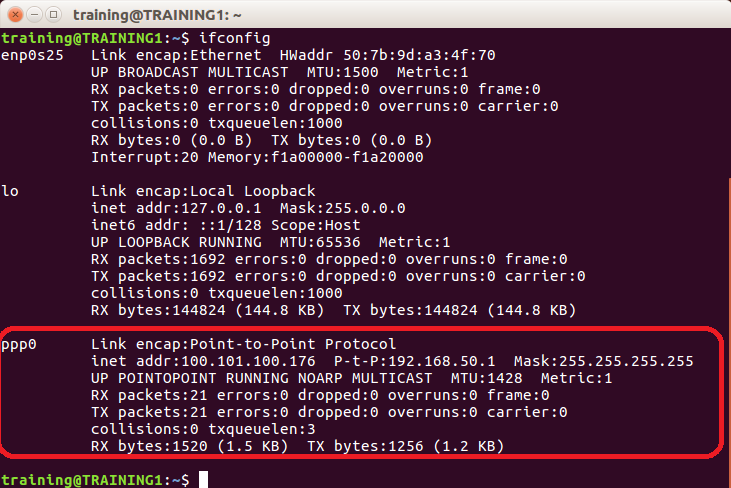
Using another terminal window, I can use ifconfig check to see that the interface is indeed up an IP address was assigned (and no other adapters are active):
Now I am able to use the new connection for accessing resources on the Internet for my IoT applications. 

Troubleshooting
I don't have a lot of experience troubleshooting with this modem or pppd yet, but I did notice the following statement in the provider file:
The packets are logged through syslog with facility daemon and level debug. This information can be directed to a file by setting up /etc/syslog.conf appropriately (see syslog.conf(5)). (If pppd is compiled with extra debugging enabled, it will log messages using facility local2 instead of daemon).
I checked on my Ubuntu machine and /etc/syslog.conf file is not present. After a bit of research, I found that Ubuntu uses /etc/rsyslog.conf instead. I wasn't able to digest the documentation sufficiently to look at any of the debug information output to logs and I didn't see anything obvious in /var/log/ folder so this will have to remain an enrichment task for now.
If anyone finds any notes to share on this debug capability, it would be greatly appreciated if you could share your results with the Element14 community!
Conclusion
I don't have a whole lot of experience with a wide variety of LTE modules, but this one seemed rather painless to get up and running quickly and the monthly charges for the LTE-M service are not outrageous for getting a Proof-of-Concept IoT design up and running.
Some folks at Avnet said it would be worthwhile showing how to use the Sequans Monarch Go with one of our Ultra96-V2 Product LinkProduct Link Single Board Computers, so I sent some time doing a quick write-up on this for Part II: Networking with Sequans Monarch Go - Part II
EDIT: Also, check out this tutorial that james.flynn put together on sending IoT data through Monarch Go using a Python application: Sequans Monarch-Go Python Example
Looking around my office, I also have an Avnet MaaXBoard handy that I can experiment with for the next part. Anything else you think I should try to connect up next for Part III of this series?

