


About a month ago I saw an ad for the FNIRSI SAG-55 Intelligent Hot Air Gun, so I asked if anyone in the community had any experience with this device (Does anyone have any experience with the fnirsi sag-55 intelligent 550w hot air-gun?) I did not find anyone that had any direct experience, but a few members were equally interested (michaelkellett bought one and wrote a blog on it). I have had some great experience with FNIRSI products like the DSO-TC2 (component tester, handheld scope) and the LCR-ST1 (Mini Smart Digital Tweezer LCR SMD ESR Tester). Given the comments and my personal experience with the brand, I went ahead an ordered one (the Pro model with the auto cool feature). It arrived about week later, but not too long before I was going on vacation, so it ended up sitting in the box for a while. Note: While I was at it, I also ordered a WMT-10, wood moisture meter and a WD-02, wall detector which I also need work with a bit.
This past weekend, while working on a build of 10 boards for a client, I decided to pull it out and try it on the SMD NeoPixel LED on these boards. I was pretty impressed with the device but quickly realized that there is a lot that I needed to learn about hot air soldering.
Many years ago, I had used a benchtop hot air soldering station at work to mount a bunch of large pin count, fine pitch TQ devices on a prototype that I was building. The job was made much easier for me as some of my co-workers had used this setup before and had already picked out solder and had pretty much determine the setting that worked best. This was a great first-time experience. This time around, it was my turn to figure out the settings.
About a year ago, I started thinking about hot air soldering. I had found some interesting liquid solder that was advertised as being thermally stable (not needing refrigeration). I had bought some but never got around to finding the right hot air system, so it sat in my soldering supplies bin. The product, CHIPQUIK TS391LT, is a no-clean Sn42/Bi57.6/Ag0.4 solution that came in a 15g Syringe. So, with a hot air gun and solder, it only made sense to give them both a try. The solder specification showed a reflow profile with a max temperature of 165°C (329°F), so I thought I would try 350°F. I crudely applied some of the solder paste to the PCB pads and placed the NeoPixel part on the PCB. I played around a bit to try and hold the part in place while started applying hot air to the PCB and the part. Initially not much happened so I increased the heat slightly and continued to try soldering. Eventually the solder began to ball up and form a connection to the NeoPixel pins.
I did this test while I was trying to complete the 10 boards that my client need, so I did not stop to take pictures or document my attempts. The good news is that the 10 NeoPixel LEDs all mounted correctly on the first try. This was a great improvement as with hand solder with an iron, I usually needed to rework/replace a few LEDs on each lot of 10 PCBs. The bad news was that I did end up make a few other assembly errors during this build. I mounted one SMD device, an SSOP20 device, turned 180° and swapped an adjacent resistor and capacitor. The SAG-55 was able to help out. I was able to desolder the SSOP device successfully, without lifting any traces (although I did manage to lift one pad while I was removing excess solder with my iron and solder wick). The two passive components also removed easily once I dialed in the right temperature (the solder I used to hand solder these parts was listed to have a melting point of 218°C or 424°F).
With my devices sent off to my client, I noticed that I had one of these same boards from a prior build that had failed, but I had not diagnosed or attempted to repair the module. A quick ohming of the contacts on the LED revealed that there was a short from the input to ground as the result of a solder bridge or a mis-aligned part. The plan quickly formed to use the FNIRSI to de-soldering the part and soldering a new component in place. Here is a short video of the de-soldering process:
With the part removed, there was a bit of excess solder on the pads for mounting the NeoPixel. Here are before and after pictures of the pads:
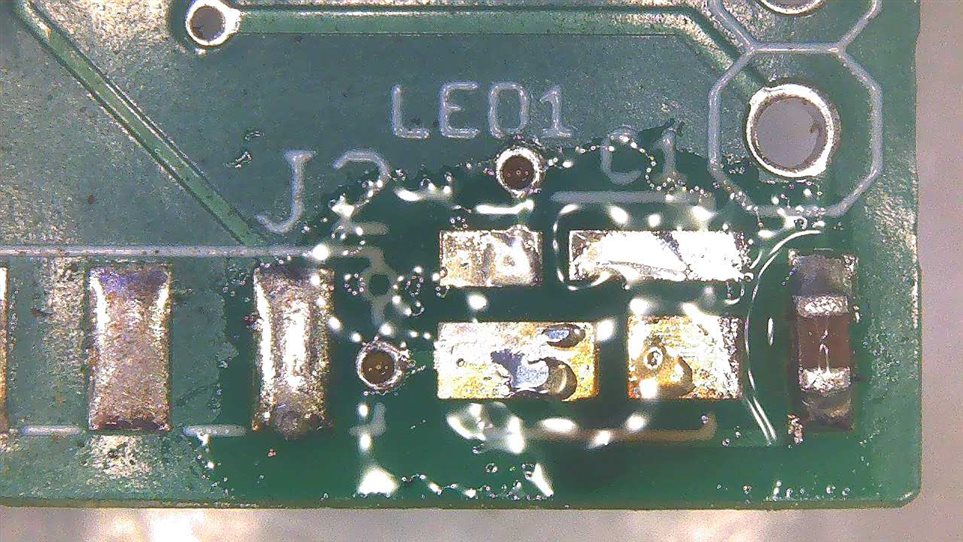
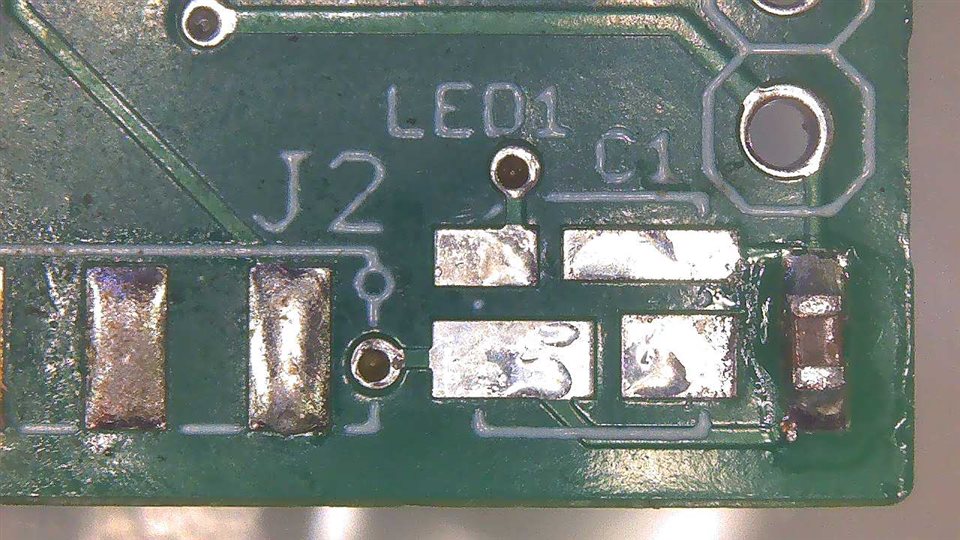
The next step was to apply some solder paste to the NeoPixel pads. This is in no means a clean approach. I just smeared on some paste to each of the pads.
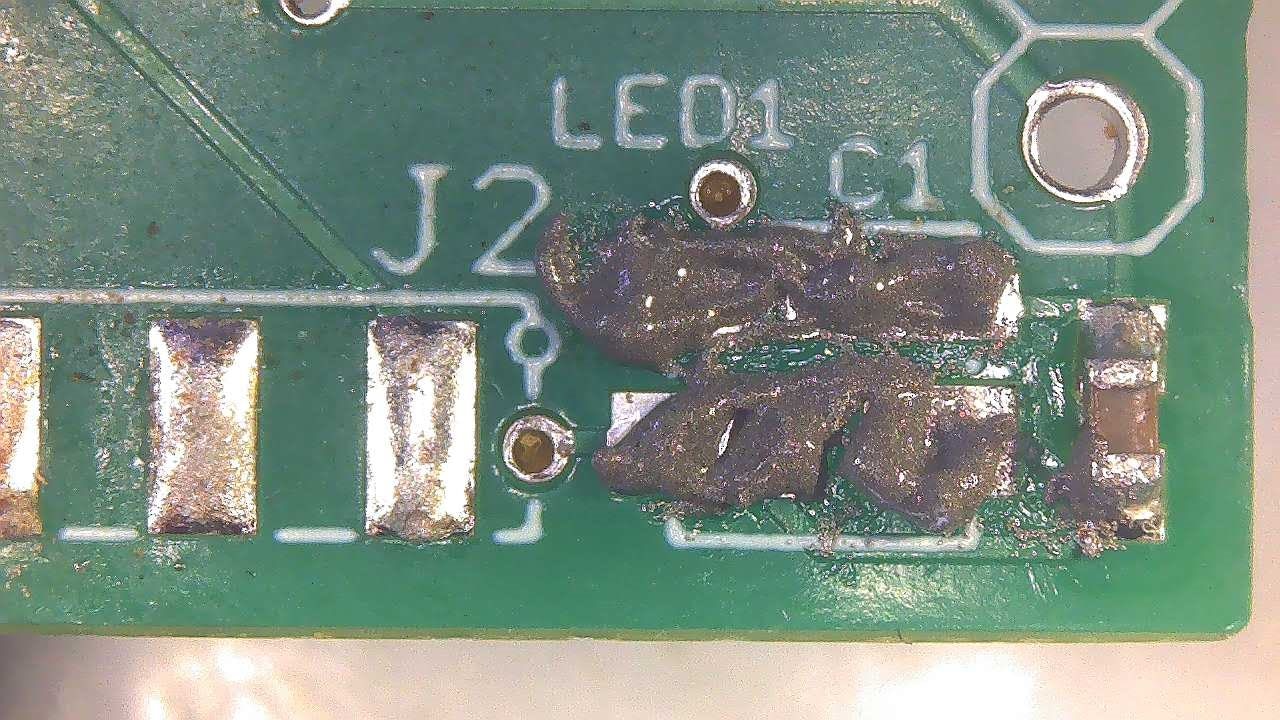
Next, I placed the new NeoPixel onto the solder paste:
I then soldered the new part to the board, as shown in the following video:
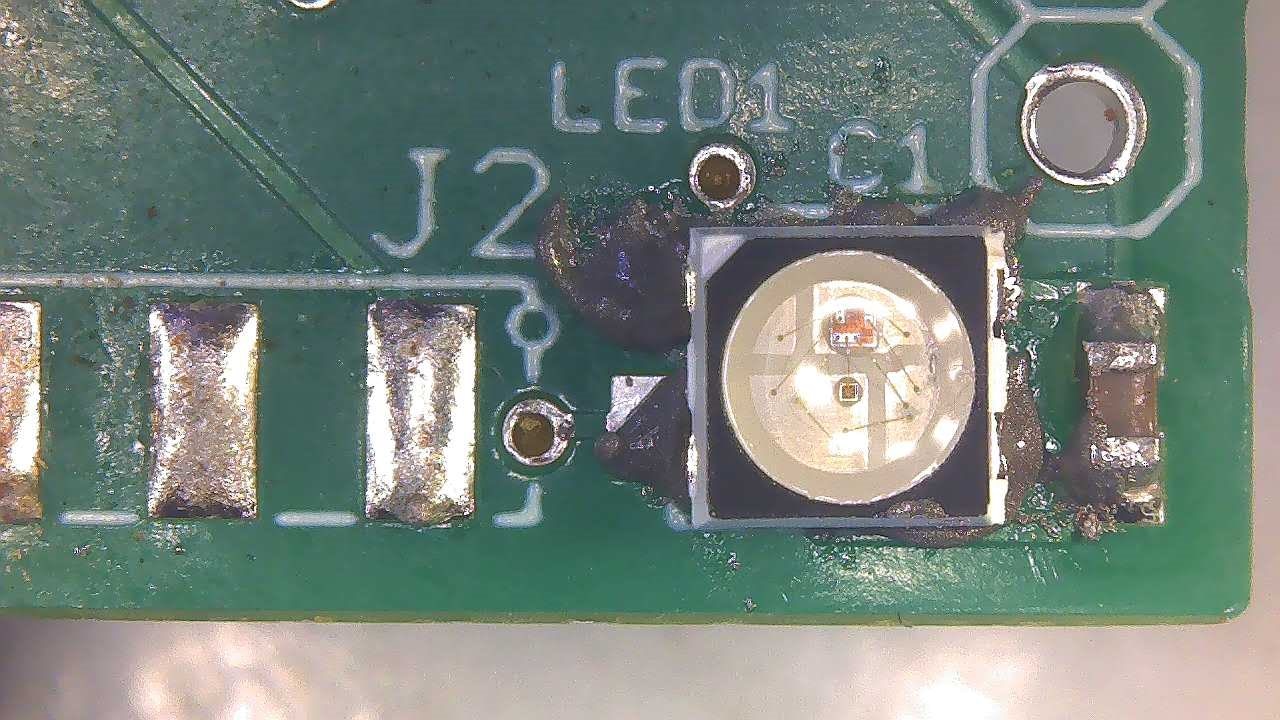
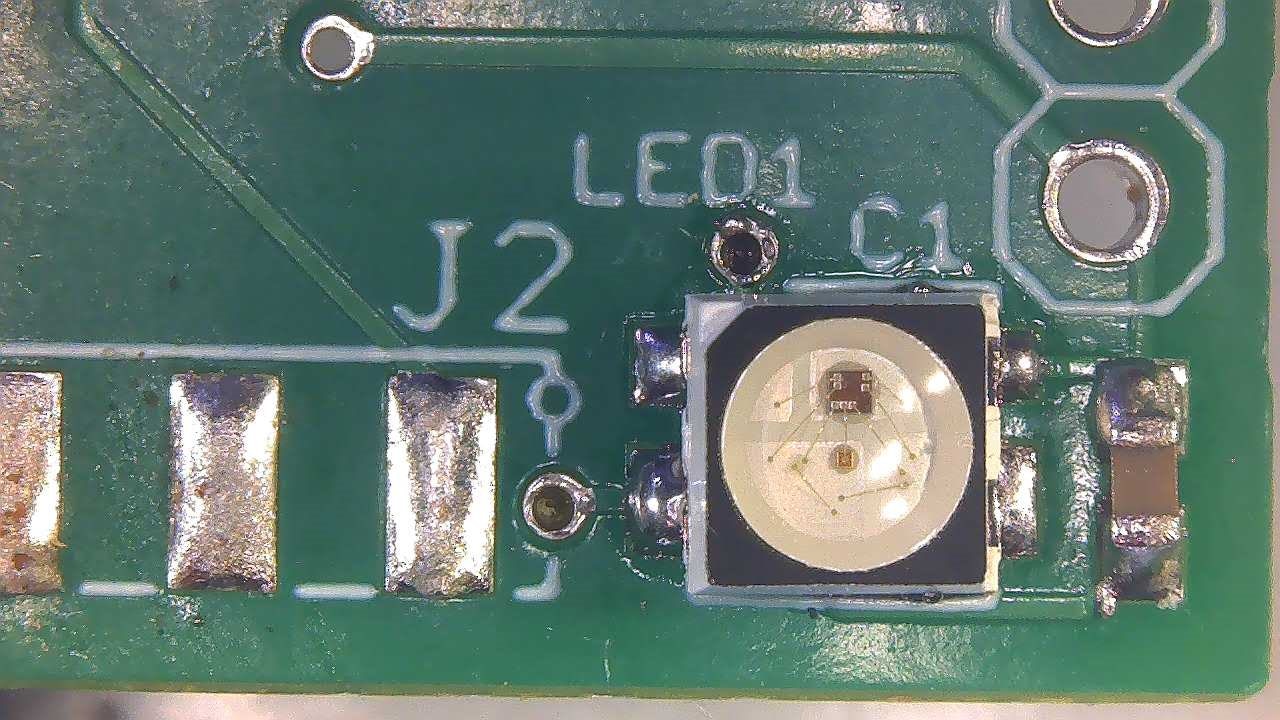
After soldering the part into place, I did a quick cleanup of the part (see below). While not apparent in the image, it seems as if some residual solder on the pads (from the original hand soldering), might not have melted enough to flow with the hot air, has caused the LED not to have settled flat on the board. As a result, the LED is slightly tilted (left hand side slightly lifted). Next time, I might need to clear the pads better.
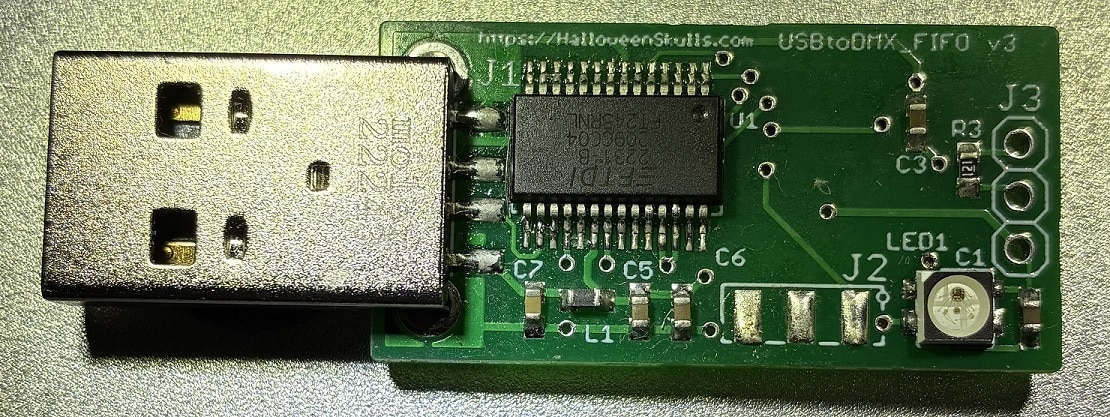
The board that I was working on is a USB to DMX adapter that I build for a client who uses them for Halloween props. This board (shown below) is a USB device, using the FT245R chip for the USB interface. This device has a bidirectional FIFO interface that facilitates a simple and clean USB read and write process. An ATtiny3226 chip interfaces to the FT245R to receive and send packets from/to the connect PC. The board also contains a RS422/485 transceiver as a DMX transceiver and a NeoPixel RGB LED.
This board is an example of how I use an LED to help me diagnose/debug a board (see dougw post, "As a designer, how do you make choices?") as well as to show activity to the user. Coding in 'C' it takes about 18 lines of code (most of that is ASM instructs to set a port bit, clear a port bit or NOP to wait) to send the serial string to the NeoPixel, which I do with a bit-banged IO port (pin). There is an additional overhead to build the string, which is 3 lines of code for each color intensity change. The programming string is 24 bits, for the 3 LED intensities, GRB ordering, 8 bits each. The timing is pretty critical, so the code must run with interrupts off (or at least make sure that the code can run without being interrupted). A 'zero' is .2 to .4 us high time, while a 'one' is .58 to 1.0 us.
In diagnostic mode, I can change the color of the LED to indicate the various events occur and/or certain areas of the code are reached. I can use the NeoPixel programming string as a scope input, along with other board signal to help debug board function. In operational mode, the LED can be used to show state and activity.
This device utilizes a custom bootloader software package to facilitate firmware updates. If the board is in the bootloader mode, the LED is steady blue. During firmware updates the LED toggles between Green and Off to indicate good programming packets and steady Red if a bad programming packet is received. When the device is operating in the DMX App mode, the LED toggles between Green and Yellow to indicate activity and various packet error conditions.
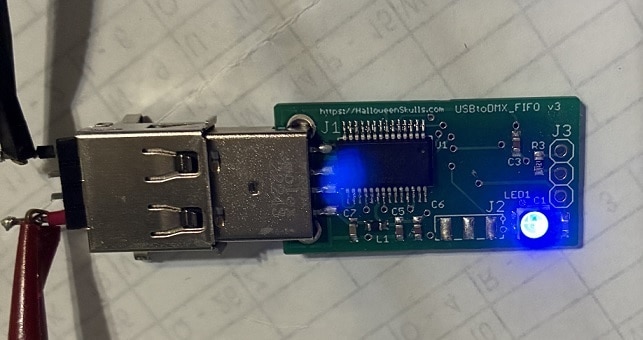
Here is an image of the repaired board, powered up during a quick current check using a current limited power supply to power the board. The board is in the bootloader mode (steady Blue LED), as I removed this board from the lot, and replaced with a freshly built board. I will need to finish the bring up procedure on this board (configuring the USB part and download the DMX app on to it) before putting this part into service.
Conclusions:
My first impressions of the FNIRSI SAG-55 Intelligent Hot Air Gun are extremely positive. While I found the UI difficult to deal with initially, I quickly learned what I needed to know and things worked well. I really like the 'Pro' device handle holder, with the automatic cool down and sleep functions. I found the ergonomics to be very comfortable in both the size and weight of the hot air gun handpiece, which I appreciate, I am sure that the use of an external power supply really helped. The external power supply was quite compact and fit very nicely under the base of my microscope boom stand base, which helped to keep my soldering workstation less cluttered, saving some precious space.
I was a little disappointed that there was not a hard on/off switch as I would not want this device to accidently get turned on and start spewing hot air. To address this issue, I have plugged the device into a plug strip with an on/off switch so I can turn if off when I am done using it.
The device heated up quickly and also cooled down quickly. The display, while operating, contained all of the useful information (temperature set point, actual temperature and air speed) and allowed the adjustment of two setup parameters during use. Again, the interface was a little difficult to toggle between modes, but still usable.
I still feel that I will need to experiment more to better match the temperature and air speed setting for different solder types and board types (size and copper flooding may effect the time need for the solder to flow). As mentioned by shabaz I might need to look into a board warmer to help with larger boards.
Another area that I will need to look further into is different solder types. While I am very happy with not needed to refrigerate my liquid solder (CHIPQUIK TS391LT), I was not very happy with the flux formula, which was listed as no-clean, but left a black and sticky mess behind.
Thanks for reading along and sorry if this was a little too long and/or convoluted story.
-

Jan Cumps
-
Cancel
-
Vote Up
0
Vote Down
-
-
Sign in to reply
-
More
-
Cancel
-

genebren
in reply to Jan Cumps
-
Cancel
-
Vote Up
0
Vote Down
-
-
Sign in to reply
-
More
-
Cancel
Comment-

genebren
in reply to Jan Cumps
-
Cancel
-
Vote Up
0
Vote Down
-
-
Sign in to reply
-
More
-
Cancel
Children