


Just around Christmas-time, element14 ran a RoadTest entitled Internet of Holiday Lights. I was a bit busy around that period, with overseas conferences to worry about, so I never bothered to apply for the RoadTest. Alas, I didn't end up missing out, because doctorcdf sent me an e-mail, letting me know that I was going to get a little bonus with my other RoadTest - I would be receiving the Arduino Uno, Arduino Yun and Infineon RGB LED Shield as well for my own tinkering. I'm so very lucky to have element14 supporting me - thanks guys!
The main benefit of this arrangement was that I could take things a little easier - the RoadTesters had a deadline to meet, and I didn't. Instead, I'd spend some spare time reviewing the products and blogging them here, on my element14 blog. I thought that would be the best arrangement, seeing as my workload is very unpredictable. So, lets just call this an "Off-RoadTest".
The Parts
The Internet of Holiday Lights bundle consisted of the Arduino Uno, Arduino Yun and Infineon RGB LED Shield.
Arduino Uno

The Arduino platform has been very instrumental in introducing people into the world of embedded microcontrollers. They made the Atmel Atmega 328P very popular and accessible, by producing an inexpensive prototyping board which contained everything necessary to program and interface with the microcontroller. Additionally, it came with an Integrated Development Environment (IDE) which was open source, and based on the Wiring language, which is very much C-like. This very much reduced the learning curve and cost - there was no longer a need to be familiar with AVR-ASM, or invest in programmer devices which would easily cost more than the development board itself.
I am a seasoned Arduino user, and it has been quite instrumental in my own tinkering. Even for making basic interfaces to the outside world, dumping EEPROMs or for generating signals, it's an indispensable part of my toolkit. Having used the Arduino since the Duemilanove, the general recipe hasn't changed much. The initial Uno R1 introduced a second Atmega 8U2 to replace the FTDI USB to Serial interface, to allow for more flexibility in the USB interface. The Uno R3 retains the socketed DIP Atmega 328P, and the shield pin-layout (including the odd spacing on the top row), although the they added I2C pins onto the top row, IOREF to the bottom row, replaced the Atmega 8U2 with a 16U2, improved the reset circuitry and moved the reset button to a more accessible location. The readability of the silkscreen design has been improved as well.
It's the most "general purpose" and most-compatible board in the Arduino line-up with most shields targeting this particular board, and a very reasonable price tag, which makes it quite desirable to own.
The board itself comes packed inside a matte-finish cardboard box, adorned with a sketch-up of the Arduino Uno PCB which is inside.
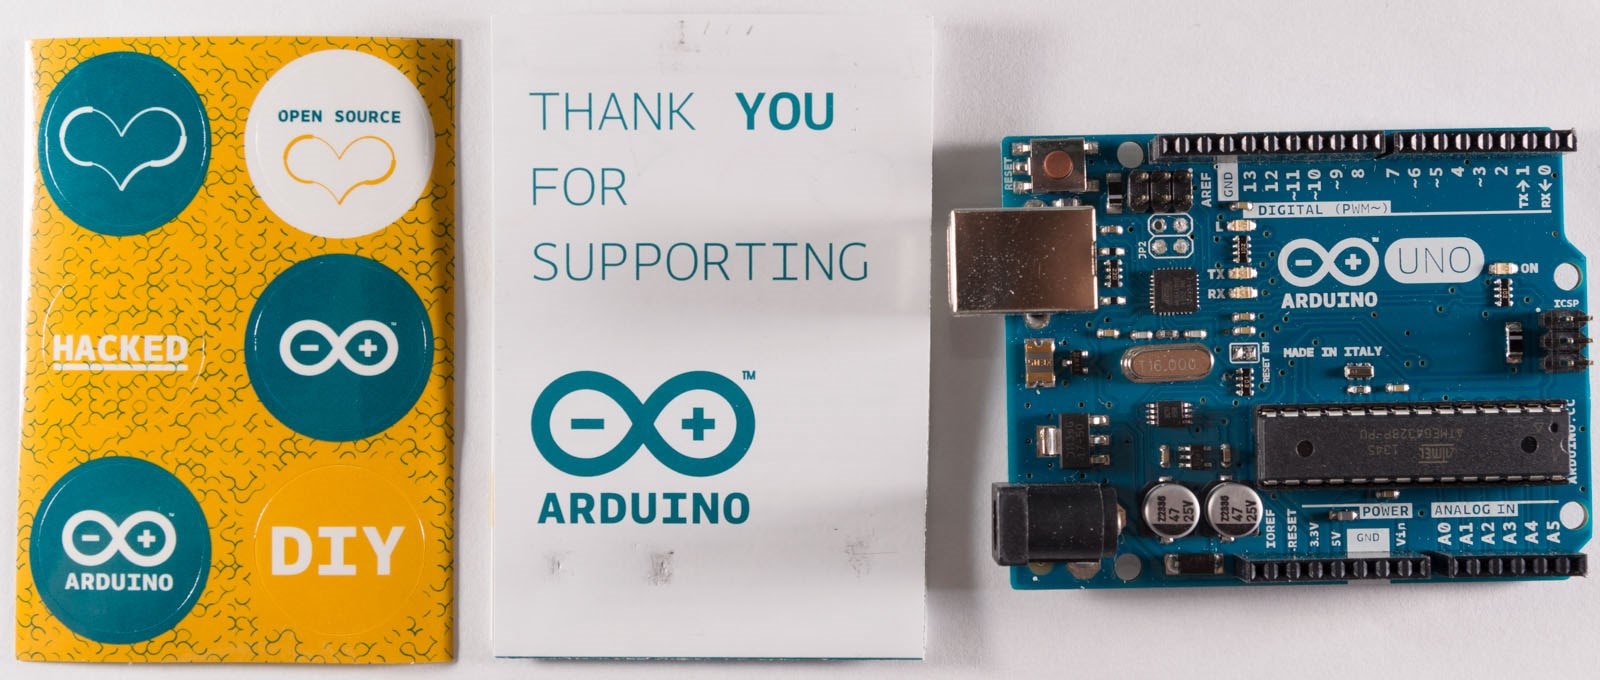
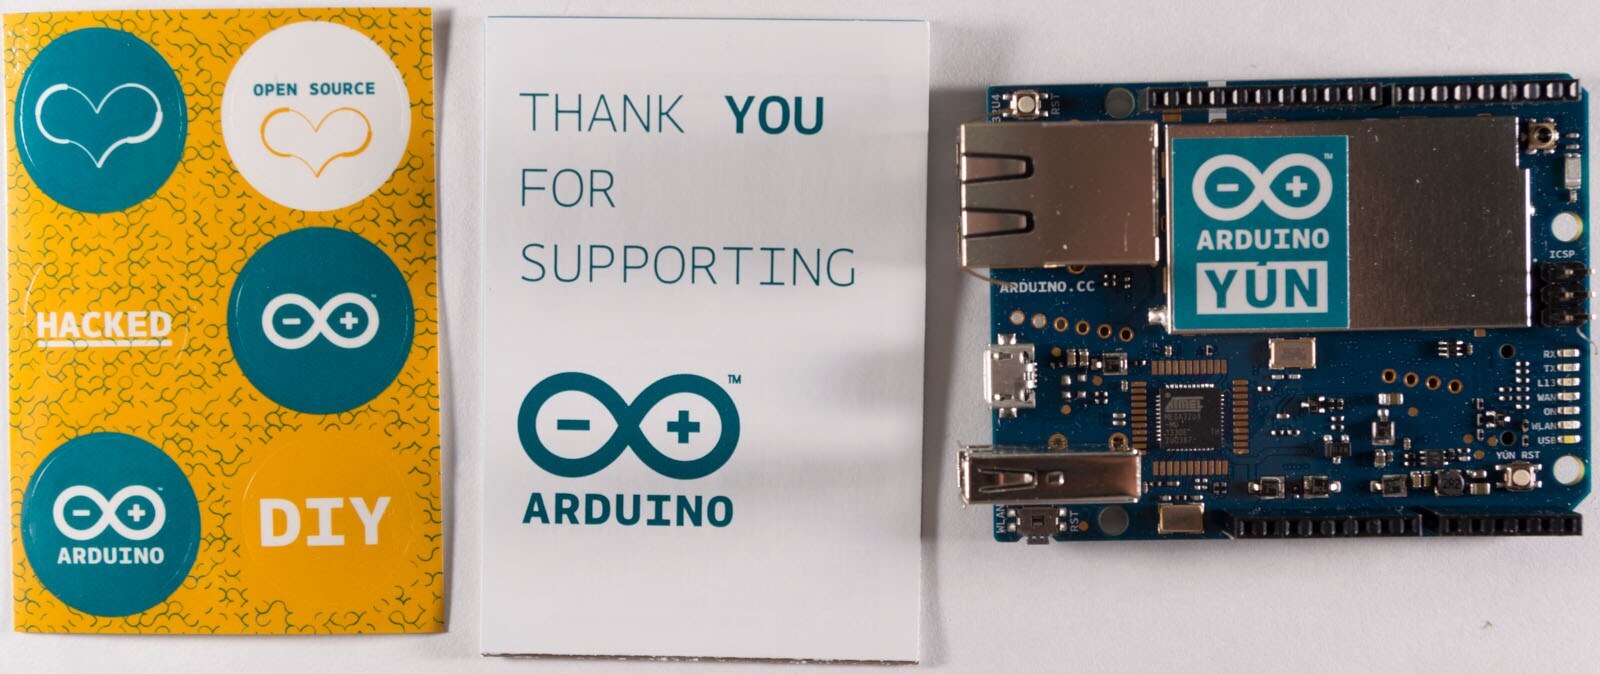
As has been the case with all genuine Arduino packages, you get a set of stickers and a small pamphlet to go with it.
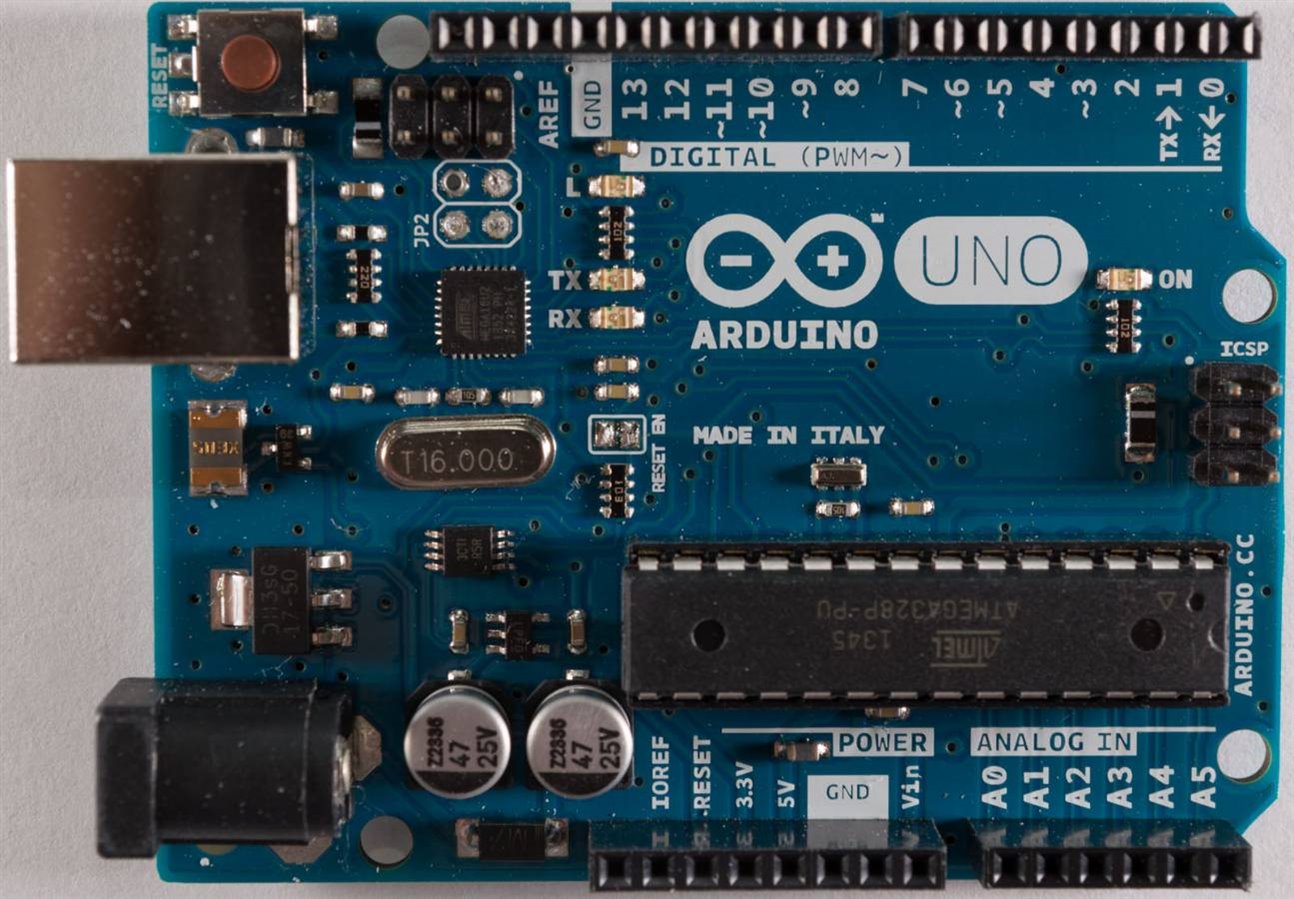
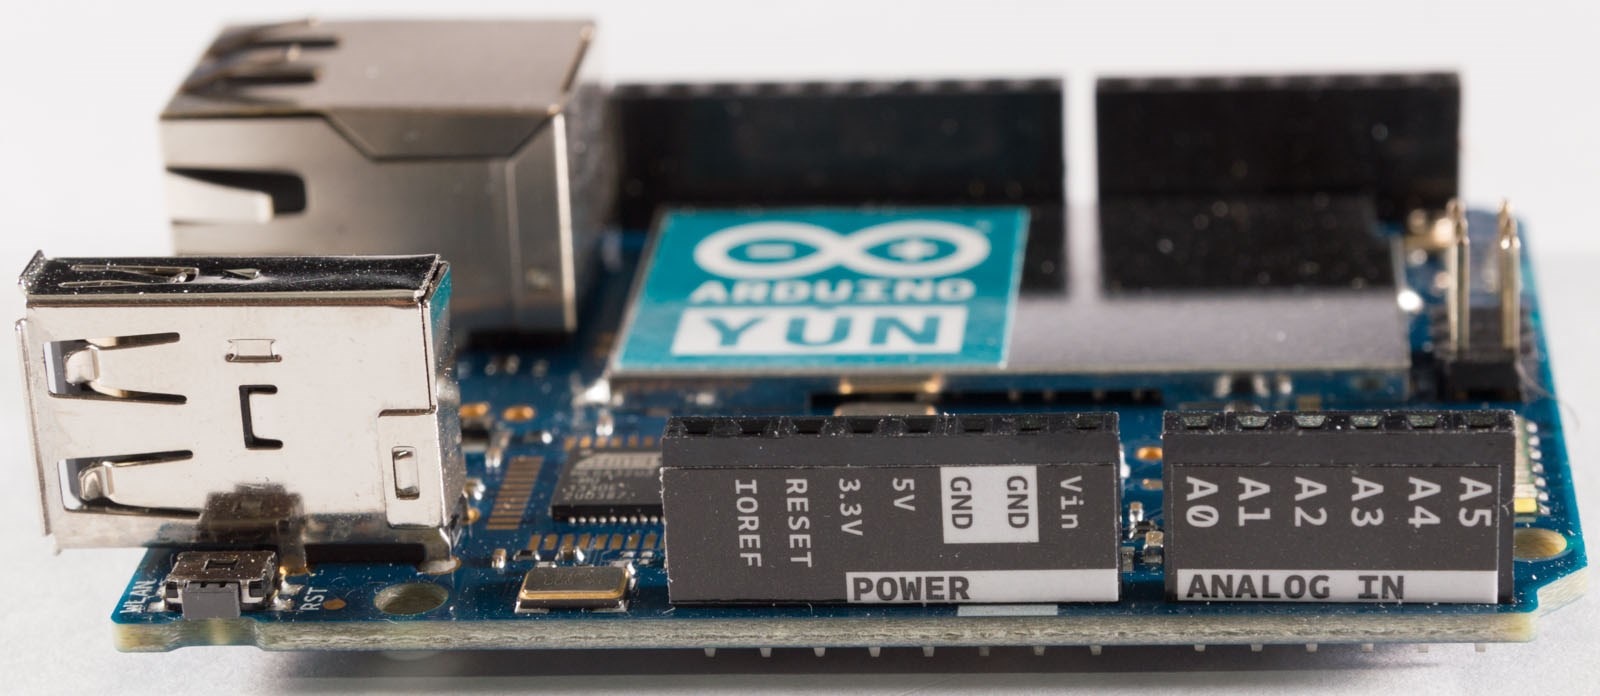
The Arduino Uno is proudly Made in Italy and feels like a quality board (when compared to clones). The top silkscreening is very useful, clearly identifying the power pins, digital PWM pins and analog input pins. The board features indicator LEDs for power, serial receive/transmit and a debug LED connected to pin 13. PWM capable output pins are marked with a ~ symbol. The board runs on an Atmel Atmega 328P, which is an AVR 8-bit 32kB microcontroller running at 16Mhz. The Uno is a 5v board, and hence features 5v TTL I/O.

The bottom of the board contains a very unique silkscreen pattern and clearly identifies this board as an Uno R3.
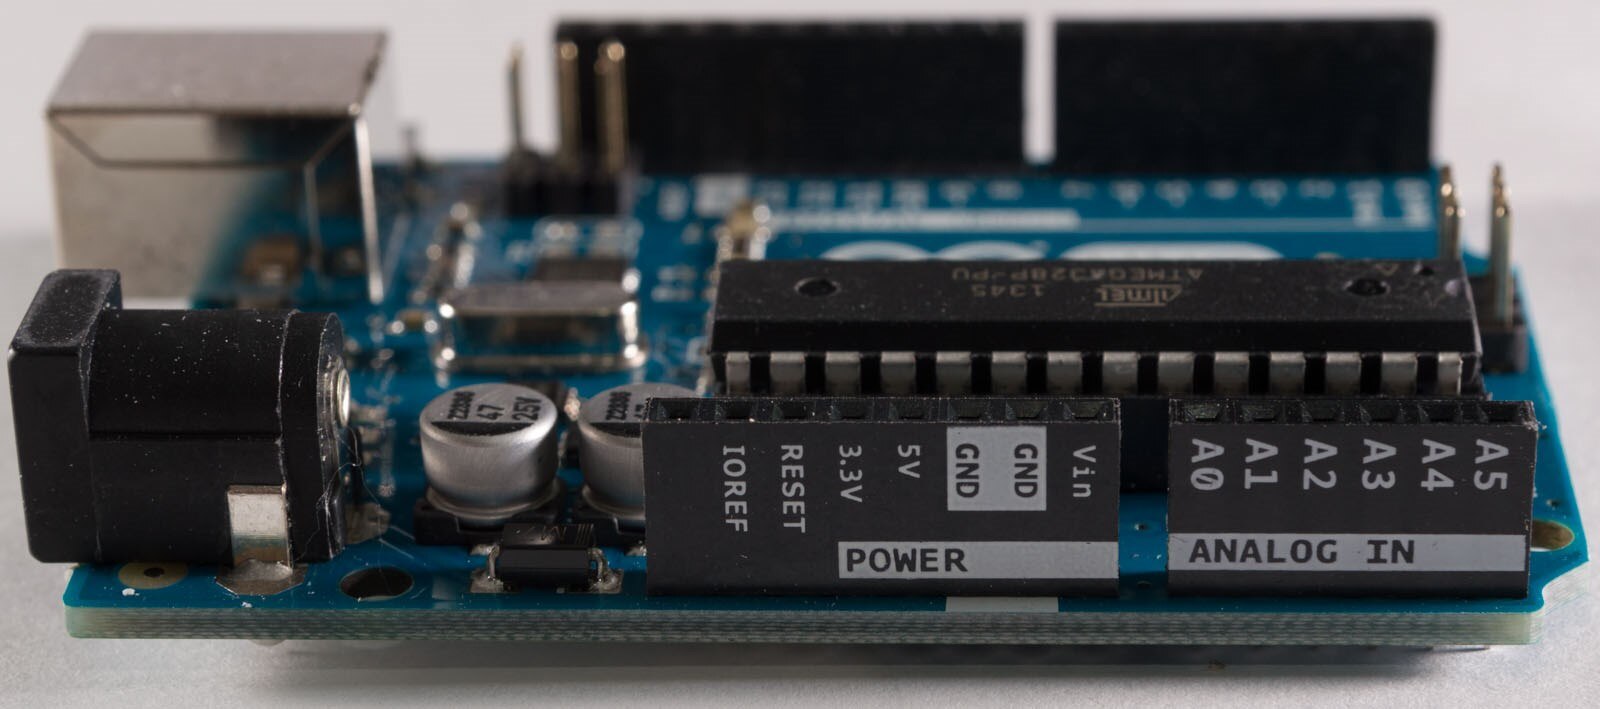
A nice change from previous Uno boards is that the header sockets are marked with silkscreening as well, which makes the function of the pins apparent even when the PCB is obscured by jumper pins. A very convenient feature indeed.
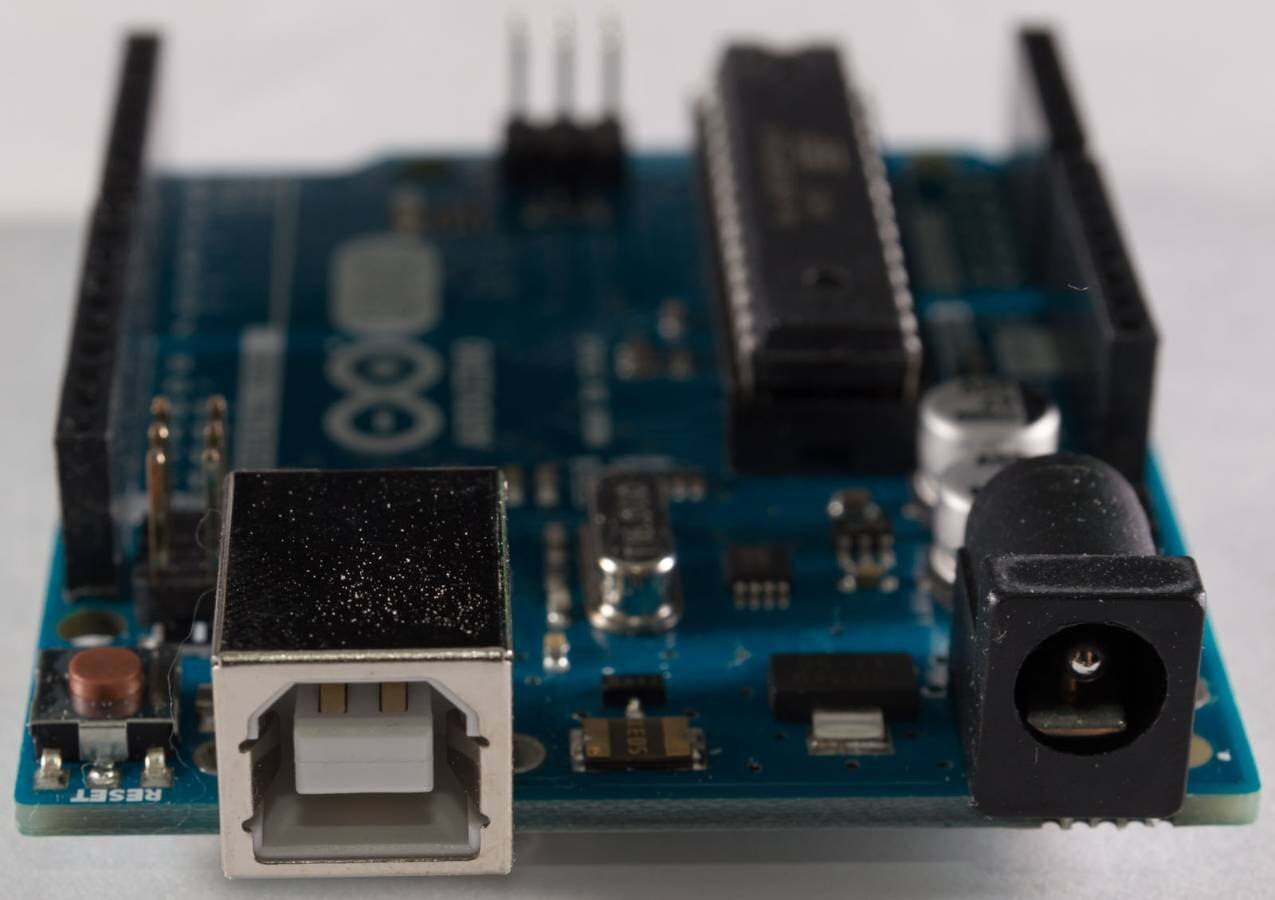
The reset switch is relocated to the corner near the USB plug, so that it can be pushed even when a shield is covering the button (which used to be positioned near the ICSP header). The board does retain its traditional USB B-type connector, which is considered somewhat archaic now, and has multiple-power source functionality - it can be powered through USB, or via a 2.1mm DC barrel jack connector with a recommended range of 7-12v as it features an onboard linear voltage regulator.
Getting started is pretty simple - you can download the IDE here, install it and leaf through the examples within minutes! This board is available for AU$32.07 from element14 Australia at the time of writing.
Arduino Yun
 The Arduino Yun is a new addition to the Arduino family. It seems to be a bit of an interesting combination device, marrying together an Atmega 32u4 and an Atheros AR9331, which normally would power a Wireless Router. In fact, I seemed to have expected its existence when I first reviewed a $22 TP-Link WR740N wireless router based on the AR9331 running DD-WRT and OpenWRT. One of my comments was that - if we were able to get a device with Ethernet ports, Wireless LAN, a MIPS CPU with a bunch of GPIO, and USB support, along with a case, power supply and cable for $22, why doesn't someone turn it into a development board?
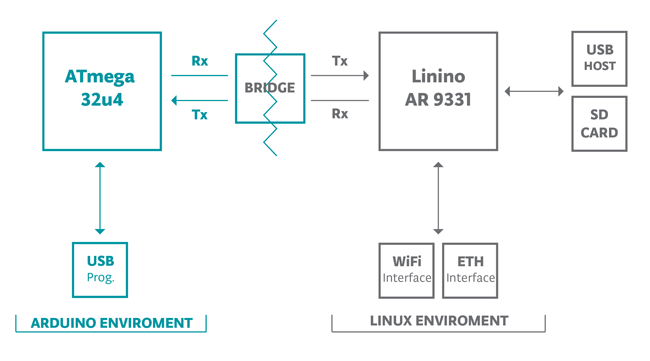
Alas, this device isn't quite what I had in mind when I said that, and instead, it's more of a Wireless-router SoC connected to an Arduino. The Atheros SoC runs OpenWrt-Yun, which runs Linux and has access to 64Mb RAM and 16Mb Flash. It also hosts a USB port and microSD storage slot, for further expansion. It features Ethernet connectivity, and in approved countries, it also has built in Wi-Fi. This allows you to run a full networking stack and process or produce queries using the power of shell scripting in Linux and utilities such as cURL. However, coding for it becomes less straightforward because the Atmega segment runs almost independently, with a special bridge API between the two to exchange data or call certain functions. This is diagrammatically represented in this diagram from here:
The board arrives packaged in a very similar cardboard box to the Uno, with the Yun pictured instead. The contents are pretty much the same as the other Arduinos.
A closer look at the top of the board shows just how packed the Arduino Yun is.
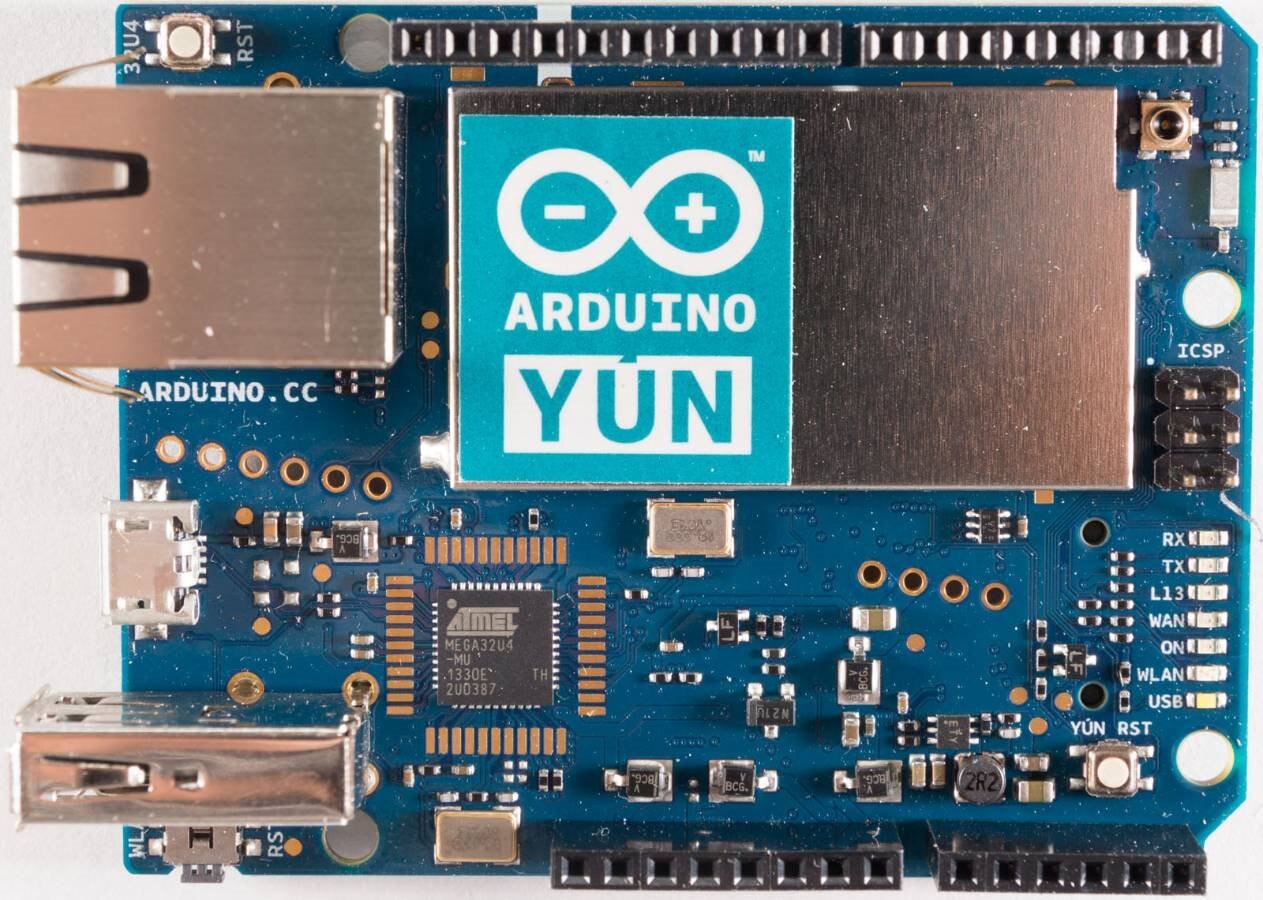
Unlike the previous boards, this board actually features three reset buttons - one of which controls the Atmega, the other resets the Atheros SoC, and the last resets the Wi-Fi to factory configuration as an Access Point. The board also features a set of indicator LEDs along the side with additional LEDs to indicate Ethernet, Wireless and USB status. The Wi-Fi chip antenna is situated just above the ICSP header. The Atheros SoC is underneath the soldered-down metal shield/can.
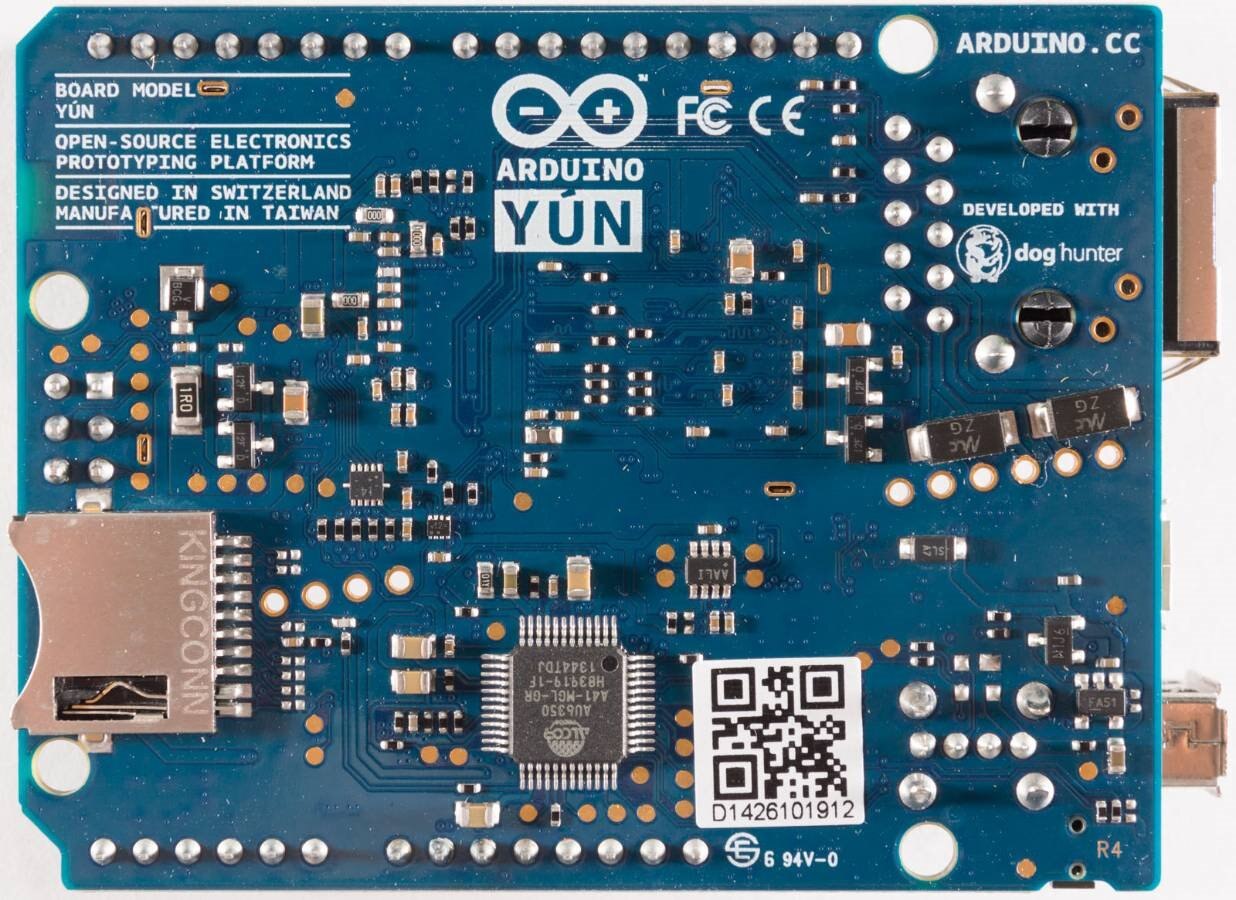
The underside of the board is where the microSD connector is. Interestingly, this is not directly hardware-connected to the SoC, and instead goes through an Alcor Micro AU6350 USB Card Reader/Hub chip. Unlike other Arduino boards, this one seems to have been developed by dog hunter, in Switzerland and manufactured in Taiwan.
Unlike the Uno, the markings on the header sockets aren't actually printed on - they are stuck on as labels. However, it is just as convenient!
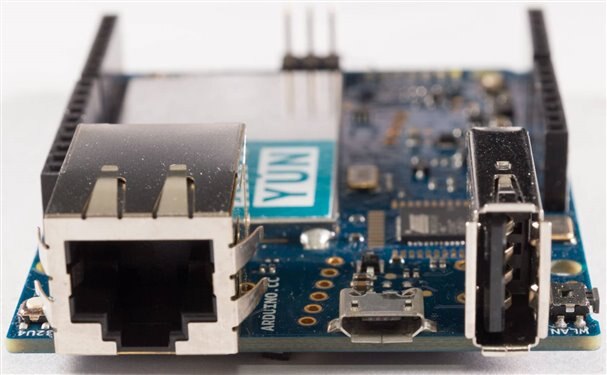
Unlike the other board, there wasn't any space for a voltage regulator, so this board doesn't have a barrel jack. There is an optional PoE attachment which can be installed though. The power is supplied via the MicroUSB-B connector (which replaces the USB-B connector on the Uno). There is a USB-A connector for attaching storage or peripherals which can be used by OpenWrt-Yun. Also on this side is a 10/100Mbit/s Ethernet interface.
The board itself is quite a bit pricier, at AU$99.73 from element14 Australia, but that's technically not too bad. In the earlier days of playing with Arduino, an Ethernet shield was the better part of AU$66, and along with the Uno base which is another AU$33 or so, we still wouldn't have Wi-Fi, USB or microUSB capabilities. The biggest difference, however, is that the previous solution is extremely limited with a hardware TCP/IP stack supporting only 4-concurrent connections, needing everything handled by the Atmega328P. There was no Linux scripting, because there was no Linux running, and so making workable servers with the Ethernet shield was a difficult challenge. As a result, the Yun actually represents fair value, and it might even be possible to use the board like a smaller router, or just use it like a low powered small Linux server.
Infineon RGB LED Shield with XMC1202
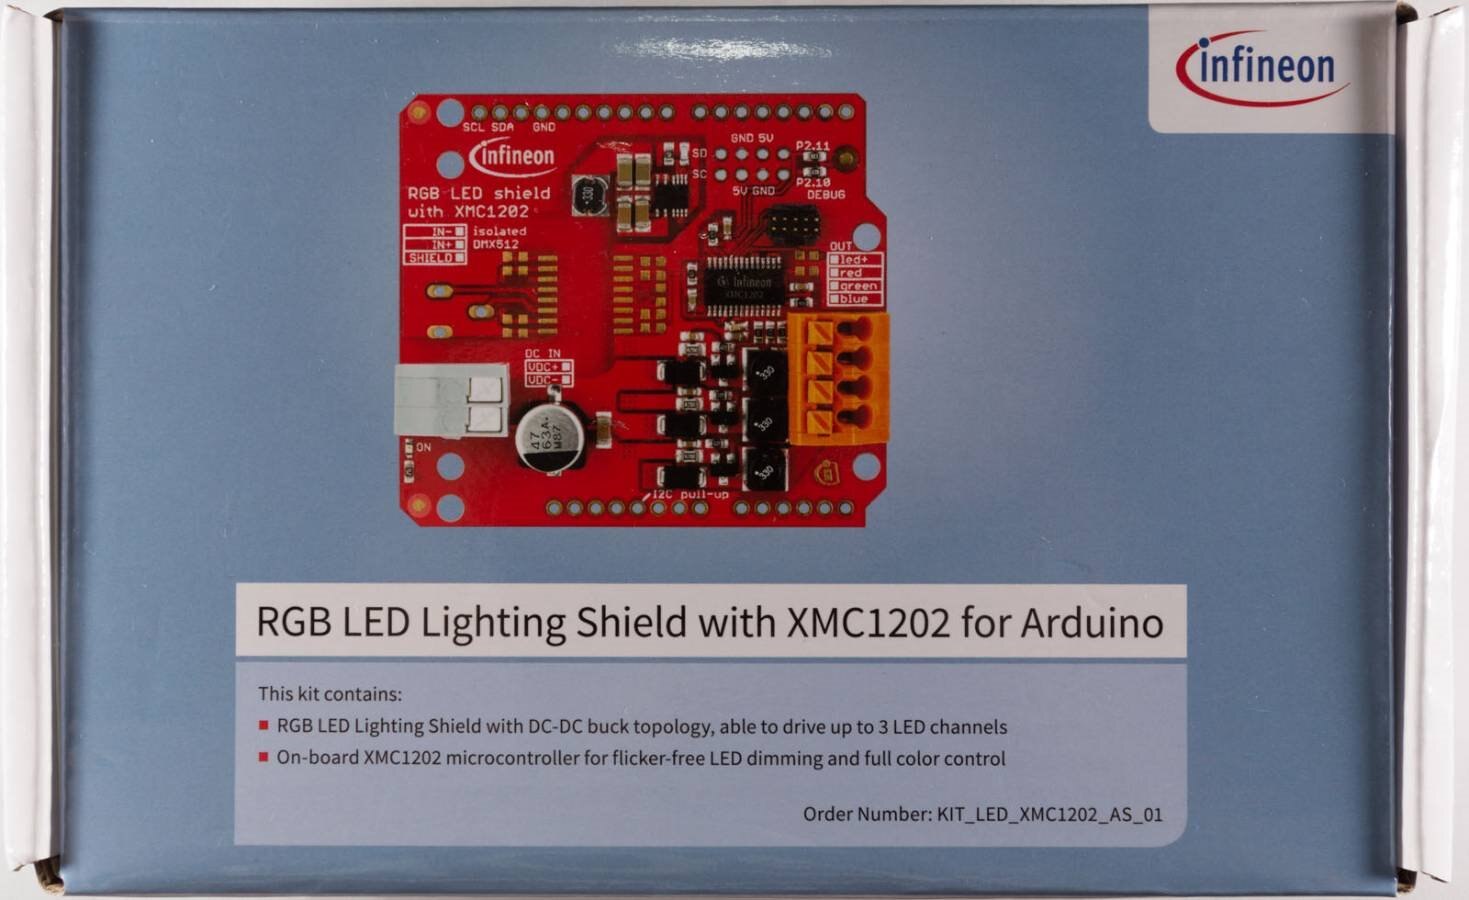
This appears to be a very unique shield which is exclusive to element14. This device is built around Infineon's XMC1202, which is an ARM Cortex-M0 microcontroller. This lighting shield features three buck-regulated channels, with a maximum input voltage of 48VDC, an output current of up to 700mA per channel and smooth pulse-density modulated dimming for flicker-free results. The board is interfaced to the Arduino via I2C. The board also has optional DMX512 interface which can be installed. The total power controlled can be up to 100W, which is about 33W per channel which is very very bright. The shield can operate on input voltages of about 6V and up, as long as the input voltage is at least 2V higher than the output voltage which is dependent on your LED configuration. This is a common requirement with buck-based DC-DC designs.
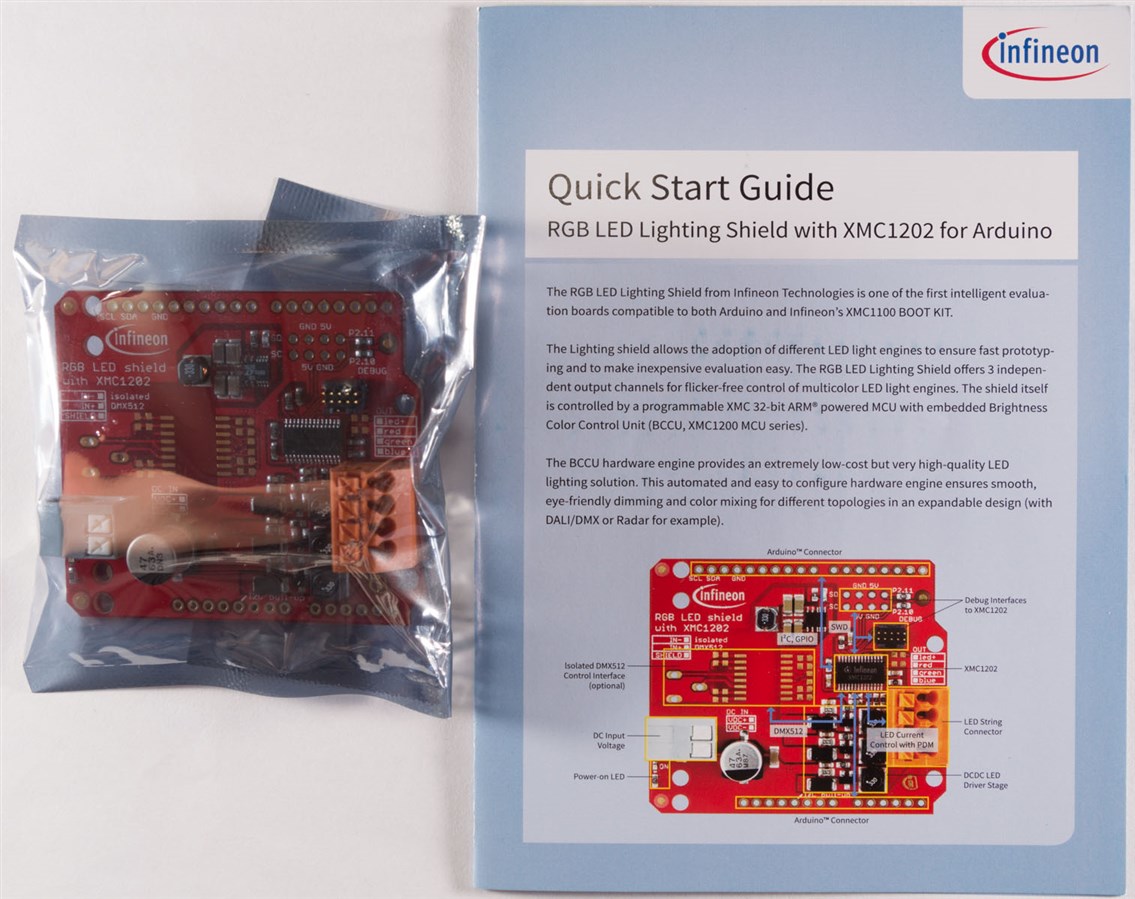
The board comes in a relatively large box, with the board in an anti-static shielding bag. A one-page leaflet is provided, which outlines the parts of the shield.
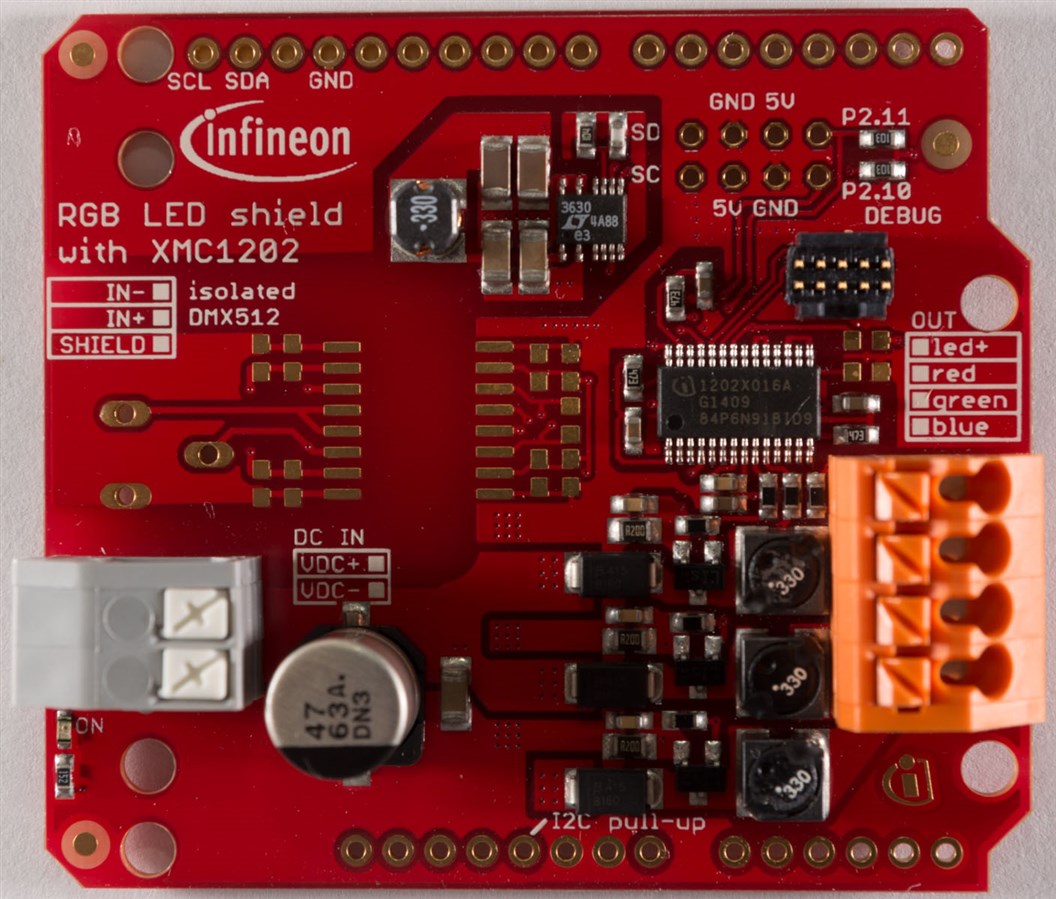
The shield itself comes in bare form, on a red PCB, with no header pins populated. I would recommend (if you have them, that) you use extended stackable headers to allow for stacking multiple shields and avoid interference issues with the Ethernet connector on the Yun. The DC input and LED outputs have (relatively interesting) connectors populated which take bare wire. The design features a common anode connection, with individual R, G, B cathode connections. All the necessary inductors, MOSFETs, diodes and capacitors have come preconfigured, which makes evaluating the solution much easier. The DMX512 hardware is not populated. Debug connection is provided for the XMC1202, in the case you wish to reprogram the ARM micrcontroller. There is also an LTC3630 High Efficiency Synchronous Stepdown Converter near the top as well.
The shield interfaces with the Arduno using the new SDA and SCL pins next to the AREF pin. If you have an Arduino Uno R2 or earlier, you will need to redirect these pins to A4 and A5 instead to make it work.
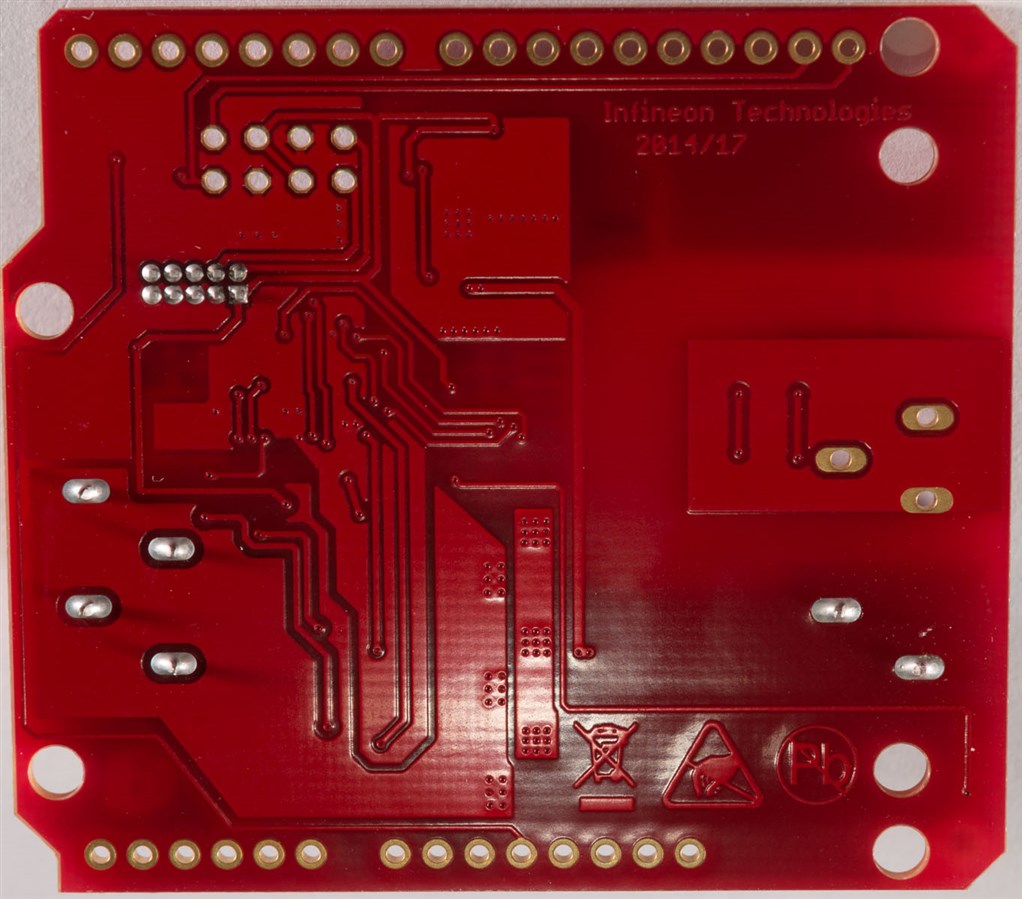
The underside of the PCB seems to be dated Week 17 of 2014, and doesn't contain any components of note.
One of the main issues with this product is a lack of documentation and libraries. The main documentation provided is in the form of introductory fliers, which don't provide sufficient information to design with. After a bit of digging, there is a board manual with the required information to design with, but it takes a bit of time to go through.
However, thanks to the RoadTest participants Robert Peter Oakes, ipv1 and @beavertank, there is now a selection of Arduino libraries which has been helpfully compared by Jan Cumps in this posting. The shield itself is available for AU$35.77 from element14 Australia but keep in mind that you will need to purchase headers, LEDs and an appropriate power supply to make it all work.
Conclusion
In this posting, I've unpackaged and shown you all of the parts included in the Internet of Lights Holiday RoadTest and provided some commentary on the parts. It might seem a little bit strange that the RoadTest included both the Arduino Uno and Arduino Yun, seeing as the Yun is a more sophisticated Arduino, but it's actually a great idea as it allows for users to prototype and test their code on the Uno which is generally more straightforward, before introducing more complexity with connecting it to the network using the Yun. It also means that, should the user make some sort of mistake, they won't be sacrificing the costlier Yun straight-up.
That being said, it's not quite possible to build a full concept with just these parts ... you do need a few more parts - wire, LEDs, heatsink, power supply, header pins and screws to name a few. In the next posting, I will explore the preparation of the hardware up to the first lighting.
---
Feel free to visit me at my personal blog at http://goughlui.com
Top Comments