


It’s been a bit of time since the judging of the Light Up Your Life Design Challenge, but I am very much honoured and humbled to have won first place. Many thanks to element14 for arranging and Würth Elektronik for sponsoring this design challenge – perhaps the highlight of my engagement with the community this year, as I had only applied for one RoadTest, albeit unsuccessfully.
Nevertheless, this meant I had a prize on its way to me and thanks to both JoRatcliffe and E14Alice , it arrived in quite the record time. But of course, there is a bit of a twist, so do read on.
A GIANT Surprise
When something like this arrives at your door, you can’t miss it.

I’ve never received a box this big from element14, but it’s large enough to contain most desktop tower PCs. Of course, that’s not what was inside, but it was a giant surprise given that it arrived the day after I was given a tracking number.

As there was a mix of things, filling the “void” is important to make sure the box can withstand travelling half-way across the planet to me, in Australia. Thankfully, element14 did not fail there, even though it’s clear the package didn’t have the easiest time in transit.

Inside was a magnifying lamp, a soldering station and a set of helping hands. But wait, you might say – wasn’t there supposed to be an oscilloscope as well?
A Secret Holiday Surprise
While some community members might know that I’ve had a good run with RoadTesting test equipment in the past, and some have been envious of my previous winnings. But as I start to realise the limitations of my needs as well as my needs, I’ve felt less of a need to have mountains of test equipment. When I see just how many people getting into electronics seem to be pining for an oscilloscope, I can’t help but feel fortunate that I’ve not had to be in that position for a good many years.
So, in the past three or so years, I’ve been quietly handing down test equipment – either giving it away or sending it out on a “perpetual loan” to colleagues, people in need or promising students, keeping what I find useful and important to me. So far, from element14 RoadTests I’ve sent away (at no cost):
- Picoscope 2205A 2ch 20MHz USB –to a promising PhD candidate and colleague
- Digilent Analog Discovery Pro ADP3450 4ch+16ch 55MHz - to a promising PhD candidate at a conference working on portable MRI who expressed a desire to upgrade from an Analog Discovery 2
- Rohde & Schwarz RTM3004 4ch+16ch 1GHz & Keysight EDU34450A DMM –to a professor who needed something in a hurry for their startup
- Keysight EDUX1052G 2ch 70MHz – to a colleague who helped donate it to a Sri Lankan university’s makerspace to replace their older CRO
- Keysight EDU36311A 3ch PSU – donated to my colleague who keeps it on the bench at my university lab
- Tektronix 2-series MSO 4ch 500MHz – donated to my colleague for home use to upgrade them from a lower bandwidth, non-decoding, no-signal-generator oscilloscope
After all, I feel horrible leaving gear on the shelf when it could be used, especially when there are people who could really take advantage of it and knowing just how something like this could change someone’s lives in the way it did mine. So, I’ve sent them all out into the world as “surplus to my needs” along with some of my unused (personally acquired) gear. Now, I live with a Rohde & Schwarz MXO4 (supplied by R&S directly) which I am very guilty of not yet delivering a review for (hopefully this will change soon) but is absolutely awesome and works very well for my needs.
Anyway, this brings me back to the whole reason I signed up for the design challenge. I didn’t sign up to win the prize, but to have a reason to experiment, design and use the WL-ICLEDs and a deadline to force myself to do it. Win or lose, in my eyes, I had won as soon as I was chosen as a contestant.
But in the case I did win, I had decided that I would relinquish the oscilloscope to create a second runner-up position. This was something I contacted element14 about facilitating, and they were happy to oblige. By getting in early, I wouldn’t have to worry about receiving and re-shipping any items – a big help to me, so thanks element14 for being so accommodating. In the past, I had been lucky enough to receive a “second runners-up” prize when none had been planned for in the Experimenting with Flyback Transformers challenge, thanks to the generosity of element14 themselves, so this was my way of paying it forward.
So, make no mistake – this was no mistake, I simply decided it would be better to gift this oscilloscope to another member of the element14 community in the hopes it would be more useful to them and it might help them with their future electronic endeavours.
As for the magnifying lamp – that’s something I actually didn’t have and needed and the hot air station was also a good idea since the current one I have is now over a decade old so I don’t know how long the diaphragm pump in it has left, but also the collar around the tip has corroded dangerously to the point the whole handpiece is due to be replaced. So probably worth having a spare.
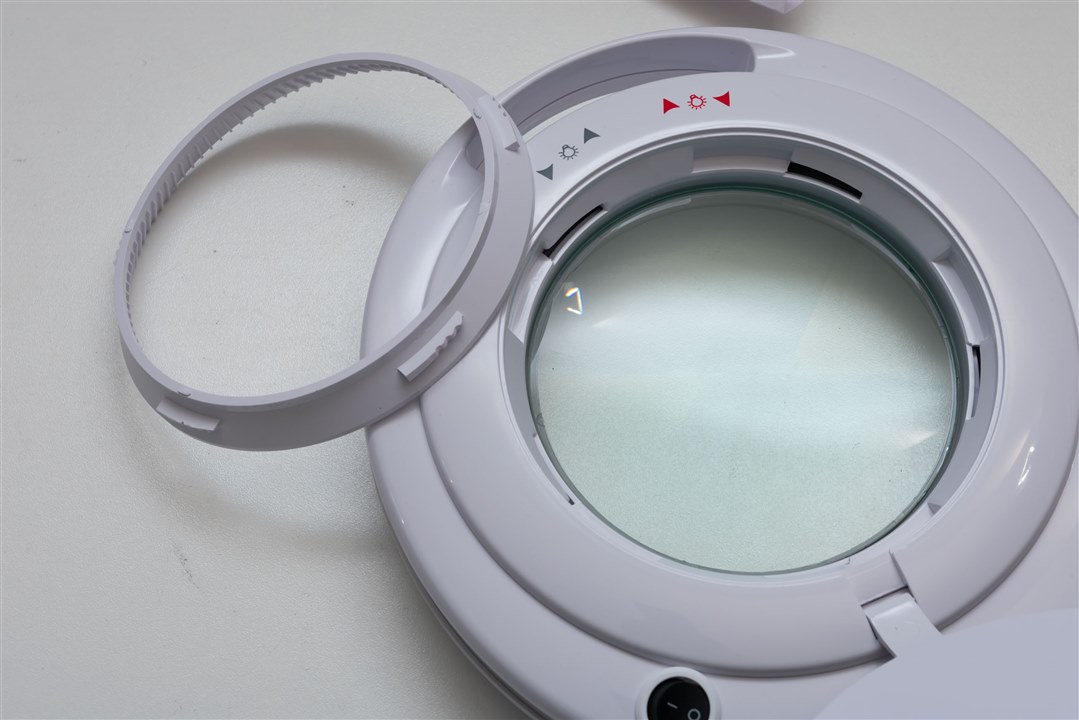
LightCraft LC9090LED/UK Magnifying Lamp

Recently, stress has been affecting the eyesight in one of my eyes and as I’m short-sighted in one and long-sighted in the other, my visual acuity isn’t quite what it was. I’ve not got one of these at my bench, but it had always stood out to me as something worth having, so I’m glad to have one in my hands now.
This one is LightCraft (Shesto) branded and uses 90 LEDs with colour temperature and brightness adjustability. There’s no mention of CRI, so I’m going to assume it’s ordinary 80CRI or thereabouts, but at least there’s an interchangeable lens - 1.75x by default and 2.25x for the alternative.

I wasn’t aware that the lighting efficiency markings on the packaging had been rescaled, so to see an LED product rank an “F” score was pretty surprising. But at least it wasn’t “everything in A, A+, A++, A+++” as it was in the past. This unit is wired for UK/EU usage – it’s a shame as it seems an Australian version is available too. But not to worry – I’ve got plenty of plug adapters.

Inside, the unit is in a Styrofoam case, taped shut at the ends with packing tape. That’s a good thing, as shipping was not particularly gentle – that bulge indicating the internals had shifted in transit.

Looking inside, it seemed the extra lens had migrated and some of the internal partitioning had broken off, but everything was otherwise intact.


The lamp itself was surprisingly old fashioned in a way, having sheathed mains flex go up the arm all the way to the head where a hardware power switch is used to turn on and off the lamp. Of the lamps I use at work, they all use a thin low-voltage DC from a plug-pack instead. The controls are touch based, and were a bit finnicky in the sense it wasn’t a pair for colour temperature and a pair for brightness – no, instead, it’s two separate dimmers. One of them (red) for the warm-white LEDs and the other (grey) for the cool-white LEDs. Once you understood that, it’s a bit easier to work with, but alas, there’s no way to keep a consistent neutral white while dimming without counting “clicks”.
At least the sun cover is integrated into the unit as a flap, meaning you can’t really forget to put it on. That way, the chances of an accidental lab-burning accident are reduced.

The lamp was somewhat thicker than I imagined, with a bit of silver coloured trim from the side.

The underside had a somewhat thick edge with ventilation slots. There’s a slot as a handle on the far edge, along with an orange-peel diffuser in front of the LEDs.

Looking directly at the LEDs, the one thing that made me look twice was the fact the LEDs were not all evenly distributed around the circumference – it looks more like three sections.

Changing out the lens involved some minor disassembly, but it was easy enough to do. The plastic locking ring didn’t feel all that sturdy, so I guess I’ll have to see how it holds up long term.

The desk clamp was fairly solid and easy to use, but as for the washer from nowhere … I have no idea where that should go.


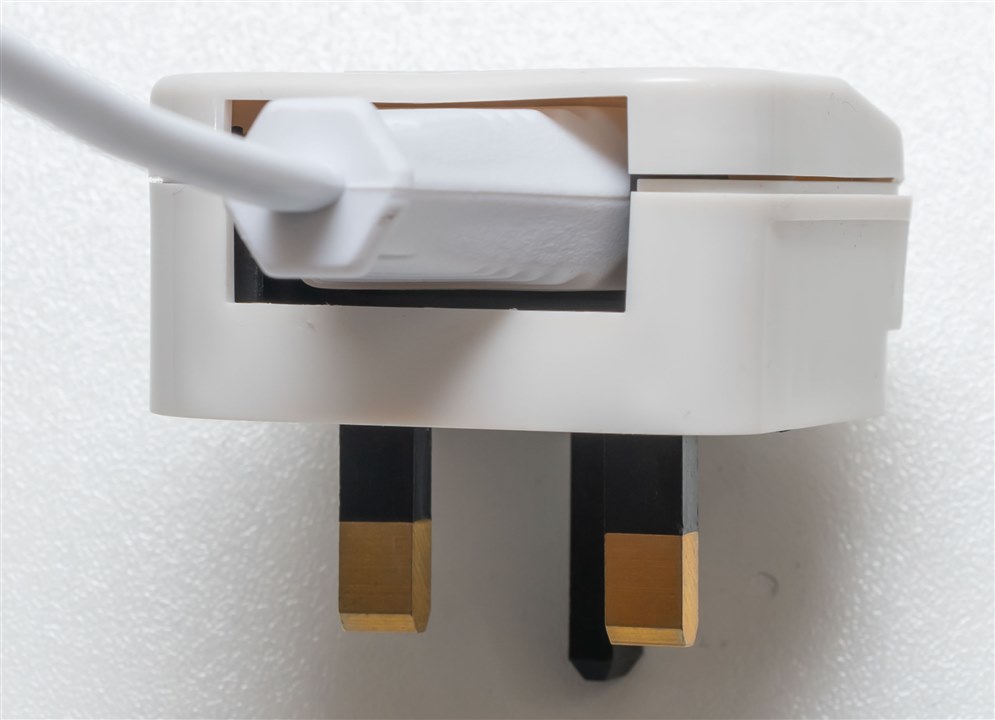
Power entered through an Europlug which had a snap-over adapter converting it to a UK plug, with the necessary fuse. I ended up adapting this (again) to an Australian plug. Nothing like an adapter chain …

It worked quite well …
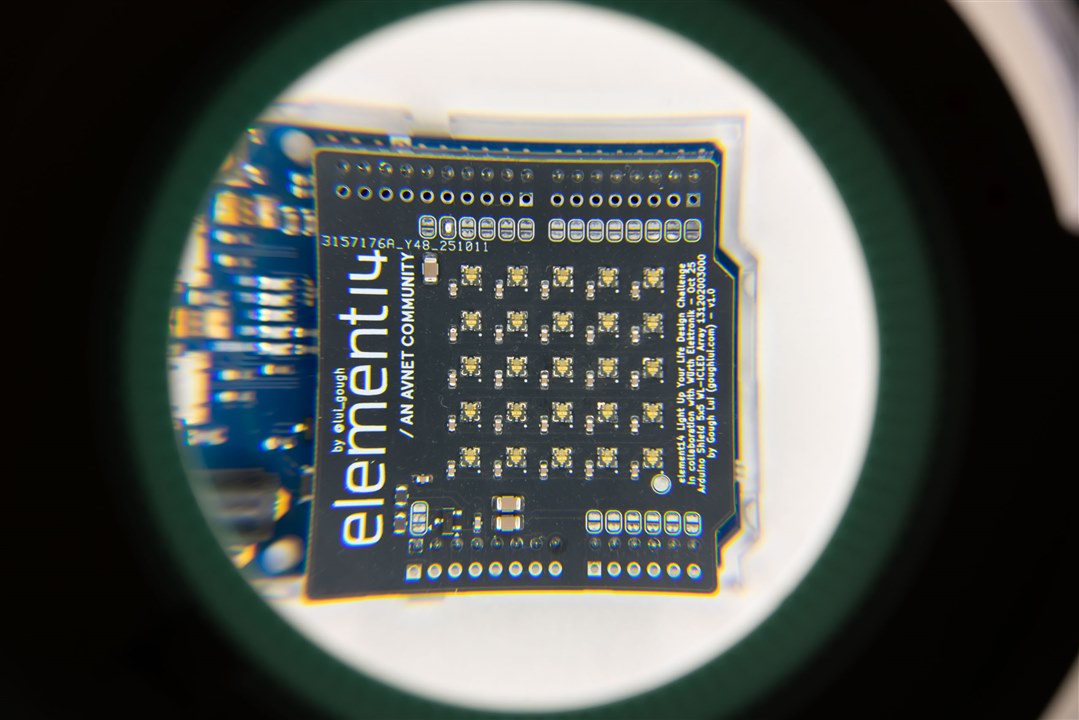
It might not be photography grade – after all, lenses like that are prone to chromatic aberrations, but it’s definitely a lot less hassle compared to booting up a digital microscope or bringing out my camera with macro lens.

Of course, the latter can get closer thanks to magnification ratios and digital zoom.
Multicomp Pro MP740907 Double Channel Rework System

This “double channel rework system” would perhaps be better known as a hot air and soldering iron station. There’s no mistaking it – this is a rebadged Atten product as well, specifically the ST-8802. It has a batch number of 04/25, so that makes it this year’s production.


It’s quite well packed inside in foam, having not shifted at all during transit.

The above are all the inclusions inside the box. It includes both UK and European power leads. As this uses a standard IEC style lead, I’ve substituted my own for use. It includes a grounding lead clip (perhaps for use in countries where the IEC ground pin is not used) and nozzles for the hot air gun.

After some minor assembly, the station is ready for use. Compared to my prior Atten station, quite a few things have changed – this unit is now smaller, eschewing the diaphragm pump for a small PC fan based blower. The soldering pencil also uses a DIN connector with no captive features and silicone wire compared to the PVC wire and locking collar of the previous unit. The control on the hot air gun itself is now absent too, as is the sponge on the soldering iron rest which has been replaced by brass wool. It’s a different station, but it does still have some similarities.

From the back, the IEC power inlet and grounding socket.

The hot air gun definitely doesn’t feel quite as slim as the previous and the loss of controls on the handle is unfortunate. The rest can be installed on the left-hand-side or right-hand-side of the unit, but as the cable is captive and exits the left-hand-side of the unit, that is where I placed it. The hot air gun doesn’t quite rest in the holder quite as solidly as I would have liked – there’s a chance it can get knocked off and its on/off is entirely controlled by whether it is in the rest or not!

The tip of the hot air gun has a sort of “vortex” pattern. I’ll have to play around with it – perhaps it’s better for mixing and avoiding hot/cold spots in the airflow, but it may also increase the propensity for lifting components as well. As I haven’t done any soldering “in anger” with the unit, I can’t say for sure right now. At least, not using the diaphragm pump means it’s probably less likely to fail and it is definitely quieter, creating much less hum and vibration.

The soldering pencil itself has become a bit thinner and nicer to hold in the hand. The bulge between the hand-grip and the barrel is a little subtle, but I’m okay with that.
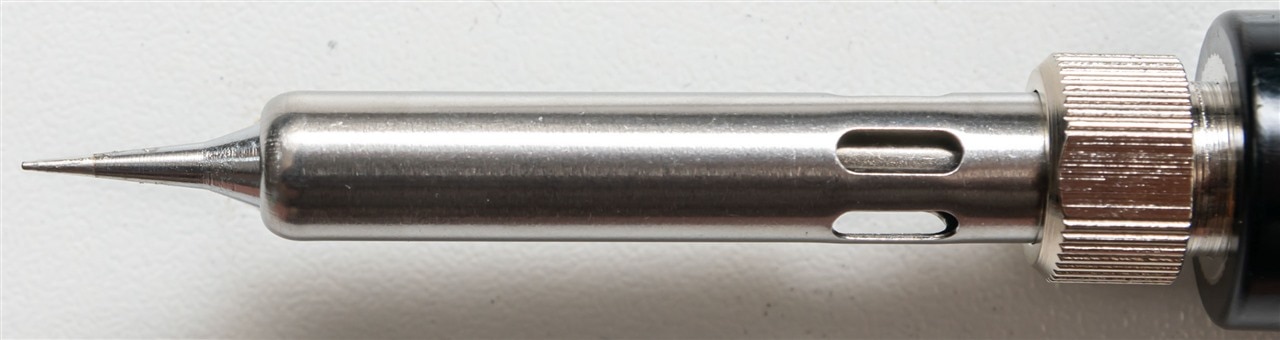
The locking collar and tip assembly appears to be identical to the previous one, making parts interchangeable, which is nice. It comes with a very fine tip conical, which is an excellent choice for a mix of soldering work. I started with that tip on my previous and it’s lasted a decade!

The display is fairly simple, with buttons and knob on the base used to control operational status (soldering iron only) airflow, temperature and presets.
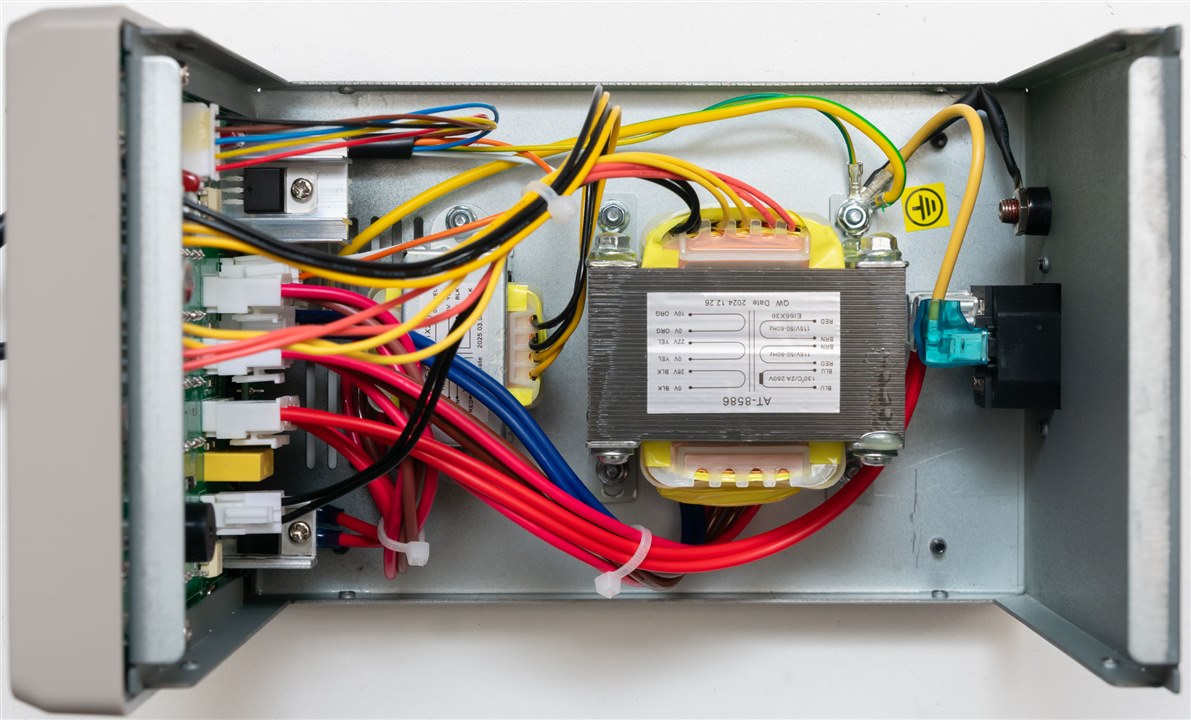
Under the hood, since I’m curious, I find out that the unit is still half-empty inside, but appears to be an amalgamation of two different units in the one box. I guess that’s an easier way to design a combination station.

The main transformer is marked AT-8586, which is the model number for their “economic” 2-in-1 rework station in a slightly more compact enclosure.

The other transformer is marked AT-858 which is their hot air rework station.

Some random shots of the PCB and wiring – looks like this station is built around an STM32 microcontroller and works with the incoming AC power rather than rectifying it to DC to run the heating elements. One improvement to the UI is that the beeper doesn't beep continuously as you increment or decrement the temperature like my previous Atten unit, which is a big improvement.


Multicomp Pro MP012468 Helping Hands

I wasn’t initially expecting this, as many challenges don’t have the finisher prize awarded to the winners, but this time was an exception. But while there was a set of helping hands, the heatshrink was nowhere to be found, so perhaps a stocking issue? I guess I shouldn’t be complaining because this was more than I had expected.
This one had a bit of weight in it, so it managed to blister the cardboard a bit in its rough journey.

A peek inside from the top of the box.
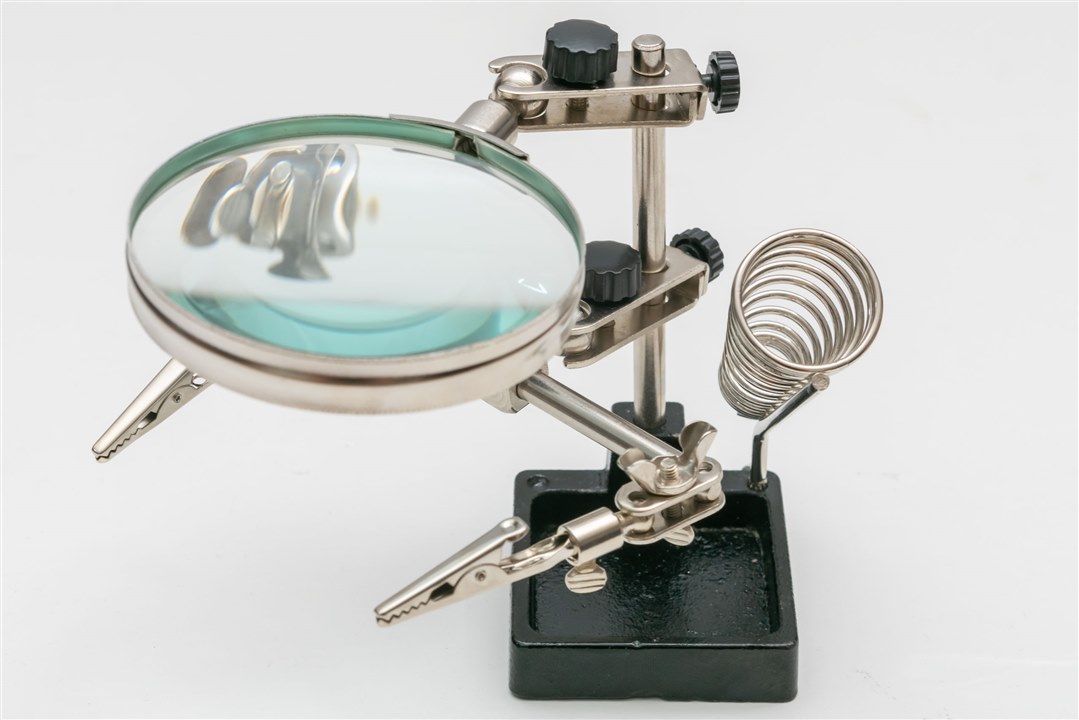
All set up. It’s easy to assemble but unfortunately, while it does have a space for a sponge, none appears to be provided. The usefulness of a generic soldering iron holder is questionable, given the small footprint of its metal base. The large magnifier almost is comically large – being heavy, the unit actually wants to topple depending on the angle of the magnifier or hands. I wouldn’t necessarily trust it with heavier circuit boards depending on where the magnifier is – perhaps it’s safest to use it for soldering without the magnifier attached to the base, as the last thing you want is something with hot solder falling over and splashing you. Alternatively, adding weight to the base might be advisable as well. That being said, if you’re careful or gentle, this would certainly be able to help with smaller tasks like holding wires for tinning.
Conclusion
Thanks again to element14 and Würth Elektronik for this contest and for the prizes. While the prizes themselves weren’t my main reason for entering the contest, they will certainly come in handy. While I might have a reputation for sweeping up prizes – it’s not to say I don’t also end up giving them away too.
Congratulations to the runners’ up prize winners – I hope you enjoy your oscilloscopes! I wish you all the best with your future electronic endeavours.
In the meantime, unfortunately for me, I'll have to go back to fighting with a few health demons ...
Top Comments