


Since my last post, I've been doing other projects including the Catch Santa Challenge and this security style camera controlled by an external modified PIR.
This was a very useful challenge and gave me time to experiment and play with the camera and Raspberry Pi.
The cable between the RPi and camera is far to short, and limits the options for mounting. Unfortunately element14 don't carry a longer cable but there is one here 300mm cable.
I also had some limitations with the SD card protruding so one of these will shorten that by 9mm
These are very useful additions/accessories so I'm surprised that element14 aren't carrying them. (HINT, HINT)
I've also been looking at the hardware to house the Camera and Pi, and thought I'd found a perfect one ...until I saw the price at $97 plus GST 
Its looking more like I'll be using one of these, since it hinges and has the clear front.
SNOW
One thing many people don't appreciate is how hard it is to work on equipment out in the cold and snow.
Generally you need your gloves on, and if you drop something its gone.
Things that require small screwdrivers, need to be assembled from several parts (ie washer + lock washer + nut), or that buildup ice preventing the tool from properly engaging (small cap screws) are best eliminated from this environment.
So the hardware needs to be designed for the intended environment.
WIFI LINK
For the WiFi I'm using one of these because in the future I may use it to pass data from the Trip Systems to the lodge.
This is designed to mount to a pole and are are used at some of the NZ Ski fields with a piece of PVC slipped over the top to keep the snow and ice at bay.
Sadly I don't have any pictures of this arrangement.
I have looked at some of the factory mounts, and to my thinking they won't last in the this environment.
I think something like this has several advantages.

It's not hard to knock one up from some water pipe and flat. I'll add some extra material to go partly around the pole for added stability.
The round section needs to be longer, and a means of fixing the cover would be handy.
Because the lodge end of the link is approx 35m lower in elevation, the mount needs to be angled down approx 6 deg. Bending the flat seems much easier than relying on adjustments that often prove the weakest point.
SOLAR PANEL
I've used the solar panel over Christmas while we were camping and it seems to function well.
I am concerned about the exposure on the rear, but the connections are very well insulated and protected.
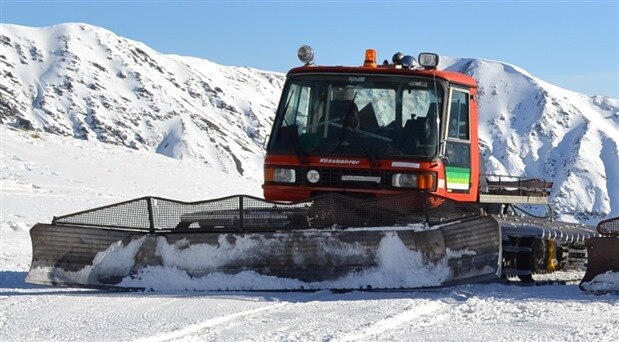
Snow comes in all forms, from wet heavy large flakes, to very fine dry powder that the wind blows into the smallest opening.

This ski-do was under cover and on the lee side of the wind.
Either you allow it in and ensure there is a drain for when it thaws, or you need to fully seal it.
I need to add drain holes, polystyrene packer, and a cover over the back to prevent ice buildup behind the photovoltaic portion of the panel.
Since I already know roughly where the sun is, and we are only interested in the winter sun, no adjustments are required.
It's therefore simply a matter of making a suitable and rugged mount that won't flex, keeps the panel in place, but is easy to remove for summer.
My current thought is the same pole fixture could also mount the camera box, and would stop the sun from hitting the front panel, which would tend to cause flare.
The rear side is where the bad weather comes from, and will be shaded, hence buildup on the brackets is likely, so some careful design work is required.
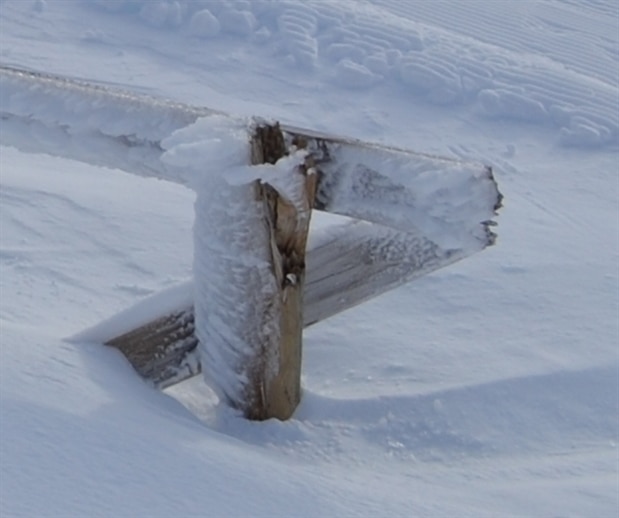
An example of what to expect
BATTERY
The battery will be housed in a plywood box, with a sloping top.
It needs to be strong enough to receive the odd shovel blow. (on the odd occasional it needs to be dug out.)
The location is just beside the return trail, and while the previous blog photo showed no snow, I have seen snow at the top of the posts.
Every couple of days one of the groomers will tidy up this trail, so using a couple of stakes/metal pegs to fasten it to the ground, is a worthy addition.
SLEEPYPi
Jonathon Watkins from SpellFoundry contacted me last year and very kindly offered me a beta version of his SleepyPi to include and test.
This had the very items that I was including as extras, so it makes a very neat solution.
There is an area for prototyping, so I can add a charge control relay and terminals, and it interfaces directly with the RPI.
He even includes the scripts to do the controlling.
I have updated the drawing to include this, the external WiFi unit, and better heartbeat/problem indicator.

Earlier in the design phase I wanted to include the ability to have the RPi do video, and I wasn't quite sure how I could do this with an external device controlling the power.
Using the scripts Jonathon has included, I simply ignore the shutdown signal while its running a video.
The RPI returns a signal to the SleepyPi that its running (or not), so the power won't get pulled until this disappears.
Low Power mode
One of the things that has worried me is the power consumption overnight, and if the skifield is closed due to extreme weather.
During this time there is unlikely to be a charge going into the battery, and while it has a large capacity, the solar panel will be struggling to raise it and run the electronics.
In June 2013 the area got the biggest dump in 30 years, and it took nearly a week to open the road and clear the drifts, hence the need to conserve power.

This was taken by Hamish as they helicoptered in to start clearing the place
I have found some settings to make an Arduino go into low power mode, and they are used in the BADGEr (see my other challenge)
I can enable this mode between 1700 and 0800 (a user setting would be ideal), but at other times, if the server the RPi communicates to isn't there, what point is there taking images?
It's reasonable to assume that the other Ski Tows won't be going if the field is shut, so enabling the future Tx/Rx data earlier may be the solution.
I can use a remote 'wakeup' over the RF data to enable the SleepyPi and resume communicating.
Lodge Server
The images from the camera get pushed out via the satellite broadband to the server for display to the skiing public.
This is currently set at every 15 mins, and at the moment is via IP connected cameras.
For this application it would be better if the images are transferred to the lodge, and then pushed out.
This also allows some staff interaction to capture video or additional images, etc and simplifies the software process's at the camera end.
The generator is started manually, but we have discussed options to collect and transfer environment data before staff arrive, so using a battery powered server (another RPi and SleepyPi perhaps.) has an advantage.
Next Post I need to decide on the software process for transfer.
Mark

