


While sorting out and reorganizing my collection of mostly salvaged zeners the other day I began to imagine what I would have to do to make a simple tester. In the past I have set up the power supply, milliammeter, voltmeter, and a variety of current limiting resistors to test the questionable zeners. After considering the problem for a while I decided that a custom power supply with a few modifications would make a perfect zener tester. I also realized that it would also do double duty as an LED tester.
Here are the parameters of the modified power supply that I envisioned.
Variable voltage control from zero to thirty volts.
Variable current limit from zero to 1000 mA.
Digital display of output current in mA and voltage across the device under test.
A means to calibrate a target mA limit prior to connecting the part to be tested.
A way to connect the component to be tested easily.
A quick inventory of my parts graveyard revealed that all the necessary components for this build were already at hand. I would use the same Chinese power supply kit that I had been using in my recent bench power supply builds.
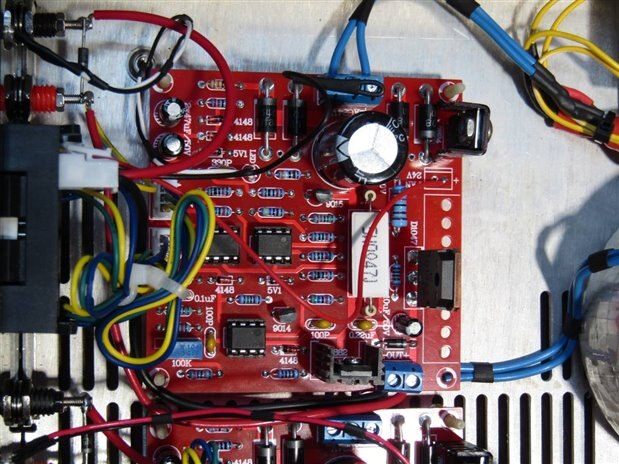
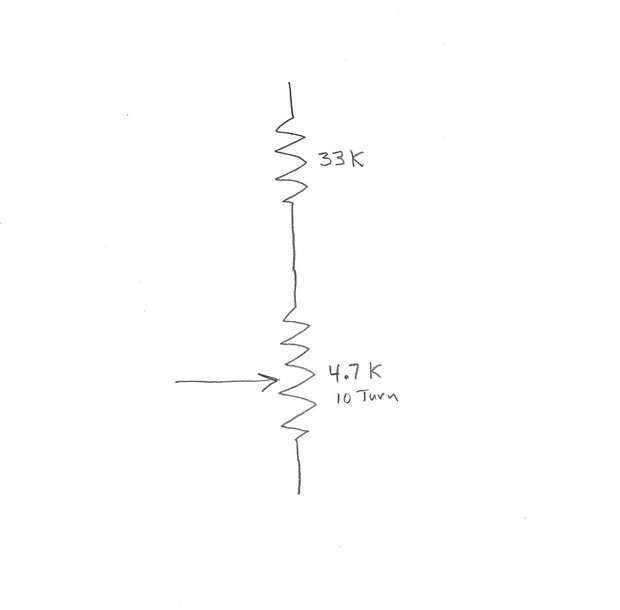
This board which is available from a Chinese Source for $10 accepts an AC input of 24 Volts and will control 0 to 30 volts output at a max 3 Amps. It also has a current limit control so that one can turn the voltage up all the way and it will self regulate the voltage to produce a constant current output. This constant current control was exactly what I needed to make the zener tester work. Since the applications that I will be testing will require currents in the low mA range I began by seeing if I could make the board work well in this range. The unit comes with a 10K potentiometer that with a 270 degree turn moves the current limit from 0 to 3 amps. For this project my preference would be a ten turn pot that controls the current between 0 and 1000 mA. After some experimentation I found that by substituting the following circuit in place of the original 10 K pot I got the result I wanted.
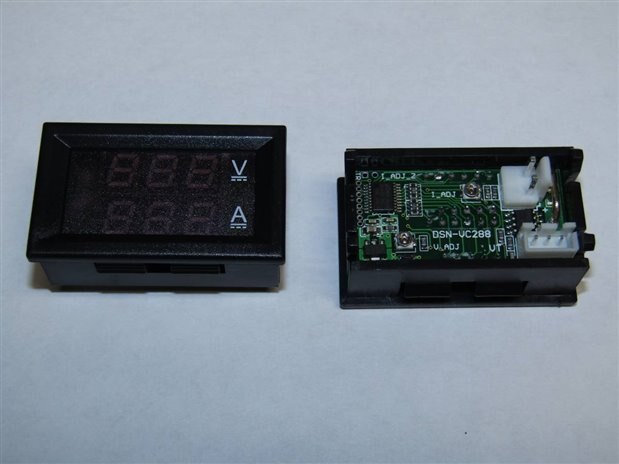
The next problem that I would have to overcome was the display of the digital meter that I hoped to use. I have used these meters on my power supply builds and they will display 0 to 100 volts to a resolution of one tenth of a volt. This will be satisfactory for my needs but the current section with a built in shunt that displays 0 to 10.0 Amps will not have the resolution that I need. I began modification of the meter by removing the factory current shunt and the installation of some low ohm resistors. After several failures I finally got close with (2) 0.1 ohm resistors in parallel. I was then able to fine tune them by adding extra solder to the leads to slightly lower their resistance further. The end result was not off as much as the linearity of the meter over the 0 to 1000 mA range so I was satisfied. The beauty of making test gear for oneself is that you can tolerate the accompanying imperfections with more grace. Here are pictures of the meter front and back.
I decided to put a switch on the output that would allow me to switch the control board's output between a dummy load that I could use to precalibrate the target mA and the actual output to the test leads. By having a center off for the switch I have the added benefit of a parking position between tests. This idea of the switch was given to me a couple years ago by mcb1 in one of the many inspirations he has contributed to my devices over the years.
By now I had collected the case, transformer, control board, meter, and other parts I would need.
I tested the transformer that was a perfect fit for the enclosure and I was dismayed that it put out 30 VAC instead of the 24 VAC required by the board. I have had enough experience with the board to know that this voltage level would stress and probably damage the circuit. In a normal build I would have gone in search of a different transformer but two things made me reconsider. Number one, it was a perfect physical fit which is not always the easy part. Secondly, this application had a relatively low power requirement. I decided to try an old trick where loss of overall power isn't a problem and went in search of a small transformer or inductor that I could put in series with the main transformer. Just as we can use a resistor divider to adjust voltages I would make an inductive divider to lower the voltage to the primary of the transformer. With some luck I found the secondary of a small transformer that moved the primary voltage of my main transformer to 96 VAC and the secondary voltage to a very acceptable 24.4 VAC. In the pictures that follow you can look for the small blue transformer serving as an inductive voltage drop for the main transformer. I did not check it but I was probably inducing a hundred volts or more on its primary. I cut the leads off flush and sealed them with epoxy so they would not be a factor. I have made a note for an experiment some night to see if I can adjust the voltage output of one transformer by loading the secondary of a second transformer that is in series with it.
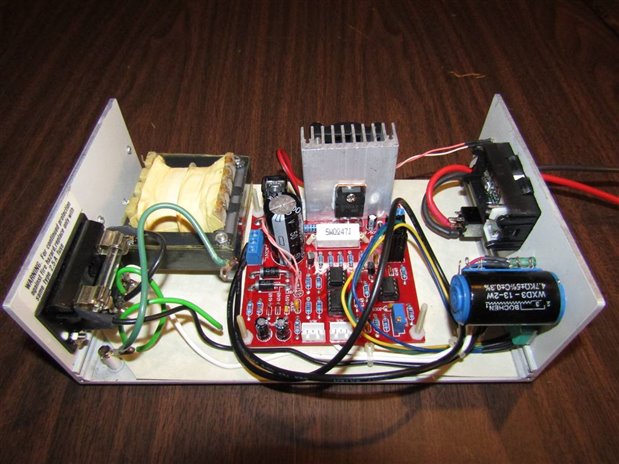
Here are some pictures of the build sequence. You may notice that I do not try to give instructions for building any of my projects. This is because my builds all come from my own pile of junk parts and most would not be able to be duplicated by a second builder. Even I am not usually able to duplicate a build. The idea of the build is however always offered to anyone interested and I will always answer questions below as to how you can integrate your own pile of parts to do something similar.
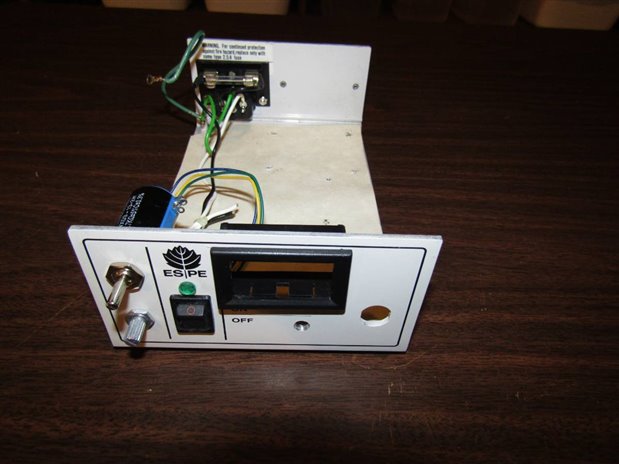
The case came from an old dental cure light. I have used these cases in the past for single channel bench power supplies.
Before wiring has begun
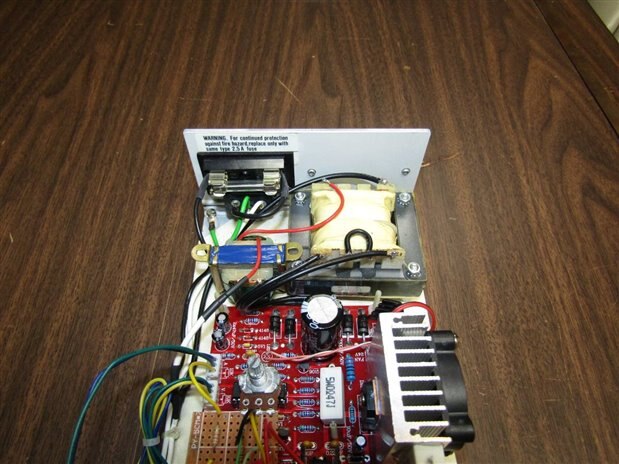
The little blue inverted transformer in the back left area is the inductor that is reducing the voltage of the main transformer primary.
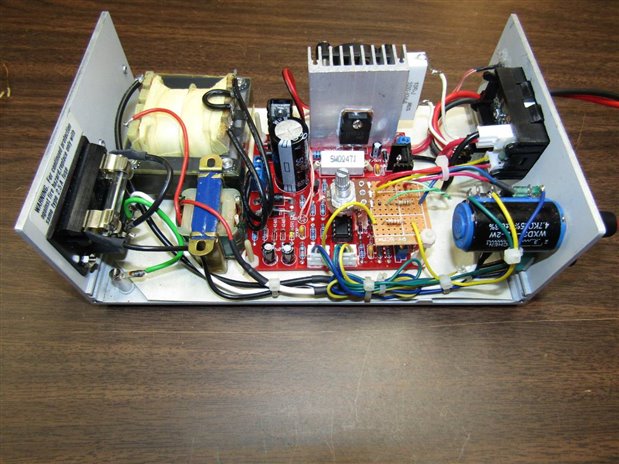
The completed wiring prior to closure of the case.
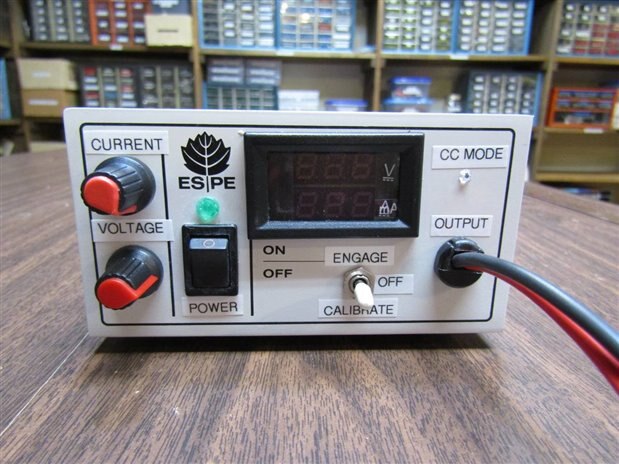
The finished front panel.
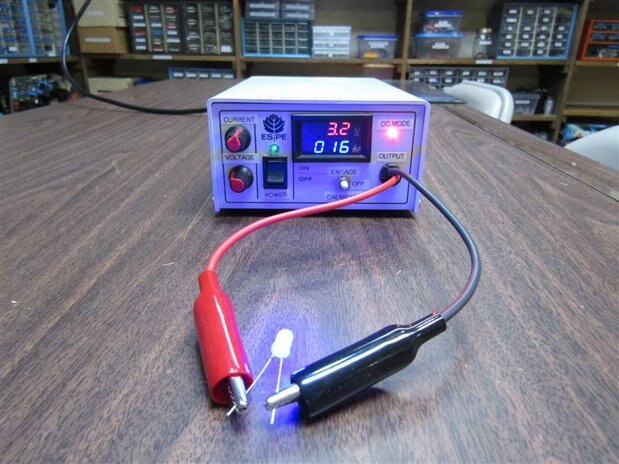
Testing a Blue LED at 16 mA and the meter showing the junction drop of 3.2V.
The bright CC Mode light comes on whenever the board is controlling the voltage to maintain the target current.
John
Top Comments