A few weeks ago Pat Kelly (one of the good folks of element14) told me about the new Freescale boards that use mbed.org for easy and quick firmware building. Easy and quick, you say? That sounds perfect for me, the hobbyist with very little spare time!
I also saw this as a possible substitute to the easy-to-use and well supported Arduino platform, so I was eager to get my hands on one to try it out.
I received my new Freedom Freescale FRDM-KL25Z board a few days later, and after some minor Mac-related hiccups I have to say I'm very impressed! It really is easy to use, and it appears to be very well supported with many libraries and dozens of examples freely available.
Given that this board retails for just 12 bucks, it's a steal of a deal for what it offers. At half the price of an Arduino Uno, it offers twice the pins, 4x the flash, 3x the clock speed, as well as some cool features like touch slider, accelerometer, and tri-colour LEDs. It even has a spot to add a holder for a cell battery to power it - I can see that coming in handy.
One of the best parts, however, is that it is very easy to use, at the level of the Arduino software. Unlike some dev environments, mbed.org is straightforward - no cryptic commands needed, and it hides what we as hobbyists don't need to know so that the interface remains clean and simple (it looks like you can choose to dig in deeper though, if desired).
And mbed.org is free and without code size restrictions - unlike some other environments. For a hobbyist like me, that's perfect!
One of the really cool things about this platform is the way firmware is loaded - when the dev board is connected to the computer, it shows up as a flash drive. To install software all you have to do is drag a file onto the flash drive.
The process does take an extra step when compared to Arduino: compiling in mbed.org creates a firmware file that gets downloaded to your computer, which you then have to drag onto the dev board flash drive. The nice thing about this is that it's easy to keep your programs handy for future use - if you want to reload something you worked on last week to show a friend, just plug in the board and drag the file onto it.
Earlier I mentioned some "Mac-related hiccups" - essentially that was a setup issue related to the way the dev board's own firmware needed to be upgraded to work with mbed.org - the Mac always adds some extra hidden files, which confuses the current version of their firmware (they're working on this for future versions). I was not able to get around this by using VirtualBox, so I just borrowed my mom's computer when I visited her a few days later. That process was very quick - I just copied a single file from my thumb drive onto the dev board to get that firmware upgraded.
After that update everything now works perfectly on my Macbook.
Here are some pictures...
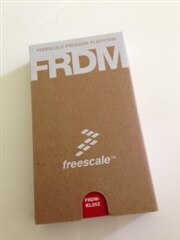
This is the box it came in - neat and tidy, well designed.
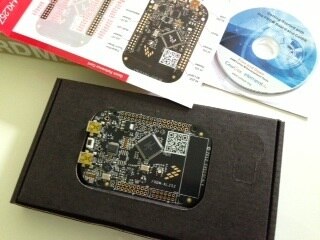
And inside the box we find the dev board, a handy reference card, and a tiny CD with some development software that I chose not to use.
As you can see, the CD is not Mac friendly, as my slot-loading Macbook doesn't like little CDs. I'm sure the software could be downloaded, but I don't intend to use it because I'm using mbed.org.
The one thing I wish was included is the headers for all the connections. Without them I was only able to run a few samples that don't require external connections (I didn't want to solder anything temporarily). Still, with the LEDs, touchpad, and accelerometer that's a lot of fun to be had!
I bought some double headers online (they're very inexpensive), so now have to wait patiently until those arrive before I can try more complex examples. As a good hobbyist I really should have had some of these already on hand though 
Ultimately I'd like to see how this board compares to the Arduino using my favourite Oomlout tutorial: http://www.oomlout.com/a/products/ardx/ (you knew it was only a matter of time!  )
)
But until those headers arrive, I will just have to wait patiently...
Cheers,
-Nico


Top Comments