


Table of Contents
Introduction
This blog post discusses how to make use of Serial Peripheral Interface (SPI) Flash memory with the Arduino, for simple byte-level access to data. I’m going to be using a custom Arduino library (there are other libraries that may be suitable, but mine is just a no-frills, simple-to-use option. It is more restrictive in that I’ve only tested with a single Flash chip, part code SST25VF080B ; it might not work if you use a different chip. The SST25VF080B chip stores 1Mbyte (i.e. memory locations 0x00000 to 0xFFFFF).
If you want to use a more feature-rich, or more general-purpose library that supports other Flash chips, that’s fine of course; the library described here is merely another option.
Simple Read Example
Lets assume you want to read 16 bytes into an array that you’ve defined:
char data[16];
Assuming the Flash memory is wired up to the Arduino, and the library is installed, then you can read the memory by using the following syntax.
uint32_t addr = 0x00000;flash.flash_read(addr, data, 16);
The above example reads 16 bytes starting from address 0x00000, into the array data[16].
Erasing Flash
The Flash memory will need to be erased before writing. You can erase either the entire memory:
flash.flash_full_erase();
Or, a 4kbyte sized chunk (i.e. a length of 0x1000) can be erased:
flash.flash_4k_erase(addr);
Simple Write Example
Writing to Flash memory is pretty simple too:
flash.prepare_write(addr);for (i=0; i<16; i++) { flash.byte_write(data[i]);}flash.write_complete();
What’s the Purpose?
Sometimes there’s a desire to store and use more storage memory space than exists in the Arduino. For instance, graphics files, or sound files can take up quite a bit of space. I intend to use this library to store star data.
One option is to use a microSD card. However, if you just need to store a few megabytes, then an 8-pin SPI Flash memory chip could work out to be cheaper and easier to use.
Note that this blog post does not consider formatting the memory chip into any filesystem format. The only access is raw bytes, accessible by selecting any address on the Flash chip. This is the simplest, most basic, way of using Flash memory.
The code in this blog post was only tested on an ESP32 board (Adafruit Qualia), and on an Arduino Uno R4 Minima modified for 3.3V logic levels. If you wish to use a 5V logic-level Arduino, then a different Flash memory chip will need to be selected, because the SST25VF080B chip used in this blog post only supports 3.3V logic levels.
Connecting the SPI Flash
Connect the Flash chip to the Arduino board as shown.
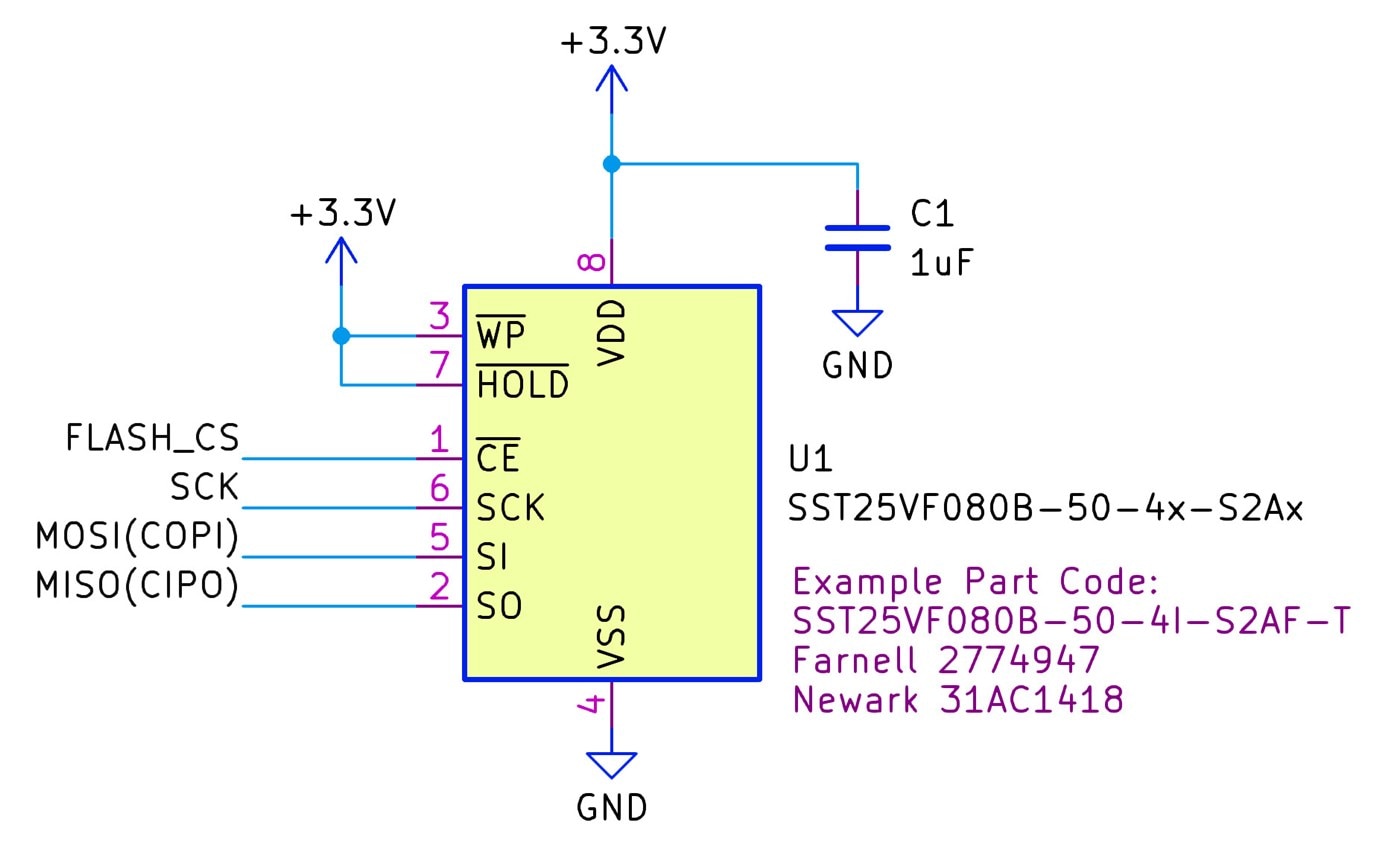
The pins connections between the Flash chip and the Arduino board are:
| Flash Chip | ESP32 Board | Uno R4 Minima | Description |
| 1 (*CE) | A0 (IO17) | D6 | Chip Select, can be any pin that works with DigitalOut |
| 2 (SCK) | SCK (IO5) | D13 | SPI Clock |
| 3 (SI) | MOSI (IO7) | D11 | SPI MOSI (COPI) |
| 2 (SO) | MISO (IO6) | D12 | SPI MISO (CIPO) |
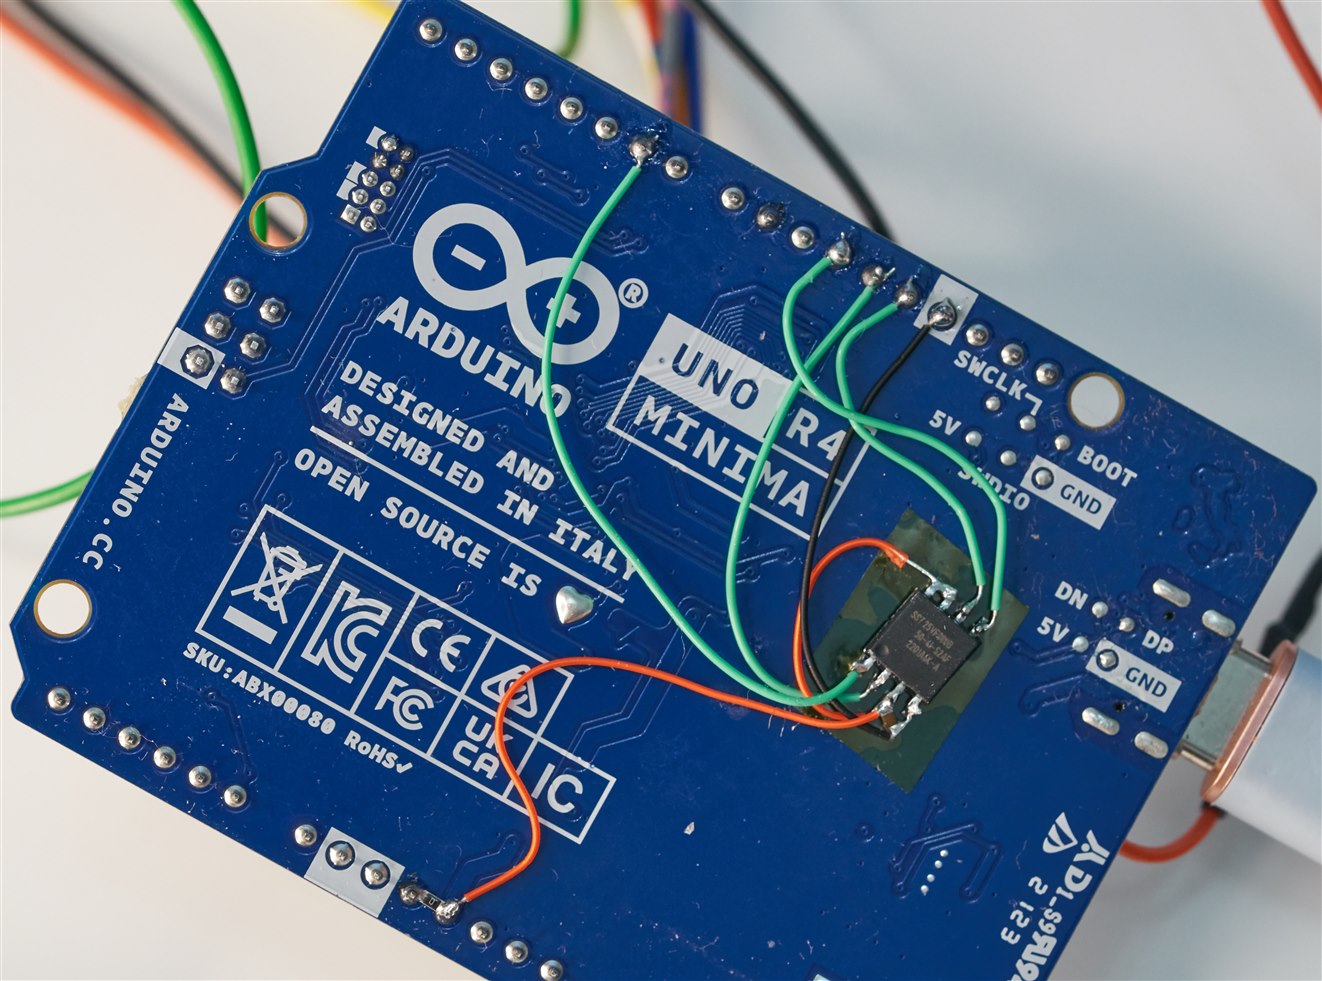
Here's my ugly prototyping on the back of a Uno R4 board:
And this is the prototyping on the underside of an ESP32 Adafruit Qualia board:

If you test this on a different Arduino board and modify the connections and make any code changes, then please mention it in the comments, to help others. Also, as mentioned earlier, the particular Flash chip that I used only supports 3.3V logic levels, so it won’t work with some Arduino boards. The Uno R4 Minima can be easily modified to work with 3.3V logic levels, and the ESP32 uses 3.3V levels by default.
Arduino Flash Library
Download the SST25VF Flash Arduino library from GitHub
To install it, within the Arduino IDE, click on Sketch->Include Library->Add .ZIP File.
That’s it!
Simple Demo Code
Within the Arduino IDE, click on File->Examples->Flash_SST25VF_Library->Flash_SST25VF_SimpleDemo
When run, a menu appears in the Arduino Serial Monitor. It’s easy to use. You’ll be able to read and write 16 bytes to test the library. If the write test is successful, then 16 bytes (ASCII characters A-P) will be written at the start of the memory, and another 16 bytes (ASCII characters K-Z) will be written at the very end of the memory. That’s all the Simple Demo code does.

Flash Monitor / Programmer
By clicking on Examples->Flash_SST25VF_Library->Flash_SST25VF_Monitor_Programmer, a more useful piece of code is available. It is controlled in two ways; either from the menu (like the Simple Demo) or, alternatively, from Python code running on your PC.
Menu access
The menu is self-explanatory, it allows the user to read any part of the memory, by entering an address and number of bytes when requested.
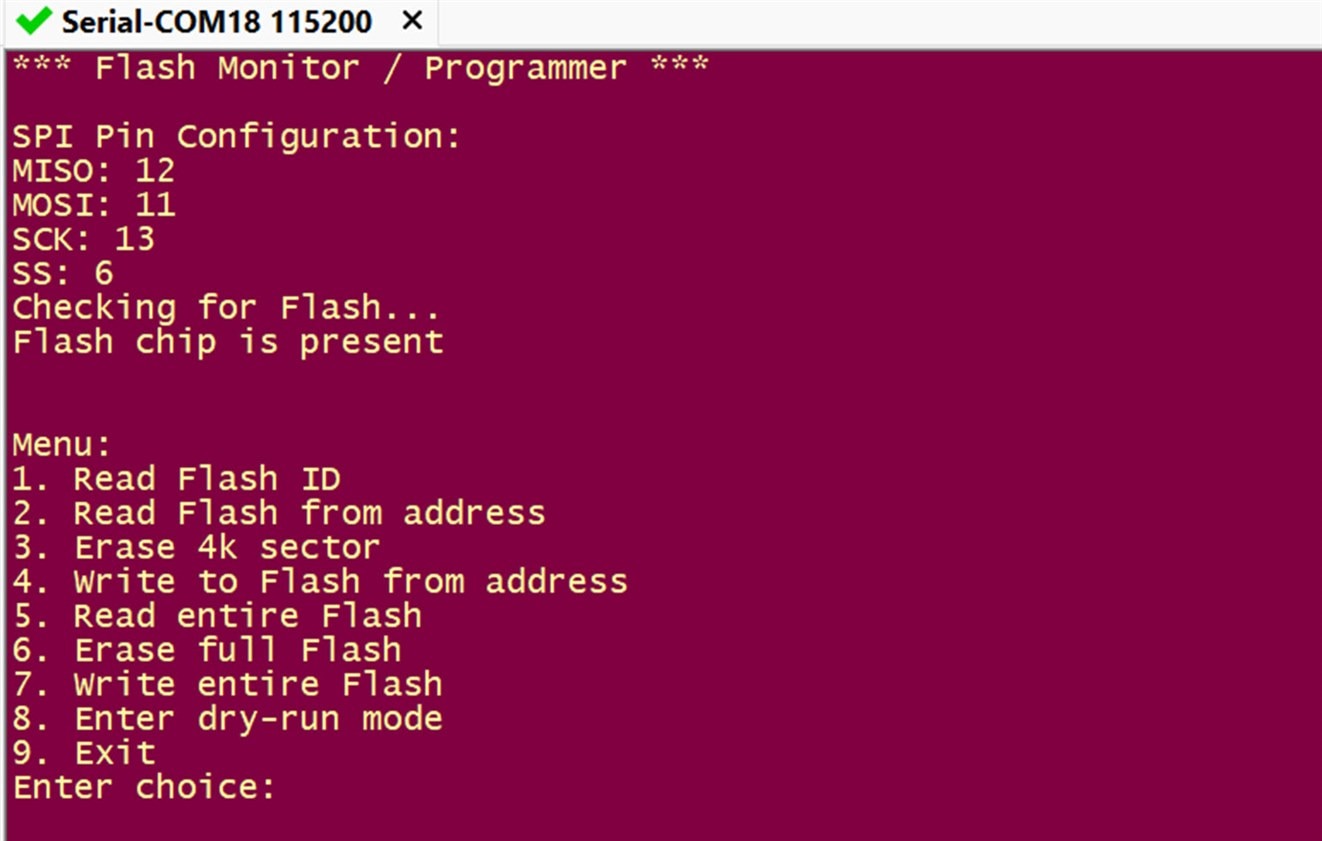
As you can see, there are also some menu options to program the memory, but they are not worth running from the menu, because the expected input is raw binary data, which isn’t easy to enter from the Arduino Serial Monitor. Python can be used for that, which is discussed next. If you want to experiment without running the risk of overwriting data on the Flash chip, then use option 8 in the menu, to toggle the dry-run mode, which will make the code still outwardly behave as if it is writing to Flash, but won't actually do that.
Python access
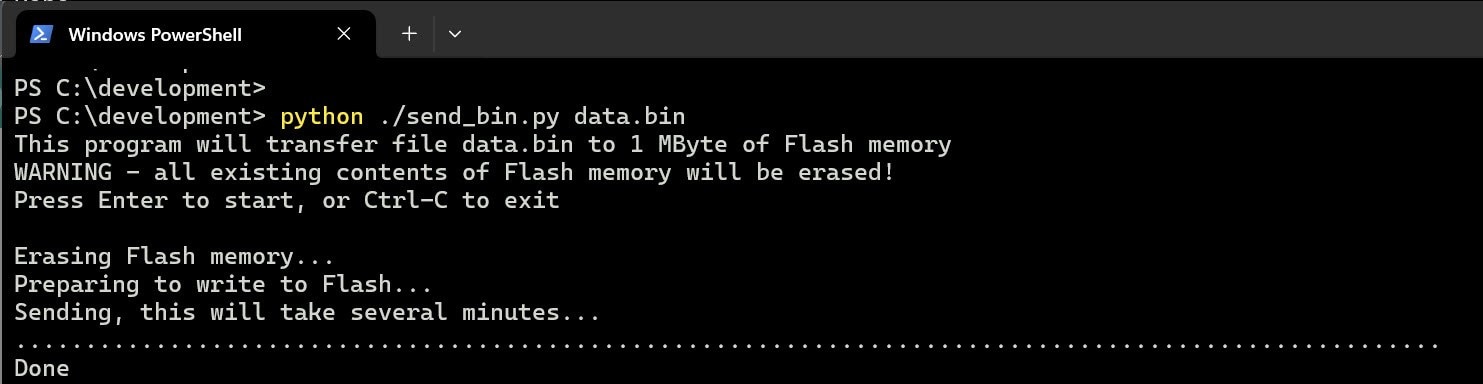
If you want to program the Flash memory chip from a binary file on your PC, then the send_bin.py program can be used. It will communicate (via the USB Serial interface) to the Flash Monitor/Programmer code running on the Arduino, which will in turn program the Flash chip accordingly.
Type the following to transfer any binary file to the SPI memory:
pip install pyserialpython ./send_bin.py mybinaryfile.bin
If you immediately get an error regarding COM port, you’ll need to edit the Python code to reflect the correct serial port name for your system.
The code will take quite a long time (about 5 minutes) to program the chip.
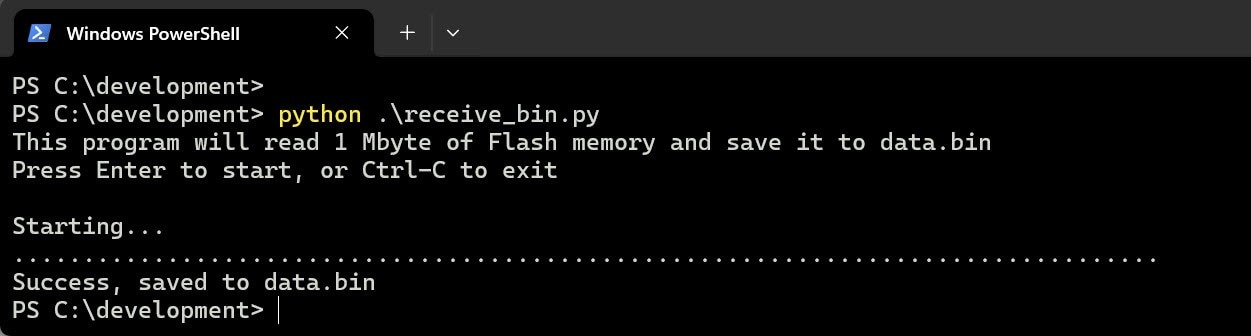
To read the contents of the SPI Flash chip, you can use the following command:
python ./receive_bin.py
When run, the Flash contents will be transferred into a file called data.bin
Summary
For about $1-$2, an 8-pin SPI Flash memory chip can be attached to Arduino boards, and then the contents can be written or read with just a few commands in the Arduino code.
The Arduino Flash library which was described, also supports the transfer of larger binary files, using Python code running on the PC. This will be handy for bulk transfer of a lot of data (such as audio samples).
Thanks for reading!
