Table of Contents
Introduction
A while back, I experimented with quite nice “H450” motor driver modules (see Using H450 (Toshiba TB67H450) Motor Driver Boards with Arduino ), and was impressed that they had a fair bit of built-in protection, were efficient and miniature, and were also cheap! I think they are far better than the typical L298 modules, which are larger, run hotter, and have less in-built protection. The H450 modules are more modern, easily available, and, as will be shown, simple to use!
I decided to make a little board for Arduinos (and other microcontroller boards, such as Pi Pico), and create an Arduino library to easily use it all.
This blog post is quite short, it simply shows how to build and use the board!
The code and PCB files are all on GitHub, ready for use or experimentation.

Specifications
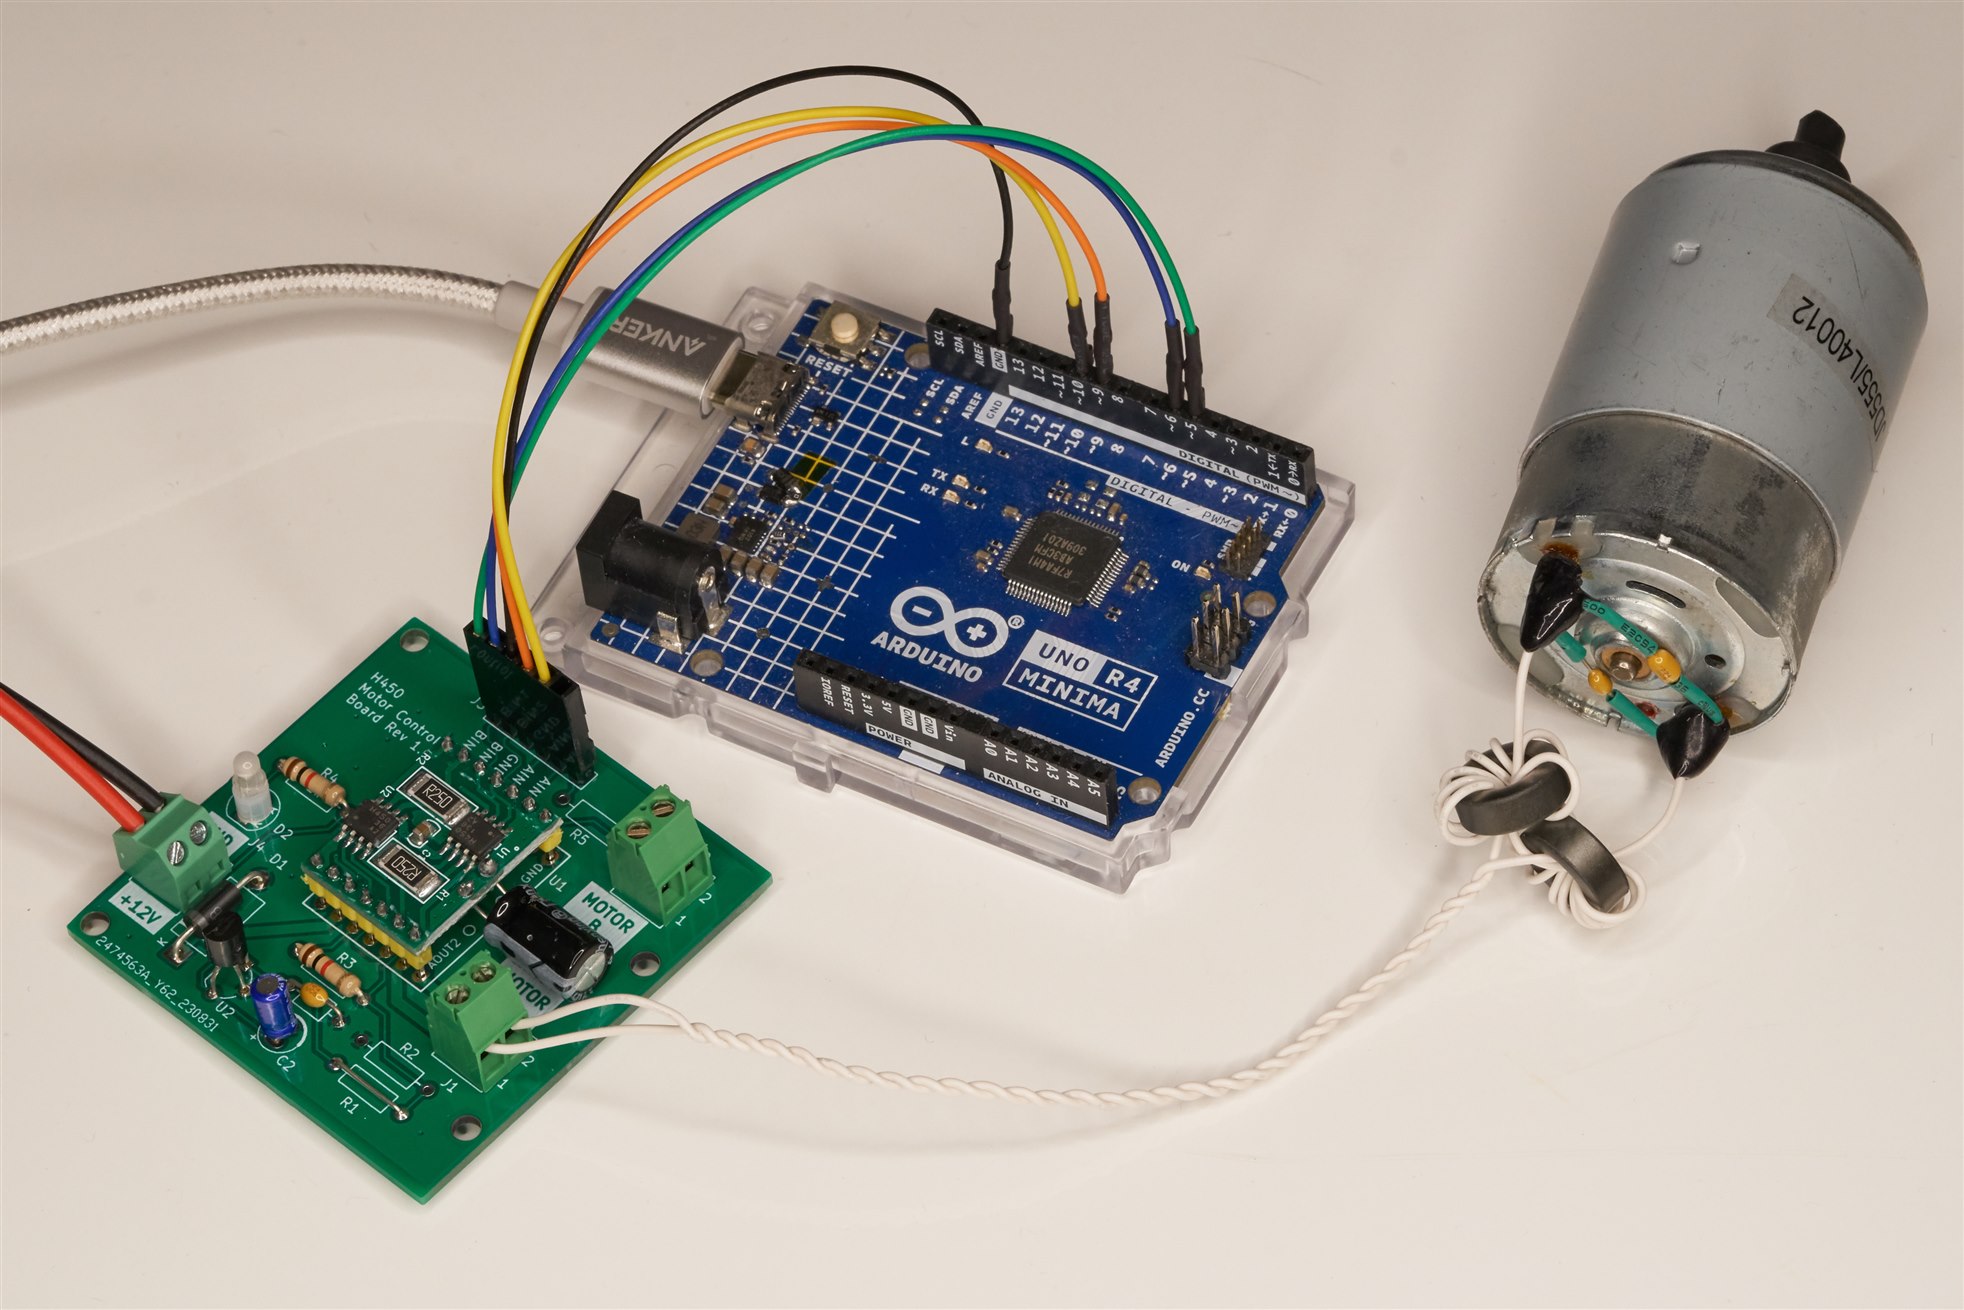
The board should work with all Arduinos (5V and 3.3V), or any other microcontroller. The board has holes for piggy-backing on top of an Arduino if desired, but the connections need to be made with wires similar to the photo above since the board does not plug-on to the Arduino.
The board drives up to two normal (brushed DC) motors. I tested with a 12V motor.
The board is suitable for 7-12V motors, up to 2A. By changing the value of a Schottky diode, the board would be suitable for 12-24V motors.
With some further modifications, the board could be made suitable for 5-7V motors.
Building It
Send the Motor Board Gerber files to any PCB manufacturer!
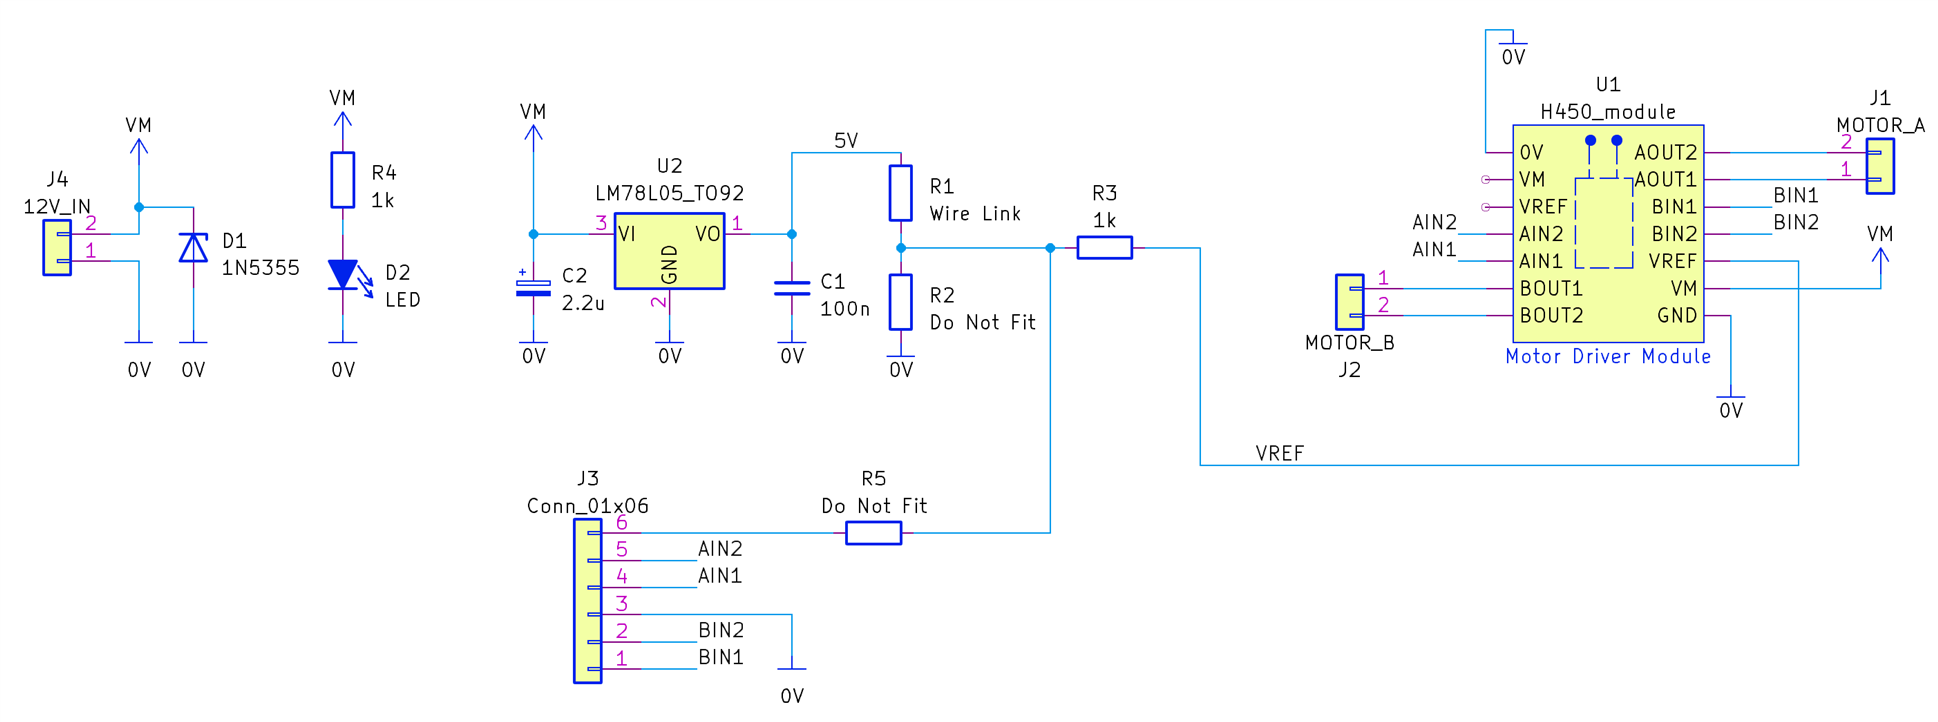
The circuit is pretty simple, since most of the important stuff is already on the ready-built module. The following parts are used:
- H450 (Toshiba TB67H450) Module, possibly A4950 may work too but that is untested
- 3 x 2-way Terminal Blocks, 3.5 mm or 3.81 mm (either will fit the board)
- 78L05 Voltage Regulator, 5V, TO-92 package
- 1N5355 18V Zener Diode
- 3 x 100 nF Ceramic Disc or MLCC Capacitors
- 2 x 10 nF Ceramic Disc or MLCC Capacitor
- 4 x Ferrite Cores Wurth 74270176
- 2.2uF 25V Electrolytic Capacitor
- 2 x 1k Resistors
- LED, 3mm or 5mm
- 6-pin SIL Header Pins

The photo above can be followed to see how to assemble the board. The H450 module has a capacitor on the underside, which needs to be bent outwards as shown in the photo above.
Circuit Diagram
The circuit diagram is shown below. There are a few “do not fit” locations on the board which can be used to adapt the board for different voltage motors, or for altering the current limit. The circuit shown is ready for 7-12V motors.

Connections
The table below shows suggested connections. The Arduino pins must support PWM capability.

The photo below shows the connections on an Arduino Uno Rev 4 board, but any Arduino board will work. Any pin labelled with a tilde (~) symbol supports PWM, and is a valid candidate for operation with this board.

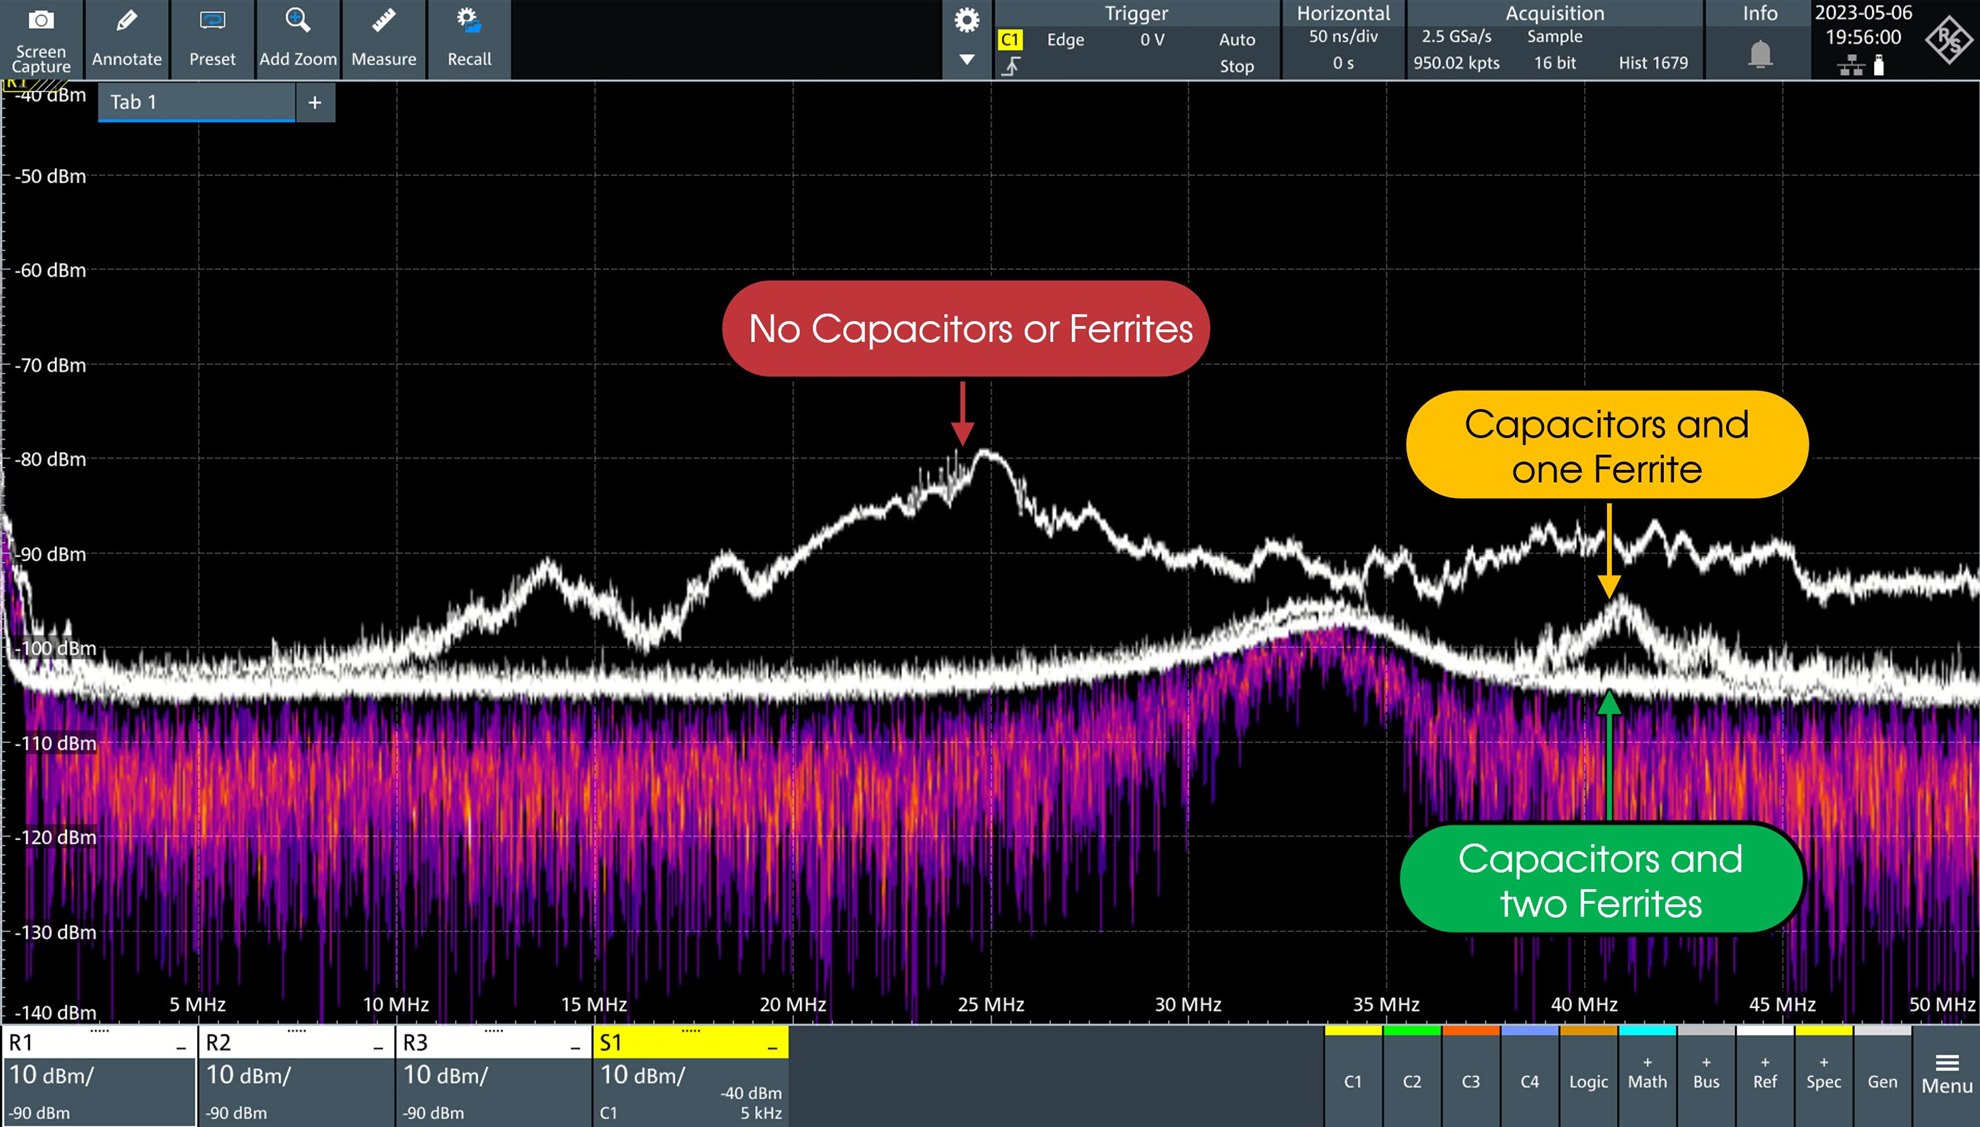
Connect a 100nF capacitor, and a 10nF capacitor, in parallel, across the motor terminals as shown in the photo below. Loop about half a dozen turns of wire through the ferrite cores. Ideally, twist the remainder wires as shown.

The reason for the motor wiring to be this way is shown in the spectrum analyzer trace below; it reduces RF emissions. Furthermore, if the project is radio controlled, you may notice that you get better range when the motors are wired as discussed.

Arduino Setup
Download the Motor450 zip file library.
In the Arduino environment, click on Sketch -> Include Library -> Add .ZIP Library and select the zip file
Click on File -> Examples and then near the bottom of the list you'll see Motor450 H450 Motor Library. Click on that and select MotorTest.
Example code will be displayed. Connect to your Arduino and click on the Upload icon!
Click on Tools -> Serial Monitor to see the following displayed:

The code is self-explanatory, and should be easy to incorporate into any project, but if you have any problems, drop a comment below.
Summary
The H450 motor driver modules are very useful, and with the built-in protection circuitry, they should prove to be reliable. The board is easy to assemble since there are so few components.
Once assembled, the Arduino library should allow operation within minutes.
Thanks for reading!
