https://docs.google.com/document/d/1VGnVMQpkWWMg6YHJZhtBj6XfbXAs6llJu9ehe6PzbAk/edit?usp=sharing
THE Avnet Azure Sphere KIT
(Test Drive & Review)
Introduction:
The Story:
An experimental experience and confession of a newbie to Azure IoT Hub. The journey through to getting data from device to Azure cloud exploring push technology
The Kit:
AVNET MT3620 (versatile compact and sensor laden IoT platform)
The Setup:
Visual Studio 2017/2019 (2017 was used)
Azure Sphere SDK (from Azure github)
The Device Driver:
FTDI: FTDI driver for Windows should be installed
TAP: Tap driver for Windows 10 installed
The Connection:
Getting Ready to Connect:
- Initial Testing:
- Content Server Sync(doing your initial 15 days routines)
Reading azsphere kit information:
Configure AzureSphere Kit IP Address:
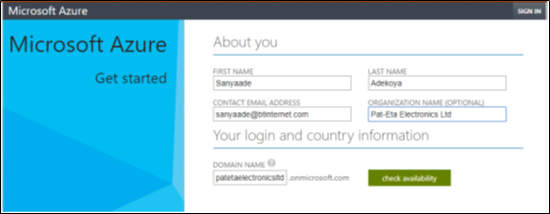
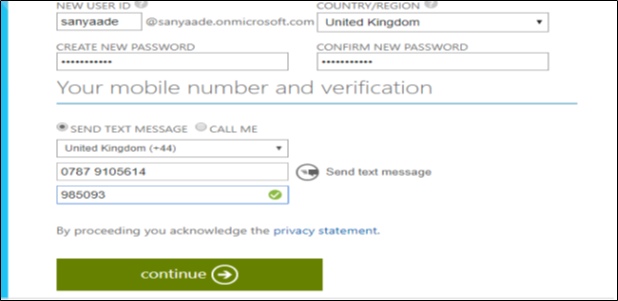
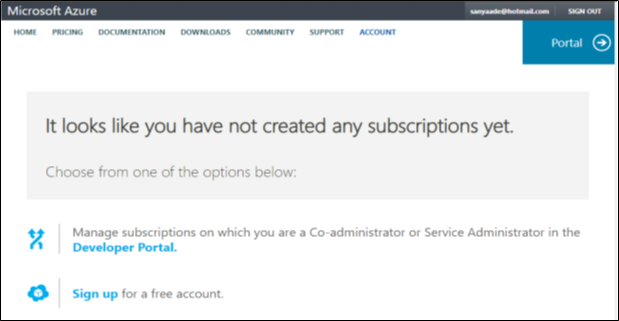
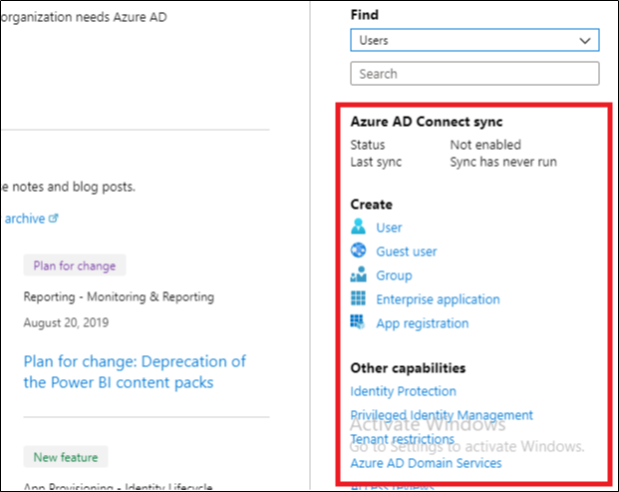
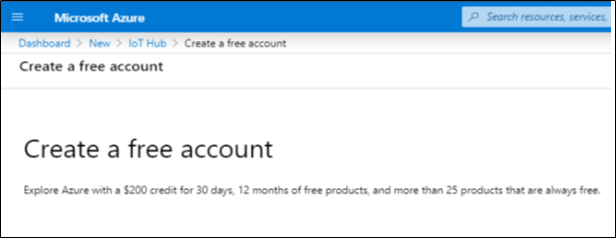
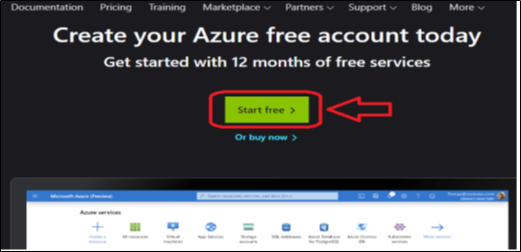
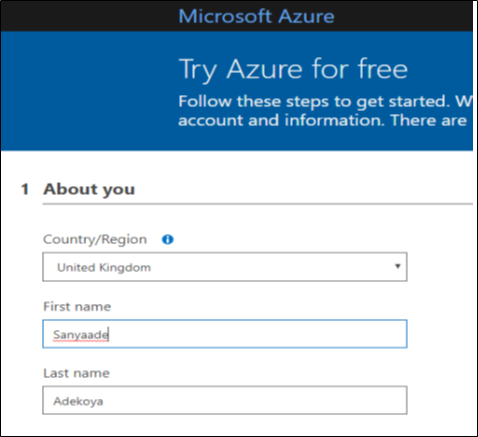
Sign up for Azure Sphere Account:
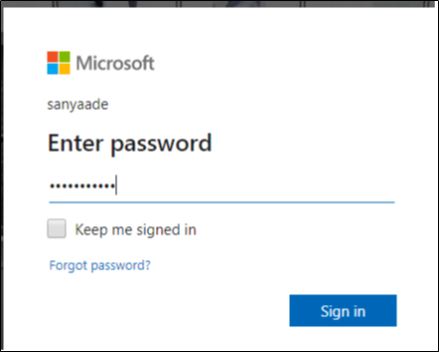
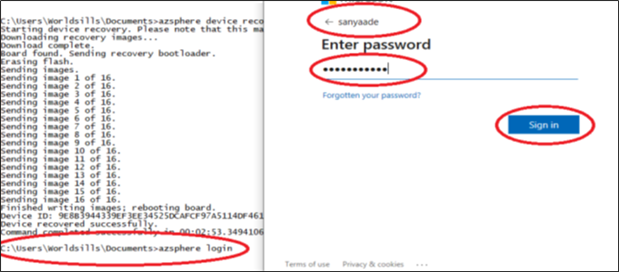
log-in to your account
Note: Due to the nature of my involvements, I have many accounts that were associated with Azure Cloud. Your mileage may vary.
If everything is successful then you should see the screenshot message below:
You should be login into your azsphere azure account.
As you can see from the screenshot above:
- 1.) My Azure Sphere tenant name is : 'lsecHEcomputingRobotics' which I created when setting for the AVNET Azure Sphere MT360 kit competition. You will need to create one for your azsphere kit.
===========================================================================================================
Phase 1: Competition: (15 Days Continuous Pinging)
The next and probably the last step is to configure your azsphere for networking. Many people may be confused just like I was with this section. What it basically meant was that you will be setting the device up to communicate over the air with IOT hub. In order to achieve that the azsphere will need an IP value assigned to it. Lets go:
open the azure command prompt preview:
- next enter the following routines:
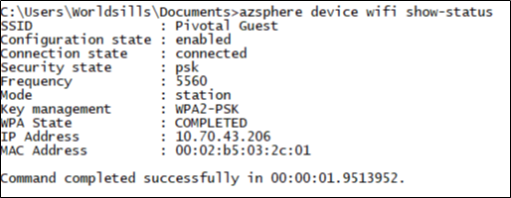
- azsphere device wifi show-status
you should see the following
from the above, you see that the IP address is not configured hence the device is not connected either.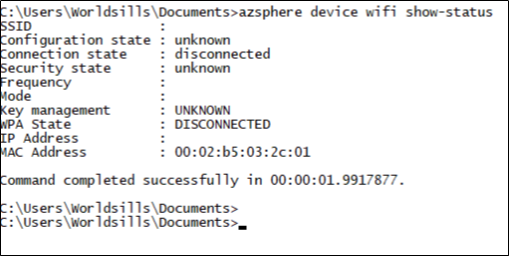
Next run the following command:
azsphere device wifi add --ssid <yourSSID> --psk <yourNetworkKey>
- e.g. azsphere device wifi add --ssid PivoGuest --psk alwaysbekind
ATTENTION: If the SSID or key includes a quotation mark, use a backslash to escape the quotation mark. Backslashes do not require escape if they are part of a value. For example:
azsphere device wifi add --ssid "New SSID" --psk "key \"value\" with quotes"
As you can see above my -s or –ssid is in quoted marks.
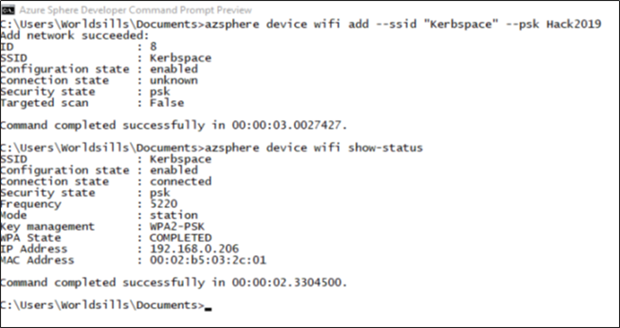
If we now run the command => azsphere device wifi show-status, we should have the following result and be connected.
See below for another correct way I was able to the azsphere connected to WiFi:
C:\Users\Worldsills\Documents>azsphere device wifi add --ssid "Kerbspace" --psk Hack2019
The next step now is to ping the contest server, to do we need to install the avnet program called azsphere-contest-app from this url on google drive: https://avtinc.sharepoint.com/teams/ET-Downloads/Shared%20Documents/Forms/AllItems.aspx?id=%2Fteams%2FET%2DDownloads%2FShared%20Documents%2Fprojects%2FMicrosoft%20Azure%20Sphere%2FHackster%20Contest%2FAzure%20Sphere%20Contest%20Registration%20App%20%28v1%2E2%29%2Ezip&parent=%2Fteams%2FET%2DDownloads%2FShared%20Documents%2Fprojects%2FMicrosoft%20Azure%20Sphere%2FHackster%20Contest&p=true&originalPath=aHR0cHM6Ly9hdnRpbmMuc2hhcmVwb2ludC5jb20vOnU6L3QvRVQtRG93bmxvYWRzL0VYYzBMczVtSkN0SHRET3g1LVNad0FjQmZSQkY4c2l5ci1IVGRURUE2NDNEbFE_cnRpbWU9SlNaYVk4WlUxMGc
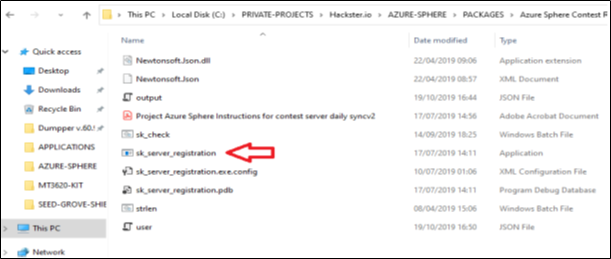
Well just download the whole folder, unzip it in your contest kit folder. Next navigate to the folder and then double click on. See the item arrowed below:
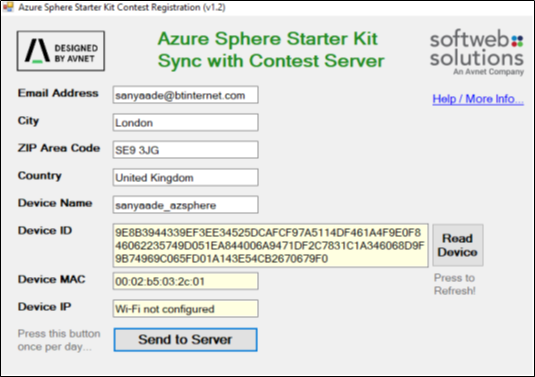
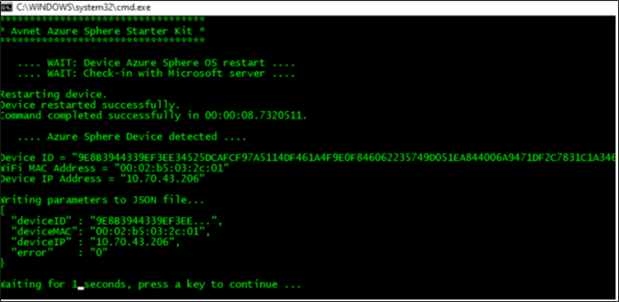
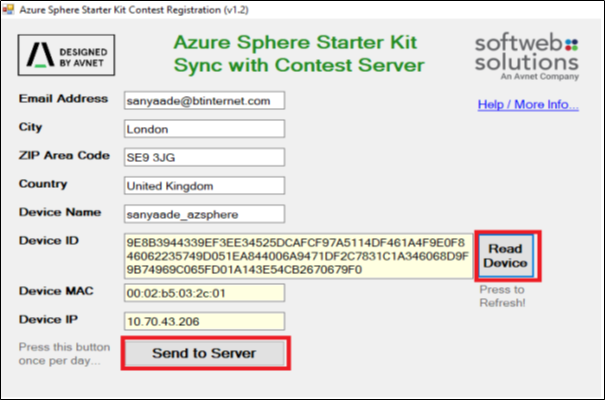
A window will open up for you to enter your details that will be sent to contest server. Fill in your detail. Now click the “Read Device” button at the bottom right hand side of the window. The program will interrogate with the azsphere devicre to obtain its ID, MAC ans IP values
if everything went well like the above green window then you contest-app program should look like the below screenshot
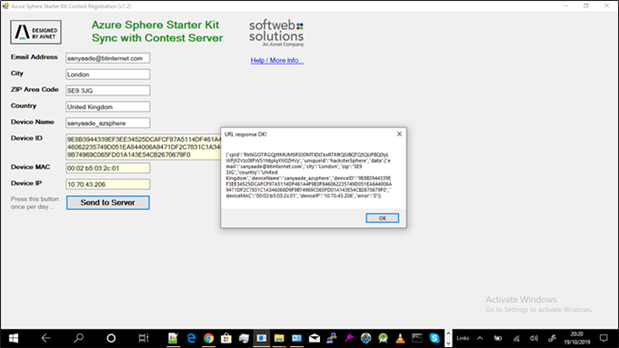
Click the “Send to Server” at the bottom of the program to have these details sent to the contest-app server. The only remain for complete part 1 of the competition is now to run the contest-app daily and continuously to ping the contest server for 15 days. Hum! Happy hacking and see you soon in phase 2 of the competition.
Phase 1 Report:
The most challenging part of the phase 1 is azure cloud account setup. Microsoft has loads of information that spread across their internet portals. Most of them vary vastly from different versions of Visual Studio editions. I thought since the azsphere kit itself is used mostly with the C language, portability and cross domain across the visual studio family should be a breeze.
Also Azure account sign up has been a painful experience for most of us that are newbie. It is either is too steep up, too steep down and mix-match. Most people on the Element 14 and Hackster.io reportedly complained about these processes. See you in phase 2:
AZSPHERE CONTEST PHASE 2(Sensor Data to Cloud)
Phase 2: Competition: (Sending Sensor Data to Azure IoT Hub)
The task for phase 2 of the contest is to send sensor's data to the Azure IoT hub.
While the azure sphere IoT device is relatively new and not in retail mode yet, avnet has published the reference design code for it on their => https://github.com/Avnet/AvnetAzureSphereStarterKitReferenceDesign . These provide some sort of jump start codes for those of us who want to tingle with the kit since reference code explores the features available on the evaluation board. Unfortunately I was unable to lay my hands on the MT3620 module so it was impossible for me to create interfaces for it from scratch. So I will be using the “Start Kit” here.
Let us create a folder and named it coding. Next we clone the github into that folder:
git clone https://github.com/Avnet/AvnetAzureSphereStarterKitReferenceDesign
This will create a sub-folder named AvnetAzureSphereStarterKitReferenceDesign and will download the software C code inside it. The folder above contains some samples code written in the C-language that will be using to interrogate with the start kit onboard sensors.
Next launch the Visual Studio IDE, mine was the 2017 edition of the compiler.
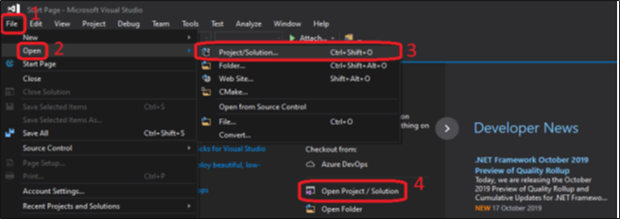
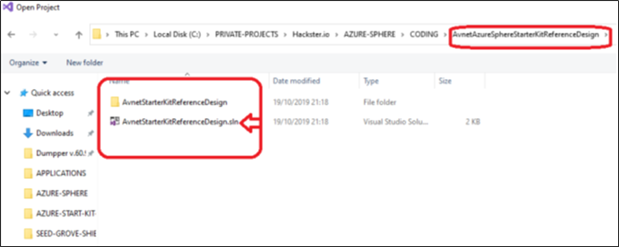
Now open the project solution file
you can either click on file menu then select open and project/solution or use Ctrl + Shif + O
Next navigate to the project folder and open the project solution file inside Visual Studio.
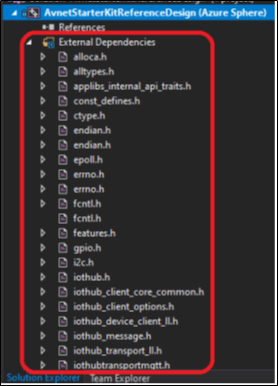
A quick walk down the aisle of the azsphere start kit reference code shows the dependencies libraries that the device made use of. See the screenshot:
I believe that this contains generic library code that can be imported by variant devices that are based around the MT3620 families. How portable are the libraries will what I love to explore and to see if these can be ported to Linux, Mac Osx with little efforts. This is the beauty of the C-language since it available on many OS platforms mostly at embedded level. Various API functions like messaging, data transport, GPIO, i2c, endian bits including onboard sensor devices and the client to iothub server were defined in the header files included in the library.
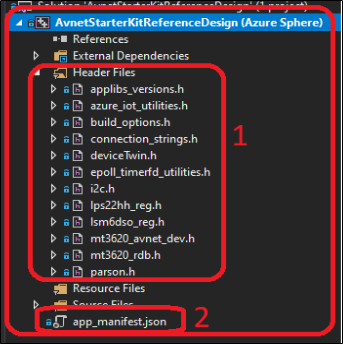
Here are the header files and the manifest json file:
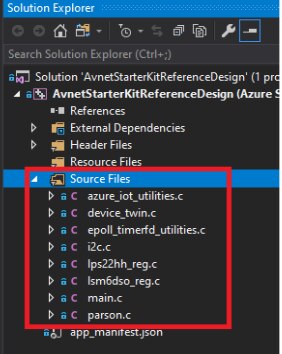
The reference source files are being shown below here:
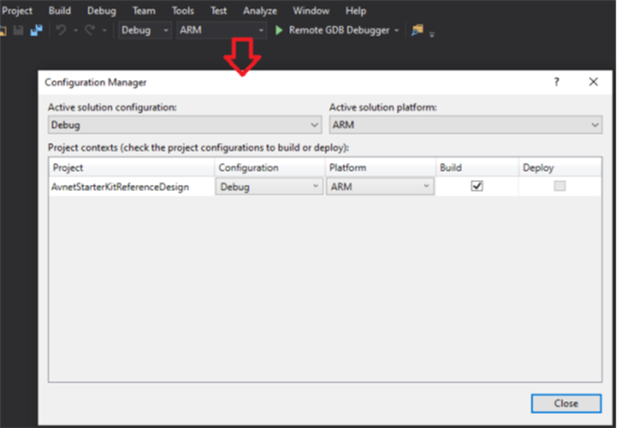
Exploring the reference design configuration show the below setup:
There is opportunity to modify this configuration to derive a new one or an extension of it. More about this later. Also configuration for release or debug including pre-build mode can be configured here.
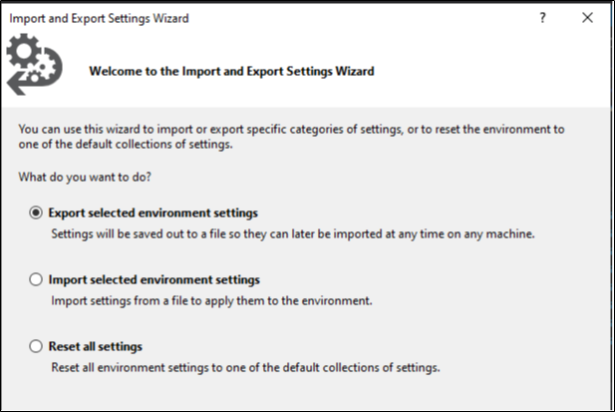
When playing around any referencing code, it is a good practice to backup settings in order to be able to fallback to the original configurations if thing get out of hands most especially newly introduce device like avnet MT3620 into the market. Luckily visual studio provides that for us. See below:
on how to export project environment settings from visual studio
On a TestDrive:
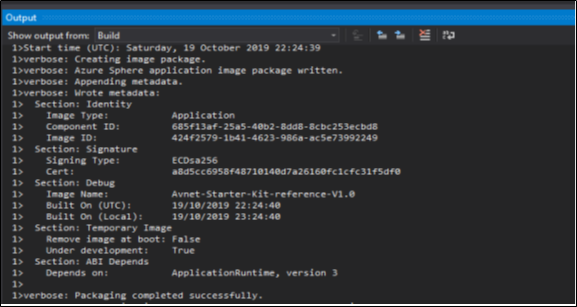
First let us build the out of box of the reference project. Select project and click on build the solution option.
The test build result shows that we are able to compile the project without errors:
This is cool as we know know that any consequence error arriving will be coming from us and not from the reference code.
Next let us look at the program start up file => main.c
Its include directives (header files) are as shown below:
#include <errno.h>
#include <signal.h>
#include <stdbool.h>
#include <stdlib.h>
#include <string.h>
#include <time.h>
#include <unistd.h>
#include <stdio.h>
#include <math.h>
The above header files are mainly standard generic C header ones.
Next ones shown below are more specific to the azsphere starter kit for device version management, i2c API declaration, wifi API connection parameters, dual MCU API prototyping, MT3620 specific API as defined by avnet.
// applibs_versions.h defines the API struct versions to use for applibs APIs.
#include "applibs_versions.h"
#include "epoll_timerfd_utilities.h"
#include "i2c.h"
#include "mt3620_avnet_dev.h"
#include "deviceTwin.h"
#include "azure_iot_utilities.h"
#include "connection_strings.h"
#include "build_options.h"
There are also header file for logging, i2c interface, GPIO configuration/mappings, wifi configuration values and some few more...
#include <applibs/log.h>
#include <applibs/i2c.h>
#include <applibs/gpio.h>
#include <applibs/wificonfig.h>
#include <azureiot/iothub_device_client_ll.h>
Device developers should always examine vendor code and play around with library header files. Good understanding of the header means we can play very well the available API and to be able to extend or port them into another platform e.g. MicroPython to enable mt3620 running on MicroPython. I have a plan on given a try of getting MT3620 running Micropython hopefully.
The three onboard button have their access code as shown below:
static int buttonPollTimerFd = -1;
static int buttonAGpioFd = -1;
static int buttonBGpioFd = -1;
static GPIO_Value_Type buttonAState = GPIO_Value_High;
static GPIO_Value_Type buttonBState = GPIO_Value_High;
They were set to non pressed mode (button up).
On the Wi-Fi, there is a routine that work with json file to contain and store start kit Wifi setup information including owner fill-in information that were sent to contest server for example or the iothub
WifiConfig_ConnectedNetwork network;
int result = WifiConfig_GetCurrentNetwork(&network);
if (result < 0) {
// Log_Debug("INFO: Not currently connected to a WiFi network.\n");
}
else {
frequency = network.frequencyMHz;
snprintf(bssid, JSON_BUFFER_SIZE, "%02x:%02x:%02x:%02x:%02x:%02x",
network.bssid[0], network.bssid[1], network.bssid[2],
network.bssid[3], network.bssid[4], network.bssid[5]);
if ((strncmp(ssid, (char*)&network.ssid, network.ssidLength)!=0) || !networkConfigSent) {
memset(ssid, 0, 128);
strncpy(ssid, network.ssid, network.ssidLength);
Log_Debug("SSID: %s\n", ssid);
Log_Debug("Frequency: %dMHz\n", frequency);
Log_Debug("bssid: %s\n", bssid);
networkConfigSent = true;
Routine updating on the azure hub when there are changes made from previous settings are as shown below
#if (defined(IOT_CENTRAL_APPLICATION) || defined(IOT_HUB_APPLICATION))
// Note that we send up this data to Azure if it changes, but the IoT Central Properties elements only
// show the data that was currenet when the device first connected to Azure.
checkAndUpdateDeviceTwin("ssid", &ssid, TYPE_STRING, false);
checkAndUpdateDeviceTwin("freq", &frequency, TYPE_INT, false);
checkAndUpdateDeviceTwin("bssid", &bssid, TYPE_STRING, false);
Poking cloud server periodically is as coded below:
AzureIoT_DoPeriodicTasks();
routine for doing the client setup is contained in a function called:
AzureIoT_SetupClient()
There are other functions implemented including polling, peripheral device handlers, timers, etc...
below is the buttons gpio function routines
// Open button A GPIO as input
Log_Debug("Opening Starter Kit Button A as input.\n");
buttonAGpioFd = GPIO_OpenAsInput(MT3620_RDB_BUTTON_A);
if (buttonAGpioFd < 0) {
Log_Debug("ERROR: Could not open button A GPIO: %s (%d).\n", strerror(errno), errno);
return -1;
}
// Open button B GPIO as input
Log_Debug("Opening Starter Kit Button B as input.\n");
buttonBGpioFd = GPIO_OpenAsInput(MT3620_RDB_BUTTON_B);
if (buttonBGpioFd < 0) {
Log_Debug("ERROR: Could not open button B GPIO: %s (%d).\n", strerror(errno), errno);
return -1;
Test driving:
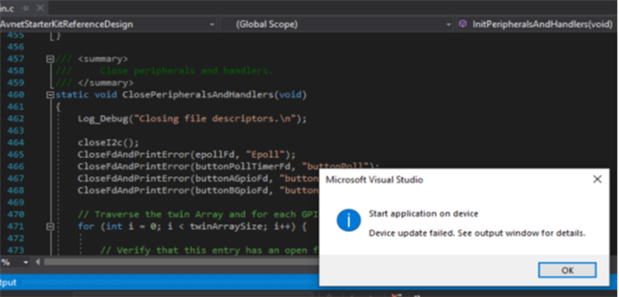
if you run the program you may get an untrusty message and the app will fail to run on your device
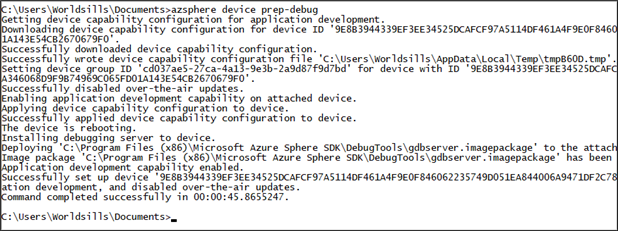
the solution to the above message is to put the device in pre-debug mode in order to allow programming it from your PC.
Open the azure command prompt preview and run the following commands:
azsphere device prep-debug
This will disable over the Over-The-Air mode and put the starter kit in local mode and prevent it from the update from the WiFi interface. The debugger tools will then be deployed onto the device. 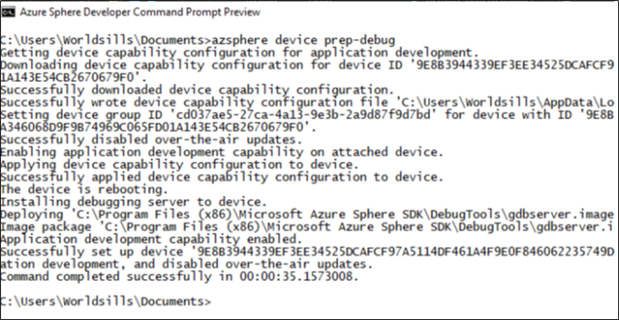
Hey!
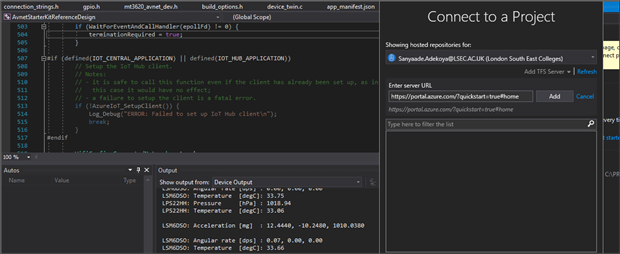
Now you can start to program and debug the starter kit from within visual studio.
Test 1: LED Blink, Sensor readings:
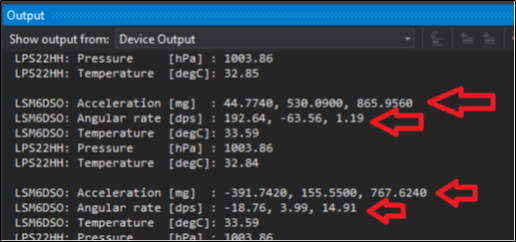
watch the accompanying video to see these. The screenshot below also shows the values of accelerometer and angular phase changes when the board was manually rotated and moved around:
Test 2: Connecting and Sending Device Data to Cloud
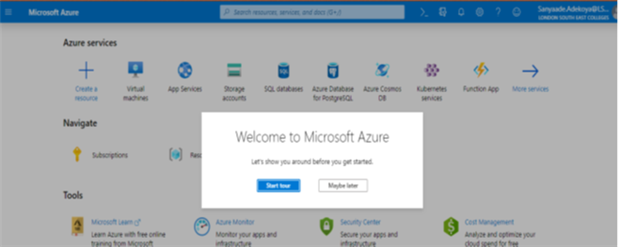
- Next login into your Azure online portal in order to do a azsphere device to cloud communication and to send those data in step 1 above to Azure hub:
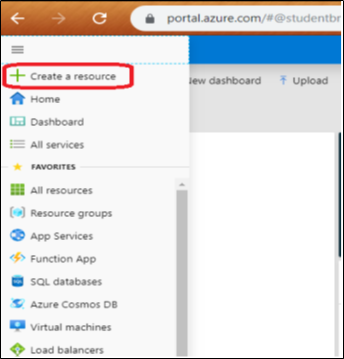
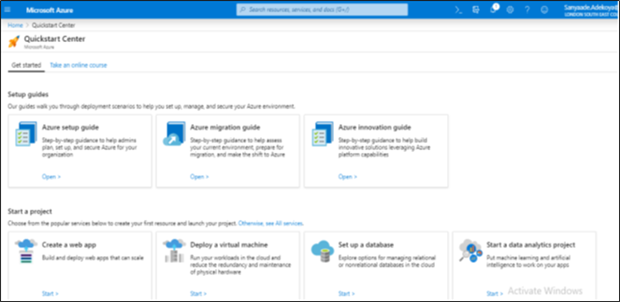
- Create a resource in the top left
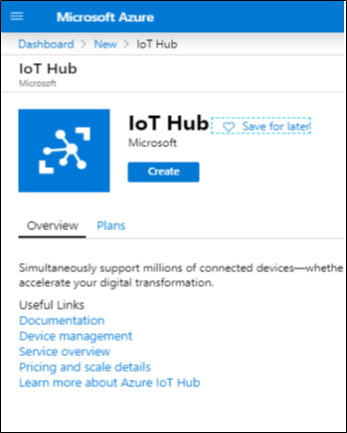
- Then search and select IoT Hub to create it
Note: Please beware of the free account and the paid version. Make sure you follow the free account steps throughout.
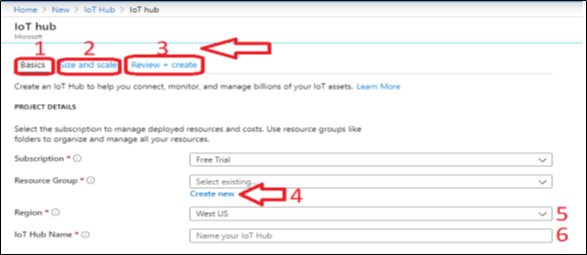
Now complete your IoT Hub registration details
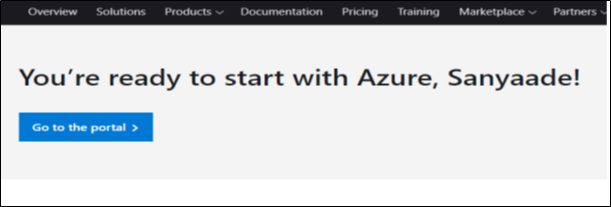
if you complete the registration process to the screen below then you are set up!
Click on the go to the portal button to proceed to the next stage of the device to cloud registration, huh!
- Now complete the six step highlight below to create and get your device ready for provisioning
This is mine creation below:
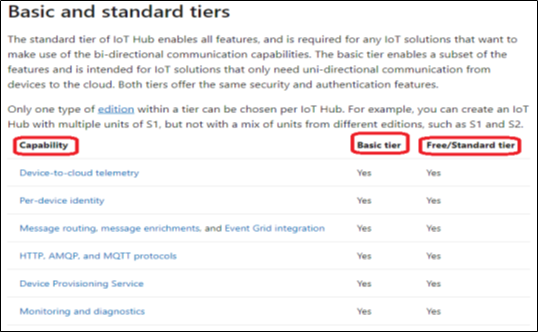
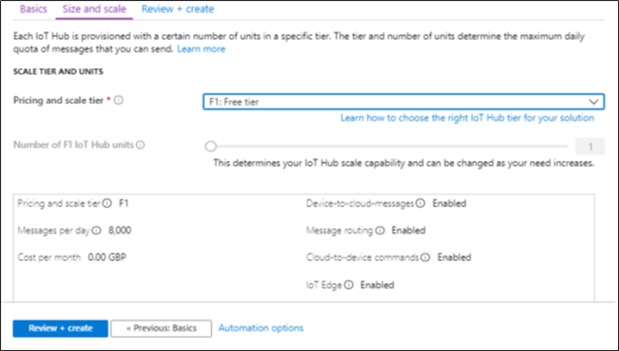
The next is very crucial since you could gobbling cost of data to cloud so a mindful steps are required when choosing the size and scale of how to provision your IoT device. Mind how you do this. Also see below for a quick overview of Basic and Standard tier
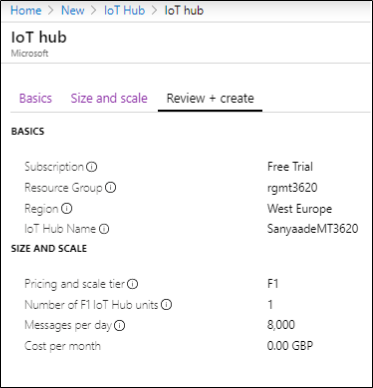
I went for the free tier at least for now that I am experimenting Azure IoT hub for the first time:
Next click on Review+create button to go to the last stage and actually create your IoT hub device
Next review your options and then click the create button to it done for your.
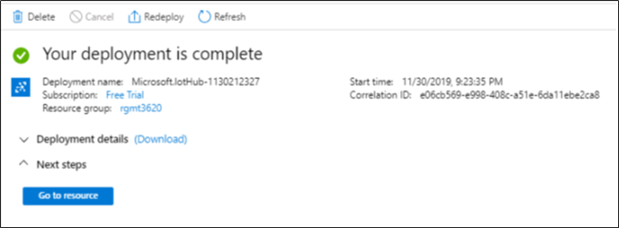
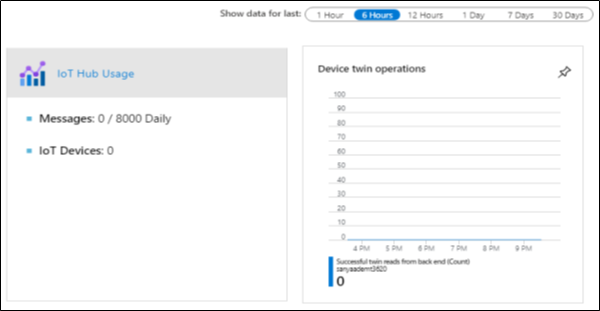
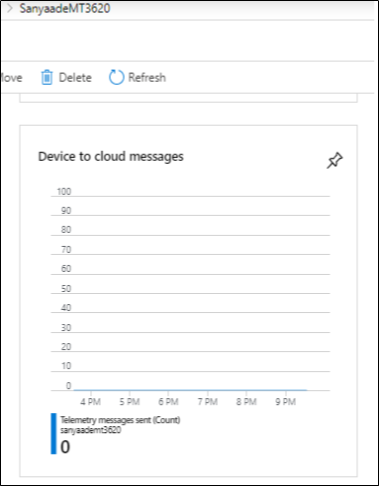
You will get a similar results like those shown below here:
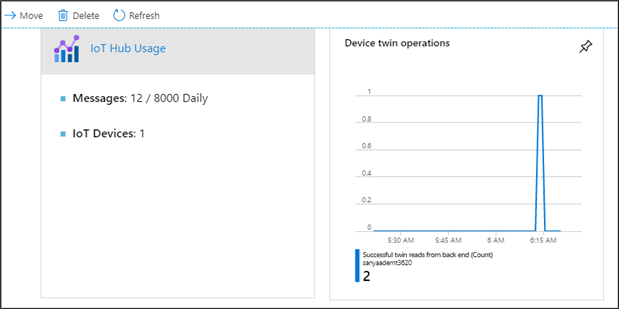
As you can see from the above images, our device twin operartion and devcie to cloud data graph are empty with no values as we have not connect the local azsphere to Azure cloud IoT Hub and send data to it device. This is our next task but we need to provisioning our azsphere to link it to IoT Hub, lets go:
Our next task is provision our device and get it connected to IoT. In order to achieve this we take the following steps:
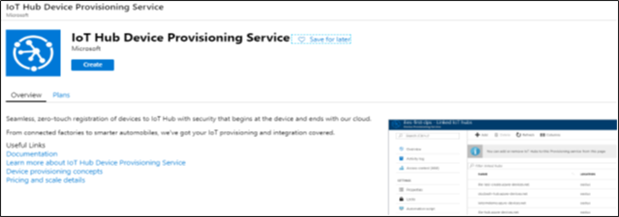
- IoT Hub Device Provisioning Service
- now go to dashboard and Click on Create a resource
- and search for Device provisioning service.
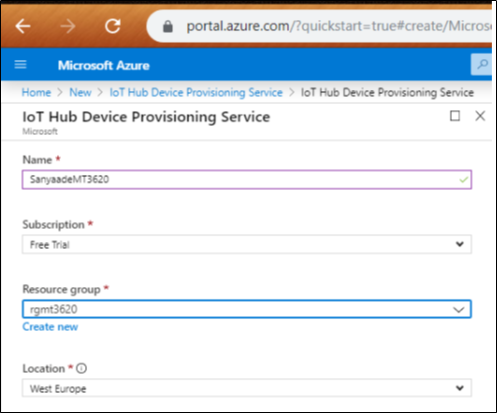
3. Next fill-in your details and click Create:
You should get a similar result like show below here:
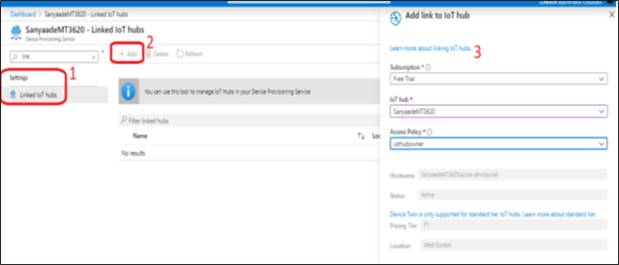
In order to link the Azure Sphere device to the service, select settings from your provisioning device, next
click on Linked IoT Hubs. Now click the +Add button see the screenshot below:
Next fill-in the details as shown in section 3 above, then click the save button confirm your action. Now refresh the Linked IoT Hubs page to get the updated settings
Local to Cloud connection: (AzSphere Device configuration)
- Next open Azure Sphere Developer Command Prompt
- Next issue the following command to download ypour device certificate into your computer
=> azsphere tenant download-CA-certificate –output SanyaadeMT3620certificate.cer
Note: (replace SanyaadeMT3620certificate.cer with your own make up name)
Few more steps before we can start to push data to cloud:
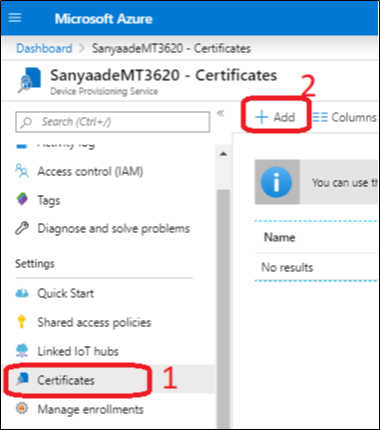
On the left hand pane of the Device Provisioning Service in your Azure Portal, select the Certificates tab
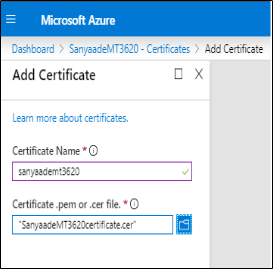
Next click the +Add, now give give it a name and upload SanyaadeMT3620certificate.cer that was created earlier
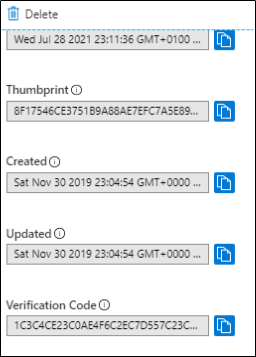
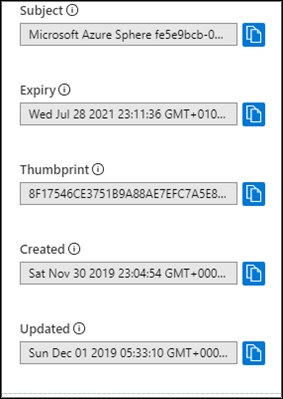
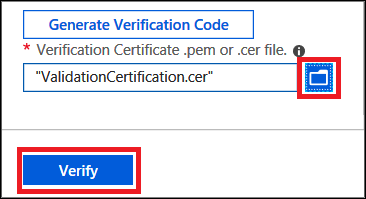
The Certificate is listed as Unverified, click on it, on the pop-up window, towards the bottom, copy the verification code generated to the clipboard
Next go back to your command prompt as enter the command below:
azsphere tenant download-validation-certificate --output SanyaadeMT3620verification.cer --verificationcode 1C3C4CE23C0AE4F6C2EC7D557C23C297DC565715B1EA3104
once again you need to replace the last bit of code above with your own generated code hope this is clear enough!
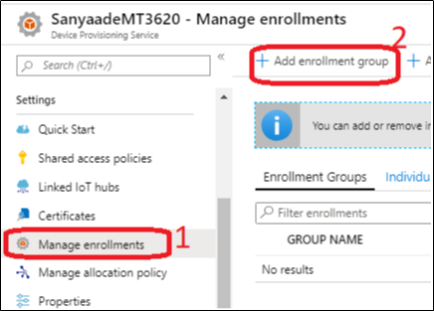
We are almost there now but on your IoT hub provisioning device, go to the left hand pane and select Manage Enrolments. Next click Add enrolment group
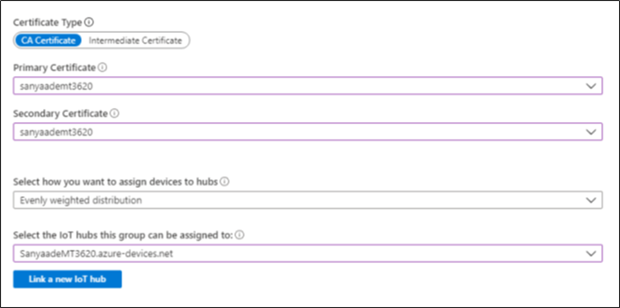
Give it a name and then choose the certificate and assign an IoT Hub
Click Save button to complete the process. We can now start to send data from our device to cloud but conduct and complete the verification process for the device:
Next go to command prompt and put the azsphere device in debug mode again. This is always need to boot it in programming mode for the SDK samples and push to cloud sessions
- ð azsphere device prep-debug
Get the mojo working:
After some high and low attempts then things started to show data:
==========================================================================================================================================================================================================================================================================================================================================================
Phase 3: Competition: (Doing the Security Enhancement)
Phase 3 Report:
General Report:
Appendix:
Bibliography:
Troubleshooting:
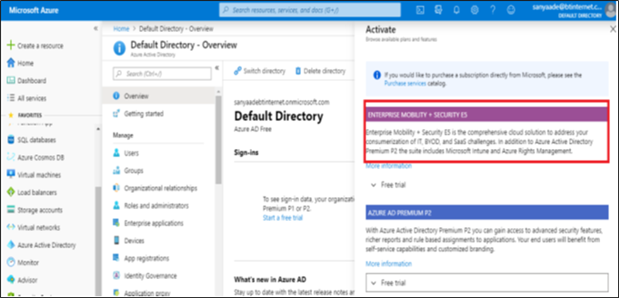
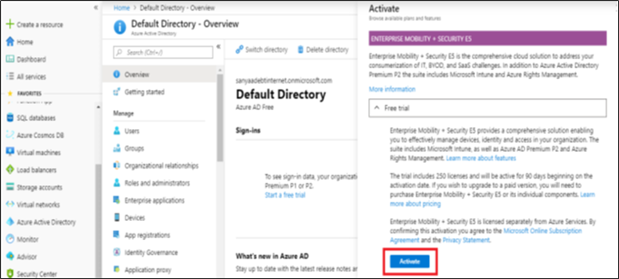
Having too many Microsoft Account creating login-in conflicts
https://docs.microsoft.com/en-us/azure/iot-hub/iot-hub-scaling
provisioning using command-line:
https://docs.microsoft.com/en-in/azure-sphere/install/qs-first-deployment












Top Comments