


The purpose of this document is to provide information that enables developers to start their first application using FreeRTOS and KSDK v2.0. FreeRTOS is integrated with the Kinetis SDK and FreeRTOS which is a Very Popular Open Source RTOS
FreeRTOS is a popular real-time operating system kernel for embedded devices, that has been ported to 35 architectures. It is distributed under the GPL with an optional exception. FreeRTOS provides a very small footprint, low overhead and very fast execution
Real Time Operating Systems (RTOS) are increasingly important to embedded systems. The Kinetis SDK delivers multiple RTOS’s including FreeRTOS, the leading RTOS according to the UBM 2014 survey. This session provides an overview of the important features of FreeRTOS and the Kinetis SDK to help you unlock the key capabilities in your next design.
FreeRTOS has become the de facto standard RTOS for microcontrollers by removing common objections to using free software, and in so doing, providing a truly compelling free software model.
FreeRTOS Unique Features :
- Task notifications: Each RTOS task has a 32-bit notification value which is initialized to zero when the RTOS task is created. An RTOS task notification is an event sent directly to a task that can unblock the receiving task, and optionally update the receiving task’s notification value
- Recursive mutex: A mutex used recursively can be 'taken' repeatedly by the owner. The mutex doesn't become available again until the owner has called xSemaphoreGiveRecursive() for each successful xSemaphoreTakeRecursive() request. For example, if a task successfully 'takes' the same mutex 5 times then the mutex will not be available to any other task until it has also 'given' the mutex back exactly five times
- Stack overflow hook/notification: Each task maintains its own stack. The memory used by the task stack is allocated automatically when the task is created, and dimensioned by a parameter passed to the xTaskCreate() API function. Stack overflow is a very common cause of application instability. FreeRTOS therefore provides two optional mechanisms that can be used to assist in the detection and correction of just such an occurrence
- Deferred interrupt handling: Used from application interrupt service routines to defer the execution of a function to the RTOS daemon task. A mechanism is provided that allows the interrupt to return directly to the task that will subsequently execute the pended function. This allows the callback function to execute contiguously in time with the interrupt - just as if the callback had executed in the interrupt itself
- Blocking on multiple objects: Queue sets are a FreeRTOS feature that enables an RTOS task to block (pend) when receiving from multiple queues and/or semaphores at the same time. Queues and semaphores are grouped into sets, then, instead of blocking on an individual queue or semaphore, a task instead blocks on the set.
Kinetis SDK RTOS Abstraction
Common Interface for KSDK Drivers to work with all supported RTOS’s
Applications written for any supported RTOS can use KSDK drivers

KSDK RTOS abstraction mapping to FreeRTOS

Prerequisite:
- Assume KDS3.2.0 has been installed in your computer
You can download latest version of KDS from Here or direct download from below link:
https://nxp.flexnetoperations.com/control/frse/download?element=7490587
- Downloaded a Kinetis SDK Package for FRDM-K64
(details can be found from my earlier blog: Getting Started with KSDK 2.0: [How to use the SDK with Kinetis Design Studio using FRDM-K64F freedom board])
- FRDM-K64 Hardware board
Now let us begin with creating FreeRTOS project
- Start Kinetis Design Studio
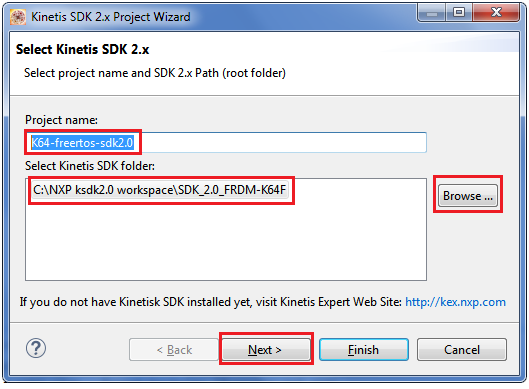
- Select the menu File > New > Kinetis SDK 2.x Project

- Enter project name of your choice i have named as “K64-freertos-sdk2.0” and Browse to the location “C:\NXP ksdk2.0 workspace\SDK_2.0_FRDM-K64F “
Select where you have unzipped the SDK package from previous step and press Next
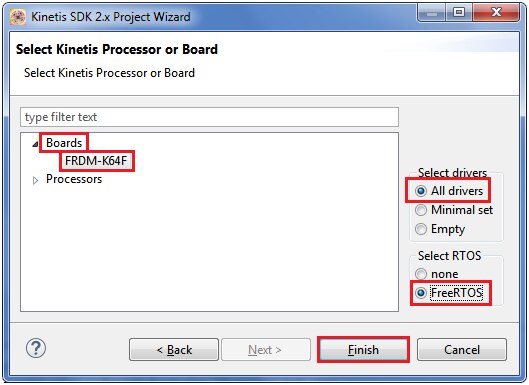
- Select board or processor and make sure you have selected FreeRTOS as shown below
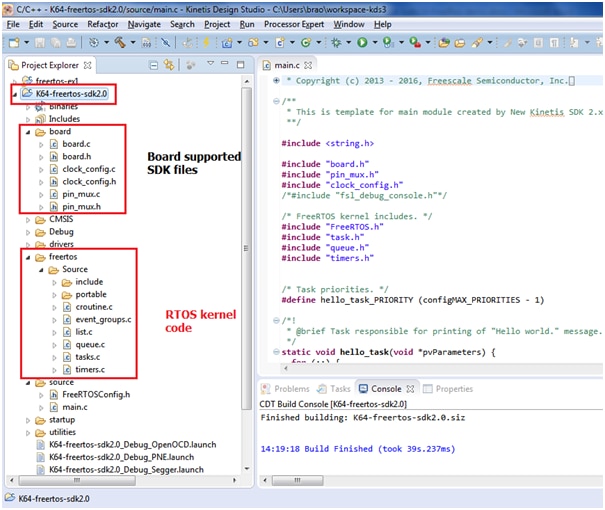
In the project created you can see the following folder structure:
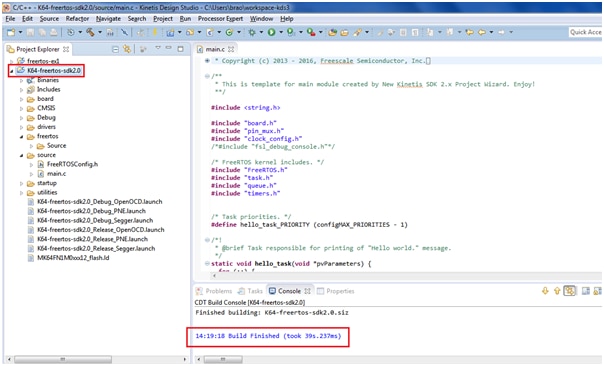
To check the project created is error free click on the hammer button to build the project as shown:

Developing the FreeRTOS application with KSDK V2.0 platform
This section describes the creation of a simple application that blinks LEDs on the FRDM-K64FFRDM-K64F board There are two task created each for RED led and Green led blink for 1000ms
After a new project is created, in the main function the following functions are added
Now we will proceed to add our code to examine the FreeRTOS concept testing RGB LED present on FRDM-K64FFRDM-K64F board
LED on board is connected to port pin as shown:
RED LED -> PORTB-22
Green LED -> PORTE-26
Blue LED -> PORTB-21
All the hardware configurations have been defined in file <board.h> inside the ‘board’ folder

We need to Enable the clock to the PORT module that the LED is on using CLOCK_EnableClock() function and Setup the red LED pin as GPIO -> PORT_SetPinMux() and initialise the RGB to on/off condition using LED_RED_INIT() function.
BOARD_InitPins(): Initialise the GPIO pins used here
BOARD_BootClockRUN(): execute the RUN mode configuration
BoardInitDebugConsole(): Initialise debug console
Also in main it is created a task red_task() and green_task() using xTaskCreate () function.
xTaskCreate () creates a new task and adds it to the list of tasks that are ready to run; it contains the following parameters:
- pvTaskCode.
- pcName.
- usStackDepth.
- pvParameters. Pointer that will be used as the parameter for the task being created.
- uxPriority.
- pvCreatedTask. Used to pass back a handle by which the created task can be referenced.
In main function create 2 tasks, one to Toggle RED Led and the other to toggle the Green Led. You can find the complete project at the end of this document.
After creating the task we need to call scheduler in order to perform multitasking function
vTaskStartScheduler();
The red_led task function will toggle the red led infinitely but calling a task delay in between

Similarly the Green task also toggles green led

We are using "vTaskDelay(1000)" delay of 1000ms in each of the task in order so that scheduler will switch the red_task() and green_task() every 1 seconds in between them and we can see the toggling of both led’s
Complete c code is shown below:
#include <string.h>
#include "board.h"
#include "pin_mux.h"
#include "clock_config.h"
/*#include "fsl_debug_console.h"*/

/* FreeRTOS kernel includes. */
#include "FreeRTOS.h"
#include "task.h"
#include "queue.h"
#include "timers.h"

#include "fsl_port.h"
#include "fsl_device_registers.h"
#include "fsl_debug_console.h"

/* Task priorities. */

#define task_PRIORITY (configMAX_PRIORITIES - 1)

static void green_task(void *pvParameters);
static void red_task(void *pvParameters);

 void red_task(void *pvParameters) {
 for (;;) {
            printf("Hello world. inside Red task\r\n");
            LED_RED_TOGGLE();
            vTaskDelay( 1000 );
 //  vTaskSuspend(NULL);
  }
}

void green_task(void *pvParameters) {
 for (;;) {
           printf("Hello world. inside Green task\r\n");
            LED_GREEN_TOGGLE();
            vTaskDelay( 1000 );
 // vTaskSuspend(NULL);
  }
}

/*!
 * @brief Application entry point.
 */
int main(void) {
  /* Init board hardware. */
 BOARD_InitPins();
 BOARD_BootClockRUN();
 BOARD_InitDebugConsole();

  /* Add your code here */

  // Enable the clock to the PORT module that the LED is on.
 CLOCK_EnableClock(kCLOCK_PortB);
 CLOCK_EnableClock(kCLOCK_PortE);

 // Setup the red and green LED pin as GPIO
 PORT_SetPinMux(BOARD_LED_RED_GPIO_PORT, BOARD_LED_RED_GPIO_PIN, kPORT_MuxAsGpio);
 PORT_SetPinMux(BOARD_LED_GREEN_GPIO_PORT, BOARD_LED_GREEN_GPIO_PIN, kPORT_MuxAsGpio);

 //initialise the RGB to on/off condition
 LED_RED_INIT(LOGIC_LED_OFF);
 LED_GREEN_INIT(LOGIC_LED_OFF);

 for(int i=0;i<=10000000;i++); // software delay
 printf("Hello world. inside main\r\n");
 LED_RED_OFF();     //Turn off RED Led
 LED_GREEN_ON(); // Turn on Green Led

  /* Create RTOS task */
 xTaskCreate(red_task, "RED_TASK", configMINIMAL_STACK_SIZE, NULL, task_PRIORITY, NULL);
 xTaskCreate(green_task, "GREEN_TASK", configMINIMAL_STACK_SIZE, NULL, task_PRIORITY, NULL);
 vTaskStartScheduler();

 for(;;) { /* Infinite loop to avoid leaving the main function */
 __asm("NOP"); /* something to use as a breakpoint stop while looping */
  }
}
Now build and execute the project

You can see the project builds without errors

You can execute the project using debug process or by generating the *.bin files and drag-n-drop to mbed folder
To generate bin file follow below step:

Binary file can be found from Debug folder of our project folder as shown below

Now connect the K64 to your computer, you will find mbed folder appears
Copy paste the “K64-freertos-sdk2.0.bin” to this mbed folder you can see red and green led toggles alternately for a delay of 1 second.
Optionally you can open the hyperterminal “putty” and configure the serial com port settings:


You can see the sequence of the task execution as shown:
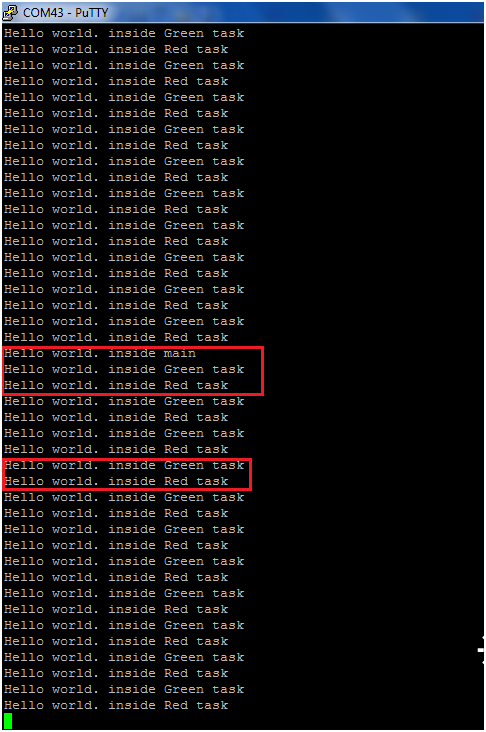
You can see Red and Green led toggling sequentially using task scheduling:
The video output of RGB blinking sequence is shown below
The project folder is attached along with this for quick evaluation
Happy FreeRTOS scheduling with KSDK2.0... 
